Why do you need to plaster the walls in the garage?
The garage is not only a place where the car will be kept protected from the weather, but also a place to store various types of tools. In addition, the owner spends time in it repairing the car or doing other work, so creating comfortable conditions there is important. Garage plastering is an inexpensive method that helps improve indoor heating by reducing the entry of wind and cold.
Dampness and drafts will not bother the garage owner. Plastering a garage with your own hands is not a complicated process, the main thing is to know some nuances.
Garage plastering is an inexpensive method that helps improve indoor heating by reducing the entry of wind and cold.
Why plaster the garage facade?
Plastering walls is a very labor-intensive and dirty process, during which quite a lot of building material is spent. Therefore, before starting work, you need to understand exactly what problems need to be solved, and whether it is worth taking on this work.
With plaster you can:
- level, compact and insulate the walls from the outside;
- seal unattractive seams;
- create a layer of wall that protects from precipitation, wind, sun, etc.;
- decorative and aesthetic effect.
If the garage is old, its walls are covered with cracks, but there is no money to build a new one, properly executed plaster will help increase strength, extend the service life and hide the shortcomings of the structure.
Why do you need to plaster the walls in the garage?
When buying or building a garage with your own hands, you dream not only that the car will not get wet in the rain or be covered in snow. You hope to create a space for yourself where you can store the necessary spare parts, tools, and various other things, dry and safe, where you can tinker with your favorite equipment without cold, damp drafts.
You expect that the walls of the garage will not be intimidated by the appearance of imperfections, crumbling brick mortar, and mold stains. To protect them from dampness, efflorescence or rust, and the interior space from drafts, the building structures are protected.
The most accessible, economical method available is plastering. Plaster not only reliably protects the walls of the garage from dampness, mechanical damage, and the room from penetrating drafts, but also provides aesthetic pleasure.
Agree, it is better to spend time in a pleasant environment than in a shabby room. With the help of decorative plaster you can give the building a unique look. A garage plastered with a heat-protective compound is easier to warm in the winter.
Plaster coatings have a number of advantages:
- fireproof;
- environmentally friendly;
- do not absorb odors;
- wash;
- easily repaired in case of local damage;
- are not favored by microfauna and microflora;
- durable;
- are cheaper;
- can be done by hand;
- they look nice.
Disadvantages appear when the plaster mixtures were chosen incorrectly, or the plastering technology was violated. Therefore, further we will answer the main questions that beginners in the plastering craft have about plaster.
Decorating garage walls
There's no point in leaving your garage walls featureless when everything can be made visually interesting. The walls of the garage are begging for stylish shelves and tool holders, made with your own hands. Choose original, wall-mounted “storages” for small items, think about color. Do not use white or too light paints inside the garage. You can visually expand the space with one or two narrow horizontal stripes, contrasting with the overall tone of the walls, but in harmony with the color of the window frame or tiles on the floor.
If you do not want to clutter the walls and leave them open, you can use decorative plaster.
For interior decoration, for example, “world map” plaster is suitable, and for exterior decoration, “fur coat”, “bark beetle”, “mosaic” plaster and many other facade decorative mixtures are suitable.
Plaster is a means of transformation and protection. You can do the garage plastering yourself or entrust it to professionals. Now you know how to deal with it.
How to plaster the walls in a garage
The quality of the initial plaster mixtures and their correct selection directly determines the quality of the future coating. There are universal plasters that can be used in rooms where there is no frost and where rain or hail does not hit the surface. They can also be used outdoors, where they successfully withstand cyclic freezing and thawing, the aggressive atmosphere of the city, increased abrasion or impact loads, and the attack of UV rays.
There are plasters designed only for use in “greenhouse” conditions of a heated room. There are resistant façade mixtures that contain components that contribute to the resistance of coatings to the adverse “influence of the street.” Mixtures for interior work - “greenhouse sissies” - are not suitable for plastering a garage. You have to make a choice between universal and façade mixtures.
According to their intended purpose, the compositions are divided into:
- conventional (used to level out surface unevenness);
- decorative (used for decoration);
- special.
A few words need to be said separately about the latter. Special types include heat-insulating, acoustic, waterproofing, sanitizing or performing other functions of plasters. First of all, you may be interested in heat protection and waterproofing.
The main qualities of all types of plaster compositions are determined by their basis - binders. These substances are natural or artificial.
Natural (mineral) binders may be found under your feet, such as clay, or plentiful on shelves. These include: gypsum, various kinds of cement, lump or slaked lime. In terms of cost, and therefore in terms of attractiveness, they are the cheapest. Mineral plasters have been tested by time, so let's start with them.
Cement
The most durable of minerals. The binder is Portland cement (most often) or other types of cements. It forms a dense coating and sets quickly, but it takes a long time to achieve final strength. The most famous types of mortar are cement-sand (CSS).
The ratio of cement and sand varies (depending on the purpose of the mixture) from 1:1 to 1:4.5. If the proportion of cement is large, the compositions are called fatty. They are prone to shrinkage during hardening, which leads to the formation of cracks. With a lack of cement, the compositions turn out to be thin, which leads to a significant decrease in the strength of the coating. Regular DSP has a composition of 1:3.
Advantages of cement coating:
- reduced water permeability;
- durability,
- strength,
- environmental friendliness;
- frost resistance;
- maintainability;
- fire safety.
Minuses:
- lack of elasticity (cannot withstand vibration loads and seismic forces);
- In the first days after application, care is required (preservation of internal moisture).
Cement combines well with other binders, for example, with lime, which gives the mixture plasticity when applied. More often than other mineral solutions it is used for outdoor work.
Plaster
Classic mixture for interior work. Since gypsum does not mix well with water, it is not recommended to plaster the outside of the garage with gypsum plaster. But under the roof of a warm garage and with good waterproofing of the floor, gypsum is quite suitable. The composition gains strength faster than other minerals. The mixture is very plastic and easy to install.
The second drawback after “hydrophobia” is the very rapid setting. Therefore, a small amount of solution is prepared in order to have time to apply all of it. A significant advantage is non-shrinkage.
Gypsum compositions have good vapor permeability, so they create a healthy microclimate in the garage house. The materials under the plaster breathe deeply.
Limestone
An inexpensive mixture, attractive for its antibacterial properties. To prepare the solution, use lime paste, fluff or suspension (milk). In terms of strength properties, lime is inferior to gypsum and cement. Therefore, complex compositions are often used: cement-lime or lime-gypsum. Lime-sand mortar with the addition of 20% cement is very good for plastering facades.
Other advantages:
- vapor permeability;
- fire resistance;
- good adhesion to drywall, wood, mineral compounds;
- workability;
- maintainability;
- durability.
Minuses:
- takes a long time to gain strength, less resistant;
- protection is required when applying and mixing;
- not resistant to vibrations.
Other modern materials
To complete the information, it is necessary to mention modern artificial compounds. Silicate compositions (liquid glass was previously known to all schoolchildren as silicate glue) differ among mineral plasters, like an “ugly duckling”.
A solution that behaves “like a pig” when applied to the wall (it sets very quickly, can be capricious when mixing, and is picky about the composition of the primer and paint) quickly gains strength, becoming a “beautiful swan.”
Advantages:
- forms a durable coating;
- resistant to chemically aggressive substances;
- easy to clean;
- waterproof;
- allows air to pass through;
- does not form shrinkage cracks when drying;
- fire resistant;
- excellent coating for porous materials and insulation;
- good adhesion;
- also used for decorative purposes.
Minuses:
- the highest price among mineral mixtures;
- poorly tolerated shrinkage of the base, vibration;
- work clothes are “destroyed” - you have to throw them away.
Acrylic mixtures, popular among builders, lack most of the disadvantages of mineral ones, but they also have their own:
- accumulate static and, in addition, dust;
- without special additives there is no fire resistance;
- porous-tight;
- requires quick work of the plasterer.
The pros are more significant than the cons:
- high elasticity;
- cheaper than other synthetic mixtures;
- reliable adhesion;
- can be washed by watering with a hose;
- rich palette;
- waterproof;
- strength;
- durability.
Of the artificial ones, the “best” is a silicone mixture.
This means the most:
- expensive;
- elastic (lengthens by 200%);
- “sticky” – adheres well and firmly to almost all substrates;
- durable.
The basis is silicone resins. Forms a polymer film that is difficult to remove. It allows air to pass through, preventing the penetration of water. Eco-friendly, not afraid of precipitation and vibrations. Due to the high cost, it is more rational to use decorative compositions.
Types of coating
Types of plasters
Plaster varies in its composition and properties.
Based on acrylic resins
These are quick-drying compounds that tolerate moisture well. They are available in a wide range of shades. The coating is elastic, easy to clean, and breathable. But most of these paints are not fire resistant. This property is inherent only in compositions with special additives.
Silicate
The price of such compositions is higher, but the coating has excellent performance properties. It tolerates precipitation and washing well, allows steam to pass through, and is resistant to aggressive chemical influences.
Silicone
These compounds adhere well to the surface, creating a durable and elastic coating that is resistant to moisture. Longest service life. Unlike the previous group, they tolerate vibrations well. The price is quite high.
Cement
Cement mortar is the most unpretentious option in terms of aesthetic qualities. It is usually used for exterior finishing, since the material requires a lot of water (the surface must be periodically moistened during the first time after application). The material is durable, resistant to frost, does not burn and does not allow water to penetrate deep into it. In addition, this is the most budget-friendly coverage option.
Gypsum plaster is suitable for interior decoration of heated rooms, since the coating does not tolerate moisture well, as well as severe frosts. The composition is elastic and easy to apply. You need to cook in small portions due to quick setting.
Pros and cons of coverage
Before plastering the walls in the garage, you should understand the positive and negative aspects of this type of coating. The advantages include:
- Fireproof material;
- Environmental friendliness;
- The mixture does not absorb odors;
- The coating can be washed;
- If defects appear, they can be easily plastered again;
- Mold and fungi do not form;
- Acceptable price;
- Durability;
- They look aesthetically pleasing.
Disadvantages may appear if the work is done in violation of the rules, or the wrong mixture was chosen.
Therefore, you should carefully study the process; this will be discussed below.
If defects appear, they can be easily plastered again.
Types of plaster solutions
Plaster, as a material used for leveling walls, is presented in a good variety on the market.
Cement
Cement plaster, which is based on cement and sand in a ratio of 1:4. Of course, various plasticizers are added to the mixture, which increase the plasticity of the resulting solution. Such plasters can be used to level surfaces located both outside and inside the garage. This mixture is distinguished by increased strength and frost resistance, and is not afraid of changes in humidity and temperature. Without plasticizers, such a plaster mixture will crack.
Another advantage can be added to the so-called long-term viability of the material. That is, it can remain in a “wet” state for a long time without reducing its technical and operational characteristics. Therefore, cement plaster can be mixed in large volumes. But this plus partly acts as a minus. That is, such solutions on the walls take a long time to dry.
Mixing cement plaster Source 36doors.ru
And other disadvantages:
- A wall in a garage finished with such material is not one hundred percent flat . No matter how hard the craftsmen try, it will not be possible to level the plane . Therefore, the plastered surface is often additionally leveled with putty mixtures.
- The cement-sand mixture does not have high adhesion , so any surfaces are pre-wetted or treated with primers.
- Cement plaster does not stick to smooth surfaces , for example, concrete . plaster mesh is first installed on it .
Cement-lime mortar. It consists of seven volumes of sand, two volumes of slaked lime and one portion of cement. The technology for mixing all the ingredients is specific: first, dry cement and sand are mixed, then an aqueous solution of slaked lime is added to the resulting mixture.
Ready-made dry cement-lime plaster Source dep-stroy.ru
Limestone
In the manufacturing process, proportions of 1:3 are used (lime and sand, respectively). Some craftsmen use lime milk instead of lime. It should be noted that this type of plaster has a high coefficient of vapor permeability. That is, the walls under the plaster layer can “breathe”. The strength characteristics and moisture resistance of this solution are not the highest, but if you protect the outer surfaces of the garage walls from the negative effects of precipitation (for example, make large eaves overhangs on the roof), then it can also be used for external application. And other characteristics:
- Easy to install . The applied layer easily attaches to any surface, even the smoothest.
- Lime has an antibacterial effect , so fungus or mold .
- This is one of the most inexpensive building materials in the category of plaster mixtures, because lime is several times cheaper than cement.
- The limestone layer is a good heat insulator . In any case, if you compare it with other solutions.
- Calmly withstands high temperatures .
- This is a fairly elastic material .
Convenience of applying lime plaster Source wastmur.se
Lime-clay. The solution contains one part slaked lime, three parts clay dough and four parts sand. The amount of sand component may vary depending on the fat content of the clay used. At the same time, it is added to the already prepared lime-clay solution.
Lime-gypsum plaster. The ratio of components is 1 to 3. First, plaster is poured into a container into which water has previously been poured with constant stirring. As soon as a homogeneous mass is formed, slaked lime is added in small portions.
It should be noted that today there is no longer any need to cook anything on your own. On the market, ready-made so-called plaster mixtures are presented in a huge assortment from different manufacturers. The latter join the ranks every year, making competition increasingly fierce.
Lime plaster dry mixture in a paper bag Source k-svarka.com
See also: Catalog of companies that specialize in finishing materials.
Plaster
Gypsum plasters are very popular today. They are made on the basis of gypsum with the addition of special substances that increase the performance characteristics of the material. Let us immediately make a reservation that this type of plaster mixture is used only for leveling internal walls. She is afraid of high humidity, and even more so of direct exposure to water. This is why the applied material quickly begins to peel off from the base, that is, from the surface of the wall.
The disadvantages of gypsum plaster mixtures include low viability. That is, the aqueous solution quickly hardens, after which it can no longer be used. Therefore, the plaster is mixed in small volumes. And one more minus - under the influence of even minor loads, a wall covered with gypsum cracks and peels off. In this regard, this material is inferior to both cement and lime.
Plastering garage walls with gypsum mortar Source remont.vgceiling.ru
But a large list of advantages outweighs all the disadvantages, hence the great popularity of gypsum plasters:
- The applied gypsum mixture does not require further finishing .
- It quickly hardens and dries , making it possible to continue repairs in a couple of days.
- Easy application process . Plastering the walls in the garage will take one day , maximum two, depending on the size of the garage building.
- The plastering process is not dusty or dirty compared to other materials.
- High vapor permeability of the applied layer.
Required tools and materials
To apply the coating you will need the same tools that plasterers use:
- trowel or trowel;
- ladle if the surface needs to be leveled);
- spatulas;
- brushes;
- plumb line, level;
- roller;
- mixer;
- rule;
- roulette;
- pencil;
- grater;
- masking tape.
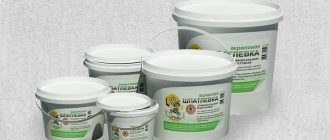
You also need to stock up on the required amount of materials themselves:
- primer;
- dry or ready-made plaster mixture (or starting components).
Among the auxiliary devices you will need beacons, containers, construction cord, self-tapping screws, and protective equipment.
How to plaster a garage manually - 6 steps
Manual finishing can be divided into 6 successive stages:
- Surface preparation (including primer).
- Installation of reinforcing mesh.
- The device of beacons.
- Spray.
- Application of primer.
- Covering and sanding.
At the work planning stage, measurements of the room are taken and the required amount of material is determined.
Manual plastering of walls
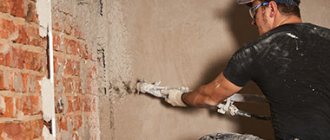
Stage 1. Surface preparation (brick, concrete walls)
Depending on the type of wall, the preparation process begins with certain procedures aimed at increasing the adhesion (adhesion) of the plaster composition to the base:
- In the case of a brick wall, it is necessary to “scratch” the surface with a metal brush, and also deepen the masonry joints by 10 mm.
- On smooth concrete walls, notches are made with an ax, hammer or other tool (to increase adhesion).
After completing the initial preparation, you must:
- Clean the surface of the walls from dirt. The entire surface to which the plaster will be applied must be clean, free of streaks and rusty, oil stains.
- If there is a fungal infection on the walls, it is necessary to treat the affected areas with a biocidal composition.
- Remove unnecessary parts that will create interference. If metal parts cannot be removed, these elements should be painted with oil paint (to avoid further corrosion and rust stains appearing on the plaster).
- Seal cracks and sinkholes. To do this, the defect site is “expanded” (i.e., a recess is made), then the area is dedusted with a damp cloth, after which the recess is filled with a cement composition.
The last step is to prime the surface with a suitable composition. You can check whether the primer is suitable for use on certain surfaces according to the packaging instructions.
Stage 2. Reinforcing mesh
In order for the plaster layer to stay on the walls as long as possible, it is recommended to attach a reinforcing mesh to the base. Its presence is strictly necessary for significant coating thickness (more than 25 mm). The mesh itself is attached using dowels, which are evenly distributed over the entire surface.
Installation of reinforcing mesh for plaster
Stage 3. Installation of beacons
These are vertical guides that serve to create an even coating. Installing beacons allows you to get an effective guide when applying plaster. Beacons are placed in increments of 1 to 1.5 meters (for beginners, the increment is assigned a little less - from 1 to 1.2 meters).
The following materials can be used as beacons:
- wooden,
- metal,
- plastic.
The procedure for installing beacons:
- Check that the places for future installation of beacons have been pre-primed (to improve the adhesion of the solution with which the beacons are mounted).
- Using a plumb line and a stretched cord, the most protruding part of the wall is located, which will serve as a guide for the further formation of the plane of the finished plaster. It is advisable to lay a minimum thickness of the plaster layer of 5 mm, but not less than the thickness of the guide beacons.
- The planks are attached using patches of putty, alabaster or glue for laying tiles. The pitch of the slats is set to 250-350 mm. The beacons should be 15-20 cm away from the edges.
It is important that the beacons are fixed at right angles. Therefore, you can’t do without a building level.
Installation of beacons for plaster
When the beacons are installed, you should wait some time for the fixing composition to dry completely.
For a better understanding of the process, we recommend watching the video below.
After this, you can begin applying the solution. The plaster is applied in several approaches (2-3) depending on the quality of the planned coating and subsequent finishing.
Stage 4. Spray
The first layer is called spray, the purpose of which is to ensure strong adhesion of the coating to the base.
Procedure:
- The solution is diluted to the consistency of liquid sour cream.
- Next, the plaster is applied by throwing it with a ladle or a trowel. In this case, the solution should be applied without gaps.
- The applied layer is not equal.
You should move on to the next stage “soil” no less than 24 hours later.
Plastering stage “Spray”
Stage 5. Soil
The mixture for the base soil layer is made of a more viscous consistency. Work is also carried out using the spray method (trowel or spatula). The beacons should be flush with the solution.
It is better to apply the primer not entirely at once to the entire wall, but to act in stages - the area between two beacons is treated at a time:
- After pouring the mixture, the surface is usually leveled with pressure. Movements should be made zigzag from bottom to top. Excess solution goes to those places where it is missing. To level the surface, it is enough to apply the rule 2-3 times. Thus, all that remains is to go through the remaining sections. Work should begin from the second lighthouse, and the areas along the edges are plastered last.
- When the plaster layer is laid over the entire surface, you need to wait until the solution sets and then remove the beacons. Fill the remaining grooves with the same “primer” mixture and level them.
If plastering needs to be done in two passes, then before the next pass, go over it with a float until the solution sets and does not stick to it. First spray the wall, and the tool should be moved along the surface in a circular motion without pressure. This is enough for subsequent finishing with tiles or sheet materials.
Primer is applied between the beacons
Stage 6. Coating and sanding
This step is necessary if the paint coating is to be used in the future. To do this, prepare a solution similar to liquid sour cream in a 1:1 ratio. The size of the component fraction should not exceed 1-2 mm.
- The coating should be applied with a thickness of no more than 3-4 mm. Here you need to use a spatula with rounded corners.
- After applying the next portion of the solution, grouting is performed immediately. First, circular movements are used, and then a “take-off” is done: the first pass is vertical grouting, the second pass is horizontal grouting (or vice versa, alternation of movements is important here).
When the layer has dried, the layer is sanded with fine-grained sandpaper.
Sanding the plaster completely levels the surface
How to calculate mixture consumption
To determine the amount of mixture that needs to be purchased for plastering the garage, after installing the beacons, measure the height of the top of 2-3 beacon strips above the wall surface in several places. It is advisable to capture both the minimum and maximum discrepancies. The measurements are summed up and the amount divided by the number of measurements taken. For example, you took measurements at 18 points and got the sum - 90 cm. Dividing by 18, you got the average thickness of the mortar coating - 5 cm.
You will also need to calculate the area of the garage wall. At F = 6 m2, you recalculate what footage will be the volume of the coating with a height of 10 mm (this is the thickness of the layer of a 100x100 cm square, for which the manufacturer calculated the mixture consumption). 6 X 5 = 30 m2. For example, the consumption of the Rotband mixture is 8-10 kg per 1 square meter. 10 x 30 = 300 kg or 10 kraft bags of 30 kg each. However, this amount of mixture will probably not be enough. Therefore, they take it with a margin of ~20%. In our case, this is 300 x 1.2 = 360 kg or 12 bags of mixture.
You can also use our online calculator to calculate the consumption of leveling plasters.
DIY plastering technology
Surface preparation
Before starting work, you must first prepare the work surface. The surface on which the plaster is to be applied is cleaned of dust, dirt, and serious irregularities (potholes, protrusions). In some cases, walls need to be primed, for example, if the wall material absorbs water strongly. If you do not use ready-made mixtures, but make the mixture yourself, in many cases you cannot do without using a plastic or metal mesh.
Let's consider the option when you plan to use a ready-made mixture, since for all types of plaster different components are used in different proportions.
It is necessary to strictly observe the proportions of the mixture and water. You can ideally mix the solution using a construction mixer or a drill with an attachment.
Reinforcing mesh
To strengthen old weak walls or those made of low-quality material, they are reinforced with metal mesh before plastering.
This procedure allows you to prevent the appearance of cracks on the wall, protect them from deformation and mechanical stress.
Beacon device
In order for the walls to be perfectly smooth, it is necessary to install special beacons. The wall is moistened with water with the addition of a primer. The material is manually applied to the wall using a regular construction trowel. From the very beginning, make sure that the layer of plaster is uniform and align it with the beacons.
In the form of beacons, you can use steel corners and a plaster rule. The rule in which the level is built determines the deviation of the wall from the vertical. Only after this is it advisable to prepare a solution, which, first of all, is applied to the surface of the corner. The corner is pressed and leveled. In places where the corner does not fit tightly to the wall, you need to place a solution under it.
As a rule, plaster is applied in several layers, since each individual layer cannot be thicker than 3 cm, otherwise normal drying will not occur. One layer dries, then the next one is applied. When the last layer has set, it needs to be rubbed with a grater.
The plaster will not harden immediately. In order for the process to go perfectly, it is better to carry out work in good weather, without exposing the results to the risk of damage.
Finishing is done in a manner most suitable for the type of plaster. Finishing work can be carried out on cement plaster only after it has completely dried. If the plastering was carried out with lime mortar, finishing work is carried out while the plaster is in a plastic state. The surface texture can be created using a rubber brush, a flexible brush or using special stamps.
Splash
Spray is the first layer of plaster that is applied directly to the base. Thus, potholes, cracks and other wall defects are filled with plaster, after which the new layer of material lies more evenly and adheres better to the base.
Primer
Primer is a very important stage of repair. The primer is applied to the walls before plastering or painting the walls to improve the adhesion of the material to the base.
Coating and sanding
If the end result should not be just smooth walls, you need to take on their design. The simplest and most popular pattern for the garage is a fur coat. Work on this pattern can be divided into 3 stages:
- cover;
- grinding;
- calibration
If you plan to do the finishing yourself, you can use a spatter brush. For machine finishing, a pneumatic gun connected to a compressor is used.
Important: If you plan to use the ready-made mixture, you should cover it twice, taking short breaks so that the solution “sets.”
The “grated fur coat” coating is performed using a special grater that has a steel surface. Sand the surface with light movements, smoothing only the ends.
The pattern is calibrated when the surface has already dried a little, but is still quite plastic. When calibrating, the movements should be wave-like, with a little pressure.
Preparatory work
Before applying plaster, the walls must be cleaned and leveled.
Preparatory work includes several stages. The first is to prepare the walls for applying plaster coating. It is necessary to clean them from dirt, dust and oil stains, if any.
After this, the garage walls need to be leveled. Then, depending on their material, the necessary means are applied to improve the durability of the future coating. If the wall is brick, it is worth deepening the seams between the bricks to one centimeter. If the walls are concrete and smooth, notches up to 3 mm deep are made on them.
Preparatory work must be completed no earlier than three days before further application of plaster mixtures.
Advantages and disadvantages of using the material
Before you start work, you should familiarize yourself with the advantages and disadvantages of the plastering material. After reviewing them, you can determine whether the plaster mixture is suitable for cladding indoor walls or not.
Garage owners use such mixtures because they have good operational, technical and aesthetic properties. The main advantages include the following:
- Moisture-repellent characteristics of the mixture. After plastering, the surface of the wetted garage walls dries quickly, since it poorly absorbs moisture.
- Air permeability. Thanks to this property, the walls of the room wear out more slowly, since they stop absorbing household fumes. Aeropermeability also helps maintain an optimal level of humidity inside.
- Fire resistance. Buildings in which plaster mixtures are used as finishing are practically not subject to combustion. Therefore, some people prefer to use plaster for cladding wooden buildings.
- Low cost. Plastering work will be quite cheap, since plastering compounds have low prices.
Despite the above advantages, the material has a number of disadvantages that you need to become familiar with. These include:
- Appearance of cracks. Cracking of the plaster appears if the facing work was carried out incorrectly.
- The need to prepare the walls. Before applying the material, preliminary preparation of the garage walls is carried out, during which their surface is covered with a primer layer.
How to paint garage walls using plaster
After plastering, the walls in the garage are often painted with water-based compositions. Acrylic paints apply easily and tenaciously to the plaster coating, which is also suitable for an unheated garage. Polyurethane or alkyd, polyurethane-reinforced paint compositions are also suitable for unheated garages. This is an expensive method of coating plaster, but the most reliable.
Instructions for plastering a garage with your own hands
Plaster application process
After thoroughly preparing the wall and tools, you can begin mixing and applying plaster mixtures.
The first layer of plaster is called spray and is applied using a trowel.
After this, the holes are removed as a rule and this area is leveled with a trowel. If beacons were used in the process, then at this stage they are removed and the traces are erased.
Coating care
Caring for such a coating is easy. When work was carried out in the heat, it is necessary to moisten the surface of the coating for three days, the cracks are rubbed with a trowel. Further care is reduced to wiping the surface with a rag, vacuuming, and in case of dirt, cleaning with a damp sponge.
When work was carried out in the heat, it is necessary to moisten the surface of the coating for three days, the cracks are rubbed with a trowel.
Before plastering the inside of the garage, you need to decide on the choice of mixture and carefully prepare the base. Such finishing can significantly improve the appearance of the garage and its climatic conditions. It's easy to do it yourself.
Plastering garage walls using a robot plasterer
Such a modern device will help save time and effort. To do this you will need:
- install the robot to the wall;
- add a plaster solution to it;
- start the unit and observe.
The automated system will perform further work independently. A person needs to periodically fill the robot’s container with plaster mixture.
Plastering walls with a robot
We recommend watching the video below to see how this miracle of technology works!
Choosing the optimal plaster solution
Before cladding the walls, it is better to select the optimal solutions for external and internal work.
For interior work
Previously, plaster compositions were used only for cladding the facades of premises, but now they are used to treat the inner surface of the walls of garages and residential buildings. Not every type of mixture is suitable for interior work and therefore you will have to select the most suitable material in advance.
Experienced builders advise using polymer mixtures to treat the interior walls. In their manufacture, polyurethanes, butadienes and epoxy resin are used. Also, for cladding garage walls, compositions made from quartz sand, slaked lime and white cement are used.
External
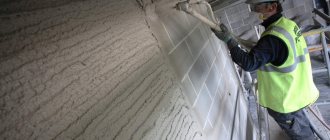
It is more difficult to select compositions for work carried out outside, since the outer walls need reliable protection from low temperatures and high humidity. Therefore, the selected composition must be moisture-resistant and frost-resistant.
Exterior finishing work can be done with silicone plaster, to which special fillers are added before starting work. Silicate mixtures of mineral microelements are also used externally. The main advantage of this type of plaster is that it is slightly dirty and covered with dust.
Suitable materials
There are many materials that can be used for decoration. You can choose them based on quality and price. If you need to finish the walls and ceiling, the following are suitable:
- Plaster.
- Ceramic tile.
- Polyvinyl chloride.
- Drywall.
- Wood chip boards.
- Plastic.
Suitable for the floor:
- Concrete.
- Ceramic tiles or asphalt.
- Tree.
- Self-leveling floor.
To calculate the material correctly, you need to divide the area of all walls by the height of one wall.