This article describes how to make natural food coloring.
All industrial confectionery and other products in grocery stores contain a lot of chemical dyes. This can be seen if you look at the product ingredients label.
- For a long time now, many housewives have been baking various pastries, cakes, cookies and other delicacies for their households and guests.
- But how to decorate a product so that it is original and beautiful?
- You can add homemade food coloring to creams, whipped cream and mastic.
- It's very simple, read all the necessary information in this article.
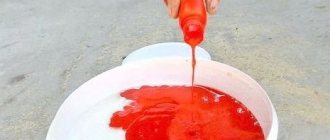
How to make natural red food coloring with your own hands?
Cake with red fondant made from food coloring
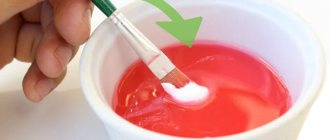
Natural food coloring is made from the juice of vegetables and fruits. To do this, you need to squeeze the juice or simply boil the grated fruit in water. For example, to make natural red food coloring with your own hands, you will need 1 beetroot. Do the following:
- Peel the beets.
- Grate it on a grater board on a large section.
- Place in a saucepan, add water so that it slightly covers the pulp of the vegetable, and turn on the gas.
- Add a few drops of 9% vinegar, but no more than half a teaspoon.
- Cook for 3 minutes - no more!
- Strain through a strainer to remove the pulp. The juice is ready - it is a natural red food coloring.
Add this dye to creams or doughs to create a red tint.
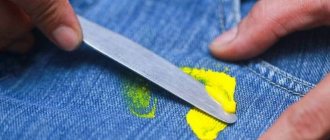
Features of obtaining yellow from various paints
The materials used to produce paints differ in their origin, structure, and optical properties. Therefore, they should be tinted taking into account the individual characteristics of the base.
Watercolor
Made from pigments mixed with weak water-soluble adhesives made from natural tree resins. These paints are translucent, so for composite colors they make a transition from light to darker. To make the watercolor tone paler, just add water to it.
By diluting watercolor paint with water, you can obtain translucent shades of the desired tone.
Tempera and gouache
These types of paints differ from watercolors in their greater viscosity and contain a strong binder. The solvent for tempera and gouache is water, but their hiding power is higher than that of watercolor.
Oily
Made from vegetable oil (drying oil). Diluted with organic solvents of the petroleum group (white spirit) or turpentine.
Oil paints have a high viscosity, making them difficult to mix by hand.
Acrylic
Contains a film-forming substance in the form of an aqueous dispersion of acrylic polymer. When tinting such materials, it is important to remember that the shade of liquid paint can be very different from the dried coating. When dried, these substances become lighter due to the specific physicochemical transformations.
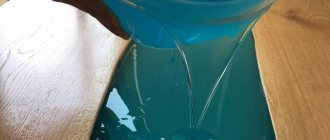
How to make natural blue food coloring?
Cake with blue fondant from food coloring
Blue (purple) color is used when creating cakes or other confectionery products. Typically, confectioners paint mastic, which is used to make decorations for products. To make natural blue food coloring, you need to juice the following fruits and vegetables:
- Black or purple grapes
- Blueberry
- Blackberry
- Fresh blue cabbage
- Frozen eggplant peel
To get the dye you need to do the following:
- Grind the berries in a meat grinder, finely chop the cabbage and eggplant skin.
- Then fill with water, put on gas for 3 minutes, add a few drops of 9% vinegar.
- Strain and use to create a unique color.
Natural dye quickly turns sour. Therefore, it should only be done once and used within 2 days. It is better to store on the bottom shelf in the refrigerator, where the temperature is lower and the air is cooler.
How to make natural orange food coloring?
Orange fondant cake with food coloring
Orange paint is bright and juicy. A dough product decorated with this color will be appetizing and beautiful. To make natural orange food coloring, you will need carrots. To obtain it, follow these steps:
- Grate the carrots on the large section of a grating board.
- Melt the butter in a frying pan and then add the carrots. The proportion of carrots and oil is 1:1.
- After 5-7 minutes, the carrots will soften and release juice. You can already use it.
- Remove the pan from the stove and squeeze the juice out of the mixture through cheesecloth.
You can also get orange paint using orange zest. Do the same thing with this fruit as with carrots.
Color theory
Colorists who always know which colors need to be mixed to get the desired result understand that, according to color theory, almost any shade can be achieved using other tones. To do this, just mix the paint in a certain proportion, and then adjust the color, darkening or lightening it. There are only a few basic colors: red, blue and yellow. When combining them, artists usually get other shades.
According to color theory, it turns out that it is impossible to extract basic tones by mixing, so they are always bought in a store in order to get other tones from them, for example, pink, blue, purple, brown. You won’t be able to mix yellow in its pure form, but you will be able to get some variations of it.
Before using paints, it is worth studying color theory and the criteria from which the color wheel is formed. It is based on three basic shades, they are called primary because they cannot be obtained in any other way.
If you mix primary colors with each other, you get orange, purple and green shades. Colorists call them secondary; they are already located in the second row of this circle.
When mixing primary colors with secondary colors, you get shades from the third row. They are shown below.
A closed circle is obtained as a result of the contact of shades from the outer and inner circle. This is how intermediate tones are formed and a closed figure is formed.
How to make natural green food coloring?
Cake with green fondant with food coloring.
Green shades are natural and juicy. They are also used to color cream and mastic. To make natural green food coloring, you need to buy a bunch of spinach.
- Scroll the greens through a meat grinder.
- Transfer the pulp to a gauze napkin and squeeze out the juice. It can already be used as a paint for confectionery masses.
If you want to get a shade of green, but more intense, then simmer the juice of spinach leaves over a fire for half an hour.
How to paint cream black
Having discussed a little theory, it's time to move on to practice. I'll show you how to make black cream cheese for leveling. I will not dwell directly on the recipe for the cream; I will only show the coloring process itself:
1. Add a little cocoa to the cream to get a brown color. You don't have to add too much if you don't want to emphasize the chocolate flavor.
2. For the job I used Americolor Super Black dye. How many drops you need for a specific volume will vary depending on the original shade and volume of the cream.
3. For kneading, I used a regular whisk. The result was a uniform and rich color. To make it even deeper, leave the cream to infuse for 30 minutes. You can even make it the night before and leave it in the refrigerator along with the sponge cakes.
4. And here is the alignment process. As you can see, the cream turned out to be jet black, without other shades, inclusions or other imperfections.
Everything is very simple. Then you can safely use the black cream using a piping bag for patterns. The main thing is to warn clients that their teeth and tongues will definitely be stained. Let them not be afraid.
How to make natural yellow food coloring?
Cake with yellow fondant with food coloring
Yellow is the color of the sun. Not a single cake or pastry decoration is complete without it. To make natural yellow food coloring, you need to buy saffron.
- Grind this plant in a meat grinder or through a coffee grinder if it is dry, and dilute with a few tablespoons of warm water.
- Can be diluted with vodka or alcohol, but with water 1:1.
- After 24 hours, strain the infusion through cheesecloth.
If you want a less intense color, then grate the lemon zest and squeeze the juice out of it. Turmeric also gives the yellow color.
Rare and complex colors
Unfortunately, it is impossible to make natural gold or silver dyes from homemade ingredients, since these colors are unnatural. To paint mastic this color on a cake or pastry, you need to make a base of orange dye. A homemade carrot additive is also suitable for this, and you need to apply kandurin on top for a golden color.
Creating khaki food coloring can be even more challenging. In general, it is not a specific color, but a range spanning greenish-brown, dusty earth, dirty yellow and other shades. All of them are united by the well-known term – “protective color”. To obtain khaki dye, you need to mix natural dyes of other colors: green, brown, yellow and others. By adjusting the proportions, you can achieve almost any tone.
How to make natural beige food coloring?
Cake with beige fondant with food coloring
Beige is the color of naturalness. It can also be made from products and there is no need to use chemical dyes if you need to decorate the confectionery product. To make natural beige food coloring, confectioners use tomato paste. Depending on the shade, the amount of tomato is added to the mass. The more it is, the faster you will get a “dark beige”, closer to orange shades. Tomato does not affect the taste of the product.
What colors need to be mixed to make yellow?
Since this shade belongs to the basic colors, it will not be possible to produce it in its pure form, however, if the pigments are mixed on a landscape sheet, there is a chance of a similar result. To make yellow, combine orange and green on paper. The shade is not very pure, but the grassy color predominates in it. This cannot be done when using oil paints; the technique only works for watercolors.
Next, let's look at what needs to be mixed to get different variations of the base color.
Dark
The darkened pigment is obtained by using orange and green paint. Shades are selected depending on the desired result. When a pigment that is too dark is needed, yellow and brown are mixed together. They are combined in a separate container until the result is satisfactory. In this case, brown is added in portions, and yellow is used as the main color. If you want to add brightness, red is poured there.
Golden
If the paint needs shining pigments, then you won’t be able to get this effect without glitter. It will also not be possible to indicate the exact proportions, since how to mix the pigments depends on what exactly the person wants. When making a golden color, a base tone is used, as well as brown and red. Regardless of the manufacturer and consistency, these colors mix quite slowly, so you have to work with a brush for 5-7 minutes to check the effect. Only after this a new portion of paint is added.
Bright
White and orange are mixed into the base tone in portions to make the pigment richer. You should be careful with beige, milky and white colors, because if you add too much of it, you will end up with a pale color instead of a bright one.
Juicy
Even elementary school students know what colors to get a rich yellow that looks like orange. When mixing, use a base yellow color, to which red is gradually added. The brightest shade is obtained by mixing 50x50.
If the paint is being created for painting walls, furniture or other work that requires a large amount of material, then you should first make a sample with the color you like. When creating it, additional color is gradually added to a small container (200-300 ml). In this case, the person first measures and then writes down the proportions in which he added the paint, since otherwise it will not be possible to repeat the result.
Yellow is considered one of the brightest and most pleasant colors. Even its bright shades do not irritate and strain the human eye as much as other tones. It is mainly used to tone the body and create a positive mood. Since yellow is associated with sunny color and warmth, people often use it when creating interiors, placing accents with dark tones of a different spectrum.
How to make natural black food coloring?
Black and dark shades are also used to decorate individual parts. You can create this color dye at home - in your kitchen. To make natural black food coloring, the following products are used:
- Black olives. They need to be grated and boiled in a small amount of water. Then strain and remove the pulp.
- Dutch ultra cocoa . It contains a lot of chocolate and is therefore darker than regular cocoa.
- Squid ink.
Use olives and cocoa powder to make dye for sweet dishes, and squid ink for lean and salty dishes.
Why are artificial dyes harmful?
Today, a large number of artificial colors are produced, which are used to give dishes an attractive appearance. But it is not always known what exactly is included in these synthetic dyes. It often happens that their composition can only be determined through lengthy laboratory studies.
Not in all cases, manufacturers are ready to comply with standards, and often hazardous components in dyes exceed the permissible content. They can not only cause allergies in people, but also have a negative effect on the nervous system, cause oxygen starvation and, worst of all, provoke the formation of tumors. Therefore, it is better not to consume such products at all, but instead learn how to make food coloring at home.
How to make natural purple food coloring?
Purple fondant cake with food coloring
It was described above how to make natural blue or purple food coloring using blueberries, dark grapes or eggplant peels. Experiment and mix berry and vegetable juices to create different shades of purple or blue.
Purple and lilac colors
The easiest way to prepare such food paints is from the peels of eggplants or blue cabbage. Grind them, add a small amount of water and bring to a boil. Then add a little (no more than ½ spoon) table vinegar to fix the color.
The result will be a fairly rich color, but you can dilute the dye with water to lighten it and create a lilac dye. Please note that this natural paint will turn sour in 2-3 days, so hurry up and use it for its intended purpose.
Mixing Natural Food Colorings: Rules
Cakes with fondant of different colors with food coloring
If you plan to work as a pastry chef at home - making confectionery products to order, then you will use a lot of food coloring every day. It can be stored in the refrigerator, but no more than 2 days, and you can mix already created shades to get new ones. For example:
- The color of the sea is obtained by mixing blue and green.
- Blue and all its shades - when mixing green and red.
- Dark (black) shade - green, blue and red.
- Pistachio - yellow and blue.
There are rules for mixing paints. They also work for mixing natural food colorings.
Rules for mixing colors
This circle shows what happens if you mix primary colors.
- For example, when red and blue are dissolved, the result is purple.
- When obtaining secondary and tertiary colors, you need to mix those colors indicated by the corners of the triangle of the secondary color.
- For example, when you mix secondary green and primary yellow, you get tertiary - yellow-green.
It's simple: look for the dyes of the desired color in your refrigerator and mix them according to the rules of this circle to get the desired shade.
How to make egg dye
Yellow food coloring (recipe): add turmeric (3 tablespoons) to a boiling vinegar solution. Remember that turmeric is quite a strong dye, so before you start working with this dye, be sure to wear rubber gloves to protect your hands from staining.
Pink: Chop 4 cups of raw beets and add them to the bowl with the eggs. If the eggs seem brown instead of pink at first, don't be discouraged. Once they dry they will be a nice pastel shade.
Food coloring for blue eggs is made as follows: add 3 cups of chopped purple or red cabbage to the solution. In order for the eggs to turn blue, they should be kept in the solution for half an hour. If you want to achieve a blue color, then put the eggs in the refrigerator and let them sit there in the solution all night.
Orange color: Onion skins (four cups) give eggs a beautiful orange tint. To get a brighter color, as in the previous case, without removing the eggs from the dye, leave them in the refrigerator overnight.
DIY silver food coloring: Place 2 cups of frozen blueberries in a container and add 2 cups of clean water. Wait until the mixture comes to room temperature and then crush the berries. Let it sit a little longer, then strain the solution. Place Easter eggs in the dye and put them in the refrigerator - let them stay there until the morning.
How to make brown natural dye at home?
Many novice confectioners think that brown dye at home is made only with cocoa. This ingredient can be used if you need to decorate a sweet cake or pastry.
But what if you need dye for a salty dish? You can use coffee. It must be brewed and strained through a sieve - the dye is ready.
Brown dye is also made from caramel:
- Boil sugar with a little water in a ratio of 5:1.
- Heat until mixture turns brown.
- Then remove from heat and add some water.
Important: Do not burn the sugar so that the caramel does not taste bitter.
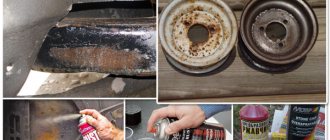
"Vinegaroon" - black dye for leather, cheap and plentiful!
"VINEGAROON" is a black dye for vegetable tanned leather. It is made at home and its ingredients are ordinary vinegar and iron. When mixed and kept for a month (or so), the iron oxidizes, dissolves in the vinegar and produces a liquid that, when interacting with vegetable tannins in the leather, reacts and turns black. The more tannins, the darker and more saturated the color. Therefore, before painting, you can soak the leather in a strong infusion of tea or coffee or walnuts and the color will be deep black. And it is for this reason that this “dye” is applicable only to vegetable tanned leather; it will not work on chrome leather - there are no vegetable tannins there. In principle, this cannot be called a dye either, since by its nature it is not a paint, but an oxide that reacts and changes color. During wear, such dyed leather does not leave black marks on clothing, as often happens with conventional paint.
The beauty of this dye is that it is very cheap (simple table vinegar and the cheapest metal wool, or even cheaper if you have a handful of old rusty nails). It can be made a liter or two or more without any special expenses. And it paints better than regular paint - right through, and does not rub off on clothes.
I would like to note that this recipe was not invented by me personally. I collected information on the Internet on the forums of tanners and woodworkers (vinegaroon is used for tinting wood products - the same tannins are used to treat leather). Based on the collected material, the mistakes and successes of others, I decided to try to make winegarun myself. Along the way, I decided to take pictures and share my results with you.
I can answer all the questions not as a specialist, but as a person who “read a little about it” and “tried it myself.” If you search for the word “vinegaroon” you will find a lot of information on this topic (if you are interested).
So..
All we need is pure white vinegar without any impurities and RUST-PROOF dishcloths. Old rusty nails work great too, as do iron filings. The main thing is that it is NOT stainless steel.
In my nearest store, I didn’t find regular washcloths (only stainless steel), but I did find washcloths with soap. They cost pennies but you have to rinse out all the soap.
In the photo there is a small bottle of vinegar and a bunch of washcloths - this is too much, as it turned out later, you will only need 3-4. You need more vinegar.
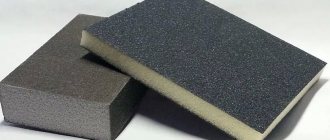
I rinsed the washcloths not just in hot water, but also with a mixture of dishwashing detergent in order to rinse out all the oils with which the washcloths are coated so that they do not rust. The smaller and finer the fibers, the better and faster they will oxidize and dissolve. Look for small and thin ones in the store.
Take a glass scrap jar. I didn’t have one, so I took the “needed” one. What to do..
Gut 3-4 washcloths and put them in a jar. Do not press them, let them “hang” in free flight.
Here I stuffed a full jar, but then took out half.
Fill with vinegar. I only bought one bottle but now I realized that I needed more..
Oxidation begins instantly - vinegar turns rusty in seconds
Cover the jar with a lid. Do not close it tightly - you need a small hole, otherwise the evaporation gases will rip the lid off the jar.
Place in a warm place. My jar was on the kitchen floor. There was no smell, only if you stuck your nose into the jar - then brrrrrr!
Literally the next day the liquid clears and becomes clear. The iron becomes covered with bubbles - the process has begun!
Stir the entire mixture every day.
All this should infuse and dissolve for at least two weeks, preferably a month. During this month, I added more vinegar and iron - I decided that half a jar was very little (greed, probably).
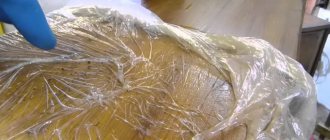
In the photo you see what I got after a month and a week of infusion. The iron dissolved, an oxide crust appeared on top and sediment appeared on the bottom. The liquid is almost transparent. The yellow color in the photo is rust on the walls of the can.
Now you need to strain everything. You see that the liquid is transparent. You also see black pieces of oxide.
This is what is left at the bottom. I got excited and also poured it into a common pot, but it was probably better to throw it away.
The liquid turned out to be quite cloudy
..so I strained it again
that's what's left on the napkin
Now I left the jar to sit for a couple more days, but with the lid completely open, so that all the vapors would evaporate. the main oxidation process took place due to vapors, so it was very important to keep the lid closed throughout the month, leaving only a couple of holes for excess gases to escape. Now let's let everything air out.
After a couple of days, my liquid separated as you can see in the photo.
I strained it again through several layers of thick napkin. Red color is the top layer
Now the middle layer has come - it is lighter and yellower
We don't need the sediment - we'll throw it away
these are still pieces of oxide after the second stage of infusion
And this is our dye. Vinegarun. Everything is strained and packed into jars (or bottles if you prefer).
Now it can stand for a year or two. It depends on how often you will use Vinegarun. You color the leather, then pour the liquid back into the jar and seal it. Leave until next use. And so on until the “fortress” weakens. When you see that the color is no longer completely black and that in order to color it you have to keep the skin in the vinegaroon longer and longer, it’s time to renew it. You don't pour out the liquid, but simply add a couple more washcloths and a bottle of fresh vinegar and go through the whole tincture process again.
The color of the winegarun may turn out different (I mean the color of the liquid and not the color of the painted skin). I got a beautiful amber color, but to be honest - on all forums they usually write that the result is either black or cloudy red or transparent... It all depends on the proportions of vinegar and iron, I think, as well as on the infusion conditions - lighting, temperature, infusion time. Many tanners are very impatient and start using the tincture within two weeks or even earlier. It will turn black, but for a truly high-quality infusion it is better to be patient and let it sit for a month.
Therefore, if you get a different color than mine, this does not mean that you did something wrong. Perhaps I did it wrong
If during “fermentation” the liquid becomes reddish-cloudy, this means that you have gone too far with iron and there is not enough vinegar to process everything. Add fresh vinegar to the bottle and everything will clear up in a day or two.
Now let's try to color the skin. It is best to do this in a bath. Take a tray for developing photographs (if you have one, I have a lot from my turbulent childhood, but they all stayed in Ukraine), you can take any other suitable non-metallic container that is large enough to accommodate your pieces of skin. I’m not painting anything now, I just took a piece of leather for clarity and I won’t use baths. I'll get wet right into the jar.
If you are using a bath, pour vinegarun into it and dip your skin in it.
Keep the skin in the solution for a few seconds and remove. Here in the photo I only held it for one second - I got it wet and took it out. The skin instantly turns gray - the reaction has begun
I got wet again and took it out immediately. This is for clarity. The lighter area - 1 second in the solution. The darker one - 2 seconds in the solution.
Now we place the skin on the table surface and look at it. The color changes before your eyes. Blacker and blacker every second.
Let stand for 5-10 minutes (I stood for 2 minutes, but it takes longer for it to soak in and blacken well). Now you need to stop the reaction and to do this you need to dip the colored piece of skin into a baking soda solution. I put a full tablespoon of baking soda per liter of water.
Dip the skin into this solution and immediately remove it. If you hold it for a long time, the skin will “burn.” You will see how, upon contact with a soda solution, the skin becomes covered with bubbles - the oxidation process is neutralized (I don’t remember the last time I used such clever words - probably back in school!
Now immediately lower the skin under running water and rinse everything well. There is no need to wrinkle or twist the leather - if you have embossing on the leather, you will destroy it. Just hold it under the tap for a long time or keep it in a bowl of clean water so that the soda rinses out
This is the wrong side.
It's dried out a little. You see a line that separates the light area and the darker one. As you remember, the lighter one was in the winegaroon for only one second, and the darker one was in the winegaroon for 2 seconds.
You need to keep it for no more than one minute; when the solution is completely fresh, even half a minute will be enough. I held it for one and two seconds - just so you can see how it works.
Our piece of skin is completely dry. The color is black but not black either. Now the real magic is to give the skin a deep black color.
During this whole process, the skin lost oil and became dry. Therefore, the color is more gray than black. We need to return lost oils to the skin so that it can acquire a truly beautiful color. You can use any oil FOR SKIN. You can use NEATSFOOT OIL - it is the best for the skin. You can use any other one you find - look at the manufacturers of leather treatment products.
Do not use olive or sunflower vegetable oil - these are mineral oils and are not suitable for working with leather.
I took what was at hand - one of the oils that I use when working.
I only applied the oil to half a piece of skin so you can see the difference.
They also say that you can use leather conditioner (not for your facial skin, but for leather products) instead of oil. I decided to try it and took my favorite.
I applied the conditioner to a small area - in the upper right corner of the skin.
I applied oil from the inside too - but just a little so that the skin does not become sour in the oil, but enough so that it changes color
I decided to go all the way and applied a fixative - a little, for shine.
In the area where there was no oil, the fixative was absorbed instantly - there the skin is dry and needs nourishment. And where you applied the oil, the skin is already sufficiently nourished and the fixative is absorbed slowly, reluctantly.
I note that at the site where the conditioner was applied, the fixative was absorbed very quickly, which means that the conditioner was not enough to return the necessary substances to the skin. It's better to use oil.
Everything was absorbed and dried. The lower part of the leather in the photo is treated with oil. Beautiful black rich color. Top right is a piece treated with conditioner. If you don’t compare it to a piece of butter, then in principle it’s normal. At the top left is pure vinegarun without further treatment with oil. The skin has lost oil and has a gray, dry color.
Here is a photo from a different angle (black is quite difficult to photograph). The area without oil or conditioner is circled in red.
Closer shot.
The cut shows that in the area treated with oil (on the right), where the oil was absorbed, the color became black. And where there is no oil - on the left - the color inside the skin remains the same.
Circled in red is the area that spent one second in winegaroon. Everything else - 2 seconds in solution.
The section shows that where the skin was in the solution for only one second, the dye did not have time to be absorbed into the skin. And where I held it for two seconds, the dye penetrated deeper. When coloring the skin in Vinegarun, within 30 seconds or longer, the solution will penetrate deep into the skin and color it completely from the inside. Hatem oil will finish the job and the color will turn into a beautiful black.
This is my experience in making Vinegarun - a black dye. I shared with you the process I went through. If you have questions, ask, maybe I can answer them. But let me remind you that I am not an expert in this. I just tried what I found on the Internet. I don’t even use black when working—I tried it out of curiosity! (But maybe now I’ll use it - don’t waste a month and a half of work!)
Thank you for your attention! Questions are welcome!
Irina
How to get pink natural dye?
Pink fondant cake with food coloring
Pink food coloring is one of the most popular dyes used to create cream and fondant with this shade. At the same time, the pink chemical dye is dangerous, as it can cause allergies or even bronchial asthma.
Make pink natural dye at home. You can get it from strawberries and raspberries. Scroll the berries through a meat grinder and squeeze out the juice. A more delicate shade will be obtained if the juice is boiled with water.
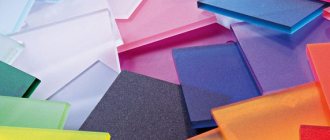
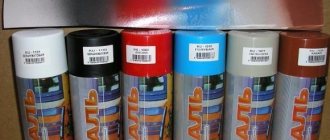
Kinds
Dyes are divided into synthetic and natural.
The classifying difference between industrial additives is their consistency.
Types of dyes:
- Liquid ones are more affordable, as they are widely available on store shelves. Most often used for coloring protein mass, cream and mastic.
- Gel ones are easy to use and have a rich color. Used for coloring creams, glazes and mastics.
- Powdered ones require dissolution when used in water, alcohol or vodka. It can also be used dry if necessary. They have a wide palette of rich colors. In addition, using powdered dye it is easy to color coconut flakes or cereals for children's crafts.
Natural dyes are made from various plant materials using a physical method. These can be berries, leaves, roots and flowers. However, during production, products undergo various types of chemical modifications, so it is safer to make natural food colorings yourself. After all, manufacturers cannot always honestly indicate the composition of the product.
What natural dye is best to use for cream, mastic, cake icing?
When creating cream, mastic and icing for cakes, it is important that these masses are uniform in texture and color. Therefore, it is better to use natural dye in liquid form. Vegetable or fruit juice or boiled liquid will help make the mass beautiful in color. It is worth noting that there are natural food colors that are used in food production in the preparation of various products. These include the following additives:
Food colorings
In addition, there are absolutely safe natural dyes. They can be divided into several types:
- Gel - used for coloring creams, mastic and dough. Consists of glycerol and glucose.
- Liquid - color the cream, help make inscriptions and drawings on the mastic using an airbrush.
- Dry - diluted in boiled water. Used to color dough and cream.
- Kendurin - allows you to achieve a pearlescent shade of cream, mastic or dragee. It consists of natural silicate, which gives this effect.
Accordingly, in addition to natural juices, gel, liquid, dry dyes and kendurin can be used to color creams, mastics and glazes.
Which ones are better to use?
When using homemade food coloring, it is worth considering the specifics of the product being colored.
For creams, mastics and baked goods
Dyes made from berries and vegetables are best suited for coloring creams, dough and mastic. The main requirement is the liquid state of the coloring composition. For example, if it is necessary to give the mastic a yellow color, use turmeric diluted in a small amount of water. In addition, the dough can be colored simply with juice squeezed from bright berries and vegetables. And put chopped berries with juice into the cream and mix, this will make the dessert even more interesting and elegant.
For coloring eggs
To color eggs, you do not need to prepare the dye first; the pigmenting ingredient is added during the cooking process.
How to dye eggs:
- in yellow - add three tablespoons of turmeric and a little vinegar to a boiling container with eggs;
- to pink - boil the eggs together with the chopped beets, while the shells will initially turn brown and turn pink after drying;
- orange - add four cups of onion peels during cooking, for a brighter color, leave in the broth overnight in the refrigerator;
- silver - add water to the blueberries in a one-to-one ratio, crush the berries and leave the eggs in the prepared mixture in the refrigerator overnight, then boil.
You should wear gloves when using turmeric.
For drinks
For coloring drinks, it is most convenient to use homemade syrups. Due to the large amount of sugar, such preparations have a long shelf life. You can make syrup from sweet pumpkin, berries, banana, yellow and red plums, pears, peach and pomegranate.
Homemade syrup recipe:
- Squeeze juice from the selected vegetable or fruit.
- Bring to a boil and add sugar in a one to one ratio. Boil for 10 minutes.
- Cool and place in a glass container with a lid.
Milkshakes and smoothies can be colored by adding fresh berries, melted chocolate, or pureed vegetables. But in this case, it is worth remembering that additives will affect the taste of the final product.
For powder
Industrial confectionery powder for baking can be replaced with colored sugar. To do this you will need a plastic bottle and natural dye. The ingredients must be placed in the bottle and shaken vigorously. A small amount of coloring should be added to prevent the sugar from dissolving and sticking together. In a similar way, you can color coconut shavings and cereals for children's crafts.
Can you use brilliant green as food coloring?
Cake with green mastic
When you need to make a mastic mass or cream for a green-colored cake, in the summer it is easy to create it from the juice of spinach leaves. But what to do in winter, when this greenery is not available, and Easter is still far away, and food paints are not yet sold in stores? Can green paint be used as food coloring?
Remember: Zelenka is not a food product!
But many confectioners use a solution of brilliant green to color confectionery mixtures. Just add one drop of this product to get a rich green tint. This amount does not give off any foreign smell or taste.
Features of painting black
It would seem that what is so difficult about coloring the cream? You take the dye and add it. If the color is faded, add more. But alas, it is likely that with this approach you will succeed:
- dark green;
- dirty blue;
- violet;
- dark grey.
At the same time, trying to correct the situation and adding more and more dye, you will spoil the cream. If the paint is dry, it will become too thick. If a gel is used, the cream will separate or even curdle due to excess moisture. Therefore, before you start decorating the cake, make sure to properly prepare the basis for the work:
- Use chocolate cream on cream, butter or cheese. You can successfully repaint a light one, but much less dye will be spent on a brown base, and the color will be deeper and more saturated.
- We use fat-soluble dye and add it only after all the ingredients of the cream are well combined. This is the only way to paint the mixture evenly.
- We wait. Black, like red, blue, and purple, takes time to activate. Therefore, we simply add the required amount of dye according to the instructions on the package and set the bowl aside for 30 minutes.
Unfortunately, these little secrets do not always help achieve a black cream color. You may not get the desired shade solely due to poor-quality colorant. Therefore, you need to pay special attention not only to the coating recipe, preparation and decoration of the cake, but also to the brand of dye used.