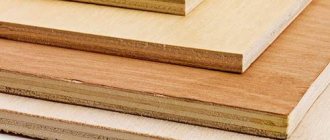
Before answering the question whether it is possible to putty aerated concrete without plaster, you need to figure out what kind of material it is.
What is putty and why is it needed?
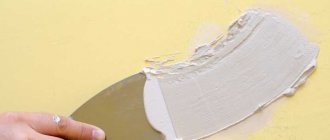
Putty or putty is a building material in the form of a thick solution used to level surfaces before finishing. The composition of the putty mixture includes: film-forming compounds, fillers, pigments. Talc, chalk, barite, gypsum, and cement are used as fillers. The purpose of the material depends on the size of the aggregate. There are two types of putty:
- starting - for rough leveling under wallpaper, contains coarse filler;
- finishing - for leveling walls to a “gloss” finish for touch-up, contains fine filler.
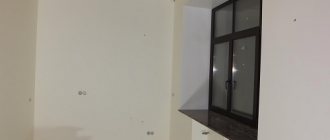
The starting putty for aerated concrete, internal and external, has a gray tint, the finishing putty is only white. Puttying of aerated concrete blocks can be done on a layer of plaster or directly on aerated concrete blocks. In this case, before applying putty on aerated concrete, the surface is always pre-primed. This is necessary for reliable adhesion of materials to the surface.
Is it possible to putty aerated concrete without plaster?
Puttying walls made of aerated concrete without plaster in accordance with SNiP 3.04.01-87 is possible only when the differences in wall level do not exceed 5 mm. If there are chips, holes or irregularities with a depth of more than 5 mm, preliminary plastering of the surface is necessary. If you follow the technology for laying aerated concrete blocks, in most cases it is possible to putty walls made of aerated concrete without plaster.
Can putty be applied to concrete surfaces?
It is recommended to lay reinforcing material (fiberglass). It will increase adhesion and prevent cracking of the putty. This is true for porous concrete.
Walls
Puttying of concrete walls is not much different from the standard one .
It is important to pay attention to the compositions used and the type of room. Concrete must be dust free and degreased. Depending on the type of finish, the final coat may need to be sanded with fine sandpaper. For dry rooms (bedrooms, living rooms, hallways) you need gypsum putty; for wet rooms, it would be correct to use cement or acrylic putty. Porous substrates that do not require leveling can be puttied with thixotropic non-shrinking compounds. Fiberglass is pre-laid. Cracks and seams are filled with starting solution. If the defects are minor, then 2-3 layers of finish are allowed without laying the start.
Ceiling under wallpaper or paneling
Fiberglass is laid on the ceiling before puttying, especially plasterboard . It can be cut into several fragments and overlapped. Installation is carried out on a layer of starting putty. It will take 3-4 layers to cover the web. When puttying under wallpaper or paneling, you don’t have to eliminate significant defects and don’t make the background white.
If a concrete ceiling needs restoration, then it is better to use acrylic mixtures.
Floor putty must have increased strength, as it will be subjected to heavy loads every day. Here you need a cement or special composition. For further sanding of floors, a waterproofing mixture is used. The surface is cleaned with a construction vacuum cleaner. The mixture is poured onto the floor, then leveled with a brush or spatula.
For painting
The peculiarity of preparation for painting is the creation of a uniform, perfectly flat surface without defects .
Acrylic putty is recommended, since polymer compositions can be tinted in the mass. This technique is used to add color saturation. Other features of puttying for painting:
- mandatory grinding of the finishing putty coating;
- applying at least 4 layers of composition to cover fiberglass;
- the use of white mixtures - putty and primer;
- laying fiberglass end-to-end with overlapping seams on the base.
A covering primer is necessary if the solution produces a yellow or grayish tint. Otherwise, a universal penetrating one is used. The concrete is directly processed using concrete contact.
Similarities and differences
Both plaster and putty are intended for pre-finishing. More precisely, to level the surface of capital structures - walls and ceilings. Both types of mixtures use the same binders, which can be used:
- Portland cement;
- Gypsum;
- Acrylic resin;
- Clay;
- Lime.
The wall is finished with lime plaster.
To prepare putties, in addition to the listed binders, drying oil and some types of adhesives are used. Putties for wood and metal can also be prepared using epoxy resin, chlorinated vinyl chloride resin, alkyd-styrene and pentaphthalic varnish, as well as a solution of colloxylin in acetone and other organic solvents.
Oil-adhesive putty of domestic production.
What is the difference between putty and plaster?
You see, both types of finishing materials include not only binder, but also filler. This is where we will find the difference between them: plaster uses coarse filler, while for putty its maximum size is limited to 0.2 millimeters.
This explains the main practical difference between plaster and wall putty:
- Plastering gives a fairly rough surface, but can be applied in a layer of 50 millimeters or more. Plaster is used to round corners, to eliminate blockages and differences in walls, and significant unevenness in ceilings;
After plastering, the wall surface needs additional finishing.
- Puttying is designed to eliminate minor defects and prepare the base for applying the finishing coat - painting or wallpapering. As a rule, putty is applied after plastering.
After filling, the surface is ready to apply the finishing coat.
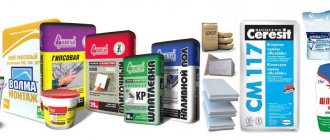
Types of putties
As a rule, when working with concrete, the following types of putties are used:
- Cement. This is the most popular type of mixture in question. Its basis is cement, most often grade M-400 or M-500. The positive side is good water resistance. The negative aspects include the lack of elasticity and, as a result, the appearance of cracks after some time due to shrinkage. This concrete putty is used for finishing walls outside the building, rooms with high humidity and working with concrete floors.
- Plaster. The basis of this material is gypsum. Due to the gypsum mixture, natural circulation of moisture occurs. Positive features include good thermal insulation, fire resistance, and environmental friendliness. The disadvantage is fragility. This mixture is used for interior finishing. It is not recommended to use this type of putty in rooms with high humidity (bathroom, shower, swimming pool).
- Acrylic. The basis here is acrylic. This is a universal putty, it is suitable for both external and internal work. Due to the good appearance of the finished surface, acrylic mixture is often used for finishing ceilings without subsequent painting.
To increase the adhesive properties of the working surface, it is recommended to treat the surface with primer before applying putty. In our case, when working with concrete, it is better to use concrete contact. However, when choosing a primer, you should pay attention to what kind of work: internal or external, it is intended.
Is it possible to putty aerated concrete without plaster?
Before answering the question whether it is possible to putty aerated concrete without plaster, you need to figure out what kind of material it is.
What is putty and why is it needed?
Putty or putty is a building material in the form of a thick solution used to level surfaces before finishing. The composition of the putty mixture includes: film-forming compounds, fillers, pigments. Talc, chalk, barite, gypsum, and cement are used as fillers. The purpose of the material depends on the size of the aggregate. There are two types of putty:
- starting - for rough leveling under wallpaper, contains coarse filler;
- finishing - for leveling walls to a “gloss” finish for touch-up, contains fine filler.
The starting putty for aerated concrete, internal and external, has a gray tint, the finishing putty is only white. Puttying of aerated concrete blocks can be done on a layer of plaster or directly on aerated concrete blocks. In this case, before applying putty on aerated concrete, the surface is always pre-primed. This is necessary for reliable adhesion of materials to the surface.
Is it possible to putty aerated concrete without plaster?
Puttying walls made of aerated concrete without plaster in accordance with SNiP 3.04.01-87 is possible only when the differences in wall level do not exceed 5 mm. If there are chips, holes or irregularities with a depth of more than 5 mm, preliminary plastering of the surface is necessary. If you follow the technology for laying aerated concrete blocks, in most cases it is possible to putty walls made of aerated concrete without plaster.
Why putty the walls in front of the wallpaper if they have gypsum plaster on them.
Despite the fact that almost all bags of gypsum plaster indicate: “does not require puttying,” much depends on the professionalism of the master. To achieve the desired result when plastering walls with gypsum plaster, you must perform the following steps: Plaster the wall to a certain width immediately along the entire height, without interruption. Trim the plaster vertically and horizontally until it hardens at a certain time. Shine the walls correctly.
If at least one of the above conditions is not met, unwanted bumps, drops, and pits will appear. Thin, smooth wallpaper can highlight wall imperfections. Heavy, dense, textured wallpaper will hide wall defects as much as possible.
We advise you to carefully check the walls before making a decision. Bring a burning light bulb as close to the wall as possible. Thanks to the shadows, all the imperfections will appear and you will understand how well the walls were glossed. But be warned! Glossing for different types of wallpaper and even for painting may vary in price. Be clear about your requirements for the walls before carrying out work.
How to determine the required volume of putty
After determining the type of putty, we need to calculate how much we need to take? Usually, on the back of putty packages everything is described in great detail. It would be better to go to the store and read this information directly on the bag. The fact is that all materials are different and it will be difficult to say the exact quantity, but an approximate quantity is possible!
How many times to putty the walls under the wallpaper
It is very important to evaluate how much you have prepared the wall before applying putty. If after plastering the wall is perfectly smooth, then of course one layer is enough. If you haven’t plastered the wall, but are trying to remove unevenness and small differences on the wall using putty, then the consumption of material will be completely different. Typically, the thickness of the putty ranges from 1 to 3 mm, in some places up to 5 mm - no more. Therefore, in the worst case, if you are going to smooth out unevenness up to 1 cm, then in any case you will need to lay the material in 2 layers.
For example, I just had such a case without plaster, when I spent 15 kg of Weber Vetonit KR putty on an interior wall 3.5 meters by 2.5 meters, with a total area of 8.75 meters.
How to putty walls for painting
If you plan not to glue wallpaper, but to paint the walls, then in this case they should be literally polished. In this case, first, with regular putty, unevenness and roughness that may exist after plastering are removed. Then, when the first layer has dried, the wall needs to be sanded, vacuumed, primed and a second layer of finishing putty applied in a very thin layer. The work turns out to be quite complicated in terms of labor costs, but perfectly smooth walls are worth it.
Taking into account the above, you just need to measure the area of the walls that are to be puttied, estimate the thickness of the layer of putty that you are going to lay, decide whether it will be one layer or two and, based on the material consumption indicated on the packaging, calculate how much putty you need to buy.
When making repairs, you need to remember an important thing: Where and how to store dry building mixtures in the apartment. Sometimes, especially if you live in an apartment in which you are renovating, see How to renovate the room in which you live, it is better to purchase building materials in parts.
Why and how to prime walls for wallpaper?
Priming the surface for gluing the canvas is a necessary step in the repair. Many people mistakenly believe that it can be skipped, because the material already holds up perfectly. Experts think otherwise, and here's why:
- Applying a primer to plaster increases the adhesive ability of the surface. The adhesion between the wall and the material will be stronger, which means the repair will last longer for the owner.
- The primer is selected for each room individually. There are moisture-resistant and heat-resistant primers. The durability of the repair depends on the correct choice of material.
- Proper priming of the surface also affects the quality of repair work.
How to properly apply primer to a plastered wall? Using a wide brush or roller, carefully apply the solution to the entire surface. Only after the work is completed and the soil has completely dried can you start gluing the wallpaper.
How to prepare walls for putty. Primer
Always, before you are going to putty the walls, you must first prime them, see the article: How to prime walls.
If you apply putty to a concrete wall, it is better to prime the wall 2 times. If you have just plastered the wall, you can prime it once before applying putty.
In any case, you need to look at the general plan for working with the walls, which I mentioned above.
Why do you need putty under wallpaper?
Remember what wallpaper used to be like? Paper, with edges that had to be cut off on one side and overlapped. This made it possible not to worry too much about the smoothness of the base; most often, the walls were covered with old newspapers before the final finishing.
Today, old newspapers have already been abandoned, but the unevenness of the walls still requires some tinkering to get the wallpaper to fit as it should. That is why many people prefer to immediately entrust these chores to third-party craftsmen who will do it faster, without unnecessary nerves and with high quality.
Modern wallpaper is glued end to end. And the slightest hole or protrusion at the junction of adjacent canvases leads to a poor-quality seam. Ideally, it should be completely invisible, which is why the base needs to be carefully leveled. But the role of putty is not only this.
The main difference, how to figure it out for a beginner
Before starting interior decoration, you need to find out what putty and plaster are, what the difference is and the specifics of their use. Both of these mixtures are used for finishing work. The main purpose of this process, from the point of view of interior decoration, is to level the ceiling, walls and corners. In exterior finishing, such manipulations are needed to create an additional layer when insulating walls. Separately, decorative plaster can be used to decorate surfaces.
Beginners should remember the main differences between these materials:
- Putty is used to correct minor surface defects (small cracks, gouges, seams), and plaster is used to level the entire area of the walls or ceiling.
- Putty shrinks less. The layer of plaster application can reach 30 mm, and in cases of additional strengthening of the walls - 70 mm. The putty is applied in a thin layer, no more than 3 mm.
- The surface after puttying is smooth, and after plastering it is rough.
How to plaster concrete
The first step is to decide which mixture is most suitable for plastering concrete walls. The general rule applies here: when choosing a solution, you should start from the conditions in which the finishing will be located.
The properties of plaster depend on the binder in its composition. According to this criterion, mixtures are divided into several types:
- cement;
- limestone;
- cement-lime;
- gypsum;
- polymer.
Cement mortar is considered universal, but it is not very convenient to use.
Its main advantages include strength and moisture resistance, as well as an affordable price. Disadvantages - low ductility, long period of complete hardening, low adhesion to a smooth concrete surface.
I use it for finishing the street side, plastering wet rooms: kitchen, bathroom, toilet. After applying cement mortar, the walls become rough from the sand in the composition, so subsequent puttying is necessary in residential areas. Lime compositions are easy to apply to walls and are highly resistant to cracking.
Disadvantage: low strength. To create a durable coating, reinforcing components must be added to the mixture. Sometimes lime is added to cement plaster to improve its properties. This composition improves adhesive and plastic characteristics.
Lime also has antiseptic properties and prevents the development of mold.
Gypsum plasters are a favorite among plasterers. They improve sound and heat insulation in rooms, contribute to the formation of a healthy microclimate and are easily applied to walls and ceilings. In addition, they dry much faster than cement plasters.
When can you not putty?
Whether we want to wallpaper or paint the walls, we must always apply putty to best level the surface.
Even if the finishing is carried out on plasterboards, you still need to putty the entire surface in at least one layer. This is necessary so that thin or light wallpaper does not show through, and the paint lays down evenly and does not show any flaws. But there are also cases when puttying is not necessary.
- If you have smooth concrete walls with a single color, and you use thick or textured wallpaper, then it is quite possible not to putty the wall before gluing it.
- It is also not advisable to use putty if you are doing decorative plaster on the walls.
- Do not putty the walls before finishing them with ceramic tiles.
- In technical and utility rooms where minimal finishing is required, you can paint the walls directly over the plaster without putty.
- Often brick or aerated concrete masonry is painted without any preliminary preparation at all - if this is not necessary, or it is a design decision.
Glazing .
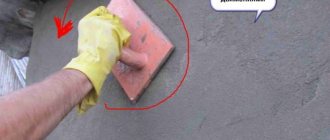
Experienced craftsmen use glossing when plastering with gypsum or cement mixture. This technique may well replace further puttying, which means significant savings in money and effort for repairs. Glossing is carried out using a soft sanding block. The plaster layer that has set, but has not yet dried, is generously moistened with water and then rubbed in a circular motion. Then a wide spatula is used horizontally and vertically along the treated wall, removing all dust and particles of plaster. After such preparation, you can paint or glue wallpaper without finishing putty.
Is it possible to do without plaster and immediately start plastering the walls?
Plaster is not a necessary base (base) for preparatory work before applying putty.
That is, surfaces can be puttied without a plaster layer.
Putty can be starting, universal, finishing.
starting putties can be applied in a layer of up to 15 mm, finishing putties in a layer of 1-3 mm.
If your surface is relatively flat, but not smooth enough for finishing putty, then you can apply a layer (leveling) of starting putty and then, after priming and drying, apply a layer of finishing putty.
In some cases, you can only get by with finishing putty.
I have a panel house and the walls are almost perfectly smooth; before painting, I immediately puttyed them with finishing putty.
But first, pick up a rule, a level, a plumb line and check the walls for their evenness.
in some cases, the wall may be flat in the plane, but piled up from below or from above.
In case of significant blockages, you cannot do without plaster.
Further, some finishing materials, by definition, do not require a plaster layer.
For example, the walls were lined with plasterboard, the gypsum board is not plastered, it is only puttied.
And putty is used not only for sealing seams between gypsum plasterboard sheets, but also for puttingty in a continuous layer.
If your surfaces are relatively flat, then the gypsum board can be attached using the adhesive method, rather than making a frame (bars, profiles).
Next, before applying putty (as well as plaster), first the old finishing materials are dismantled and then the primer is dried.
If the base actively absorbs moisture and the strength of the base is in question, then deep penetration primers can be used.
If it doesn’t absorb, the base is smooth, adhesion is insufficient (for example concrete), then you can buy something like this
Also, you cannot do without a primer when applying layer-by-layer leveling mixtures (putty, plaster).
Some plasters can be used instead of putty.
For example, the minimum permissible layer thickness of Rotband gypsum plaster is only 5 mm, the maximum permissible layer thickness is 50 mm.
Source
What comes first: plaster or putty?
If we consider what is applied to the wall first: plaster or putty, then the order should not be confused. A construction rule helps to understand and remember the sequence; failure to comply with it leads to defects.
The rule is as follows: a weak coating is applied to a strong base.
That is, a stronger coating cannot be applied to a weak wall, because it will come off along with part of the top of the underlying material. This often happens already during the curing stage. Plaster coating is always made more durable than putty. If you plaster over putty, the hardening top layer will tend to “shrink,” which the less durable putty base cannot resist. The resulting stresses will cause pieces of the hard finish to crack and fall off.
first apply plaster then putty
If you first plaster the wall and then apply putty, the putty will not fall off or crack.
Technology of work using the example of a bathroom
- The current finishing is removed from the walls. Detergents and water are used to remove oil stains. Use a metal brush to remove mold and mildew. Then the surface is primed.
- Tile adhesive is prepared in a container. Detailed instructions are provided by the material manufacturers.
- The adhesive composition is applied to the cleaned and dust-free surface with a notched trowel; the optimal tooth size is 6 mm. The glue is leveled and the beacons are installed.
- The solution is then given 24 hours to dry.
- Next, seal and stir the cement plaster. It can be applied to the wall manually or mechanically.
- They start plastering from the corners and then move on to the row sections. To level the layer and remove excess solution, the rule is to work from the bottom up.
- Leave to dry for 2 days. After this you can lay the tiles.
Leveling concrete walls in a living room: 1st method
Suitable for thick wallpaper or painting without special requirements for the result.
Materials - factory dry mixtures in bags:
- universal cement plaster weber.vetonit TT-40;
- finishing polymer putty weber.vetonit LR+.
Stages of work:
- Prepare the surfaces. Dust the walls, remove grease stains (if any). Install the beacons at a distance of 1.8-2.3 m from each other. Wet the working area with water - there is no need to prime the walls before applying weber.vetonit TT-40 plaster.
- Prepare the solution. Pour water into a container, add powder (not vice versa) and stir with an electric mixer. The ratio of liquid to material is indicated in the instructions on the package.
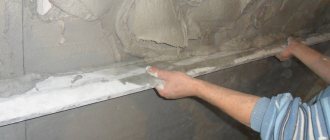
- Plaster the surface. Apply the mortar between the beacons, smooth it with a trowel, level the plane, resting the rule against two adjacent beacons, etc. After 3 hours, rub the surface with a plastic float. If the room is dry and hot, it is recommended to wet a new cement layer every 3 hours during the day.
IMPORTANT. Metal beacons must be removed after the plaster has dried (to avoid corrosion and the appearance of rust stains in the future). Use a basic solution to fill the furrows.
- Putty the walls. You can begin finishing leveling after 7 days, when the cement base has gained strength. The method for preparing a solution from the weber.vetonit LR+ putty mixture is the same as for plaster. Apply the composition with a paint spatula, carefully smoothing it (the surface should be smooth without ridges or grooves). Small defects can be easily removed with P240-320 sanding paper when the surface is completely dry. After this, you can glue thick or leveling wallpaper. Painting is also possible if there are no special requirements for decorative aesthetics.