The times of European-quality renovation with impersonal rooms and plasterboard walls are gradually passing. More and more owners of apartments and private houses are striving for individuality when decorating their interiors. One of the ways to express artistic taste is a panel of decorative plaster. At the same time, it can be done independently even by those “masters” who are not very comfortable with a brush and spatula and do not have an artistic education. This article will talk about several techniques for creating panels from decorative plaster with your own hands.
Bas-relief, panel, stucco
First, you need to understand the basic concepts in order to work in a unified technique. This will help create a harmonious decorative decoration that will look aesthetically pleasing in the interior of the room. There are several types of relief for three-dimensional drawing:
- Bas-relief is a relief image of something on the surface of building structures (wall, ceiling, column, etc.). In this case, the depicted object can protrude above the surface of the base by no more than half of its potential volume. The actual dimensions of the bas-relief depend on the chosen style and artistic execution, but for modern residential premises it rarely exceeds 50-70 mm, making a more expressive relief is inappropriate, since it will be too disturbing in the cramped conditions of a city apartment.
- A panel is a relief or textured image of something that is applied to part of the wall. It is framed with certain frames: relief, with a painted ornament, baguette, frame and other material, etc. This type of decor is more suitable for decorating residential premises, both in terms of execution and the convenience of further maintenance - cleaning, restoration, etc. Not only bas-relief, but also fresco, mosaic, etc. can be used as a panel execution technique.
- Stucco molding is one of the types of bas-relief, which is a decorative overlay made of plaster, wood or polymers. Made in the form of various rosettes, pilasters, baguettes. As a rule, it is installed with glue at the top of the wall or ceiling.
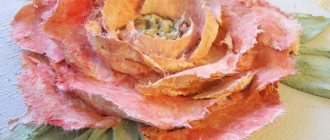
Important! Panels on the theme of flowers and floristry are typical of the Art Nouveau style. It harmonizes with most modern styles and is one of the simplest to implement, since it does not require special adherence to real shapes and sizes.
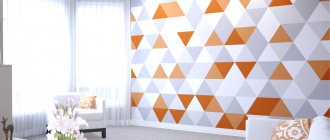
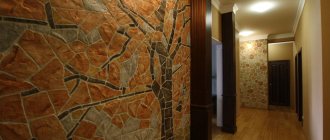
Decorative panel made of ceramic tiles
Ceramic panels are not just interior decoration, they are the inner world of the house, adding unique originality and picturesque appeal to it.
Ceramic tile panels look great in the bathroom and kitchen, living room and hall. Such decorative elements look no less impressive on building facades, columns or niches.
A tile panel can occupy either a small area or an entire wall, from floor to ceiling. There is also a variety of “free size” panels that do not have a complete plot and their fragments can be laid out at an indefinite height. Often this is a drawing without clear boundaries or an abstraction.
Decorative panels made of ceramic tiles have a number of advantages:
- durability of finishing;
- image durability;
- resistance to abrasion and fading;
- ease of care;
- resistance to various cleaning agents;
- environmental friendliness of the material;
- huge selection of patterns for design.
Many people want to do most of the repairs and decor with their own hands. This is necessary not only to save money, but also to demonstrate your creative abilities. It’s also especially nice to show your creations to guests.
Before you start laying tile panels, be sure to read the instructions. They write there how to properly attach the selected tile.
There are two types of laying ceramic tiles: seamless and regular. Both grout and sealant are used, but in different ways. When laying seamlessly, the gap between the fragments should be minimal, and the tiles should have a perfectly even cut.
Before installation, it is imperative to prepare the surface. A complete absence of traces from the previous coating is required. A primer is applied to a perfectly flat surface.
While the primer dries, you need to lay out the panel on any flat surface so that all the elements exactly match the intended look of the picture. This way you will be sure in what order to lay out the fragments. The tiles should be laid from below and during work be sure to check for bevels.
Small pieces of tile can be glued with liquid nails, and large pieces can be glued with special construction glue. Only after the two bottom rows have dried can the next ones be laid.
See various options for tile panels in the interior of an apartment:
Material for bas-relief
Any factory-made dry plaster mixture can be used as a material for a relief panel. However, when choosing it, you need to pay attention to the following characteristics:
- Maximum thickness of the working layer. When creating a relief panel from decorative plaster, the thickness may be slightly exceeded, but if the relief area has a large area and/or protrudes too high above the base surface, then additional reinforcement will be required. And the image itself will be quite fragile;
- Thixotropy is the ability of a plaster mortar to slide off the applied surface under its own weight. It is necessary to select compositions with minimal thixotropy indicators;
- Surface quality - the panels themselves are the final decorative finishing of the surface. Quite often, a thin layer of paint or varnish is applied to them, both as a finishing touch and for protection. All surface defects, if they should not be present according to the artistic idea, will be clearly visible. Therefore, it is recommended to use finishing or multi-finish putty;
- Lifetime of the solution - if you do the work yourself, especially if you have no experience, it will take quite a lot of time to create a bas-relief. Therefore, it is recommended to mix small portions of the plaster mixture. And also choose those compositions whose shelf life of the finished solution is more than 60 minutes;
- Adhesion to the surface is one of the main indicators of choosing a plaster mixture for creating panels. Determines the strength of the connection between the decorative element and the base, as well as the reliability of fastening individual elements or layers of bas-relief to each other.
For creating paintings from decorative plaster in rooms with normal humidity, finishing and multi-finish gypsum putties are best suited.
For rooms with high humidity, it is recommended to choose cement-based putties. For bas-reliefs with high local thickness, as well as a large area, it is recommended to use plaster with coarse filler as an intermediate base. This can be any type of starting plasters. Their use will provide the necessary volume and also create a solid basis for reliable fastening of the finishing putties.
IMPORTANT! When using separate base and finishing materials, it is necessary to select dry construction mixtures with a binder of the same type. That is, apply gypsum putty to a gypsum base, and cement putty to a cement base.
In addition, there are ready-made compositions specially designed for creating bas-reliefs: Marmur Stucco, VGT Bas-relief, Clavel Riviera.
Applying plaster
The application of the decorative layer depends on the type of mixture, but it is done in several layers, the thickness is chosen in accordance with the base - concrete, wood or brick. The structure of the entire wall can be:
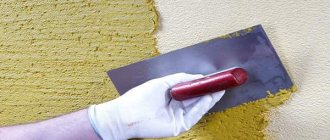
- Smooth - with imitation of marble, granite, any natural stone. This type is created by components in the composition of the powder or ready-made solution. Apply it with a simple spatula in 2 layers, first the starting mixture, then the finishing or universal mixture. After which they sand, but after each stage they prime and wait for drying.
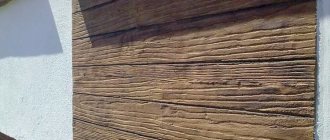
- Textured - the entire area is artistically intersected with fragmentary elements. They consist of stone chips and sand. During manufacturing, the manufacturer adds large or small particles to the composition. Work with rubber, metal or plastic spatulas.
- Relief, when using a painting tool, a special roller with grooves and additives, bulges and depressions are created in the building material.
They choose any finishing method they like, but this is not the final process, but only the basis for creating a panel.
Base for sculpture painting
Almost any materials and building structures with a sufficient level of strength can be used as a base: plasterboard, magnesite sheets, all types of starting plasters, bare brick and concrete (panel) walls. Smooth materials with low adhesion must be pre-matted. To do this, their surface is treated with coarse sandpaper.
It should be noted that deformable non-mineral materials such as fiberboard, chipboard, plastic and wooden lining are not very suitable for creating a picture from decorative plaster. Before starting work, it is strongly recommended to dismantle them and carry out all work on mineral bases.
Wooden walls made of timber or rounded logs should be sheathed with gypsum plasterboard to create a base with acceptable adhesion.
Advantages, disadvantages of artistic stucco molding
Like any other method of decorating a room, stucco decoration has a number of advantages:
- a high-quality bas-relief looks expensive and luxurious;
- a product made of plaster or polystyrene foam will cost very little;
- with the help of stucco molding, a unique design of any room is created;
- decoration with relief paintings is perfect for almost any interior style;
- With the help of bas-relief it is easy to hide some of the imperfections of the walls and zone the room.
In modern interiors, decorating with such sculptural compositions has become accessible.
There are also some disadvantages:
- creating this item is a labor-intensive process;
- gypsum structures are not suitable for placement in wet rooms (bathroom, kitchen), as well as in the open air;
- the finished product requires regular maintenance.
The bas-relief is made of wood, clay, alabaster, plaster or stone.
Necessary tool
When creating panels from decorative plaster with your own hands, you use thinner tools than those used for plastering smooth surfaces - trowels and trowels. Most often used:
- Palette knives are miniature trowels with an original blade shape.
They are sold both individually and in the form of sets of several tools. The working part of the palette knife (spatula) is made of stainless steel and has varying degrees of elasticity. As practice shows, for inexperienced performers it is easiest to work with soft, elastic instruments. A stiffer palette knife with a long spatula is convenient for cleaning off excess from bas-relief elements.
- Meshes for cutting.
Used in pottery. They are steel wire or plates rolled into a loop and having different profiles. In a budget option, you can use a set of plastic stacks for working with plasticine.
- Paint brush with artificial bristles.
It is used to smooth out sharp edges, as well as to moisten the working surface if the plaster on the panel begins to dry out. It is also used at the final stage of processing, when the surface of the bas-relief is covered with a thin layer of transparent protective varnish.
- A medium and small spatula is used to form the main volume of the relief when performing a large volume of work.
You can create a relief using a stencil for decorative plaster.
Preparing the wall
Many people think that decorative plaster, which is used to create panels, does not require additional preparation of the entire surface. This is fundamentally wrong; it is difficult to correct irregularities after applying the drawing, and they spoil the picture. The wall will be completed in its entirety:
- clear;
- coat with primer;
- plaster;
- let dry;
- prime again.
It is possible that those places that are not occupied by the relief installation will have to be puttied and sanded, but it is better to treat the entire area; the adhesion of building materials of different compositions will be ensured by a primer. The surface must be dry and clean.
Cleaning and priming the wall
The working base must be pre-prepared to eliminate the possibility of cracking of the decorative coating and to maximize adhesion to the working surface. This is a fairly simple process that involves doing the following:
- The surface is cleaned of dust, dirt, old finishing materials;
- All defects are eliminated - cracks, cavities, etc. Significant irregularities are removed provided that they cannot become the basis for a bas-relief. To properly correct defects, all defects must be thoroughly cleaned to their full depth. Then treat local areas with a deep penetration primer. After a few hours, they can be filled with a cement-based repair mixture. If the structure has a tendency to shrinkage deformations, then it is recommended to use serpyanka plaster mesh on deep cracks and expansion joints between panels.
- After the repair mixture has dried (3-5 days), the surface is re-cleaned and treated with a deep penetration primer. For hygroscopic materials, such as gypsum plaster, gypsum board blocks made of porous concrete, it is recommended to apply two layers of primer.
Tools for modeling putty in an apartment
For sculpting work with putty you will need the following tools:
- putty knife;
- trowel for decorative plaster;
- palette knives;
- bucket for solution;
- stacks of different sizes;
- pencil for drawing an outline;
- polyethylene film;
- chisel;
- sandpaper;
- masking tape;
- brush-brush;
- cream injector;
- latex gloves.
Volumetric compositions are invariably associated with classical styles.
The materials you will need are plaster itself, primer paint, Marseilles wax, acrylic or latex paints, glue, spray paint.
Basics of creating a three-dimensional drawing
When creating a relief pattern, various techniques can be used:
- Application of textured materials. The putty mixture acts as a binder base. Various textured elements are added to it: stone chips, quartz sand of large fractions, pieces of mica and other flocks. Various spatulas are used to apply finishing material to the surface;
- Structuring the base - to create a relief, rubber rollers with corresponding protrusions, or graters with a special relief on the surface are used;
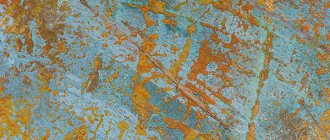
- Smooth again using different materials. Such panels do not have a relief, but look heterogeneous in appearance due to the inclusion of various materials in the surface of the base: marble, granite, cork, metal, leather, textiles, etc. Materials can be placed randomly or create a composition.
However, real artistic bas-reliefs and panels are created by hand. To do this you need to have artistic taste and certain skills in modeling and drawing. To gain experience, you can take advantage of master classes on creating paintings from decorative plaster.
Perspective
It is used quite rarely when creating bas-reliefs. Mainly in landscapes, marinas, etc. Particularly complex decor in terms of perspective are drawings with city landscapes. Since they require the creation of strict and perfect proportions. To make it easier to create perspective, it is recommended to follow these rules:
- Distant small objects should be drawn first;
- Make lines or relief on distant objects thinner;
- The height of the image or relief in the background should be less than in the foreground.
Reinforcement of plaster step by step example of bas-relief
When creating bas-reliefs with high relief, the most protruding parts must be reinforced. This will help protect them from cracking and peeling under their own weight. As a rule, reinforcement is performed for gypsum panels and soft wire attached to self-tapping screws is used. The process of reinforcing the bas-relief is carried out before the stage of applying the main volume of putty and looks like this:
- The sketch of the drawing is transferred to the base (wall) previously divided into squares;
- At the nodal points of the most prominent exhibit object, holes are drilled for dowels with a diameter of 4-6 mm. For drywall, it is allowed to screw self-tapping screws directly into the base. The height of the cap should be no more than 10 mm. A wire is wound onto it, creating a kind of frame;
- Starter plaster is applied to the frame. After drying, excess volume is removed using sandpaper or palette knives.
Cutting technique
A fairly simple technique that is perfect for novice interior designers. This is done using cultural stacks, plastic clay knives or chisels. Its principle is as follows. The general contours of the future bas-relief are sculpted from gypsum, alabaster or finishing putty with a large amount of plasticizing materials in its composition. After the mass hardens, all the details are cut out from it. To make the work easier, the plaster should be slightly moistened with water using a brush.
Layer-by-layer application
This technique is used to create complex multi-level compositions. It consists of layer-by-layer application of putty to the base. In this case, it is recommended to move from the general contours of the composition to smaller details located highest from the base. In fact, this technique is reminiscent of building up an object in a 3D printer, layer by layer.
When using quick-drying gypsum-based finishing putties, the wait between coats can be no more than 1.5-2 hours. In this case, it is not necessary to apply a primer between layers, provided that the surface has not become dusty.
Master class of layer-by-layer application:
Coloring
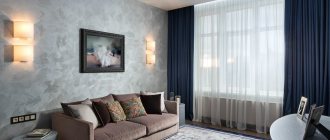
Some types of decorative panels, panels made of decorative plaster on the wall do not require additional decoration. However, to give the volumetric design greater expressiveness, as well as to protect small relief details, it is advisable to cover the surface with paint. One of the most popular coloring methods is patination.
The base color is chosen to be neutral; acrylic-based paint can be applied using a spray gun; this not only significantly speeds up the process, but also makes the coating more uniform. In addition to the color of the base, two compatible shades are used, which highlight the tops and valleys of the relief. The tops are made lighter and the valleys darker. This will visually make the relief deeper.
Lighting
Special lighting can add special chic to interior design and decor. In this case, the panel will become the main decorative element of the interior. In order to determine the correct locations for lighting sources, you need to use a painting lamp, installing it at various points around the bas-relief. For lighting, spotlights are used, most often in a plasterboard box.
Tyutyunnikov Dmitry
Article verified by a decorative finishing specialist
Master class on creating a bas-relief
You can also make stucco molding yourself, for this you need to take
- gypsum;
- clay;
- alabaster;
- plaster based on gypsum.
The subject of a three-dimensional image on the wall can be anything
Even a beginner can create a bas-relief design. In this case, it is better to use gypsum and plaster based on it. Maybe you won’t get a gorgeous picture, but you can decorate a room with a relief image. The main thing is to follow the entire sequence of actions exactly:
- A box with low walls, which looks like a tray, is assembled from slats and plywood. Its dimensions must correspond to the dimensions of the future relief slab; a bas-relief will need to be created there. In addition to the box, you can take other means, for example, an ordinary candy box, or a frame of suitable size, just first glue it to the glass with adhesive tape.
- It is necessary to cover the mold with polyethylene. The foam needs to be straightened so that there are no folds on top. If you can’t level it out, at least leave a minimum of unevenness.
- The solution is prepared strictly according to the manufacturer’s instructions and poured into the mold. When planning to create an ornament with high relief, wire is installed in the slab to further reinforce the composition.
- In order for the mixture to set initially, it must be left for a while. It is impossible to say exactly how long it will take, because... the indicator is different for each material. It’s just that before using this or that raw material, it is necessary to clarify all the nuances of working with it.
- You can start creating the bas-relief itself. First, the outline of the required decorative pattern is applied to the tile. Then you can begin to increase the volume inside the circuit from the newly prepared mixture. The volume is increased in layers so that each layer hardens a little.
Bas-relief in the interior of simple houses was rarely used before
Working with plaster is not difficult, even convenient, as long as the raw material is wet. At this time, you can get rid of the excess, use a knife, and adjust the ornament using a chisel or a wood cutter
If the material is not completely dry, simply plaster it. It is much more difficult to process an already hardened surface.
It will definitely be the highlight of your interior
If you need to make an in-depth image, you can do this in the following ways:
- The background layer itself needs to be built up around the figure, so that all the elements end up in a small recess. Everything ends with sanding the background plane.
- Images can be deepened if you select a small amount of base material using cutters and a chisel.
A little imagination, creativity and stunning results
Creating a bas-relief image yourself is a painstaking job; it requires time and considerable expenses. But, with a reasonable approach, you can give the design of your home an original, even unique look.
Question answer
Hello, Sergey! Thank you for your site! My husband and I have been painting walls for six months. We work with a spray gun and the works come out like copied postcards, it’s not an airbrush; you can’t paint little details with it, and sometimes we spoil it with a brush. Customers like it! Maybe they’re lucky! But I want a different effect. Friends gave a whole room for painting, chose the sea, the sun and palm trees! Tell me please, how to draw a surf and a waterfall without a spray bottle! In the photo is our first sea! From repeatedly redrawing the island, I thought that the island would fall off along with the plaster. I made the sky according to your advice, but 6m made itself felt, I had to resort to a spray gun! Read answer
Hello! I’m from Kazakhstan. I’m a self-taught artist, I recently finished my first job of painting a wall in a nursery, to strengthen my skills, I would like to start by telling you all the tools you should have to create a painting. And how to shade the drawing I can’t create an effect blurriness (I paint with acrylic, but is it possible with tempera oil) Thank you for your attention and I will be grateful if you answer!
Read the answer
Sergey, hello.
I looked through all the questions so as not to bother you again, but I didn’t find the answer to my question, so I’m making a request. Please tell me how you created your website?! If it’s not difficult, tell us point by point what needs to be done and what platform you have it on. I understand that you are doing this yourself. I understand the need to create a website, but how can I make it work? Was your website, for example, very difficult to create? Of course, now I’m not talking about the colossal work that you put into the forum and high-quality content of the site, but in general, can a beginner do this? I would be very grateful for your answer. Read the answer
Applying the base
After you have decided on the location of the panel, you need to apply a base layer of decorative paint. To do this, you can take regular acrylic putty and apply it in a layer of a couple of millimeters. After this we form a small drawing. This can be done either with graters or in other ways. If you make a drawing with a plastic grater, then there is this texture option: lightly press the grater onto the fresh putty and tear it off. The result will be a rough surface. Instead of a grater, you can use a natural sponge.
After the putty has dried slightly, you need to smooth the surface with a float. The main thing is not to smooth it out too much. The result should be a slightly uneven surface with islands.
After the putty has dried, you need to polish the surface with spatulas or a metal float. To do this, you need to walk along the surface with spatulas at a slight angle. A beautiful metallic shine will appear.
Then you need to cover the surface with patina or varnish. Patina can be taken either with a ready-made shade or colorless. You can tint it in the color you want yourself. Can be applied either with a roller or with a sponge. After the sponge you get beautiful stains.
Now you can start drawing the drawing.
DIY techniques for making relief designs
At home, bas-reliefs are made mainly from plastic materials - clay, plaster, paper, salt dough. Standard plastic elements that have lower artistic value are purchased less frequently.
Such decor would look appropriate in the design of the same name, Art Nouveau, Art Nouveau, Baroque, Rococo, Empire.
Made from gypsum plaster
Gypsum and plaster products are created using the following techniques:
- Free plastering of individual elements that are not fixed to the wall. This is the best option for beginners, as the design can be edited several times;
- Plastering models on the wall itself - performed directly on the supporting plane;
- Reverse casting is a complex method in which the model is made using a mold. The good thing about this technique is that it allows you to create many identical parts;
- Flat modeling directly on the wall - some experience is required to work. The finished product is an intricate picture, individual parts of which extend onto the ceiling and go around corners.
This natural material is well suited for creating stucco.
Advice: if the modeling is made from individual elements, they are glued using PVA or acrylic glue.
From clay
Often bas-reliefs are made from colored polymer clay or ordinary clay. Both options require firing in a kiln, followed by mounting on the wall. There is flat and volumetric modeling. Both are performed on a substrate using various shapes of stacks and fingers. The finished item is fired and pasted on the wall. Large paintings are made up of many details. “Botanical” bas-reliefs are popular – voluminous fresh flowers are “rolled” into a layer of clay, a form is placed on top, into which a liquid solution is poured. The result is a flat surface with voluminous plants on it.
Clay is the most accessible material that is suitable even for beginners.
From paper
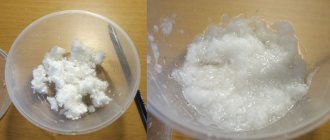
Creating a three-dimensional painting from papier-mâché is a quick, cheap way. The hardened composition is more durable than gypsum. To complete this you will need paper napkins and PVA glue. These materials are kneaded into a thick mass from which the details of the painting are sculpted. The finished composition is slightly tinted and covered with a layer of paint and varnish.
A paper bas-relief will give your home an original and unique look.