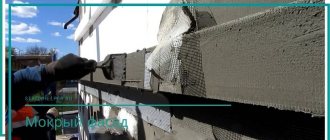
Purpose and application
Acrylic putty protects the surfaces of walls and ceilings from mechanical damage and harmful environmental influences. It also serves to level them before decorating: painting and wallpapering.
Acrylic putty is used for exterior work and interior decoration. It is used to fill cracks, level walls and ceilings.
Acrylic putty is used to treat different types of surfaces
The material is also used for puttying construction bandages, for repairing concrete, wooden surfaces, and drywall. Use it to seal cracks and depressions from anchors on the walls and ceiling.
Which putty is suitable for wallpapering?
Before purchasing putty and wallpaper, you need to study the differences and purpose of the two options – starting and finishing. When the walls are outwardly smooth and have practically no flaws, you can immediately treat them with the finishing mixture. If there are deep unevenness on the walls, it is necessary to use starting gypsum putty.
For areas such as the kitchen or bathroom, a durable and moisture-resistant composition is needed. Cement-based putty meets these requirements. To better bond the layers together, each of them is coated with a primer, including before wallpapering.
Starting mixtures are rough to the touch due to the coarse grain size. However, they are absolutely reliable and adhere perfectly to any surface. They are used at the initial stages of processing immediately after applying the plaster. The thickness of the layer can vary depending on the depth of the flaws and reach 20 mm.
At the final stage, a perfectly flat surface can be achieved using latex or gypsum compounds. Buyers most often pay attention to the uniformity of the mass, its color, the cost of the product and the reputation of the manufacturer. The most popular brands are Vetonit, Blik and Knauf.
The grain size of the finishing mixture is finer, so the walls do not look as loose as when applying the starting putty. As a rule, the final layer has a depth of 4-5 mm.
Before gluing wallpaper, you need to level the walls, and to do this, choose the right putty for interior finishing work. There are universal compositions on sale that can be used to bring walls to perfect condition with a minimum number of defects. They combine two types of mixtures - starting and finishing. But the price of such putty is much higher.
Post Views: View statistics 4,187
Advantages and disadvantages of the material
Acrylic mixture has a number of advantages that set it apart from others:
- safety and reliability;
- high adhesion and versatility;
- wear resistance and strength;
- fire resistance;
- moisture resistance;
- resistance to ultraviolet rays;
- long service life;
- quick drying;
- elasticity;
- efficiency;
- possibility of tinting;
- no shrinkage;
- no smell.
Acrylic putties have an elastic consistency, making them easy to work with
Due to its advantages, acrylic putty is in wide demand among buyers.
Like any type of putty, acrylic material has disadvantages:
- high price;
- dust during sanding of each layer of putty;
- small thickness of the putty layer;
- does not withstand low temperatures when applied.
The putty must be applied at a temperature not lower than 10 degrees, otherwise it will lose its elasticity. Despite the listed disadvantages, it still has more advantages.
Acrylic putty loses the elasticity necessary for work at temperatures below ten degrees Celsius
How to hold a spatula
A layer of putty of optimal thickness is obtained by holding the spatula at an angle of 60°, followed by a decrease in the angle as the mixture is consumed.
To maintain such an inclination, the spatula must be held by the handle with your working hand, and the corners of the plate should be held with the fingers of the other hand. The greater the angle of inclination of the spatula relative to the wall, the thinner the layer of putty will be.
Composition and technical characteristics
The composition of acrylic putty includes:
- liquid acrylic and acrylic resins, due to which the material acquires elasticity;
- modifiers - protect against cracking and shedding;
- dyes - you can choose any shade of the mixture;
- filler - gives the putty a uniform texture;
- antiseptic additives - not found in all acrylic putties, give it resistance to pathogenic microorganisms, fungi and mold.
The technical characteristics of acrylic solutions include:
- able to combine with mineral supplements;
- service life up to 25 years, shelf life of paste material - 1 year;
- the application layer should be no more than 5-7mm;
- the density of the material is 1.8 kg/m3.
The thickness of the applied putty should not exceed 5-7mm
The drying time of the material is 12 hours. A thin layer can dry faster, in 6-8 hours. In a humid room, the solution takes longer to dry.
Maximum thickness of applying a layer of putty on walls
During preparatory, finishing or repair work indoors, the thickness of the putty plays an important role. Failure to comply with the recommendations and established parameters for the level of thickness of the putty layer may ultimately result in the fact that it begins to gradually peel off from the surface.
Important! The maximum thickness of the putty applied is one of the main factors that must be taken into account during preparatory work. The putties themselves are starting and finishing. In addition, there are special universal solutions that allow you to quickly pre-prepare walls before finishing work.
Starting layer
The initial stage of puttying walls involves the use of rough starting material. This material is called starting putty. It is used to eliminate a large level of wall difference, hide strobes, and also hide all kinds of irregularities or holes. The advantage of this putty is that it is very easy to use.
Types of acrylic putty
Acrylic putty is divided according to purpose into starting (leveling) and finishing (decorative).
According to their purpose, putties are divided into leveling and decorative.
They differ in grain size. The starting one is intended for sealing large cracks. The high grain size of the building material allows you to hide unevenness and minor defects in the internal and external walls.
The finishing putty is applied in a thin layer and is the final step when treating the surfaces of walls and ceilings. It removes minor scratches.
The finishing putty has a smaller grain size and gives a perfectly flat and smooth surface.
According to the area of application, acrylic putty is:
- for interior work;
- façade;
- universal.
Universal putty has properties that allow it to be used both inside and outside the building.
For interior work
Acrylic putty is used to treat the walls and ceiling inside the building.
Putty for interior work is used for finishing all types of residential premises
If the surface of the walls and ceiling is concrete or wooden, then there is a danger of their destruction under the influence of moisture and water vapor. To protect walls from them, use water-dispersed acrylic putty.
The acrylate mixture has an important feature: it protects against water. It provides waterproofing of walls and ceilings.
Facade
Facade putty is intended for external use. It forms a protective layer that protects the facade from the harmful effects of the environment: dust, precipitation, wind. Facade putty has thermal insulation properties that protect the house from heat loss. It is used to level the surface of facades for cladding. It also performs a decorative function.
Facade putty is used for exterior work.
Universal
Universal putty is used for both interior finishing and exterior work. It applies to any surface and dries quickly.
Existing application methods
Obtaining a perfectly flat surface after the puttying procedure largely depends on the correct selection of the method of its application.
There are several puttying techniques, and each of them is aimed at correcting a specific surface condition. Starting, lighthouse, finishing, putty for cracks - each type of mixture is used for specific purposes in accordance with its purpose and recommended application technique.
Lighthouse finishing: how to learn
Beacons for leveling walls are hollow slats made of wood, metal or plaster. Beacon putty involves first filling the voids in the slats with a mixture, followed by leveling the entire surface according to the finished beacons.
The difficulty of placing beacons for a beginner lies in their horizontal and vertical installation using a level.
If the slats are installed incorrectly, the entire alignment process will be useless. If necessary, lighthouse puttying can be replaced by leveling using a painting grid, which is less costly financially, but easier to implement.
Partial puttying: when to use
Puttying a small section of the wall is justified only when dealing with cracks or chips that have arisen during the repair process.
If the damage to the integrity of the surface is small, then you can get by with a ready-made mixture for finishing putty.
It is more elastic and forms a thin layer that will not stand out on the wall.
If partial puttying is due to the need to combine different decorative finishes on one wall (for example, bas-reliefs, panels, etc.), then a special feature of applying the composition will be careful study of the edges of the treated area.
Thick layer technique
The starting putty is designed to be applied in a thick layer, which can hide any imperfections in the wall the first time. The thickness of such a layer can reach up to one and a half centimeters, and if necessary, after the putty has completely dried, you can begin applying the next layers. For better adhesion to the wall when filling with thick layers, a painting mesh is often used.
Comparison of acrylic, latex and gypsum putties
We offer a table from which you can conclude which of the proposed putties is better, and you will see the advantages of the acrylic mixture.
| Acrylic | Plaster | Latex |
| It comes dry, which needs to be diluted, and ready for use. | Sold as a dry mixture | Ready mix |
| Strong and durable, resistant to mechanical stress, does not crack | It is characterized by high strength, hardness, and is resistant to cracking | Durable, but does not withstand low temperatures, hard |
| It is easy to apply, but at low temperatures it loses elasticity and dries quickly. Each layer is sanded | Elastic, easy to apply, sanding simply and quickly. Knead in small portions because it sets quickly, thickens and dries. | Viscous, viscous, difficult to apply, difficult to smear on the surface, application requires experience. It must be applied in a thin layer, otherwise there is a risk of cracks. A lot of dust flies while sanding |
| Eco-friendly, does not emit harmful substances | Eco-friendly, natural material | Toxic |
| The putty breathes, but vapor permeability is low | High vapor permeability | The basis of latex putty is acrylates. Low vapor permeability |
| Used for interior and exterior work in any premises. Moisture resistant | Absorbs water, so it is used only in dry rooms, requires a perfectly leveled surface | Can be used in any room, even with high humidity. Suitable for interior work |
| Suitable for processing any surfaces: concrete, wood, metal, drywall, plaster | Used for finishing concrete and wooden surfaces, drywall | Not suitable for processing metal surfaces |
| High price | Low cost | High price |
Putties for interior work
Among the huge variety of finishing materials offered by manufacturing companies, both technical and decorative, putties are among the leaders. They are classified according to one of the main differences - how ready the mixture is for use. There are putties that are completely ready for use, offered in plastic containers, and dry ones, packaged in bags.
Ready putty
Before you figure out what putty to use for wallpaper, it’s worth learning about the benefits of the finished material.
Pros:
- Its differences are uniformity and excellent plasticity.
- It is very easy to apply to the wall.
- It has the ability to be stored for a long time without loss of properties provided that the container is tightly closed.
- Usually used as a finishing touch. It can also serve as a base for painting and can be tinted well.
Minuses:
- High price.
- Restrictions on storage conditions - cannot be frozen.
- The shades of decorative putty may differ in different batches.
Dry putty
Pros:
- Has an affordable price.
- Can be stored for a long time if the packaging is intact and is frost-resistant.
- Possibility of adjusting the size and thickness of the batch.
- Mixtures are divided into two categories: starting putty, used for leveling walls, and finishing putty, used for wallpapering or other types of decorative finishing.
- There are universal-purpose putties that are suitable for both initial wall treatment and finishing work, for example, Knauf multi-finish.
Minuses:
- It takes time to mix the working solution.
- To prepare the mixture, you need skill in determining the correct ratio of the mixture and water, as well as special devices - a drill with an attachment or a mixer.
- The mixture dries quickly and cannot be reused. You need to decide in advance on the volume and quickly complete the work.
- The desired shade of decorative finishing putty may differ in different batches.
Dry plaster mixtures differ in the materials used as the base:
- Gypsum – have a white color and are characterized by high plasticity. Gypsum mixtures are easy to apply and sand, and dry quickly. It is not advisable to use such putty in rooms with high humidity.
- Cement - mainly used for external work, as well as for finishing premises with high humidity. Frost-resistant, with low moisture absorption. The best base for this type of putty is brick or concrete.
- Polymer - usually used for processing joints, seams, cracks, as well as for finishing walls for painting. Plastic, have excellent viscosity. Recommended for use in decorative finishing in new homes if there is a risk of shrinkage and deformation of the walls.
- Glue-based putty - consists of drying oil, glue and chalk. It fits well on walls with small defects, leveling and filling existing cracks. It is applied in a thin layer, which after drying has great strength.
- Oil-adhesive - acrylates and polymer plasticizers were added to the components. It is used only indoors on surfaces that have low adhesion and require leveling: wooden, dense concrete, as well as on walls prepared for painting or pasting with light wallpaper.
- Latex – the area of application is the same as that of an oil-adhesive mixture. It contains water, polymer additives and fine calcite sand. Forms a thin, even layer of great strength.
Acrylic putty is a universal mixture that is used for external and internal work. Acrylic in the mixture promotes excellent application on any surface, which as a result becomes even and smooth.
There is no need to prepare the working mixture, since it is sold ready-made and can be stored in a plastic container for a long time without retaining its properties. It has a paste-like consistency, making it easy to apply and spread over the wall. Acrylic putty has water-repellent properties and is elastic; after drying, it does not crack, does not shrink, and perfectly levels the surface of the walls.
How to choose
The primer and putty should be taken from the same manufacturer, preferably a well-known one.
It is better to choose a paste mixture for painting; a powdery material is suitable for wallpaper.
Preference should be given to products from one manufacturer
If you need to treat a damp room, then you need to pay attention to whether there is information on the packaging about the permissibility of such use.
When choosing a building material, look at the shelf life of the finishing material and labeling. Putty produced no more than 2 months ago is considered fresh.
No. 5. Which putty should I choose?
As is clear from the existing assortment, putty is chosen depending on what material will be leveled, taking into account the characteristics of the temperature and humidity conditions in the room:
- For walls, you can choose virtually any putty . If it comes to bedrooms, living rooms, children's rooms, hallways, offices and other rooms with a normal level of humidity, then it is best to use gypsum putty. For work in the bathroom, cement or acrylic putty is suitable;
- for ceiling putty, an acrylic composition is usually used, which allows you to create the most even and smooth surface, but gypsum putty is also quite applicable;
- for puttying wooden surfaces it is better to choose an acrylic composition;
- for puttying drywall, acrylic composition is suitable, as well as gypsum if we are talking about dry rooms;
- for facade and other exterior work ;
- for painting It’s better to take gypsum or polymer putty - they create an even, beautiful layer. You can also use cheaper cement wallpaper for wallpaper.
Working with acrylic putty
Working with acrylic putty is not difficult, it is important to study the instructions and follow all instructions. Let's consider the sequence of work.
Surface preparation
Before you begin to putty the surface, you need to remove the old coating from the walls. If there was wallpaper on the wall, then they are removed in 2 ways:
| 1.Dry. It consists of removing wallpaper without using water. Use a spatula to pry up the loose piece of wallpaper and rip it off the wall. | |
| 2. Wet. If it was not possible to remove the wallpaper using a dry method, then moisten it with warm water. After they are saturated with moisture and the glue swells, they are removed from the walls with a spatula. |
You need to start cleaning the walls using the dry method. If it doesn’t help, then move on to the wet method.
Paint is removed using 3 methods:
| 1.Thermal. To clean the old coating, use a hair dryer and a spatula. Use a hairdryer to warm up the painted surface. The swollen paint is removed with a spatula. | |
| 2. Chemical. Spray a special remover over the surface and wait 2 hours until it dissolves the paint. | |
| 3. Mechanical. This method is more complex and time-consuming. To remove paint, use an ax to make notches. A hammer drill or drill is also used to remove paint from the wall. |
These methods are effective to varying degrees. Some of them are more labor-intensive and require greater labor effort, while others require more time to remove paint from the wall. The choice of method depends on your desire and the availability of certain tools.
The old plaster layer is removed with a spatula. If the layer is weak and voids have formed inside, then the plaster falls in pieces. If the plaster is strong and difficult to remove, then the wall is pre-moistened with water.
To remove plaster, the wall surface is moistened with water.
In addition to a spatula, a grinder, a chisel and a hammer are used to remove the plaster layer.
Primer
The primer is necessary so that the surfaces on which it is applied will easily adhere to it. The primer is poured into the bath. Joints and corners are brushed. A roller with a long handle is lowered into the bath and the primer is collected.
It is important to apply it correctly in order to completely saturate the walls. Liquid should be released at the front of the roller.
To avoid drips, excess solution is removed by rolling a roller along the ribbed surface of the bath. If streaks do form, they are smeared with a slightly damp roller.
A roller dipped in primer is rolled out over the tray so that the excess liquid drains back
It is better to use a fluffy roller because it picks up more mixture and does not create bubbles.
Roll out the solution on the wall. The first layer dries for 3-4 hours. After it has completely dried, apply a second one. After drying, 2 layers seal the cracks. Serpyanka mesh and putty are placed on the seams. Sand the dried seams with sandpaper and prime.
Puttying the surface
When applying a layer of putty, use 2 spatulas: large and small.
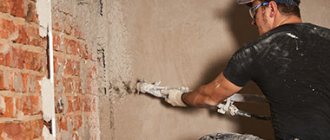
Using a small spatula, the mixture is taken from the container and placed on a wide tool. With its help, apply starting putty from the corner of the wall and stretch it over the surface. Movements must be confident. The spatula is pressed tightly against the wall at the same angle. If sagging appears as a result of applying the mixture, then do not be upset. They will be removed during the sanding process.
When puttingtying walls, the spatula should be held at a right angle
The first layer of starting putty is applied at 6 mm. If the base is covered with cracks, then a special reinforced mesh is applied to it. They putty the wall in strips with an overlap of 7-8 mm. After the first layer has dried, the surface of the walls is cleaned (polished). The starting putty is applied in 3 layers. When applying subsequent ones, you should change the direction of each.
The finishing putty has a very thin layer, so the spatula is held almost perpendicular to the wall. After drying, sand it with sandpaper with 150 abrasive.
After treating the walls with finishing putty, the surface is sanded with sandpaper.
Surface cleaning
After the putty has dried, cleaning is done, i.e., sanding the surface of the walls or ceiling. Sand it by hand or with sanding machines.
For processing, you can use a sanding block, an abrasive mesh or sandpaper.
Sanding starts from the top corner:
| 1. Sand small areas of 1 m with spiral movements, pressing lightly on the wall. | |
| 2. To make flaws visible, place a lamp on the wall. With good lighting, any defects can be eliminated. | |
| 3. After sanding, check the surface by touch to see how smooth it is. | |
| 4. The rule is to identify irregularities in the form of gaps between it and the wall, which should be removed. |
After work, remove dust with a vacuum cleaner or a wet cloth.
An exception
In some cases, the curvature of the walls is so great that more than 5 cm of mortar must be applied. For every additional 2 cm of layer, a reinforcing mesh must be used. Plaster is not the most expensive building material, but you need a lot of it, so in some cases it is better to abandon the use of mixtures in favor of plasterboard boards. In addition, such materials are quite heavy, so before starting work you need to make sure that the wall being treated is reliable.
Both for painting and for wallpaper, the wall needs to be puttied . The only difference is the degree of smoothness of the finishing layer. Since wallpaper can hide small unevenness, maximum leveling is required for a plasterboard wall or ceiling before painting.
To putty, you need to stock up on 2 spatulas - a small one up to 10 cm for applying the mixture and a working one from 30 cm. Using an overlay spatula on a large one, apply the putty along the working blade. The spatula is pressed tightly against the wall at an acute angle and passed along the wall, puttingty on the surface. Next, holding the spatula perpendicular to the surface, remove the residue. We repeat the procedure in the adjacent area.
Movements should be made perpendicular, or in a diagonal direction. The transitions between strokes must be smoothed out immediately, before the mixture begins to harden. The surface can also be leveled using a rule. Using a spatula, the material is applied to a large area and leveled using the rule. At the moment, the main thing is to bring out the plane .
After the starting layer has dried, the surface is primed. The next layer is applied perpendicular to the previous one . We dry, prime, putty with finishing putty, eliminating irregular burrs and minor irregularities. Dry and treat the surface with a fine mesh grater. This is a finishing putty for walls to be painted.
Tips and tricks
Experts advise thoroughly mixing the finished mixture before puttying so that some components that weigh more do not settle to the bottom.
Other tips:
- If the composition is brought in from the street, then before using it it must stand for 2-3 hours in the room.
- The application layer should be no more than 3 mm. The thinner the layer, the neater the surface looks. Cracks are sealed with 5 mm putty.
- It is better to carry out external work in cloudy weather at a comfortable temperature.
- The solution is stirred in parts because it dries quickly.
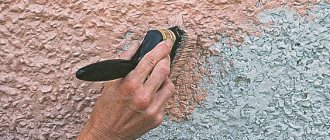
- After removing the old finishing layer, the surface is leveled, the cracks are sealed and putty is applied in an even thin layer. If it is necessary to apply a pattern to the putty, then it is done immediately after applying the layer so that it does not lose its elastic properties.
- If the mixture thickens in the heat, then it is diluted with water. Water in the solution should be no more than 5%.
- The primer and putty must be of the same brand. The remaining putty is stored in a hermetically sealed container to extend shelf life.
When working in hot weather, the surface of the walls must be moistened. It is prohibited to use heat guns and other heating devices to speed up the drying of putty walls.
In hot weather, the wall surface is moistened with water
Purpose
To level the walls, a thickness of no more than 5 cm is sufficient.
Applying putty to concrete walls and ceilings eliminates differences of up to 1.5 cm. Specially prepared mixtures can be used to fill voids and small cracks, but there are also putty compositions, the use of which is justified when filling seams and rustications :
- Putties of the first layer are necessary to eliminate significant defects existing on the surface. The work is carried out using sequential application of several layers of the composition. The layer thickness is no more than 5 mm, the number does not exceed three. The introduction of reinforcing additives into the composition helps prevent cracking of the mixture during the drying process.
- Finishing putty completes the creation of a smooth and durable surface. The peculiarity of such mixtures is that, when applied, filling the smallest holes and cracks between the particles of the dried leveling composition, they make the surface absolutely smooth. After sanding, you can paint it, glue wallpaper on it, or carry out any planned finishing work.
- Universal puttying compounds are distinguished, first of all, by a rather high price, but when performing work in the most critical areas, they fully justify the money spent. When working with this composition, it can be applied in a layer of 5 mm, and, if necessary, reduced to zero.
When choosing a putty to level the surface of a ceiling or walls, it is necessary to study its composition and clarify the permitted thickness of the applied layer.
After the finishing putty has dried, you can finish the walls with any chosen material.
For leveling with layer-by-layer application of the composition, putties with the finest grain (0.15 mm) are used, then a mixture with a slightly coarser grain (0.8 mm), and the last layer is putty. the grain size of which is no more than 0.1 mm.
The number of layers applied and their thickness depend on what the final coating will be. Under the tiles, it is enough to go through the walls “to tear off”, that is, apply putty so as to fill the voids and cracks.
Under the wallpaper you will need at least two layers of the composition, 5 mm each. However, when preparing for painting on the wall, the maximum layer of putty reaches 15 mm.
Review of popular manufacturers
It is best to choose putty from a well-known manufacturer. The material from a popular company is of high quality, easy to apply and lasts a long time. Let's look at which acrylic putties from which manufacturers are offered on the modern market.
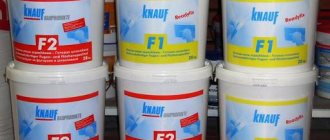
"Knauf"
The acrylic putty produced by the brand is of high quality. It is durable and comes in a wide range of colors. Suitable for all surfaces, including wood. It adheres perfectly to concrete and brick because, in addition to acrylic, it contains gypsum and mineral additives.
Acrylic putty "Knauf" has gained popularity due to its versatility and high quality
A package of 25-30 kg costs 400 rubles.
"Ceresit"
The company's products are famous for their strength, elasticity and frost resistance. The fine-grained structure helps to bring surfaces with large differences to an ideal appearance. The putties contain gypsum, which helps the material dry quickly and prevents cracking.
Ceresit putty is durable and elastic
Price 800 rubles per package of 25 kg.
"Prospectors"
The Russian company produces putties using German technology.
The putty has astringent properties and high adhesion to surfaces. Easily covers large uneven areas. Not afraid of low temperatures. Shelf life is about 12 years. Once opened, it can be stored in packaging for up to 2 years.
Acrylic putty “Starateli” is a high-quality mixture that allows finishing on any surfaces
The cost of a 20 kg package is 250 rubles.
"Bolars"
A Russian manufacturer produces acrylic starting putties. They have increased strength, frost resistance, and moisture resistance. They do not absorb moisture, so they are actively used not only in dry, but also in wet rooms. Construction mixtures withstand the negative effects of the environment: precipitation, low temperatures. The putty is easy to apply due to its plasticity and high adhesion to surfaces.
Acrylic putty "Bolars" is intended for facade and interior decoration of rooms with normal and high humidity
25 kg of mixture costs 330 rubles.
SCANMIX TT
Putty is used to level facades. Its component is cement, so it easily lays on concrete. The material is moisture resistant and is used to seal large cracks and level surfaces with significant differences in height. Cement is a natural substance, so the putty is environmentally friendly and safe for human health.
SCANMIX TT putty is an acrylic putty designed for facade work.
The cost of acrylic putties for exterior work is 470 rubles per 25 kg.
"Vetonit"
The putties of this manufacturer are of high quality, are not afraid of frost and moisture, are easy to apply, strong and durable. Capable of repairing significant chips and leveling any surface. The material is economical. They can be used to treat large areas of external walls.
Vetonit putty is made from environmentally friendly raw materials, therefore it does not emit toxic substances
The cost of 25 kg packaging varies from 500 to 600 rubles.
"Glims"
The acrylic material of this manufacturer stands out among other building materials due to its wide temperature range from -50 to +70 degrees. It is characterized by high wear resistance. Used for treating walls made of concrete and brick. When applying the mixture, the leveling layer lays down easily. No stuck solution will accumulate on the spatula. Glims putties are characterized not only by good adhesion, but also by high vapor permeability. The solution can be applied not only in a thin layer of 1-3 mm, but also in a thicker layer - up to 20 mm.
Glims putty is used for interior work in rooms with moderate humidity
The cost of packaging, depending on weight, is 360-650 rubles.
"Volma"
Acrylic mixture "Volma" is distinguished by its composition. It includes gypsum-containing fillers and cement. It is used for leveling concrete, plastered facades. High adhesion and elasticity allow you to perfectly level the surface. The putty layer has high thermal insulation properties. They keep the house warm.
Acrylic mixture "Volma" has a high degree of adhesion to most materials
The price of a 25 kg package is 380 rubles.
In order for the cladding to serve for many years and delight you with its appearance, it is important to properly prepare the surface of the walls and ceiling. The best product for exterior work and interior decoration is acrylic putty. It has a number of characteristics that distinguish it from other building mixtures.
Application technology
There are several rules for working with putty that must be followed:
- Before starting work, it is necessary to check the room temperature. It must be within the acceptable range specified in the manufacturer's specifications.
- During finishing work, the perimeter must be de-energized.
- Before applying the solution to the wall, you need to make sure that it has the correct consistency. It should not drain from the spatula blade or fall off a vertical surface. A solution that is too thick must be diluted with water.
- During operation, the composition must be kept in a closed container to prevent it from premature hardening.
- To smooth out unevenness, you need to let the putty harden a little, but not dry completely. After adjustment, the wall is carefully washed away with a primer.
Basic putty is applied only to prepared walls.
Surface preparation
You cannot putty on an unprepared wall. Surface preparation occurs in several stages:
- cleaning the wall from dust, dirt and weakly fixed fragments of plaster;
- expansion of cracks and cracks to a size of 2-3 mm. For the procedure, you can use a construction knife or spatula;
- grinding the surface using abrasive materials. If you need to putty a smooth glossy wall, you need to pre-treat it with sandpaper to give the surface a rough finish;
- removal of accumulated dust. You can use a vacuum cleaner or a damp sponge;
- surface primer. Although cement basecoats do not require this, it is recommended to prime the walls before applying putty in any case. This reduces material consumption and improves adhesion.
After the walls are prepared, you can mix the mortar.
Preparation of the solution
Basic putties based on gypsum and cement are sold in dry form. To prepare a ready-to-use solution, the powder must be diluted with water. The average ratio of water to mixture is 1/4, but it is better to check the proportions recommended by the manufacturers.
To achieve the correct consistency of the solution, first pour the required amount of water into the container and only then add the dry composition and mix everything with a construction mixer.
Attention!!! After the mass reaches homogeneity, it is recommended to let it sit for a while so that the water saturates all the components, and then mix again.
Applying putty
To work with basic putty, you need 3 spatulas with different blade sizes. A narrow spatula with a width of 3 to 5 cm is used when sealing cracks. The medium one (with a 10 cm spatula) is used to distribute the solution over a wide working surface (size from 30 to 60 cm).
First, seal the cracks. The putty is distributed perpendicular to the direction of the crack under slight pressure so that the mass fills all the voids. Then the remaining putty is smoothed with a spatula along the direction of the crack. After all defects have been eliminated, you can begin finishing the main plane.
The solution is scooped out of the container with a medium spatula and evenly distributed over a wide one. Then the composition is applied to the walls with sweeping but smooth movements. A thin layer will be obtained if the working blade of the spatula is located at an acute angle to the surface.
For final leveling of the coating, you may need a rule (a long strip that allows you to cover a larger area than a spatula).
After treating the entire area, the composition is allowed to dry and then you can begin finishing.
Technology of working with putty
In any work you must follow certain rules. This is when the quality of work and long service life of the surface are ensured. Starter putty is no exception to the general rules.
Before puttying you must:
- Clean the surface from dust and dirt. Plaster that does not adhere well, is swollen or crumbling should be removed to the base of the wall. To carry out these preparatory work, you will need a steel spatula and other tools: a metal brush, a hammer, a grinder, etc.
- Before applying the material to the plastered wall, you need to remove dust with a vacuum cleaner or damp sponge.
- If there are greasy and oil stains, you should use solvents: acetone, gasoline, etc.
- Primer follows - an operation that cannot be ignored in order to avoid subsequent shedding or peeling of the applied putty. The primer is applied in several layers depending on the porosity of the surface. It is not at all necessary to wait for each layer to dry completely, but the last layer must be dried strictly according to the technology - this is indicated on the packaging. Deep penetration soil should be used.
It is important to note that the primer must be compatible with the putty in composition. The finished putty should be thoroughly mixed before use. If it was stored for a long time, its components separated. Mix using a mixer.
Gypsum and cement mixtures are sold in dry form. Water must be added to such materials in strictly defined proportions indicated on the packaging. To do this, first water is poured into the container in the required quantities, and only then the mixture is poured in with continuous stirring. The finished solution is kept for up to 15 minutes and mixed again.
Tips for applying the material
As already mentioned , to increase adhesion (adhesion of the mixture to the surface being repaired), the walls must first be primed with a deep penetration primer so that the thick layer of coating does not peel off (swell) over time. Proper preparation of the walls guarantees a successful renovation.
- You should scoop up the solution with a spatula in large quantities and apply it to the surface with broad strokes, energetic, confident movements.
- The spatula should be pressed tightly against the wall, maintaining the same angle of contact.
- If there are sagging, they are smoothed out with a clean spatula or removed altogether.
- If the unevenness is significant, then you need to let the preliminary layer harden a little.
- The walls are sanded only when the mortar has completely hardened.
When the walls in a room are not very smooth, as is often the case, this can be quite easily eliminated with starting putty if you have certain skills in working with the material. All defects can be corrected. To make large planes (walls, ceilings) perfectly flat, you need to use a special tool - a rule.
Only after you have finished working with the putty, sanded the wall and achieved a smooth surface, can you begin to cover it with the finishing material.
