Installing beacons for plastering walls seems to beginners to be perhaps the most difficult and incomprehensible task. And, although displaying beacons is a responsible task, however, it is not too difficult to master and do it yourself. A beginner needs to understand the intricacies of marking and creating an auxiliary plane, after which the rest of the work will no longer be so mysterious.
How to place beacons under plaster
A beginner, when starting to level walls, has little idea how to install the beacons, at what step to place them, or how to attach the guide profiles to the wall surface. The placement of beacons under plaster must be taken seriously, since only correctly aligned guides will allow achieving the required evenness of the walls. An incorrectly installed beacon (crooked or insufficiently fixed) becomes the cause of defects.
Let's talk about which beacon pitch to choose. The distance between the planks should be chosen based on the length of the rule with which you will level the plaster mixture. It is better for beginners to use a short tool (up to 1.5 m). This rule is simpler and easier to manage.
Since the rule is supported and moved along the beacons during alignment, the maximum pitch of the guides is set less than the length of the rule bar by 20 cm (up to 1.3 m). The minimum step can be any, most often it is 0.8 m. The distance of the outer guides from the internal corners is 10-30 cm. When installing beacons, they retreat from door or window openings by 0.1-0.15 m.
The main stages of placing beacons for wall alignment:
- mark the surface of the structure to be leveled;
- set guidelines for the outer beacons;
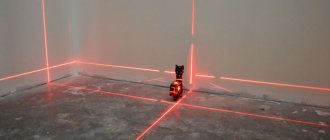
- at a short distance from the surface to be leveled, using levels, a plumb line or a laser level, create an auxiliary strictly vertical plane using laces (threads, rays of light);
- take measurements of the deviations of the wall surface from the auxiliary plane, find the “zero point” - the place where the surface protrudes most;
- the auxiliary plane is corrected, taking its elevation above the zero point by the thickness h of the plaster layer;
- install alternately two extreme beacon profiles according to the position of the adjusted auxiliary plane;
- install intermediate profiles, checking their position along the outer guides;
- prime the mortar part of the beacons (laps or mortar paths).
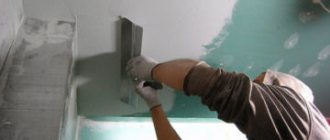
Fastening beacons
Aligning the walls with beacons requires their correct installation; the final result will depend on this. Therefore, compliance with all stages and extreme composure will be required to avoid rework.
Fixing a metal profile-rail
Such strips can be installed in two ways, which are selected based on the specific situation.
Using dowels
Performed according to the following scheme:
- Marking is being done. The lines are drawn strictly vertically in increments of 80 to 100 cm. It must be taken into account that the first part will be located at a distance of 20 cm from the wall. To achieve the required evenness, a plumb line is used.
- Holes are drilled exactly along the lines. They are placed in increments of 30 centimeters. The minimum depth should be 8 millimeters.
- The dowels are driven in. If they are not there, then you can use a proven method - chopiki.
- A self-tapping screw is screwed into the dowel, having previously placed a “eared” fixing the slats on it.
- First, two profiles located at the edges of the wall are attached and aligned. A cord is stretched between them, along which the remaining elements are placed.
This option allows you to cladding walls along beacons with your own hands by adjusting the thickness of the plaster layer.
VIDEO: a quick way to install beacons
Application of gypsum mixture
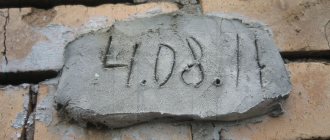
How to set beacons using a solution? To do this, you will need a mixture of gypsum, cement and sand, metal slats, a level and a long, even lath. Installation technology: marking is carried out, as in the previous version, the required amount of solution is mixed, the mixture is applied pointwise along the entire length of the line and beacons are immediately installed. Each exhibited element is checked for level. Final fixation is achieved by laying another layer of mortar.
The process seems simple, but requires some experience.
Installation of beacons made of cement and plaster
This process will require more time. Fixation occurs according to the following algorithm:
- 30 cm are retreated from the ceiling, the same distance is measured from the wall. A nail is driven into the resulting point or a self-tapping screw is screwed in.
- A plumb line is lowered to the floor. Another screw is screwed in at a height of 20 cm from the floor.
- The procedure is repeated on the other side.
- A cord is pulled between the screws so that it does not come into contact with the surface. Several more screws are installed along the rope line.
- A solution is applied to each screw, a rule is placed between the top and bottom, and the space under it is filled with the mixture. This is done with all elements.
That is, you get even tubercles of plaster that will play the role of beacons.
How to place beacons under plaster walls without a laser level
The main thing here is to correctly align the beacon profiles under the plaster.
Like any installation technology, the installation of beacons for plastering walls includes marking the area with the subsequent alignment and fastening of profiles to the surface.
Before the advent of laser levels, plasterers used a plumb line and a ruler to mark, driving nails into the wall, the heads of which, aligned in the same vertical plane, served as a guide. In addition to the plumb line, a building level is used to check verticality.
To install beacons for plastering walls, two main marking methods are often used:
- regular markings;
- spider method.
Methods for marking beacons
Regular markup
Let's look at how to set beacons in the usual way. You will need a level and a nylon thread. Our task is to create a strictly vertical auxiliary plane, spaced from the “zero” point (see gallery below) at a minimum distance (h) - the thickness of the solution. For different plaster mortars, h is different (usually indicated on the packaging of the dry mixture as the minimum thickness).
Taking into account the fact that the beacon profiles already have their own height b (mm), formed by the heads of the screws, the auxiliary plane should rise above the zero point by (h – b) mm.
- We retreat from the corner of the room 10 cm, from the ceiling 15-20 cm (point A). Similarly, on the other side of the wall we mark point (B). At both points we install a self-tapping screw protruding 3-5 cm above the wall.
- We attach a plumb line to the first screw, and under the thread we mark two new points (A1 and A2): the first at a distance of 0.15-0.2 m from the floor, the second in the middle between A and A1. We screw in the screws. Similarly, mark points B1 and B2 and install two more screws.
- At this stage, you need to align all the caps in the same plane. To do this, we pass the cord of the plumb line tied to the upper screw over the head, and screw in or unscrew the underlying screws so that their heads touch the cord passing above them. We do the same with the screws on the other side.
- We stretch a horizontal line (lace) between the opposing screws, passing it over the caps. We connect the fishing line and the diagonals (A-B1 and A1-B). If the hardware is installed correctly, the diagonal lines will touch in the middle.
- We mark points C and D (10 cm to the center from A and B under the horizontal line). We also install on self-tapping screws with caps adjacent to the fishing line (for convenience, we draw lines between the screws with a marker). Having measured the distance CD, we divide it into segments of length from 100 to 150 cm (the distance between the beacons). We install the hardware, focusing on the fishing line.
- For all new screws, repeating the operations described above, we install a pair of lower beacons on the lines.
- The resulting vertical plane makes it possible to identify the most protruding point of the wall (zero), which is determined by measuring the distances from the wall to the plane formed by the fishing lines.
- If the distance between the zero point and the vertical plane is greater than h or hb, we adjust the position of the plane by screwing or unscrewing the hardware to the same distance.
Marking points A1 and A2
Installation of self-tapping screw
Pulling the lace
Marking points C and D
Determining the zero point
If clips are used to attach beacons, then the thickness of the clip plate is also taken into account.
Screwing and unscrewing screws simultaneously is not difficult. It is enough to tighten or unscrew them by the same number of turns, because the thread pitch of the self-tapping screws is the same.
Spider markup
Installation of beacon strips for plastering walls is carried out in another way - the “spider” method. The name arose due to the use of four (two horizontal, two vertical) stretched threads. However, if everything is done carefully, high accuracy is achieved. The method will help to determine the optimal thickness of the coating for leveling, which means that the consumption of plaster on the beacons will be minimal.
- Having retreated from the corners of the wall (and from the ceiling) 15 and (5) cm, mark points, drill a hole in them, then, inserting a dowel, screw in 2 self-tapping screws with a screwdriver so that the caps rise above the wall by 5 cm.
- Now you need to use a plumb line to mark a place above the wall, 5 cm from the floor, for installing two more screws (strictly vertically, under the top ones). Holes are drilled into which self-tapping screws are installed, protruding from the wall also by 5 cm.
- At a distance of 2 cm from the wall surface, a nylon thread is tied to the upper screws. Using a plumb line, notice on the lower screws the places where you need to tie the nylon thread coming from above, so that it is strictly vertical. In these places the ends of the threads are tied with tension.
- A pair of horizontal threads is tied to two threads stretched vertically so that they can be moved. By moving horizontal threads along the wall, they reveal the curvature of the surface, the maximum protrusion (zero point), as well as whether the wall is collapsing and in which direction.
- If the distance from the zero point to the horizontal thread is greater than the minimum possible layer thickness for the selected plaster (h for beacons made of mortar, or hb - in the case of using standard profiles, where b is the height of the flange of the beacon profile), screws are screwed deeper into the wall at the same distance, ensuring that the horizontal thread is positioned above the zero point by the amount h (or hb). If the zero point protrudes beyond the vertical plane formed by the threads, the protruding section is cut off, or all screws are unscrewed to the same distance.
- Along the created vertical zero plane, 3-5 self-tapping screws are placed under each thread, the heads of which touch the threads.
Installation of 2 screws
Marking the space for screws using a plumb line
Attaching a horizontal thread
Installing screws under the thread
Setting up intermediate beacon profiles along two precisely oriented lines is no longer difficult. You can place beacons in the gap under horizontally stretched threads. Any beginner can handle this.
Option 2: installing beacons using self-tapping screws
The advantages of this method are the speed of installation and the ease of setting the level of the future plaster surface. It is especially good for beginners, as it allows you not to worry about the time it takes for the putty to set and the violation of the verticality of an already installed beacon as a result of accidental contact with a hand or tool.
Materials and tools
For this installation method you need:
- lighthouses;
- screws;
- dowels;
- mounts for beacons;
- impact drill or hammer drill;
- screwdriver or screwdriver;
- level;
- plumb line
Beacons for leveling walls
The working process
On each marking line, six holes are drilled with equal spacing, 8 mm in diameter and 50 mm in depth. Then dowels are hammered into them and screws with a length of 50 to 80 mm are tightened, depending on the calculated maximum thickness of the plaster layer.
Attention! The depth of screwing is determined by the level and plumb line so that their heads are in the same plane with the marking cords.
Then a special mount for the beacon is mounted on the screw. Fastenings come in plastic and metal of various designs. After these elements are secured to all the screws, the beacon is installed in their sockets. All beacons are mounted in this way, with constant control of the verticality of their installation.
Completion
Plastering can begin immediately after the installation of the beacons is completed. This is the most important advantage of the method using self-tapping screws.
How to place beacons under plaster walls using a laser level
One of the modern marking tools used is a laser level. Using it, placing beacons under plaster walls is much faster and easier. You can also use a laser level to set a right angle between adjacent walls. You will need a rule 5-10 cm long less than the height of the wall. The device is placed perpendicular to the wall near the corner (if the wall is short) or in the middle (if the surface to be plastered is long).
We install the laser level as close to the wall as possible (3-4 cm) so that the plane created by its beam is parallel to the one being processed and perpendicular to the adjacent, already plastered wall. We mark with a pencil the places where the lines of light pass, so that when knocking down we can place the device in the same place. Using a metal square, we measure the deviation of the wall surface from the plane formed by the beam, recording the results on the surface or in a notebook.
- Having identified the zero point, we mark it with a cross, measure or calculate the distance from the light plane to the future surface. Let’s say that from the zero point to the beam is 25 mm, the plaster layer is 10 mm, the height of the beacon profile is 6 mm. We calculate the minimum distance between the beam plane and the top of the beacon ribs: 25 – 10 = 15 mm (see figure).
- To mark the rule in three places, glue masking tape onto its plane, onto which we apply a mark spaced 15 mm from the working edge (or draw a line directly on the rule, spaced 15 mm from the edge). The beam must pass along this mark when setting the rule on the edge of the beacon being set.
- We draw beacon installation lines on the walls. We throw along the line furthest from the level the solution. We install the profile bar by slightly pressing it into the solution.
- We set the rule with the edge on the edge of the profile and press the profile against the wall with the tool so that the laser beam coincides with the marks on the tape.
- We set aside the rule, remove excess solution, clean the top of the beacon with a spatula so that the working surface is clean and smooth.
- We install the following profiles in a similar way, sequentially approaching the level.
Zero line
Attaching grafted to the lighthouse
Combining the line on the rule and the laser beam
Removing excess solution
Installing a beacon on a solution
Marking beacons is done with a laser level several times faster than other types of marking.
How to draw a right angle between walls for subsequent installation of beacons
When plastering, it is necessary to remove right angles between all partitions. This significantly improves the appearance of the room.
Extending corners is carried out in several stages:
- First, the master determines which wall will be the base one. If there are windows, this will be the outer wall of the building. In the absence of windows, there is a wall into which the person entering rests his gaze.
- The surface is covered with plaster.
- If the other wall is blocked away from you, then use a square or ceramic tile. A rule will be needed to determine the degree of curvature. You need to set up a beacon to tighten the corner.
- If the wall is piled towards itself, the corner output is made using a vertical level. The maximum inclination is calculated, auxiliary devices are set and a right angle is displayed.
Types of plaster beacons
Beacons made of different materials are used as guides when leveling walls.
It can be:
- mortar (tracks made from mortar, the top edge of which serves as a guide);
- metal profiles (made of aluminum or galvanized steel);
- plastic profiles (disadvantage - they bend easily);
- wooden slats (rarely used, secured in place with nails);
- strings.
Types of lighthouses
All types of beacons have advantages and disadvantages. It is not recommended to leave beacons made of metal in the plaster; they are removed after the composition has set. Profiles left behind will corrode over time, causing rust spots to appear. Wooden slats can swell and warp from moisture. Plastic profiles warp too easily, making them more difficult to install and secure accurately.
In addition to T-shaped beacon profiles, L-shaped ones are produced. They are installed on plastered protruding corners. After leveling, the L-shaped profiles are left in the thickness of the finish.
Metal beacons come in lengths of 3 or 6 m. They are cut to size before installation.
The process of plastering walls.
In cases of a large layer of plaster, which reaches about 15 mm, it is necessary to divide all the work into 2 stages. First you need to apply the solution to the surface and level it so that it does not touch the beacons. The distance between them should be approximately 10 mm. After the initial layer of plaster has completely dried, you can proceed to further stages of work. It is necessary to apply the solution with a reserve, then it needs to be leveled with a rule that will come into contact with the beacon profile. The rule needs to be directed from the bottom to the very top, sometimes it needs to be swung in different directions. You cannot tear it off the surface. This can lead to an uneven surface in the future. When the main part of the mortar has dried, you can begin to level the angles between the floor and ceiling in relation to the wall. This leveling takes place using a trowel, with which you can easily work in hard-to-reach places, such as corners. Only after the entire surface of the wall has completely dried can the beacons be removed. Defects that may remain after removal need to be leveled with a small amount of solution. If you plan to lay tiles on the wall in the future, these small defects can be left, or the profile itself can remain on the surface; it will not interfere with the laying of the tiles.
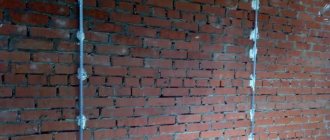
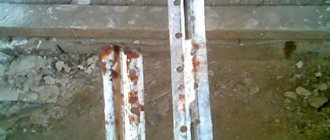
Preparing the wall surface
Before placing beacons for plaster, the surface to be leveled is prepared. Get rid of unusable old coating, stains, mold, and excess metal parts. Cracks and chips are repaired. Smooth concrete surfaces are covered with notches, and the joints in the masonry are embroidered to a depth of 10 mm.
Details about plastering walls made of different materials:
- Plastering brick walls.
- Concrete walls.
- Plasters for wood.
Remove dust from the surface, dry it, the base must be primed and, after drying, reinforced (if necessary).
Preparing the wall for plastering
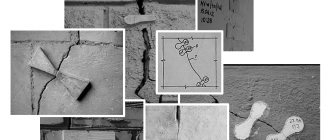
Remember that before the actual plastering process, it is necessary that the walls are smooth and free of defects. The surface must be prepared, otherwise the final finish will quickly become unusable. Cracks or stains may appear on it, which will force you to make repeated repairs or put up with very unpleasant visual characteristics of the walls.
If the wall is really old and looks deplorable, then the preparation may take longer than the plastering process itself, this is normal. You may need the help of friends, neighbors, or better yet, a professional specialist who will do it all quickly and efficiently.
The preparation stage should include a lot of steps:
- It all starts with directly cleaning the old wall. It is necessary to remove paint, wallpaper, lime, ceramic tiles or old plaster, even if it is as good as new.
- Now the surfaces of the walls are carefully inspected. You need to find the defect and fix it so as not to get into trouble in the future. Cracks, crevices, eroded parts of the walls - all this must be removed or repaired in every possible way.
- Next, you need to find and remove every bump or bead, because in the future they can interfere with the plastering process. An exception may apply to elements that are part of the concrete base.
- Sometimes the walls are affected by mold or various bacteria. You can’t just leave this area or cover it with a layer of plaster. It is necessary to carry out “treatment” using special compounds, and then treat it with a primer with an antiseptic inside.
- The surface should be smooth and clean, no dust.
- The last stage of preparatory work concerns the primer. It is carried out along the entire wall, the minimum number of layers is two, and preferably three. When selecting the composition of the primer, consider the composition of the wall itself.
Installation of beacons for plastering walls in different ways
When installing, the main thing is to securely fix the beacon profiles to the wall. To reliably, quickly and accurately install the beacon on the wall, use ready-made or home-made fasteners, for example, eared ears, clips. Often the installation of beacons for plastering walls is done using mortar.
To prevent the solution on which the profiles were installed from serving as an accelerator for the crystallization of the plaster composition applied during plastering, the flashings are coated with a primer after installing the beacons.
Installation on plaster mortar or tile adhesive
Let's look at how beacons are placed, when they are installed and fixed using a plaster mixture. If you install the profile directly on the screw caps, it may rotate during the fixation process, deviating from the correct position. Therefore, piles of plaster composition protruding above the caps are laid around the hardware with a spatula.
Round or rectangular “bedside tables” are formed from the slides; the top is cut off along an auxiliary vertical plane at the height of the caps. On such hardened bedside tables, it is much easier to place beacons under the plaster and secure them with plaster mixture or tile adhesive.
After installing the plaster beacons on the marks, fix the position of the profiles between them. Pieces of cut drywall can be useful here, from which you can make a mark of the required height by gluing the pieces with a solution or adhesive mass. If the beacon profiles are located close to the surface of the base, it is enough to place a mortar mixture under them in the right places.
Installation of beacons without mortar
Since our task is the reliable installation of beacons with protection against displacement during the plastering process, we need quick, strong fastening of the profiles to the self-tapping screws. For this purpose, several types of fasteners have been invented.
You can install beacons on hardware using:
- clips;
- creamers;
- eared;
- cleverness;
- homemade brackets made from straightened and cut beacon profiles.
The advantage of such fastening is the speed of installation, the absence of the need to wait for the plaster mixture to harden. In other words, it is enough to install the beacon profile and secure it with the fixing parts on the screws, and almost immediately after installation you can begin plastering. Beacon profiles installed on the walls will no longer move.
The disadvantage of such fastening compared to fastening to a plaster mixture is that it requires the installation of additional hardware, as well as the purchase of clamps.
Lighthouses from solution
You can make your own beacons for leveling walls using a plaster composition, for example, gypsum or cement. Such paths, made from the same plaster composition that will be used for subsequent plastering, do not need to be removed.
The easiest and fastest method is suggested by Andrey Shaiter.
To make guides from mortar, only a rule, a spatula and a trowel are used. The axes of the beacons are first marked on the wall, the zero point is found using a laser device, an auxiliary plane is set, and marks are made on the rule. Before starting work, prepare a viscous elastic solution.
Step-by-step production of a mortar beacon using the Scheiter method:
- the rule is installed on the edge (fixed in this position on the scaffolding);
- use a trowel to apply a solution to the upper edge of the rule;
- apply the correct bar with the solution to the wall, pressing until the line on the rule and the laser beam are aligned;
- using a rectangular trowel, adjust the angle of contact between the rule strip and the wall (to achieve the formation of a perpendicular);
- use a spatula to remove excess mortar from both sides of the instrument;
- using cotton threads, cut off the edge of the rule from the created mortar path, remove the rule;
- Allow the solution to dry for a day, after which they lightly pass along the top of the beacon with a block of sandpaper.
Fixation rule on scaffolding
Application of the solution
Adjusting the contact angle
Combining the line on the rule and the laser beam
Cutting off the rule from the track
This method creates mortar paths 2 cm wide. Made from gypsum, they dry out within a day and become suitable for plastering. During manufacturing, it is recommended to rest the lower end (heel) of the tool’s strip on a wooden wedge to avoid displacement of the strip when cutting with a thread.
Another method of making mortar guides and controlling their vertical level is somewhat more complicated.
- The rule bar is attached to the pre-installed screws to the wall (perpendicularly, on the edge).
- The gap between the plank and the wall is filled with mortar (without gaps).
- Use a spatula to remove excess plaster longitudinally from both sides.
- Gently tapping, shift the rule along the axis of the beacon, and then remove it from the formed path.
Option 1: installing beacons on gypsum putty
This method is most common. It is simple, quick and allows you to install the beacons yourself without any problems, as well as easily remove them after completing the plastering work.
Materials and tools
For this installation option you will need:
- lighthouses;
- gypsum putty;
- water;
- bucket;
- construction mixer or drill with an attachment for mixing mixtures;
- Master OK;
- long bubble level or rule.
The working process
Following the instructions on the package, mix the putty solution. You should not knead a large amount of the mixture at once, as it sets within about 40-60 minutes, during which time you need to use it all up. Immediately before starting work, thoroughly moisten the wall using a sprayer.
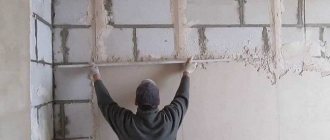
The installation of beacons begins with corner lines. Small portions of the putty mixture are applied to the marking along the entire length of the line in increments of 15 - 20 cm. The greater the deviation of the line from the vertical, the thicker the layer should be.
The beacon is placed on top of the solution strictly along the line, adjusting its position using a level. To align it in a vertical plane, press the side that needs to be brought closer to the plane of the wall, checking the level and the stretched cords. If the height of the lump of gypsum putty thrown onto the wall is not sufficient, carefully remove the beacon from the wall and add mortar.
The second corner beacon is installed in the same way. Until the mixture has set, it is possible to adjust the installation of the beacons.
After this, allow the gypsum putty to dry and check the correct installation of the beacons using a level. Then intermediate beacons are installed, the tops of the profiles of which must be in the same plane with the stretched cords.
Completion
The gypsum putty is allowed to dry thoroughly before plastering. After the wall is plastered, the beacons are carefully removed, and the grooves that form in the places where they are installed are smoothed out with a small amount of solution. It is believed that this is not necessary if the wall is plastered under tiles, but in the case of painting or wallpapering, it is recommended to remove the beacons without fail, since traces of rust may appear on the finished surface of the wall. This happens because during the plastering process the rule repeatedly passes with force along the tops of the beacons. Thus, even though the lighthouses are galvanized, after finishing plastering the room, the coating on all the upper edges of the lighthouses is torn off. This is what opens the way for corrosion.
Materials and tools
To plaster with leveling compounds and prime, use conventional plastering tools.
To install beacons you will need:
- plumb line (laser level or building level);
- nylon lace;
- a set of dowels and screws (the length of the latter depends on the thickness of the leveling layer);
- spatula and trowel;
- marker or pencil for marking;
- trapezoidal rule (10 cm shorter than the height of the leveled wall);
- solution container;
- screwdriver (for self-tapping screws);
- metal scissors (needed to cut the profile into pieces for making fasteners);
- perforator;
- chisel and pliers for removing metal guides;
- masking tape.
Installing beacons for plastering walls may require purchasing beacon profiles and a sufficient number of screws (of different lengths). In the case of making mortar paths or attaching guides to the mortar, you will need to stock up on dry plaster mixture or components for preparing the composition.
Deciding on the choice of material
We will definitely look at how to install beacons for plastering walls, but later. Now we need to understand the existing varieties of this material and the features of choice. Previously, wooden planks and all kinds of planks were used. This material was impractical because it was susceptible to time and external factors. On this basis, plastic and metal beacons began to appear. But what kind of beacons should be installed for plastering walls?
- The plastic version has flexibility, which in our case is inappropriate. It is necessary to calculate the force when working with the rule, since excessive pressure will lead to deformation of the beacon or its sagging. In general, work with plastic beacons will be slower.
- Metal beacons are not as flexible, which makes them practical. Most often the galvanized option is chosen. The metal can be of different thicknesses: 10 and 6 mm. The first option is used when there is no need to remove the beacons after applying the plaster. The six must be removed from the surface.
If choosing beacons based on material is difficult, you need to sample two types of material and try each in action. Only the right choice will allow you to correctly place the beacons under the plaster walls.
The division into types is based not only on the material. Lighthouses can be shaped like L or T. They also vary in size. For residential premises, a length of 2.7 m is usually chosen. As for the width, the most popular indicator is 3 mm. This indicator is often sufficient to level the wall. Well, don’t forget about the material consumption.
Rules for plastering lighthouses
Leveling the walls by plastering is carried out following the rules developed over centuries.
- The plaster should not be stronger than the base material. During hardening and strength gain, internal stresses arise in the composition, which can be destructive for a weak base.
- The base surface must be carefully prepared before plastering. Any negligence will lead to the appearance of cracks, peeling of the plaster layer or the appearance of stains, efflorescence and other defects in the plaster.
- Applying a primer to patches, mortar marks, and mortar paths is mandatory.
- It is better to place beacons under the plaster slowly, especially paying attention to the accuracy of the geometric constructions.
- When plastering, the solution is applied evenly, spreading without leaving gaps.
- The strip between the guides is plastered in small sections, since otherwise too much excess mortar will accumulate on the rule. This may cause the instrument to become deformed.
- It is necessary to rest the rule on the guides only with slight pressure, so as not to damage the tops of the profiles.
- After leveling the mixture from bottom to top, one leveling is performed in the opposite direction, which ensures the mixture is fixed to the wall and prevents the composition from sliding.
- The profiles are removed until the plaster gains strength.
- The resulting grooves are filled with a solution that is more viscous than when plastering.
- If plastering is done with gypsum, then the excess is either immediately thrown onto the wall where the mixture is missing, or thrown into a separate container. The gypsum composition, which has already been on the wall, can cause the freshly prepared solution to instantly set, becoming the center of crystallization.
From all of the above, it is clear that the correct installation of the outer guides becomes the basis for the correct exhibition of intermediate beacons for plastering walls with your own hands. Having successfully completed the beginning of marking work, beginners usually get a taste for it and work with great pleasure, because the result - perfectly maintained geometry - is inspiring.
How to create corners in a bathroom: all corners are 90 degrees or just two
Now that we know what threatens us, we can try to make markings at 2 angles and see what threatens us in this case. We do everything the same, only for the main, first wall we take the one opposite the opening (the wall parallel to the bathtub).
- Draw a line parallel to the first wall.
- We set the square and the rule at two corners.
- Draw lines to the wall with the opening.
Let's see what happens if we align 2 corners
This is what happened. We place the wall with the opening and the wall opposite only in the vertical and 2 corners of 90 degrees, where the bathtub is. The consumption of plaster and labor costs is less. The corners adjacent to the wall with the opening are not so scary. If there is a gap, it is small.
Deciding on the angles
Let’s decide whether we will draw right angles only where the bathtub is or in all corners. We pay attention to the other side of the wall, which is in the corridor. If the wall with the opening is blocked, then the second side of the wall will need to be plastered in the same way and brought vertically, otherwise the door will not be able to be installed smoothly.
I recommend: How to properly organize a construction site for a country house
Important point
, if you start from the wall with the bathroom, then it will no longer be possible to bring out the corners with the wall with the opening, because starting from the wall with the bathroom, all the irregularities will “crawl out” onto the wall with the opening and it may turn out that on one edge of the opening the thickness of the wall will be 10 cm, and on the other 15 cm. And how to install a door in such an opening is completely unclear...
You need to start leveling the walls from the wall with the opening, if you are leveling all the corners, and if only two corners, then the wall parallel to the bathtub should be leveled first.
Preparatory work for installing beacons
Floor screed guides should be installed on the prepared surface. The performance characteristics and service life of the screed being performed depend on the correct execution of work to prepare the room for installation of guides. The strength of the poured base and its appearance are also determined by the quality of preparation of the floor surface.
Beacons for floor screed
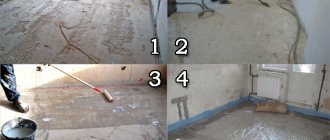
Sequencing:
- Remove skirting boards around the perimeter of the room.
- Clean the old base from the worn coating.
- Eliminate oil traces, greasy stains, and dirt on the surface.
- Clean the base with a vacuum cleaner.
- Sand protruding areas and local irregularities.
- Seal deep cracks and cavities with the repair mixture.
- Cover the surface with primer using a roller.
- Place the waterproofing material on the dry base.
The most important task is to draw the “zero” line
All subsequent work will only gain some meaning if the zero level is very accurately determined, corresponding to both the horizontal and the required thickness of the future screed.
To work, you will need a water or laser level (the second, of course, is preferable - it will greatly facilitate the process).
Water level
You can, of course, use a building level, but in this case it must be quite long (1.5 - 2 m), very precisely calibrated, and the worker himself must have an excellent eye, since an error with this method is most likely.
Building traditional level
So, on the wall of the room, in the corner, which, according to a preliminary visual estimate, is located higher than the others, a mark is placed. Its height from the floor can be arbitrary, but it is better to choose, firstly, a multiple value, and secondly, such that it is more convenient to work - for example, 1.5 m.
Punching a reference horizontal line
- With the help of the mentioned devices and tools, the level of this mark is transferred along all the walls, in order to connect the resulting marks with a solid straight line around the perimeter of the room. If everything is done correctly, then the line should close at one point, without the slightest difference in height. This reference line can be useful later not only for pouring the screed, but also for carrying out some other finishing work.
- The distance from the reference line to the floor surface is carefully measured every 0.5 m. The obtained values are recorded on paper or simply on the wall surface (if possible). Now, by simply comparing the results, the highest point of the floor along the perimeter of the room is determined - this is the place where the obtained value is the smallest.
In the example, there is a clear excess of 50 mm
- If you have already decided on the minimum thickness of the future screed, then you can proceed to beating the so-called zero level. At the highest point, mark the required height from the existing base. Let, for example, it be 30 mm - this is the minimum thickness a concrete screed should have to ensure its strength and solidity.
- Next, you can do two things. So, you can apply the method already described above and draw a zero line along the floor surface in the same way. This is not entirely convenient at such a height. Therefore, you can do it easier - measure the distance between the marked mark and the reference horizontal line. Then transfer this value strictly vertically at several points on the walls, so that the distance between the marks allows you to draw a line using an existing ruler. The resulting line, completely outlining the perimeter of the room, will be the zero level.
- It’s too early to limit ourselves to this. In construction practice, it is rare, but still there are times when the floor level in the center of the room is slightly higher than near the walls. This is easy to check - you need to stretch the cord between opposite walls along the zero mark, and check the distance between it and the floor in the center of the room. This check is done in several places. If the distance between the cord and the surface is less than the required minimum thickness of the screed, then you will have to move the zero level up slightly - to the height required to ensure the required thickness.
If everything is normal, the zero-level tapping can be considered complete.