In repairs, accuracy and quality of work are important. Great attention is always paid not only to beautiful finishes, but also to smooth floors, smooth walls and ceilings. In capital construction, walls sometimes deviate from the vertical axis; they have relief, irregularities or bends. In such cases, correction of the main walls takes place before finishing. The most convenient option is to install beacons for plastering walls using a laser level. If you properly level the main walls, there will be no major flaws left on them, and any finishing or decoration can be easily done. Although this type of repair work requires specialized tools, the process itself is quite simple and can be done without the help of professionals by studying the theoretical material.
What to do before starting work
The preparation stage plays an important role in installing beacons using a laser level, which helps to significantly reduce the time required for installing the slats. Not only the final result, but also the specifics of the work will depend on the quality of the preparatory work.
Not only the final result, but also the specifics of the work will depend on the quality of the preparatory work.
Marking walls and ceilings
Before placing beacons under the plaster using a laser level, all surfaces are marked. The first mark is placed 30 cm from the corner. How often the profiles should be positioned depends on the size of the rule; to create an even coating, its ends should extend 5-10 cm beyond the rail.
So, having marked the first line, you need to attach the tool so that its ends extend a few centimeters beyond the mark and put a new mark. When marking a wall with a window, work begins with placing slats along the edges of the window and filling the space around it. Then additional beacons are installed and the wall processing continues. If during marking the rail ends up in the door, it should be installed closer to the latter.
Before placing beacons under the plaster using a laser level, all surfaces are marked.
Types of lighthouses
Beacons for plaster come in different configurations and from different materials. Let's take a closer look at them.
Metal
Typically these are aluminum or galvanized T-shaped profiles, which are easily deformed and sag under load. They are fixed to the wall with spot plaster under the lighthouse at a short distance from each other. The profile edge is a working surface that should look outward, and wings with perforated holes are attached to the wall.
Metal beacons are the most popular and sought-after types of profiles
Wooden
An old proven method is to install beacons from even slats, 4 cm wide. Advantages are the low cost and rigidity of the material. The profiles are fastened to the base with nails or self-tapping screws, having previously made recesses for the cap so that the protruding part does not interfere with the movement of the leveling bar, which is made from wooden boards or plywood.
To prevent the plaster mortar from laying down in a thick layer, recesses are made in the corners of the rule. They are placed on wooden profiles, and the surface is leveled with upward movements. Wood tends to swell from moisture, to avoid this, beacons and guides are impregnated with drying oil or wrapped with tape.
Wooden beacons are made from rectangular wooden slats 4 cm wide
When using a metal rule, the outer part of the slats is erased and deformed.
Plastic
This type of beacons is identical in appearance to metal beacons, but differs in properties in that the plastic is not subject to corrosion, and the profiles can not be removed, leaving them inside the plaster. It is made of polyvinyl chloride (PVC), used not only in construction, but also in other areas of production. The price of this material is low, it is light and flexible. The downside is the appearance of fragility at low temperatures and under mechanical stress.
Plastic profiles are not subject to deformation and corrosion damage
Reusable steel
This category includes three types of beacons - tubular, rectangular and square. They are durable and can be used many times not only for walls, but also for floor screeding. The disadvantage is the large thickness, deformation during extraction and high cost.
Reusable steel beacons are made of durable material so they can be reused
Homemade
To make such beacons, scraps of plasterboard or wood-containing boards are used. But more often, experienced craftsmen use the solution itself to make guides. To do this, using a level, maintaining a vertical position, screw screws and dowels into the wall. Then the rule is applied to them with the flat side, and the space between it and the wall is filled with mortar. After drying, the guide is ready for use. This type is good because there is no need to fill the recesses after removing profiles from foreign material.
Homemade lighthouses are made from scraps of drywall
Strings
Another interesting way is to install string beacons. To do this, mark a vertical line at the site of the future profile, install channels at the bottom and top, and screw screws along the mark at intervals of about a meter. A metal wire is attached to the upper and lower fastenings and tensioned. The guides are ready for use.
The strings are used repeatedly for walls of any length.
String beacons are metal strings stretched over stops.
Laser levels for beacons
In order to install any type of beacon perfectly level, use a laser level, which is fixed to the wall with vacuum suction cups or magnetic holders. Using a beam, they study the wall, that is, they find the most protruding point, and from it all calculations are made to install the beacons at the required thickness of the plaster layer.
How to place beacons using a laser level
To install beacons using a laser level, a “brick” type device with a vertical circle of 360 degrees is suitable. If you install the tool correctly, there will be a gap of about 1 cm between the laser and the plaster.
If you install the tool correctly, there will be a gap of about 1 cm between the laser and the plaster.
Installation of plaster beacons using a Bosch GLL 3-80 laser
First, significant defects must be assessed and the laser level for plastering walls must be positioned so that the laser lies parallel to the bottom edge of the wall. It uses a diagonal screw that smoothly rotates the level. Of course, when setting the level, the quality of the main wall should be noted, but, regardless of the rest of the unevenness of the entire wall, the first few rows are laid out in parallel.
Before setting beacons using a laser level, you need to make sure that the projected laser beam does not collide with any uneven walls. This is easy to notice: when encountering any minimal obstacle on the way, the beam does not travel to the end of the room. The distance between the laser and the most protruding point of the surface should not exceed 1 mm.
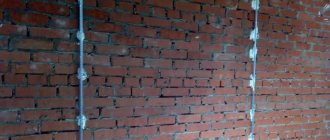
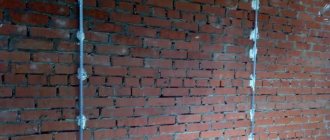
Next, holes for the dowels are drilled. The heads of the screws must be placed in one row in order to further align the beacons evenly and continue repair work. The next step is to unscrew and align the screws in one plane.
First, significant defects must be assessed and the laser level for plastering walls must be positioned so that the laser lies parallel to the bottom edge of the wall.
There are two main ways to align screws:
- Installing the device on the previously marked lines and unscrewing the screws so that the beam lies exactly on their heads;
- Install the device at a distance of 2-3 mm from the previously marked lines, unscrew the bolt to a position where there is a clearance of no more than 2-3 mm from its head to the wall.
It is more convenient to start with a screw located on the most convex part of the wall. You need to make a mark on the screwdriver at the appropriate distance (you can first stick a small piece of tape) and unscrew the remaining bolts to this mark.
These methods are suitable if the laser beam passes exactly parallel to the bottom of the wall. Otherwise, to set the beacons using a laser level, you need to unscrew the screws, adjusting the level with a thread.
First, the outer beacons are installed evenly, a lace is pulled along them and the rest are unscrewed accordingly. This option for installing beacons is performed without a laser level.
First, the outer beacons are installed evenly, a lace is pulled along them and the rest are unscrewed accordingly.
Scanning walls and setting markings without a laser level
The solution to the question of how to install beacons on a wall for plaster comes with experience. The most difficult stage is installing the markings.
Regular markup
Marking is done in 7 steps:
- It is necessary to make two holes on opposite sides.
- Self-tapping screws are screwed into the holes. Between the latter it is necessary to stretch the thread.
- A bubble level is attached to the long rule with tape.
- The rule should be placed vertically so that it touches the tensioned thread.
- The master moves along the wall and monitors the level readings.
- As soon as the rule touches the bulge, but does not touch the thread, the distance is measured and the position of the guide thread is adjusted with screws.
- Perform the following thread position check.
Spider markup
This markup consists of four stages:
- Holes are drilled near the ceiling and floor on both sides. Dowels with an indentation size of 5 cm are inserted into them at the top, and clamps for plumb lines are mounted at the bottom.
- A plumb line is attached two centimeters from the surface. As soon as it stops oscillating, its position on the clamps is noted, and a guide thread must be tied there.
- After tensioning the vertical guides, horizontal strings are attached to them, which will move.
- The spaces between the horizontal strings must be the same, and at each level the place where the beacon profile will be mounted is determined.
How to check the flatness of a surface with a laser level
When leveling walls using a laser level, it is worth noting only the installation of slats. You need to turn on the vertical plane of the device and fix it so that the projected plane runs strictly parallel to the wall. In this case, the laser does not build the leveled wall itself, but a plane parallel to it.
If the laser is interrupted and does not reach the end of the wall, then the surface is not perfectly flat. The instrument should be moved slightly and the change in the laser observed. To clarify differences on the wall, a wooden or metal meter with a millimeter scale is best suited.
To ensure that there are no moving parts on the instrument, this may cause inaccurate measurements (for this reason, it is better not to use a tape measure).
Next, you should select vertical sections at a distance of several centimeters from each other and install the measuring instruments perpendicular to the surface. It is necessary to note the measurements through which the laser will pass and repeat the procedure after 70-100 cm. Based on these data, you can approximately imagine the degree of curvature of the wall.
If the laser is interrupted and does not reach the end of the wall, then the surface is not perfectly flat.
General preparatory work
Although the method of installing beacons for plaster is different, the preparatory work is always the same. It doesn’t matter what material the walls are made of: brick, concrete, plasterboard, gas block or foam block. Before installing the profile, the surface must be treated. Preparation procedure:
| 1.Use a hard brush to remove dust and large crumbling particles. | |
| 2. Reinforced tape is applied at the corners between heterogeneous walls to prevent the formation of cracks. | |
| 3. The depressions are sealed with fiberglass and covered with plaster, having previously expanded and treated the problem area with a primer. | |
| 4. The plane is covered with deep penetration soil 2-3 times vertically and horizontally. | |
| 5. Calculate the number of lines for the profile; accordingly, there will be the same number of beacons. | |
| 6. Find the most protruding point and take this fact into account when installing the guides. | |
| 7. Vertical marks are made on the walls using a laser tool. If this is not available, then take a flat two-meter strip, to which a verified bubble level is tied. | |
| 8. If metal or plastic beacons are used, they are shortened with metal scissors; reusable profiles are cut with a saw, making them 10 cm shorter than the height of the wall. |
After completing the preparatory work, they proceed directly to installing the guides. In addition to the fact that each of the walls must be flat, the geometry of the room must also be maintained: if it is a standard rectangular room, then the angles between the walls must be 90º.
With the help of a laser level this is done easily and simply. First, choose any of the walls, along which the remaining walls, floor, and ceiling will subsequently be aligned. The laser level is installed in one of the corners of the selected object on the floor or wall; you can also use a tripod. The beam should pass through two adjacent walls relative to the selected one at a distance of 5 cm from the edges. On the main object, select the most convex point and mark it with a marker. The first lighthouse is being installed on it. Everything else is aligned with it.
A laser level will help to carry out competent calculations and accurate marking of guides
Pros and cons of using
Installing beacons with a laser level has significant advantages over other installation methods, including:
- Ease of implementation compared to installing beacons with a plumb line;
- High accuracy in measurements;
- Significant time savings (especially noticeable when performing large-scale work);
- High quality coating. Plastered walls do not contain any defects, burrs or irregularities;
- This method is especially convenient when working on large-scale walls.
Plastered walls do not contain any defects, burrs or irregularities.
However, there are also disadvantages to working with a laser level:
- To perform the work efficiently, experience and professional knowledge are required;
- Large material costs may be required.
Many developed chains of construction stores offer a large selection of tools and materials, including various levels. The quality of wall leveling largely depends on proper preparation and choice of materials.
To do the job well, experience and professional knowledge are required.
The process of installing beacons is not as complicated as it might seem at first glance. However, in order to correctly install beacons and carry out subsequent repair work, at least a little experience in the construction industry is required. You should also study some theoretical material and note important details. It is convenient to draw up an algorithm of actions and highlight points for each stage. After this, you can confidently begin the practical part.
Installation of rubbed gypsum beacons
These guides are not metal, but are made entirely of plaster. They are more difficult to install, but with practice, you can cope with this task. The main advantage of this method is the saving of plaster, time and effort. There are many ways to rub, this article describes one of them.
Rubbed gypsum beacons are installed if a minimal layer of plaster is required.
Preparation of tools and materials
To polish gypsum beacons you will need:
- gypsum putty;
- Master OK;
- narrow and wide spatulas;
- self-tapping screws with dowels;
- U-shaped metal profile to the height of the wall with perforated holes for self-tapping screws;
- rule;
- water;
- construction mixer;
- container for mixing putty;
- level.
After the tools and material are prepared, installation work begins.
Installation work
| 1. The support screws are leveled at a distance from each other less than the length of the rule, about 20 cm. It is very convenient to use a laser level, which is installed so that the laser runs parallel to the wall. The first self-tapping screw is fixed with a screwdriver, screwing it to the required depth. Mark the line of laser impact on the screwdriver barrel with a marker. All subsequent screws are screwed until the laser beam aligns with the mark on the barrel. | |
| 2. Construction stores sell special screwdrivers with multi-colored markings. In this case, simply remember the color of the line and tighten the screw until the laser matches the desired color mark. | |
| 3. The next step is to install the profile on the left side of the support screws at a distance of 2 cm from them. The wide side of the rule should pass freely between the screws and the metal template. | |
| 4. Next, they begin to apply the gypsum track. The solution is mixed to the consistency of rich sour cream and applied to the side wall of the channel from the side of the supporting screws, the head of which should be visible, or make a mark in the place where it is located. After applying the putty along the entire length of the template, take the rule and place it on the caps with the flat side. The screws should be on the sides of the rule. Excess solution is removed simultaneously from both the future lighthouse and the profile. | |
| 5. After allowing the solution to set a little, the profile is removed, having first unscrewed the screws. Do this carefully so that the putty does not stretch. To form a new beacon, the channel is cleared of putty. |
Ending the process
After the gypsum track has dried, the screws are unscrewed, the recesses remaining from them are covered, and the excess mixture is removed from the lighthouse with a spatula, then sanded. The plaster guides should ultimately have a rectangular shape.
How to install beacons for dry screed
Dry screed, which is characterized by ease and speed of installation, is becoming increasingly popular. For the most part, fine-grained expanded clay is used for dry screed, on the leveled surface of which GVL slabs are laid.
But since expanded clay is a loose mixture, it needs to be leveled. For this purpose, dry screed beacons are used.
The minimum layer should not be less than 3 cm, so a regular factory beacon will not suit us. I advise you to use a metal profile for plasterboard 60 by 27 mm.
We already know how to prepare the base and set the floor level, so we will immediately begin installing the beacons.
The profile can be laid with the flat side down and then it does not need to be removed. It will remain in the floor and will act as a lag for the gypsum fiber sheets. With this position of the profiles, expanded clay will fill the space between the walls.
Or you can lay the profile with the flat side up and after the expanded clay is leveled, remove the profile and then fill it with expanded clay.
