6389 0 0
SlavagodM October 20, 2016Specialization: master of interior and exterior finishing (plaster, putty, tiles, drywall, lining, laminate, etc.). In addition, plumbing, heating, electrical, conventional cladding and balcony extensions. That is, the renovation of an apartment or house was done on a turnkey basis with all the necessary types of work.
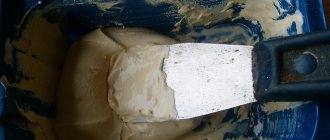
Putty with starting mixture on beacons
Starting mixtures are usually used to level walls and ceilings, but this, of course, is not the final finish. The goal in this case is to create an even base for the cladding - this can be wallpapering or puttying with a finishing mixture for painting (it can also be decorative). In addition to the video provided here, I also want to make some clarifications.
Much about starting putty or plaster
Note. I will not describe everything in detail, since a lot is shown in the video, and the article will only be a clarification and addition.
Preliminary work
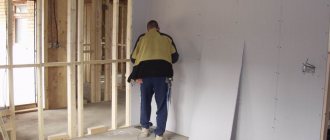
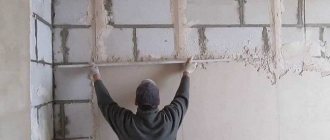
Plastering walls along beacons is carried out after preparatory procedures to obtain a high-quality design of the premises.
The following stages of preparatory work are necessary:
- inspection of wall panels;
- surface measurement by level;
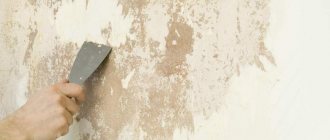
- cleaning surfaces from dust, dirt, old individual coatings;
- padding;
- fixation of reinforcing mesh.
It is necessary to inspect the wall panels for defects and protrusions. Irregularities are marked on the wall using a marker or pencil. Difficult areas will require careful leveling.
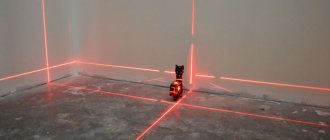
At the next stage, the walls are cleaned of old paint, plaster and other finishing materials to the base. The marked depressions are eliminated using putty, and the protrusions are leveled. Differences on the wall panel should not be more than 12 mm. The use of a laser level is recommended.
Then the level of the flat surface is changed and places for installing beacons are marked. The walls are cleaned of construction dust and can be vacuumed.
The next step is priming the base. The primer helps protect surfaces from moisture, mildew and mold. The composition is selected taking into account the surface material and the type of room (kitchen, living room). Priming increases the adhesion of the base and reduces the risk of delamination of the plaster.
When applying a dense layer of plaster mixture (more than 10 mm) and then laying tiles after drying, additional surface reinforcement will be required.
You need to select a reinforcing mesh made of glass fibers, metal or polyethylene. The mesh is fixed using a special solution or dowels.
Types of putty
When choosing a putty for painting, you need to know that it is not advisable to use a universal putty, since it contains fractions of a fairly large size, and the surface after drying will become rough, and it cannot be cleaned even with a fine-grained grater.
To obtain a smooth surface, purchase starting and finishing putties from the same manufacturer. In this case, they match each other in composition and there is no chance of exfoliation from the base.
To putty the ceiling, it is recommended to purchase starting and finishing putties from the same manufacturer.
Choose a putty taking into account where the finishing work will be done:
- in a dry room;
- in the toilet or bathroom;
- in the kitchen;
- veranda, loggia and other semi-open spaces.
The choice of finishing material also depends on how much the surface will be exposed to moisture.
When purchasing a composition, they use the services of a consultant. If the seller is inexperienced, then you can follow the tips:
- The packaging of the putty for use in a dry room is marked KR, for rooms with high humidity - LR+;
- you need the same amount of starting putty as finishing putty;
- purchase either putty marked “for any surfaces”, or special ones for concrete, drywall, and wooden surfaces;
- Ready-made mixtures are available for sale in buckets of different capacities and dry, packaged in bags of 15, 20 kg.
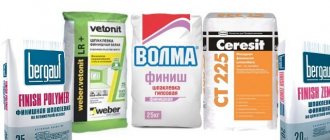
There are several types of putty for rooms with different humidity levels
It is more convenient for a novice master to use already prepared mixtures, but there is one catch - after unpacking, they are used within the period specified in the instructions.
Gypsum putty has a very short shelf life (4-6 hours). If you are not sure that the composition will disperse quickly, buy dry putty in bags and dilute as much as you see necessary.
Inexpensive mixtures are selected based on composition until the skill appears:
- with PVA glue;
- gypsum;
- adhesive and oil-adhesive.
It should be taken into account that oil-glue putty, although inexpensive, is dense in consistency and difficult to spread, gypsum putty sets quickly, and the mixture with PVA glue cannot be applied in a thick layer, as there is a possibility that it will “float”.
PVA putty
Gypsum putty
Oil-adhesive putty
After you get your hands full, they work with water-dispersion, latex and acrylic mixtures. Although they are expensive, working with them is a pleasure thanks to their characteristics:
- have excellent adhesion;
- easy to apply and spread on the surface in a thin layer;
- have a boiling white color;
- after drying, they become dense, do not scratch, and are easy to sand;
- after sanding the ceiling becomes smooth;
- treated surfaces last a long time.
Kneading is done in small portions.
You can choose either a Russian or foreign manufacturer. Each company adds additives that make their products unique.
The Russian ones that are in demand are “Prospectors”, “Osnovit Ekonsilk”, “Rusean TT”. Foreign ones are more expensive, but experienced builders prefer Sheetrock, Knauf, Ceresit, Bergauf, Weber LR+.
Putty "Volma"
Putty Prospectors
Putty Osnovit Ekonsilk
Putty Rusean TT
Sheetrock putty
Putty Knauf
Ceresit putty
Bergauf putty
Weber LR putty
Tools
Putty on beacons is made using the following tools when leveling the panels:
- beacons;
- primer mixture;
- construction mixer;
- set of spatulas;
- building level;
- drill with attachments;
- painting mesh;
- wide brush;
- plaster;
- sheets of sandpaper;
- rollers;
- rule;
- abrasive mesh;
- deep containers.
Depending on the base material and the putty application technique, beacons made of plastic, metal, string, reusable steel, etc. can be used.
Plastic beacons are lightweight, easy to fix and remove. They are not susceptible to mold or rust and can remain in the putty composition. Such products are not suitable for exterior decoration.
Galvanized ones are affordable and easy to install. The products are produced in standard sizes 6-10 mm.
String beacons are a system of self-tapping screws with wire. To install the elements, dowels and a hammer drill are used. The design is easy to use and affordable.
Frame method
Laying on a metal or wooden frame is used. It is important to remember that the wood must be dry, otherwise defects may occur. Metal is much more acceptable, it has excellent technical characteristics and is more reliable in operation. Guide and rack profiles are used.
First of all, the profile must be attached to the base of the ceiling; the point of attachment to the floor is identified using a plumb line. Rack-mount samples are inserted into the guides. The range between the posts is 0.4-0.6 m.
The sheets are fastened with self-tapping screws. For strength, rack profiles must be attached to hangers. It is important to be careful when working with fasteners to avoid damage.
For a standard sheet, about 100 pieces of self-tapping screws are required. Upon completion of this work, the planes are completely covered with putty (fastening points first).
Each owner chooses the most appropriate method of leveling the walls, based on many factors.
The right approach to work will ensure the best conditions in the room in which the renovation was carried out. Share:
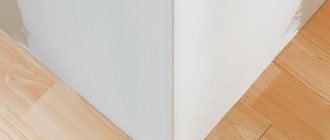
Installation of beacons
The beacons are designed to create a contour for applying the plaster mixture and subsequent leveling of the walls. The accuracy of the installation of beacons determines the parameters of a smooth surface.
At the next stage, the beacons are fixed. To install the profiles at a given level, you will need to stretch a strong thread or thin cord. Taking into account the tension level, screws are screwed into the wall, which will become the basis for the beacons. Then, using a small amount of putty, beacons are attached to the surface.
The arrangement of elements is carried out from the corner part. According to standards, the gap between the beacons should be 120-150 mm. The size of the gaps may vary depending on the method of applying the plaster, the quality of the finishing material and the dimensions of the room being decorated. On smooth walls with small uneven areas, the elements are installed only in a few places on the wall.
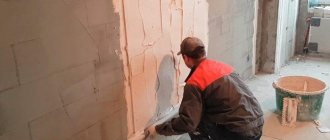
Aligning the walls in the bathroom according to beacons
Aligning the walls in the bathroom according to the beacons is a labor-intensive, but mandatory procedure. The fact is that the plaster simply will not stick to an uneven wall, so the walls need to be leveled before finishing. It costs the same as it was already described to install beacons.
But the problem is the extremely small bathroom space. That is, you will have to look for small rules, install beacons more often to be sure that the wall is level. Our construction teams take on any level of complexity. The main thing for us is high-quality repairs; the complexity of the order does not matter.
Our company is engaged in leveling walls in Sevastopol, we will always be happy to help you make high-quality repairs.
Useful information about repairs
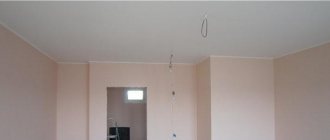
Applying putty
Puttying the walls is carried out in 2 stages. First, a rough (base) layer is applied, then the finishing coat. Step-by-step coating of the walls with the composition will provide a high-quality finish without peeling off the putty.
At the first stage, a dense layer of putty is thrown onto the surface and leveled, 4-5 mm should remain to the upper edge of the beacons. After filling the gaps between the profiles, the composition is dried. Then the surface is primed.
The next layer of putty is less dense and is applied carefully. The thickness of the putty composition should slightly exceed the height of the beacons. When leveling, the excess mass is cleared off as a rule.
After the putty coating has dried, it is necessary to apply a thin finishing layer of primer. The coating needs to be leveled. Finally, painting and wallpapering are carried out.
If you plan to lay tiles, the base must be sanded and coated with a primer mixture. When wallpapering or painting, you need to make the walls smooth by treating them with sandpaper. Then 2 layers of putty are applied step by step. It is necessary to process the internal corner areas using a square and a corner spatula.
Tips and tricks
Builders with extensive experience recommend listening to their advice:
- If painting will be done with textured or structural paint, which is dense in consistency, you should opt for a universal putty.
- You can avoid painting a putty ceiling if you use a composition with added color. In this case, the surface will not be bright, but still a pleasant shade, and the work process will be halved.
- In places of high humidity, use cement-based or polymer-based putty. It is advisable not to use gypsum boards even with a moisture-resistant coating.
- When purchasing mixtures, pay attention to the expiration date; fresh is considered to be one that was produced no later than 2 months ago.
- To cover wooden ceilings, use mixtures containing fire-fighting and antifungal additives.
- After stirring the putty, rinse the dirty whisk in clean water. If this is not done, the mixture will harden and sprinkle into the newly added solution.
- Keep spatulas clean while working; a frozen piece of putty will scratch the surface, and trapped dirt will cause streaks.
- Buy putty and primer from the same manufacturer, this will ensure better adhesion between layers and quality of finishing.
Putty with color will eliminate the need to paint the ceiling
Before starting work, tap the plastered ceiling with the handle of a trowel. A change in sound tone will indicate the presence of voids. At this point the plaster must be knocked down.
A painted ceiling is beautiful, cozy and durable. Preparing it for painting is not an easy task, but it can be done, you just need to be patient. But pride will overwhelm the one who copes with all the difficulties.
Have you puttyed the ceiling before painting? What life hacks did you use? Share your experience in the comments.
How to remove beacons after plastering: technology
Before removing beacons from plaster, it is important to determine how hard it has hardened. The easiest way to remove beacons is from an uncured plaster layer.
The guides must be removed from the plaster carefully so as not to damage the coating. If the plaster layer has not hardened completely, then cuts are made along the edges of the beacon strips with a spatula. The cuts will reduce the bond between the plaster and the metal profile.
The ends of the profile should also be freed from plaster mortar. The next day, use a screwdriver to bend the top of the lighthouse, and then use pliers to pull it out 10-15 cm at a time.
If the beacons are removed after the plaster layer has completely hardened, then you will need a regular hammer and screwdriver. First, use a magnet to find the beacons. If the location of the profiles has been marked, then it is necessary to begin the process of dismantling them. Removing the beacon strips begins from top to bottom so that pieces of plaster do not fall on the worker.
Preparing the beacon for extraction and dismantling
Using a screwdriver and a hammer, knock out the edge of the profile, and then pull it completely out of the plaster by hand. The resulting groove must be plastered carefully; after drying, it is sanded with sandpaper.
If the beacons were attached not with mortar, but with screws and dowels, then first remove the plaster layer near the fastener heads, unscrew it, and only after that remove the profiles.