Types of wood putties
Depending on the composition, the following types of putties are distinguished:
- Oil-adhesive. The basis of such compositions is oil varnish and drying oil. Adhesive elements and pigments are added to them. This composition can be made either manually or industrially. They are rightfully considered the most optimal, as they are suitable for both external and internal work.
- Adhesive. They are various adhesive-based putties. Oils are added little by little to the adhesive composition as a plasticizer. Such putties are mixed immediately before use.
- Nitro putties. They are based on quick-drying compositions of cellulose origin. Cellulose resins and ethers are dissolved in special compounds (solvents) and mixed with plasticizers. The production of nitro putty is possible only by production methods.
- Gypsum putties. Today they are used much less frequently. However, their production has a place because they have good surface adhesion, are universal in use and safe. The disadvantage of this composition is the fact that gypsum putty will have to cover the entire surface, and not just the damaged area. Otherwise, the “patch” will be noticeable.
- At home, you can prepare oil-glue and adhesive types of wood putties.
Characteristics and manufacturing process
To begin with, it must be said that today there are a lot of factory mixtures designed for these tasks. However, whether it is wood putty for the floor or for working with furniture, it is quite expensive. This is especially noticeable when it is necessary to process massive areas or structures.
High-quality factory mixtures are usually sold in small packages to prevent them from quickly hardening upon contact with air.
Properties
- First of all, a high-quality mixture should fit perfectly on the surface and have a high level of adhesion . In this case, the tightness of the connection is often checked by vibration and even minor mechanical stress.
- Also, wood putty for exterior use must have a certain resistance to moisture and the ability to withstand intense heat and cold . It is worth saying right away that for facade work, separate materials are produced, which, in addition to their additional qualities, quite often receive a certain level of toxicity due to the use of certain components. Some materials of this type are immediately made with colors to match a certain type of wood.
- The fact that the resulting substance must have a certain elasticity deserves special attention . The master should easily place it in the problem area and use a spatula to stretch the layer over the entire surface.
- After hardening, the putty usually becomes very strong and hard . However, when working with wood, it is worth making a substance that will retain its elasticity, but at the same time it can be processed with sandpaper.
Even for wood, there are a huge number of different types of putty, which have their own unique properties and features.
- If you need wood putty for doors, then you need to understand that it will constantly be affected by various factors in the form of vibration . Therefore, a material is selected that is very resistant to these forces and has very high adhesion.
- Most craftsmen choose wood as a building or finishing material because of its good appearance . That is why they try to match the putty to the color of the type of wood used, so that traces of the work are invisible.
After hardening, the composition must be sandable
- Other experts believe that this type of structural treatment is only appropriate when leveling for painting is planned . Then it should be taken into account that the composition of the putty should not react with the selected dye. Otherwise, you may get streaks on the surface or irregularities will appear again.
Advice! Almost all of these properties must be combined in one material. That is why professional craftsmen recommend using factory mixtures of popular brands if the amount of work allows such costs.
Type of varnish that can be used for making
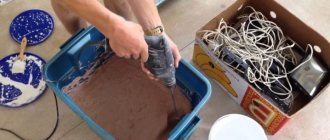
Manufacturing
- First of all, they determine for what work the material is needed. If the putty will be used indoors, then a special water-soluble varnish is used for its base. For facade work, it is best to use moisture-resistant mixtures, although their price can be several times higher.
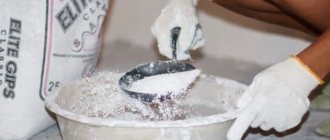
- Next, you need to take regular chalk and grind it to a powder state. Professional craftsmen recommend purchasing it already in this form, since most often its cost will be lower than that of lump or timber material.
Some craftsmen prefer to use PVA glue instead of varnish, but the putty made in this way takes a very long time to dry
- The chalk is mixed with the base until a toothpaste-like state is achieved. In this case, it is worth dividing the mixture into two parts in advance, into one of which sawdust is added. This is how putty is obtained for leveling large differences.
- In the next step, the manufacturing instructions suggest adding a small amount of pigment to give the mixture the desired color. After this, the composition is left closed for several hours so that it can infuse and all the substances react with each other.
- It should be said that some manufacturers of such materials strongly recommend priming the surface before starting puttying work. This increases the level of adhesion and reduces the absorption of wood.
Advice! Professional craftsmen recommend making homemade putty in small quantities for one day’s work. Otherwise, the substance may dry out or lose its properties.
Chalk in bags with large packaging
What should the putty be?
The quality of the final result of wood processing depends on the quality of the putty, which has a number of requirements. The putty composition should adhere well to the pre-primed wooden surface. After drying, the putty should form a solid layer that does not have cracks. The putty should under no circumstances crumble, otherwise it will be impossible to sand it. Sanding can be done either dry or wet and is a mandatory step in wood processing. It is also important that the compositions that are applied over the putty layer are distributed evenly, do not change their properties and dry within the time specified by the manufacturer. Depending on the type of putty, its application is carried out using a sprayer or using a spatula. It is also important to ensure the uniformity of the putty composition, its fine grinding and the absence of any foreign elements that contaminate the composition. Otherwise, deterioration in the quality of the coating is inevitable. So, for example, if debris gets under the blade of a spatula, it can cause scratches on the surface being treated. In addition, the presence of contaminants in the composition can complicate the work, increasing its duration. If debris gets into the spray nozzle, it makes it impossible to function, which means you will have to stop work to clean the nozzle. The minimum shrinkage coefficient of the putty composition or its complete absence will save money and work time.
Chalk-based putty recipes
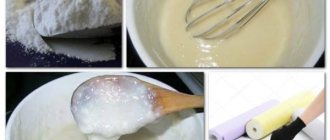
One of the most famous and well-proven wood putty recipes is the one based on ground chalk. 1. It is necessary to take equal parts of chalk and PVA glue, mixing them thoroughly. The result should be a creamy composition. If necessary, add one or another ingredient by adjusting the liquid/viscosity of the putty. You can also add finely ground wood sawdust to the composition. This will help correct significant unevenness. The “disadvantage” of putty prepared using this method is the long period of hardening, about 24 hours. This is due to the presence of PVA glue in the composition. 2. Chalk should be mixed with water-soluble acrylic varnish to the consistency of a liquid paste. Putty made according to this recipe is characterized by many advantages: elasticity, reliability and a short drying period (from 2 to 8 hours). In addition, you can give the putty a certain shade by adding pigments to the composition. These mixtures should be applied before they dry, so they should be prepared in small batches. It is also recommended to immediately remove uneven spots and drips of putty, since this will not be easy to do after it hardens. It is more convenient to apply these compounds with a rubber spatula, and carry out sanding with a grinder or a block on which sandpaper is attached.
Oil wood putty recipe
To make putty, you will need 2 types of oil: turpentine and linseed. So you should mix
- 280 g linseed oil;
- 60 grams of turpentine oil;
- 30 grams of pumice, ground to fine crumbs.
After these ingredients are thoroughly mixed, you should add: Casein and white gelatin, 20 grams of each ingredient;
- 12 grams of borax;
- 18 grams of ammonia 18%;
- 290 grams of cold water.
The composition is thoroughly mixed and then placed in a water bath. It should be heated to 90 C, stirring continuously. The putty will take the form of a paste of uniform consistency. After the mixture has cooled slightly, you can begin to putty the pre-primed wood surfaces. It is important to finish the work before the composition cools completely. Reheating it is possible, but not recommended, since the effectiveness of the putty is lost.
Other putty recipes
Wood putty can also be prepared using resin. This composition will have a waterproof effect. To prepare the mixture, melt 400 grams of ozokerite, or earthen wax, in a suitable container. Melt 200 grams of rosin in the same way, then mix the ingredients. Gradually add yellow ocher to the mixture, continuing to stir the mixture. You will need about 350-400 grams of ocher. Hot putty is applied to the wooden surface, forming an even, uniform layer. It is permissible to reheat the putty if the work is not yet completed and the composition has already hardened. Among craftsmen there is also a recipe for a universal putty, which is also suitable for treating wooden surfaces. To prepare it, you need to thoroughly mix 20 grams of castor oil and 50 grams of rosin. After this, 140 grams of benzene is added to the composition. The finished putty is mixed again. It should be borne in mind that it takes quite a long time to dry - up to 4 days. This compound is best used on small surfaces, but is also ideal for filling deep holes such as nail marks. If you are looking for a putty composition that is resistant to high temperatures, pay attention to the following recipe. So, mix the dry ingredients - magnesia oxide, 200 g and 20 g of zinc oxide. Continuing to knead the composition, add water to it. The consistency of heat-resistant homemade wood putty should be paste-like. This composition hardens for quite a long time, but is able to withstand heating of about 1000 C.
Main manufacturers
Putties on the domestic construction market can be presented by both foreign and Russian manufacturers. Of particular interest to consumers are mid-price products with high product characteristics.
We recommend: Penoplex plaster
| Putty | Type | Applied layer | Drying time | Seasonality of work |
| Dry mixture “Plitonit-KF” | Cement | 5 mm | 72 hours | At +5-30°С |
| Dry mix “Knauf Multi-Finish” | Cement | 1-5 mm | 24-72 hours | At +10-20°С |
"Ceresit CT-225" | Cement | 1-3 mm | 24 hours | At +5-30°С |
| Dry mix “Glims Finish-R” | Cement-polymer | 1-10 mm | 24 hours | At +5°C and above |
| Dry mix “Bolars Finish-Super” | Polymer | 0.2-2.0 mm | 2 hours | At +5-30°С |
| Pasta "Bolars Empire-facade" | Polymer | 1-5 mm | 24 hours | At +5-35°C |
| Pasta “Profi” | Latex | 1-5 mm | 4 hours | At +5°C and above |
| Paste “Holzer Festspachtel Elastisch” | Latex | 0.2-3.0 mm | 10 hours | At +10-30°С |
German cement-based Knauf exterior putties are characterized by high levels of frost resistance and moisture resistance, so they will be the best option for finishing the exterior walls of newly constructed buildings and restoring old façade surfaces.
Knauf putties
Finnish acrylic-based putty compositions “Vetonit” are ideal for working with any concrete or wooden bases subject to high humidity levels.
Photo of Vetonit LR putty
Domestic mixtures “Ceresit”, “Starateli” and “Bolars” are distinguished not only by their affordable price, but also by their good quality, and also allow you to obtain a durable coating.
Photo of finishing plaster Prospectors
Prices for popular types of putty
Putties
Types of putty layers
When starting work, you should decide which layer of putty needs to be applied - base or finishing. In the first case, fillers that have a medium fraction are added to the putty composition. When it comes to homemade wood putties, use ground pumice or sawdust. After drying, this layer has roughness, and its thickness can reach several centimeters. The finishing putty should be more uniform so that after drying you get a smoother surface. The finishing putty is applied in 2-4 layers.
Qualities that wood putty should have
In order to perform quality work without harming your health, the selected putty must have a number of properties, for example:
- good adhesion to the surface;
- plasticity, easy application and distribution over the surface of the processed material;
- quick drying;
- no toxic fumes;
- low cost along with decent quality;
- smooth structure;
- no shrinkage;
- amenability to grinding;
- no cracking or crumbling after drying.
We recommend: Decorative Plaster from Regular Putty. Versailles.
How to apply putty?
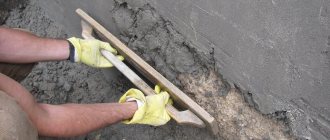
The surface on which the putty is applied must be clean and primed. A spatula or sprayer is used. Each of these tools implies a certain consistency of the composition. So, a liquid mixture is prepared for the sprayer, and a creamy or dough-like mixture for application with a spatula. If you plan to cover a large, flat area, prepare a putty with a consistency similar to sour cream. For local application, use a dough-like consistency. When applying with a spatula, you should strive to create a uniform layer. This will only be possible if the tool is clean. Upon completion of work, the spatula should be immediately rinsed under water; this will be impossible to do after the putty has hardened and the tool will have to be thrown away. Putties made at home are dry sanded using a grinding machine or a block with sandpaper attached to it. In conclusion, it should be noted that making your own wood putty and applying it to the surface is not an incomprehensible task. Using homemade putty material will help save money, while the quality of such compounds is in no way inferior to factory-made analogues. Moreover, by making putty with his own hands, the master can be confident in its quality and the absence of highly toxic and poisonous elements. It is especially convenient to use “homemade” putty when you need to treat a small area. After all, the purchased material, as a rule, remains unused and dries out, while homemade putty can be diluted in strictly required quantities. Although, when processing large wooden surfaces, such compositions turn out to be beneficial.
Why do you need homemade putty?
Putty for wooden surfaces can now be purchased at a favorable price at any building materials store. All compositions from the world's leading brands are characterized by fast drying time, excellent adhesion to wood, and ease of application. However, not every mixture has these characteristics, because some manufacturers try to save on key ingredients. Since wood tends to expand and contract under specific thermal conditions, over time a poor-quality mixture can easily crack and become unusable.
To prevent this from happening, you need to either buy expensive wood putty or make the composition yourself. Only in this case you guarantee the durability of the floor covering and the aesthetics of its appearance.
Related article: Aluminum horizontal blinds: features and care