Is it possible to paint tiles with paint?
Do you need special products to paint tiles in the kitchen or bathroom, or is regular wall paint suitable? Definitely required. This is due to 2 factors:
- the specifics of the surface (different types of ceramics);
- rather difficult conditions existing in the bathroom, kitchen - humidity, high temperature, splashes of grease.
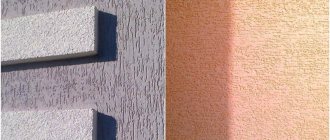
Surfaces finished with plaster or covered with ceramic tiles are different - they have different structures, they react differently to painting:
- when painting a plastered wall, the paint freely penetrates into the microscopic pores of the plaster, bonding with its base;
- Ceramic tiles are dense, compact, smooth, so paint has no chance to penetrate its structure and does not adhere well to the surface, so it is necessary to use special products.
When planning to paint tiles in the kitchen or bathroom, you need to remember certain conditions that exist in these rooms. The paint must have the following properties:
- adapted to prolonged contact with moist air, water;
- resistant to cleaning and mechanical damage;
- resistant to detergents, so you can wash walls and floors without fear of damaging the coating.
Why age brick?
Aging brick does not imply the purchase of long-used material from bygone times; such finishing is created artificially. Architects suggest painting a brick wall in such a way as to recreate the vintage effect of the entire room. Antique brick painting is used in a variety of style solutions:
- hi-tech;loft;minimalism;functionalism.
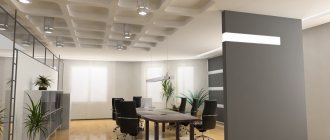
Old brick is not a relic, but an opportunity to make something beautiful out of something forgotten. Often such a decorative wall with antique brick becomes the highlight of the room and the main accent in the design.
With its help, they create the atmosphere of an ancient castle or decorate completely modern objects. A similar solution can be found in residential buildings, or cafes, restaurants, bars. Aging brickwork allows you to add a special atmosphere to the room and visually insulate it.
Artificial aging of a brick facade is rarely practiced; it is mainly an element of interior decor.
Return to contents
What paint should I paint the tiles with?
On store shelves you need to look for products intended for ceramic surfaces, that is, ceramic tiles, terracotta. How can you paint tiles? You should not use the same paints for different types of ceramics. It’s a good idea to buy different products for painting tiles on the floor and walls; these surfaces work with different intensities and are exposed to different influences.
Many paint and varnish compositions are two-component paints for ceramic tiles, mixed immediately before use. These innovative compositions for various types of surfaces are very popular.
From a paint and varnish composition for tiles, we expect strong adhesion to the substrate. You need to choose products taking into account the requirements of a given room - when painting a wall, floor in a bathroom, kitchen, you need to pay attention to resistance to:
You need to think about what type of coating will help achieve the desired effect:
- the matte finish looks elegant and perfectly reflects the subtle appearance of the three-dimensional pattern of the tiles;
- glossy - affects the optical appearance of the room, visually enlarging it.
You can use tile paint to paint the seams of the tiles; you can purchase a special product for painting the seams.
Popular paint options:
- paint V33 – for painting ceramic tiles in the bathroom and kitchen; This is a product for wet areas, resistant to water;
- Instead of V33 restoration paints, you can buy Noxan hydrographic paint - you can use it to paint the inside of the shower stall. While the V33 manufacturer does not recommend constant contact of the painted surface with water, Noxan does not have this problem.
Paint consumption (according to the manufacturer's calculations) providing coverage with one layer:
- Noxan – 5-6 m²/kg;
- V33 – 12 m²/l;
- Flüggera Flutex 10 – 8-10 m²/l.
Varieties of decorative bricks
You can make aged facing bricks yourself, or you can buy them. It comes in several types, which will be discussed below.
Clinker
This type of brick most closely resembles a regular one, and is a heat-resistant finishing material (made from clay at a temperature of +1200 degrees). Clinker bricks are ideal for imitating antiquity, but are expensive. Most often it is used for lining fireplaces or existing stoves.
Gypsum brick
The material has a high level of moisture absorption, which is why it is suitable only for interior decoration. In order to reduce the level of moisture absorption, it should be coated with varnish or paint that does not allow water to pass through. The material is very light and easy to use, and is not afraid of fire. Gypsum brick can be made even at home.
Flexible brick
This is a special decorative type tile that is used for cladding facades and decorating interior walls. It makes it possible to achieve the effect of beautiful and neat brickwork. The material is used not only for a flat surface, but also on corner elements, as well as rounded structures, if these are non-standard design solutions. Also, flexible brick has a pronounced texture, is stylized like natural brick and is available in many shades. The basis of raw materials are polymer and mineral components.
Reviews about paints
According to reviews, the compositions have the following properties:
- Flügger Flutex 10 is a thick matte paint. It has a noticeable smell, not particularly strong. It's easy to apply, doesn't drip, and doesn't require much leveling. The Flutex coating is not bad - applied with a brush. Full coverage can be achieved in just 2-3 coats. Nothing special? The old bathroom disappeared under 5-6 coats of V33 roller painted. Not a bad result.
Photo of a painted wall – matte white
V33 for tiles is a two-component product - the contents must be poured into a container, then mixed thoroughly. The additional component that guarantees the properties of the product turned out to be problematic, so it is necessary - its smell is unpleasant, spicy. V33 is more liquid, it seems that it “flows” along the wall. After applying two coats, the walls looked much better, although they still needed bleaching. Experience, the right tools, and work technique will be decisive!
Photo of a painted wall – satin white with shine
Photo. 3 coats of V33 applied
Photo. V33 Layer Count Comparison
How to paint brickwork: 9 important points
Bright or whitewashed brick walls are a popular interior decoration. How to prepare the surface yourself and paint the masonry, what shades and effects are in fashion - we found answers to all questions
Fireplace portals, kitchen aprons, fragments of old walls and new decorative masonry - brick is constantly found in the interior, it is not going out of fashion and is increasingly becoming an object for design experiments. The easiest way to update a brick wall yourself is with paint - however, when painting you need to take into account several important details.
There is no way back
If you are determined to repaint a brick wall, you should know that it is almost impossible to remove paint from it. The original terracotta cannot be returned; the color can only be changed by repainting. And repainting will definitely be required: in five years the paint will most likely fade and even crumble.
Natural means capricious
Brick is a porous, breathable material. Building codes and regulations require long periods of weathering and drying. If you decide to paint a new wall that has stood in its original form for less than a year, be prepared for surprises: efflorescence and moisture stains can ruin the texture of the painted wall.
Thorough preparation is the key to success
The surface must be clean before painting. All salt stains must be removed with a wire brush (never use acid!). Wash the wall with soapy water and leave to dry: the brickwork needs about a week for all the excess moisture to come out of the pores.
Focus on results
The whole personality of a brick is in its rough texture, this is true, but large flaws are still better to be plastered or puttied. The romantic charm of antiquity will not go away, but painting over masonry without chips and cracks is much more convenient. And the finished surface looks neater.
5. Choice of paint – safety and visual effect
The main thing is not to choose façade paint by mistake. Of course, such materials are better suited for painting porous surfaces, but they contain many volatile substances that are hazardous to health. You will need interior paints - you can choose acrylic or alkyd for a matte or semi-gloss effect. Or use oil paint - it will give the brickwork a soft shine.
Primer - the main thing behind the scenes
The primer should be selected taking into account the choice of paint, but in any case it should penetrate deeply into the base and create a durable water-repellent film. Apply a thick layer of primer - and be sure to let it dry completely.
Smooth color or special effects
It is better to paint a brick wall with a brush - it is easier to feel contact with the surface and apply even strokes. The direction of painting is horizontal, according to the masonry pattern. For acrylic paint, brushes made of polyester fiber are recommended (but high quality!), alkyd and oil paints require brushes made of natural hair. The universal size and shape of a tool for painting walls is a flat brush with a width of 75 to 100 millimeters. To work out the corners, brushes that are twice as narrow, with an obliquely cut edge, will be useful.
It is better to use a roller if you want to achieve the effect of a primer layer: brick absorbs a lot of paint at once, so it will take a long time to work with a roller on a smooth coating. But a carelessly rolled layer will turn out quickly and easily!
If you apply paint with a sponge, you will get the effect of old faded masonry. In this way, you can whiten the wall and make the paint layer translucent (as in the case of working with a roller). You can use a sponge to apply bronze or silver highlights, add spots of contrasting color to the wall, or paint over images using stencils.
Another common (but more labor-intensive) painting method is to paint each brick with a paint of the same tone using a brush and use a contrasting color compound for the joints.
Stylistic guidelines
There are no special barriers to using painted brickwork in interior design. But most often it can be found in lofts, or in spaces subordinated to the spirit of country or gothic. In the first case, designers choose rich colors, metallic effect, letters, numbers, graffiti on the walls and even coloring. In a variety of ethno-variants and Gothic interiors, the walls are covered with paint unevenly, but, as a rule, one soft tone is used - light or dark. The most popular color is white; against its background, the texture of the brick looks especially stylish.
In its original form
If you suddenly, with the greatest difficulty, cleared the wall of old plaster, discovered brickwork of unprecedented beauty and want to use it in the interior “as is”, without covering it with a layer of paint, then it makes sense to apply clinker oil to the brick. A special composition will refresh the surface, make the color brighter and more even, help eliminate small stains and protect against the appearance of new stains. Home craftsmen use acrylic parquet aqualak for the same purposes.
You can leave the brick wall uncoated, but you need to keep it clean, prevent mold from appearing, periodically wash and thoroughly dry the masonry.
Preparatory work - how to avoid mistakes?
Proper preparation of the base is important.
- First you need to remove furniture, appliances, and equipment from the room that are interfering with the work.
- It is necessary to thoroughly degrease the surface of the tile (get rid of greasy stains and deposits, which can lead to deterioration of the adhesion of the paint layer). You will need water with added detergent and a sponge.
- The seams need to be cleaned. All traces of mold must be removed. For cleaning, special anti-mold products are used.
- Finally, the surface is washed with plenty of water.
Now it's time for renovation work! They include the following steps:
- All scratches, cracks, and cavities must be filled with a special waterproof tile repair compound, which will allow you to achieve a better aesthetic effect. Thanks to grouting, scratches are not visible after painting, walls and floors are effectively protected from moisture penetration.
- For this reason, it is necessary to repair the damaged seams (cracks are filled, grout is applied again). Excess solution is removed.
- The surface is polished and leveled.
- Cleaned from dust.
After protecting the edges of the furniture (if it is impossible to disassemble it), and the places where the tiles meet the wall and floor with masking tape, you can begin painting.
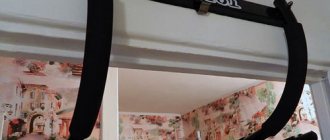
Advice: if possible, you need to dismantle, unscrew, unscrew everything that is possible before painting. This will avoid additional work! Otherwise, after removing the masking tape, you can get the result as shown in the photo below.
Home technology
If you wish, you can always get aged brick at home by aging it artificially with your own hands. Technologically, this process does not present any particular difficulties. You just need to prepare the tools necessary for the job:
- Chisel and hammer. Grinder. Paint and sponge for painting seams. Sandpaper. Blowtorch. Hammer drill, if the surface area to be treated is large enough.
First, sand the surface with sandpaper or a sander to make it realistically rough. When working with an angle grinder, some nuances arise.
You have to make sure that the surface is well processed to obtain a fairly believably aged surface. Then, using a chisel and a hammer, they slightly damage the masonry, breaking off small pieces of brick. For the same purpose, you can use a hammer drill to save time when doing a large amount of work.
When trying to achieve verisimilitude, one should show a sense of proportion. The chips should be uneven and arranged in a chaotic manner. You also need to pay attention to the seams, because in ancient masonry they are damaged in places and there is no mortar.
Using a chisel and hammer, knock pieces of mortar out of the seams. You can take a hammer drill for this purpose, using it to make evenly small indentations between the masonry. So you'll have to work on that too.
Here's what it might look like in the interior
Having achieved the desired effect, you can proceed to the next stage of work. To do this, use a blowtorch to darken some areas, creating the desired effect.
Next, even out the shade. This can be easily dealt with using sandpaper. Gradually treating the masonry with it, it is necessary to achieve a uniform darkening, which distinguishes the old masonry.
It is very important to pay attention to color, because in ancient masonry the seams are always dark. To do this, use mineral paint (tip: it’s better to mix paint of several tones to get a decent result!), apply it to the seams with a sponge and spread.
Know! Having completed the main task, you need to once again go over the entire surface with sandpaper. Next, you should pay special attention to the sharp corners that arose during the processing of the brickwork. They must be carefully sanded, giving a naturally aged look.
Having finished with the main stages of aging brickwork, you can move on to the final finishing.
To do this, go over the entire surface with coarse sandpaper. The scuffed effect should look natural, because under the influence of time the brick is destroyed evenly over the entire surface. Therefore, some places will have to be treated more carefully to enhance the effect.
You can achieve the same effect by sandblasting the surface using a special tool. But this technology is not always available, since not everyone has the necessary equipment at hand. Therefore, the method described above is more accessible.
This completely uncomplicated technology allows anyone, even a beginner, to express themselves in creating a new original design with their own hands. This way you can process any structure, be it masonry for a fireplace, or an entire wall for a house made of old brick or your apartment.
You can create an aged brick on the wall with your own hands using available tools or buy ready-made artificial material.
Patina on stone is created by using paint and rubbing the surface of the building material with sandpaper. This type of decoration is used in the interior spaces of rooms and is suitable for various styles. Aging of external walls is much less common.
Painting: what to remember?
The most important, mandatory recommendations on how to paint tiles can be found on the paint packaging. It is necessary to strictly follow the information provided about the procedure, painting method, drying time of individual layers.
The room must provide certain conditions of humidity and temperature:
- humidity should not exceed 70-80%;
- the optimal temperature is 24-28 degrees.
Working conditions affect:
- drying speed;
- strength parameters;
- aesthetics of the resulting coating.
For example, if the room is too hot, the layer dries too quickly and may turn out less durable and short-lived.
Most manufacturers recommend treating the tiles with one layer of a special primer for ceramic substrates before painting. The primer gives the wall the necessary roughness, and the paintwork gets better adhesion to the base. Using a primer is especially advisable if surfaces are constantly exposed to water (kitchen, bathroom). When painting other rooms, the initial layer can be made with paint diluted with a small amount of water (up to 10%).
How many layers should I apply?
You should use the information contained in the product instructions and your own wishes regarding color intensity. Between applying layers, you need to allow a drying interval of 12-48 hours (depending on the manufacturer's recommendations).
New paintwork takes much longer to cure:
- mechanical resistance is achieved after a few days;
- chemical resistance – after about a week;
- full functional properties – in a month!
You should not use the room for the first 3-4 days; you need to treat painted surfaces with care for the next few days. You must be careful not to stain the painted surface or splash it with water.
Photos of work: after and before painting
Is it possible to paint the tiles or is it better to knock them down and glue a new one? If the tiles are in good condition, there is no need to replace them. Painting will update the interior, change the color - quickly and inexpensively.
Ceramic tiles are durable and retain their decorative appearance for decades. But sooner or later cracks appear and the glaze begins to crumble or become stained. The easiest way is to remove the old covering and replace it with new tiles. But this is not always affordable. Sometimes it's easier to repaint ceramic tiles and give the cladding a completely different look.
In addition to painting, you can also do artistic painting on new or defect-free tiles installed on the wall. This is a simple technology that differs from conventional painting. This article only covers regular staining of ceramic tiles to update their appearance.
But painting tiles is not always advisable. For example, floor tiles can only be painted around the perimeter, where foot traffic is minimal. As a rule, the middle part of the corridor, kitchen or bathroom is not painted. None of the existing types of paint will withstand intensive use for a long time and will begin to peel off and lag behind the floor. Detergents with abrasive additives have a particularly active effect on paint.
Tiles that are constantly exposed to water, for example, those surrounding a faucet or located on the wall of a shower stall, are also not suitable for painting. It is better to install new tiles here. Small areas of painted tiles can be protected with transparent screens made of impact-resistant glass or monolithic polycarbonate.
What you need to paint tiles
The process of painting ceramic tiles requires the use of certain tools and materials. This is quite labor-intensive work, not too complicated technologically, but it takes a lot of time. High-quality tools and materials will make it much easier, but will make it a little more expensive.
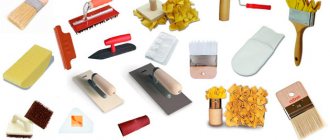
To work you will need:
- metal and regular sponges for washing dishes;
- sandpaper;
- metal grid;
- plaster float;
- surface grinder;
- brushes are narrow and wide;
- paint roller;
- tape or tape;
- epoxy primer;
- latex, epoxy or oil paint;
- special paint for ceramics;
- solvents.
To protect against dust and chemicals, be sure to have a respirator, rubber gloves, and goggles. The work is done indoors and is quite dusty.
Materials and tools
To complete the work, you will need inexpensive materials to imitate brickwork and simple accessible tools, namely:
- spatula width 200 mm and 80 mm;
- flute tassels 5 and 3.5 cm wide;
- paint roller;
- paint tray;
- building level 2 m long;
- long metal ruler;
- tape measure and pencil;
- cardboard brick template;
- primer;
- masking tape 1 or 1.5 cm wide;
- dry mixture Rotbant;
- paint ;
- color tex: red-brown, red, orange, black;
- matte acrylic varnish;
- electric drill with whisk;
- kitchen sponge;
- sandpaper #180 and 240;
- bucket for mixing the solution;
- container for mixing paint.
Preparing tiles for painting
Painting tiles belongs to the type of work in which the preparation process is much more complicated and requires more effort and time than performing the task itself. If you are going to paint several tiles, then preparing them will not be a problem. But if you intend to update a wall or the cladding of an entire room, you will have to work hard.
- At the first stage, all tiles will have to be thoroughly washed to remove dirt, grease, and solid deposits that have accumulated on the surface. Their layer, as a rule, is not too thick even in the most neglected room, but it holds firmly and is not easy to wash off. For washing, first a wire sponge, then a regular sponge and a variety of detergents containing abrasives are used. Fine sand can also be used. There is no point in sparing the glazed coating - it must be removed completely, otherwise the paint will not stick. After washing the tile as much as possible with chemicals and abrasives, it is washed again with clean water and left to dry.
Grinding
The purpose of this stage is to remove the glaze from the surface and level the surface of the cladding for painting. This exposes a ceramic base that is porous enough to provide significant levels of paint adhesion and smooth enough to provide an aesthetically pleasing painted surface.
Sanding is done manually using a plaster float with fine sandpaper attached to it using a surface grinder. Using a power tool makes work much faster and easier, but is accompanied by the generation of large amounts of dust. To reduce dust, the surface of the tile can be wetted, but in this case waterproof sandpaper is used. A sanding mesh is used to clean the seams. It is very convenient to wrap the mesh around a spatula, knife blade or other flat hard object and then process the seams.
Primer
Before applying epoxy primer, the wall should be rinsed with clean water and allowed to dry. After this, rinse again to remove any remaining dust and leave the wall for 24 hours for the water to completely evaporate. If you prime wet tiles, sooner or later the water will find its way out and stains, cracks or blisters may appear on the painted surface.
How to expose brick?
Exposing the wall should be done without haste, breaking off small pieces of plaster so as not to damage the surface. It is best to use a chisel and hammer for this. First you need to check the quality of the brick: if it does not crumble, has a good texture, and there are no cracks on it, then it makes sense to clean the entire wall. Once the plaster is removed, the surface should be cleaned with a wire brush. Next, the wall must be washed with warm water using a piece of clean cloth. After the wall has dried, all that remains is to apply sealant.
Is it possible to paint tiles?
From time to time you want to update your interior, and the hardest thing is with coatings that are difficult to replace. These include tiles. And it would be necessary to change it, but when you remember the expenses, the dirt, and you don’t want anything anymore. Therefore, when you are tired of the old tiles, have not yet decided to lay a new one, but want to refresh the appearance, we begin to think about whether it is possible to paint the tiles. In principle, it is possible. But this is a temporary option. And, as a rule, it is not very durable. Everything looks decent from a few months to three to five years. The period until everything looks good depends on:
- Type of tiles. On a glazed surface, there is a high probability that the paint will begin to peel off quickly and peel off. If the surface of the tile is rough, then properly selected and applied tile paint will last for some time.
- Preparing the base. Smooth - glazed - tiles must be made rough. All the rest - wash well and degrease. There will certainly not be a normal result on a dirty or greasy surface.
Paint for ceramic tiles - a way to change its appearance without replacement
- Selected materials. The choice of paint for tiles and primer must be approached carefully and thoughtfully. There are not so few materials and new ones are constantly appearing. Read the description carefully, even if you were told that this is what you need.
- Compliance with technology. Materials for painting tiles are produced by famous companies. In any case, we recommend buying these. They often post technological maps. They describe in detail where, when, how and in what order the work should be carried out. If you follow the recommendations, the result is guaranteed. And, it’s better to read the technology of the work before you buy it. Just believe me.
Let’s say right away that cheap paint for ceramic tiles is a fantasy. There is no such option. The price for materials is decent. Maybe just a small area will help you avoid spending too much.
Aging brick with plaster
To create a more original and unusual antique effect on brickwork, you can use plaster.
Suitable for both regular and decorative. Suitable colors for this purpose are:
- white, beige, light gray.
The brick will contrast with these colors, which will create the desired effect. You will need to prepare a plaster solution and apply it to the wall in such a way that it appears as if the plaster is peeling off the wall over time.
The remaining bricks must be aged using the first of the described methods (using sandpaper and a blowtorch). This design of brickwork will look very original and impressive. It is worth remembering only one basic rule: when collapsing the plaster, it is important not to overdo it so that the entire coating does not fall off.
If the masonry allows, then several bricks can be pulled out of it in the upper part. Outwardly, it should look like a slightly collapsed wall.
Completing all these steps will allow you to create your own ruins in the interior with your own hands. You should not remove elements from the middle or from the bottom rows of the masonry. This can lead to the real and complete destruction of the wall.
Thus, aging a brick with your own hands is quite simple.
Everyone can choose a simpler and more accessible aging method. The result will be an interesting interior element. This decoration of brickwork in the interior will go well with the overall decor of the room in a country or vintage style.
Published March 11, 2018
A fashionable trend in the construction and design of premises - artificial aging of brickwork - came to us from America, where it was introduced 50 years ago. It was there that this fashionable style was born. Against the backdrop of an old brick wall are chic furniture and accessories. With this combination, the quality of the furniture is further emphasized and the zest of the room appears.
Technology and sequence of work
Renewing old tiles in a bathroom or kitchen does not take as long, of course, than replacing them, but the work is not the easiest. Especially if the tiles have a glazed surface. There are only three stages:
Working out the seams when painting tiles in the bathroom is very important
If we are talking about painting floor tiles, another step may be required - varnishing. The varnish is taken with increased wear resistance and tolerates high humidity well. Usually - deck or yacht. They can definitely withstand the load. But make sure they are compatible with the tile helmet you choose.
And yet, long-term results are not guaranteed. To check, you can carry out work in a small area “where it is not visible.” True, the materials should already be there... In any case, this way you can work out the technique, and in the process a lot of things become clearer.
How to paint brickwork: 9 important points
Fireplace portals, kitchen aprons, fragments of old walls and new decorative masonry - brick is constantly found in the interior, it is not going out of fashion and is increasingly becoming an object for design experiments. The easiest way to update a brick wall yourself is with paint - however, when painting you need to take into account several important details.
1. No turning back
If you are determined to repaint a brick wall, you should know that it is almost impossible to remove paint from it. The original terracotta cannot be returned; the color can only be changed by repainting. And repainting will definitely be required: in five years the paint will most likely fade and even crumble.
2. Natural means capricious
Brick is a porous, breathable material. Building codes and regulations require long periods of weathering and drying. If you decide to paint a new wall that has stood in its original form for less than a year, be prepared for surprises: efflorescence and moisture stains can ruin the texture of the painted wall.
3. Thorough preparation is the key to success
The surface must be clean before painting. All salt stains must be removed with a wire brush (never use acid!). Wash the wall with soapy water and leave to dry: the brickwork needs about a week for all the excess moisture to come out of the pores.
4. Focus on results
The whole personality of a brick is in its rough texture, this is true, but large flaws are still better to be plastered or puttied. The romantic charm of antiquity will not go away, but painting over masonry without chips and cracks is much more convenient. And the finished surface looks neater.
5. Choice of paint – safety and visual effect
The main thing is not to choose façade paint by mistake. Of course, such materials are better suited for painting porous surfaces, but they contain many volatile substances that are hazardous to health. You will need interior paints - you can choose acrylic or alkyd for a matte or semi-gloss effect. Or use oil paint - it will give the brickwork a soft shine.
6. Primer - the main thing behind the scenes
The primer should be selected taking into account the choice of paint, but in any case it should penetrate deeply into the base and create a durable water-repellent film. Apply a thick layer of primer - and be sure to let it dry completely.
7. Smooth color or special effects
It is better to paint a brick wall with a brush - it is easier to feel contact with the surface and apply even strokes. The direction of painting is horizontal, according to the masonry pattern. For acrylic paint, brushes made of polyester fiber are recommended (but high quality!), alkyd and oil paints require brushes made of natural hair. The universal size and shape of a tool for painting walls is a flat brush with a width of 75 to 100 millimeters. To work out the corners, brushes that are twice as narrow, with an obliquely cut edge, will be useful.
It is better to use a roller if you want to achieve the effect of a primer layer: brick absorbs a lot of paint at once, so it will take a long time to work with a roller on a smooth coating. But a carelessly rolled layer will turn out quickly and easily!
If you apply paint with a sponge, you will get the effect of old faded masonry. In this way, you can whiten the wall and make the paint layer translucent (as in the case of working with a roller). You can use a sponge to apply bronze or silver highlights, add spots of contrasting color to the wall, or paint over images using stencils.
Another common (but more labor-intensive) painting method is to paint each brick with a paint of the same tone using a brush and use a contrasting color compound for the joints.
8. Stylistic guidelines
There are no special barriers to using painted brickwork in interior design. But most often it can be found in lofts, or in spaces subordinated to the spirit of country or gothic. In the first case, designers choose rich colors, metallic effect, letters, numbers, graffiti on the walls and even coloring. In a variety of ethno-variants and Gothic interiors, the walls are covered with paint unevenly, but, as a rule, one soft tone is used - light or dark. The most popular color is white; against its background, the texture of the brick looks especially stylish.
9. In its original form
If you suddenly, with the greatest difficulty, cleared the wall of old plaster, discovered brickwork of unprecedented beauty and want to use it in the interior “as is”, without covering it with a layer of paint, then it makes sense to apply clinker oil to the brick. A special composition will refresh the surface, make the color brighter and more even, help eliminate small stains and protect against the appearance of new stains. Home craftsmen use acrylic parquet aqualak for the same purposes.
You can leave the brick wall uncoated, but you need to keep it clean, prevent mold from appearing, periodically wash and thoroughly dry the masonry.
The most detailed information about car valuation online is here.
Many, many people prefer an antique style in their home. To create it, they purchase old furniture and other interior elements. However, all this is quite expensive. A cheaper way to decorate your room in a retro style is to paint it in a special way. Before antique painting any item, you need to study the suggested instructions and the types of paints that are used for this purpose.
- 1 Working with wooden elements 1.1 Tools and materials
- 1.2 Stages of work
Working with wooden elements
Of course, in every house there are a lot of wooden objects, such as a table, a wardrobe, the walls themselves and others. For this reason, you should consider how to paint antique wood, what is needed for this and what materials to use.
Tools and materials
Tools you need to have:
- Rubber spatula,
- Screwdriver,
- Sanding machine or sandpaper,
- Brush or roller
Materials you need to purchase:
Stages of work
Painting antique wood with your own hands involves a few simple steps:
- First you need to prepare the wooden surface. Preparation consists of removing the old layer of paint or varnish. In addition, the surface needs to be leveled, which can be done with wood putty. After leveling, the entire surface is sanded, for which you need to use a grinding machine or sandpaper,
- The second step is to cover the entire wooden surface with stain to determine the color.
After applying the stain, the structure of the wood becomes visible
Advice! To apply stain in the old style, you should make a special swab - wrap a small piece of cotton wool in a cotton cloth.
The stain is poured in small portions onto the cotton wool and applied to the wood with light touches. In such work, the main thing is that the stain does not flow out when you press the swab. The wood should be coated several times.
- Near locks, handles, and corners, the coated stain is sanded with sandpaper to achieve natural abrasions,
Working with sandpaper
- Then the entire surface is covered with two layers of colorless varnish.
Applying a layer of clear varnish
All wooden objects painted in this way will have a natural wood pattern, which is typical for old interior elements.
There are other ways to age furniture and any other wooden items. Let's look at one of them using the example of how to paint an antique table.
First comes the preparation. After this, apply a layer of paint of any characteristic color, for example, gray.
Advice! To ensure that the pattern of wood fibers is visible through the paint, only one layer is applied.
Next, they create a shabby effect, as in the previous method, and in the same places. The next step is to achieve the effect of the old paint appearing from under the new.
This is done simply: the brush is slightly dipped in paint of a color different from the first layer. Then it is wiped with a dry cloth, and then smeared with force over the surface.
The photo shows that one paint appears from under the other.
It turns out that not the entire surface is painted, which creates the illusion of antiquity.
Applying paint using a dry cloth method
Another way to age furniture is to create the illusion of dirt. For this, dark wax is used to cover the wood. It is worth painting unevenly. After painting, the wax is covered with dark varnish.
Uneven application of dark wax
Working with metal
In addition to wooden objects, metal ones can also be aged.
The technology consists of the following steps:
- First, the surface is completely sanded and cleaned of dirt, grease stains, rust and other types of contaminants,
- Next, a layer of special paint – metallized – is applied to the surface. Such paints are popularly called “metallic”. It is best to apply with a brush, since the resulting pattern will already have an antique effect,
- Afterwards, a layer of primer is applied to the dried paint. A craquelure primer must be used. This primer, after drying, forms a transparent surface,
Applying craquelure primer
- After priming, the metal is painted in an antique style with your own hands using a top craquelure coating. As this composition dries, cracks form. The deeper these cracks are, the thicker the coating layer,
Surface after the top coat has dried
- In order to enhance the effect of antiquity, apply a little burnt umber to a piece of fabric and rub it into the painted surface. All excess umber is removed, leaving them only in the cracks, which creates a finished image of the old item.
Rubbing the surface with umber
It must be said that metallized paints can be used not only for metal objects, but also for clay, wood, brick and others.
Advice! To ensure that such a layer of various paints lasts longer, before painting the metal antiqued, a special electrically conductive paint is applied to its surface.
As such protection, electrically conductive paint zinga, which consists of 96% zinc, can be chosen.
As protection against high temperatures, for example, when it comes to fireplace doors, fire-retardant metal paints, polystil, can be used, which can withstand exposure to open fire for 45 minutes.
Working on brick
Working with brick is the easiest, since it itself has an old-fashioned look. The instructions have only one simple step - painting with acrylic paints of the selected colors. The only difference between this type of painting and the usual one is the method of applying the paint.
So, antique-looking brick painting should be done with a sponge. It is simply dipped in paint and applied to the surface of the brick with light touches.
Brick painted antique with different paints
To enhance the effect of antiquity, before painting the brick antique, the joints of the masonry are rubbed with ordinary earth, making them darker or painted over with paint of any color.
As you can see, creating an antique effect on any surface is not difficult. In addition, if we consider painting as the main method of achieving the goal in this matter, then we can talk not only about simplicity, but also about cheapness, since the price of paint is much lower than the price of furniture (
Preparing tiles for painting
From the very beginning you need to wash the base. The paint is applied in a thin layer and even small irregularities - drops of grease, lime stains - everything will be visible. Therefore, we wash and clean thoroughly. If you decide to paint the floor tiles in the bathroom, first remove all silicones, grout, level and clean the seams.
It all starts boringly - with cleaning
Further. If the tile is glazed, it is better to scratch the glaze. There are many ways.
- If you have a grinding machine, this will simplify the task. We use sandpaper with medium grain and make the surface rough.
- You can try a grinder with a grinding attachment. But it will be too dusty.
- Wire brush.
- A block wrapped in coarse or medium grit sandpaper. We select the grain experimentally.
What primer to take
The soil must be adhesive, but not the type of concrete contact. It leaves a rough surface, which is unacceptable for painting. After applying the primer, the surface should be smooth, so carefully read the description and composition. If the composition contains quartz sand or other abrasives, this is not our option. You will need a primer with polymers: epoxy, acrylic, polyurethane, etc. In principle, you need to immediately select the paint so that the polymers are compatible.
When painting tiles in the bathroom and kitchen, we are looking for a primer for exterior work. It is precisely designed for use in rooms with high humidity. We can recommend several primers with suitable properties.
- Bostik "Bostik"Undir N. Acrylic water-soluble emulsion. Suitable for old tiles, terracotta, stone tiles. After drying it forms a transparent blue film. Color must be taken into account when choosing paint.
- Tikkurila (Tikkurila):
- Otex. Can be applied to glazed tiles without prior sanding. There are bases in two colors - white or with added color of the desired color. The second option is used for rich tones.
- Otex Akva - Otex Akva. Water-soluble, odorless primer. Can be painted in all colors. An excellent base for bright color, but can also be white or very light. This is if you need light shades.
Different markets may have different designs
Tikkurila adhesive primers have been tested. They were used specifically for painting tiles, but on the walls of the kitchen and bathroom. In order to paint floor tiles, this primer will also work. It will be necessary to choose paint and varnish with high resistance to mechanical stress. Surely there are compositions from other manufacturers.
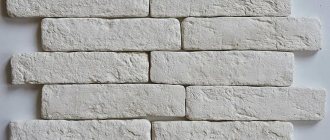
Imitation brick from soft tiles
Ease of installation and surface treatment are two main features that characterize soft tiles. The material has a relief texture reminiscent of natural stone. That is why imitation brick on the wall is practically no different from real masonry.
It is important to know! Soft tiles are also used for exterior decoration. Due to its resistance to temperature changes, it is used, for example, on building facades, etc.
Another advantage of the material is its flexible structure. These tiles are laid on smooth and rounded walls. It is also suitable for cladding small architectural forms. The buyer is given a wide color palette to choose from - by combining different shades, original compositions are created.
Alternating colors of soft brick tiles refresh the interior
Paint for ceramic tiles
The main question is how to paint tiles in the bathroom and kitchen. Ceramics are smooth and non-absorbent substrates, and there are many paints for such surfaces. They are not budget ones, but not all are very expensive. There are from the middle price range. Look at the characteristics so that it has high hiding power, strength, and the ability to wash, and with brushes. The surface can be glossy or matte. The degree of gloss and matte varies. This alone gives a sufficient number of options even in one color. You can also use templates, stickers and other methods.
Paint for ceramic tiles can be:
- superurethane enamel;
- epoxy paint;
How the bathtub changed after painting
When you decide to paint the tiles in the bathroom or kitchen, immediately look for a pair - a primer and paint. They must fit one another. Typically, paint manufacturers recommend specific primers. Look through the recommendations, you may find what you need and you won’t have to think about the compatibility of the ingredients.