Ceramic coating may lose its decorative qualities over time, and the color may become less bright. But replacing the finish with a new one is not always possible; then you can update the interior by painting the surface. Ceramic tile paint must be chosen correctly to withstand moisture and create a strong bond. Suitable options will be discussed below.
Is it possible to paint tiles?
Before painting ceramic tiles, you need to understand whether this can be done and where. You can paint any type of ceramic, but you need to understand that in areas where water often gets in, the coating will not last long. Therefore, painting in the area of the bathtub and shower is undesirable.
Tile paint should be applied in an environment of moderate humidity, so it will be possible to make cosmetic repairs to the room quickly and often, without major expenses.
You can paint any type of ceramic, but you need to understand that in areas where water often gets in, the coating will not last long.
What are the pitfalls?
Painting bathroom tiles with your own hands is not difficult, but it is much more difficult to do it well. So that the coating does not crack or peel off the surface after a short period of time.
The first thing to consider is the water resistance of the material. Even if you are painting regular bathroom walls, washable and super durable paint is required, not to mention painting tiles. You will find out which composition is best suited in the next section.
The next important nuance is a smooth, non-porous surface. Glazed ceramic tiles are not intended for painting - the paint will not be able to penetrate into it, which means it will not adhere firmly. Fortunately, there are special primers - they are suitable for non-porous glossy substrates, adhere firmly to the wall, and improve paint adhesion.
See how best not to do repairs.
The last important detail is easy maintenance. Wall and floor coverings in the bathroom must withstand not only the ingress of water - they will have to be washed more often than others. Savings during repairs in this case may affect the quality and stability of the painted coating.
Purposes of coloring
Painting tiles on the floor, ceiling and walls is allowed, but you need to choose the right type of paint so that it can withstand the load. The choice also depends on the purpose of the painting work:
- The desire to update the appearance of the old tile covering;
- To create an additional waterproofing layer, the painted surface can also protect the seams;
- An economical option to change the style in the room;
- To create decor, you can use stencils and paint additional designs.
If the tile itself is in good condition, then only the joint coating can be renewed by removing the previous one, which has lost its properties.
Painting tiles on the floor, ceiling and walls is allowed, but you need to choose the right type of paint so that it can withstand the load.
Painting kitchen tiles
Particular attention is paid to the choice of paint for tiles, since the kitchen area is used in difficult conditions. The walls serve as a backdrop for the furniture. If you need to update your interior, painting is the easiest way to change the shade.
Defining boundaries
Before applying the first coat of paint, the size and geometric shape of the area it should cover is determined. Do not use the product in places where steam accumulates. Here the composition is applied around the perimeter or a border is made. In this way, the problem area is fenced off and adjacent ceramic elements are highlighted.
Preparing the base
The coloring composition will adhere well if the surface is prepared. The tiles are cleaned of dust, grease and dirt. Increased attention is paid to the seams between the tiles. For washing, use a soap solution or a specialized product.
If it is cracked, it is better to remove the grout in the seams and fill them with cement fugue. Excess material is removed. After filling the joints, the tiles must be washed again. If you cannot remove grease and dirt with a soap solution, you can use a scraper and abrasive powder. To remove slippery deposits, a mixture of ammonia and water is used. The components are taken in equal proportions.
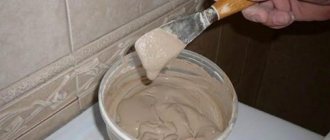
Surface priming
If the entire surface of the wall is subject to repair, then it is pre-treated with fine-grained sandpaper. Large areas are difficult to clean in this way, so in this case it is better to use a primer. It will improve the adhesion of the composition to the base. To work, you will need a special substance designed for smooth surfaces: tiles, plastic or glass.
The primer will not only improve adhesion, but also cope with small chips and shallow cracks. The tiles can be painted once they are dry. This requires from 1 to 24 hours.
Features of paint application
Painting tiles is no different from treating other surfaces. To protect those parts of the walls on which the composition will not be applied, masking tape is used. Stencils are used to apply the design. They are also secured with tape. Using templates, you can create an apron or the perimeter of the room in the center
The edges of the stencils are pressed tightly against the tile, otherwise the paint will flow and the design will not turn out neat. Small brushes are used to decorate individual cladding elements. The strokes are applied evenly.
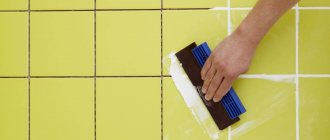
Color of tile joints
It is easier to paint the seams between tiles on the floor or wall in the same color as the entire surface. To create contrast you need a thin brush. The seams are covered with masking tape, after which the base shade is applied to the entire tile. After the paint has dried, the tape is removed and glued to the tile. The seams are now being processed.
The color can be contrasting: white with black, black with yellow. Similar shades from the same palette are suitable: brown with beige, azure with blue.
How to protect the coating
To make the new cladding last longer, the painted surface is treated with a water-based urethane varnish. This layer not only protects the walls from the influence of negative factors, but also fixes the pattern. The base should be varnished after the last layer of paint has dried. This takes 3-4 days.
When using a brush, the varnish is applied in 2 layers, if a roller is used, then in 1. Protection is required if the floor is painted or the tiles are lined with an oil composition. Before using the varnish, its compatibility with the paint is checked. To do this, a test sample is made on a piece of glass or plywood.
How to make a picture on tiles
If you have artistic talent, a panel containing plant elements, a still life, is depicted on the kitchen wall. First, the place that will be allocated for the painting is determined. The tiles are pre-treated with acetone to remove the fat layer, as well as with fine-grained sandpaper.
A pencil is used to draw the outlines of the drawing. Next, they are outlined with a thin brush. Oil-based paint will help here. Inside, the drawing is applied with an acrylic compound half an hour after the outline has dried. To prevent the paint from spreading and going beyond the outlined limits, apply it pointwise. The brush is held perpendicular to the base.
Features of operation
Painted tiles require special care. Since steam often accumulates in the kitchen, the humidity level increases, temperature changes occur, the paint layer becomes dull and loses its decorative qualities. Epoxy paint will crack if exposed to direct UV rays. Oil compositions do not tolerate frequent and prolonged contact with liquid. Do not wash the painting, ornament or picture on the tile with abrasive powders or metal scrapers. To ensure that the pattern remains bright, no acid-containing substances are used for cleaning.
Painting tiles: pros and cons
When deciding whether to paint floor tiles or other surfaces, you need to evaluate the positive and negative aspects of the process. So among the advantages they note:
- The speed of creating a new finish;
- You can disguise visible flaws in the coating;
- Wide range of shades;
- Saving money;
- Easy to repair, you can do it yourself.
The downside is the short service life of the coating. So, instead of painting tiles on the floor to make them last longer, you should choose an epoxy or latex type of paint. For walls and ceilings, the strength requirements are lower.
You can disguise visible flaws in the coating.
Tools and auxiliary materials
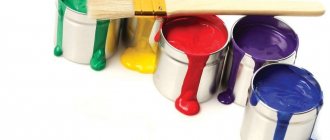
High-quality repairs are impossible without a minimum set of tools and equipment. In addition to a can of paint, you need to stock up on the following things:
- A set of brushes of different sizes and hardness for painting corners and hard-to-reach places. Airbrush, spray gun - depending on ability to use.
- Palette (optional) to obtain the desired shades.
- Roller with replaceable blocks; paint tray of suitable size.
- Masking tape to protect surfaces bordering the painted area.
- Polyethylene or paper to protect everything that needs to be protected: floors, plumbing, furniture.
- Sandpaper (or sander) to roughen up glossy tiles.
Stencil ornament in a modern style Source pinimg.com
- If you plan to decorate with an ornament, you will need stencils or decorative stamps, as well as small brushes and sponges for applying pigment.
- Means of protection. A respirator and gloves are especially useful if the composition has a pungent odor.
- Additionally, the following materials are needed:
- Grout. It will help prepare the seams for painting.
- Priming. Acrylic or any other primer with high adhesion (for smooth surfaces) is suitable. It will make the tile rough, making it easier to apply paint.
- Varnish. Needed if you are going to additionally protect the paint layer.
- Solvent. It will be needed to wipe off paint that accidentally gets outside the tiles.
What color should I paint the tiles?
The choice of color largely depends on the preference of the owner. But it is advisable not to use overly bright colors; it is necessary to select options that match the furniture and other decorative elements.
You can apply different shades, the main thing is that they look organic together. The same point is important when using drawings; they must match the color of the main background.
It is advisable not to use overly bright colors; it is necessary to select options that match the furniture and other decorative elements.
Choosing paint
If we talk about the choice of composition, here, first of all, you should proceed from the type of room. For example, acrylic or epoxy grout is suitable for enclosed shower rooms. Acrylic paint has a bright color and is easy to use and apply. Epoxy dries quite quickly, and, in addition, it emits virtually no odor, which makes it a good option.
Acrylic paints
Gloss solution is best suited for gloss lovers, as it perfectly preserves the enamel coating and gives it shine. One of the brightest representatives is semi-matte satin enamel, which hides smudges. In addition, it masks various types of dirt well and creates the illusion of a velvet surface of the product.
Types of paints and varnishes for painting ceramic tiles
How to repaint the tiles in the kitchen, bathroom or another room? There are many paint and varnish materials that are suitable on the construction market. You need to study their features before choosing.
There are many paint and varnish materials that are suitable on the construction market.
Oil paint
This type is characterized by low cost, average resistance to moisture, and is destroyed by the ingress of alkaline substances. Drying takes about a day, there is also a strong smell, and they do not last long.
This type is characterized by low cost, average resistance to moisture, and is destroyed by the ingress of alkaline substances.
Alkyd enamel
Paints based on alkyd resin are better able to withstand negative environmental factors and will last about four years. If the composition contains rosin, then it is permissible to paint the floor covering.
Paints based on alkyd resin are better able to withstand negative environmental factors and will last about four years.
Pentaphthalic and Glypthal enamels
These paints are often used as tile paint in the kitchen and other rooms. There are types suitable for exterior painting; it is important to study the purpose of the composition on the packaging.
These paints are often used as tile paint in the kitchen and other rooms.
Nitropaint
A universal option, suitable for interior and exterior decoration. It is inexpensive, creates a reliable coating that will be glossy. It dries very quickly, so it is advisable to use a spray bottle for painting.
They are toxic and fire hazardous; when working inside a building, the master must wear a respirator and create a high level of ventilation.
It dries very quickly, so it is advisable to use a spray bottle for painting.
Acrylic paints
Acrylic is also universal, and the most popular for tile coverings. They are distinguished by a good level of moisture resistance and a wide range of colors.
They are distinguished by a good level of moisture resistance and a wide range of colors.
Glass paints
This type is suitable for creating a pattern on tiles; their price is high, so painting the entire area is impractical. Vibrant colors are created that look great in drawings.
This type is suitable for creating a pattern on tiles; their price is high, so painting the entire area is impractical.
Epoxy enamels
Epoxy creates a reliable and durable layer that can withstand various negative factors. Therefore, they are used in rooms with high loads, also for floors.
Epoxy creates a reliable and durable layer that can withstand various negative factors.
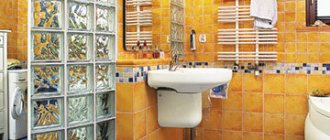
Why paint tiles in the bathroom
Traditionally, tiles are considered the best wall and floor coverings for rooms with high humidity. The average lifespan of finishing material is 25 years or more. Naturally, during this time the bathroom interior becomes outdated/boring many times over. The main tasks that painting tiles in a bathroom solve are:
- replacement of existing interior design;
Wall painting to increase the decorative value of the interior. - reducing the budget and labor intensity of repairs;
Removing tiles is considered the most dusty operation of a bathroom overhaul. - cosmetics instead of major repairs in a short time;
- absence of “wet” technologies and work;
- masking tile defects (chips, cracks);
- reduction of finishing time.
Painting work is carried out much faster than laying tiles.
Over time, interiors become boring, and tiles are too expensive to buy collections of them every 5 years to implement fresh design solutions. Therefore, it is easier to apply paints and varnishes to individual areas in fragments or to paint the entire surface in a color of interest to the user.
Floor and wall coverings - mosaics, tiles, porcelain tiles - are subject to restoration.
Preparatory work
It is necessary to first remove unnecessary objects from the room; anything that cannot be taken out is covered with a film covering so as not to be painted. Switches and sockets should also be securely closed.
It is necessary to first remove unnecessary objects from the room; anything that cannot be taken out is covered with a film covering so as not to be painted.
Vinyl film
A simple way to make your bathroom attractive and bright is to stick a colored self-adhesive film on the tiles. This finish has a number of advantages:
- Easily and quickly sticks to tiles and other smooth surfaces;
- Available in a large number of colors;
- has no smell;
- does not require drying time.
The only tools you need are tailor's scissors. Surface preparation for gluing the film is standard - cleaning and degreasing. You can cut out shapes of different shapes from the film and create ornaments.
For the bathroom, you should choose a material marked wave 3 - it can be washed with detergents. The ideal option would be to add an image of a brush. This film can be cleaned with an abrasive and rubbed with a hard bristle, but it costs more.
The film is translucent. If the tile is not white, then it should be coated with a light primer to create a background.
Design Variations
There are many options to create a new original interior using paint. The master can give free rein to his imagination; the following variations can be taken as a basis:
- Full coloring;
- Partial color renewal in the required areas;
- Creation of patterns, drawings, images.
There are many options to create a new original interior using paint.
Color selection
The choice of colors and their combination determines how the tile will be perceived after painting. A color background can irritate, promote a surge of energy, or, conversely, have a calming effect.
It is recommended to avoid bright colors, even if they seem very beautiful. A bright background quickly tires, having an aggressive effect on the psyche. The best option is neutral tones that blend in with the rest of the room. Against a neutral background, the flaws made when painting the tiles are not so noticeable.
If desired, you can make the colors livelier by using several colors of paint at once. It is possible to apply ornaments and designs (for example, apply patterns in the corners of floor tiles). This is done manually or using stencils. In the latter case, even an amateur can complete the painting.
Advice! When applying several colors to a tile, you need to ensure that they are harmoniously combined. Otherwise, instead of the original colors, you will end up with a tacky daub.
How to change the appearance of ceramic tiles without painting
In areas where moisture is frequently present, painting will not be effective. Therefore, it is better to cover them with a special film; a high-quality type is required. Suitable carbon fiber for cars. It is glued to a cleaned and degreased base. The film covering is pre-cut to the size of the tile.
In areas where moisture is frequently present, painting will not be effective. Therefore, it is better to cover them with a special film; a high-quality type is required.
Painting the tile flooring can be a good option to get a new interior. The work is simple to carry out, so you can save money and do the repairs yourself.
Epoxy resin on tiles - coating various tiles with resin
Epoxy resin flooring is becoming increasingly popular. This is not surprising, because epoxy resin has many advantages. You can even use epoxy resin to create a new finish on old tiles. In this guide, you'll learn how you can apply epoxy to tiles and the benefits it provides.
- 1 Why epoxy resin flooring on tiles?
- 2 epoxy resin tiling: advantages and disadvantages
- 3 Epoxy resin flooring material on tiles
- 4 Instructions for coating tiles with epoxy resin 4.1 Preparing the tiles
- 4.2 Apply primer
- 4.3 Selecting a suitable epoxy resin for flooring
- 4.4 Mixing epoxy resin
- 4.5 Apply epoxy resin.
- 4.6 Scattered decorative elements
- 4.7 Sealing tile flooring
- 4.8 Curing of epoxy resin flooring
Why epoxy resin flooring on tiles?
In every house and apartment, major repairs cannot be avoided at some point. This also includes updating the flooring. Before you can install a new floor, you usually need to remove the old one first. Especially old tiles in the bathroom are often difficult to remove and often require great effort to break. Not only does your bathroom need new flooring, but it also needs waterproof and waterproof flooring.
Epoxy resin is a good choice for refinishing old tiles. Epoxy resin consists of two components: a resin and a hardener. Once you have mixed these two components according to the instructions, you can apply the epoxy resin as a coating.
Almost all materials can be coated with epoxy resin. Additionally, epoxy resin on tiles offers you a variety of design options because you can mix it with different colors and fillers. This way you can design your floor to your liking.
Coating tiles with epoxy resin: advantages and disadvantages
Epoxy resin flooring on tiles offers many benefits and only a few disadvantages.
ADVANTAGES
- Installation without joints or seams.
- Epoxy resin is easy to use
- It is abrasion resistant, does not wear out and is very durable.
- Epoxy resin flooring can withstand both mechanical and chemical loads.
- Particularly suitable for large areas.
- The flooring does not require much maintenance
- The epoxy resin on the tiles is completely waterproof.
- It's relatively inexpensive
- The coating is non-slip and therefore safe.
FLAW
- To achieve satisfactory results, the resin and hardener must be mixed exactly according to the instructions.
- The epoxy resin coating can only be removed with difficulty and only by mechanical force.
Mixing resin and hardener correctly is easier than you think. You just need to follow the manufacturer's instructions exactly and do not mix products from different manufacturers.
In addition, other ingredients, such as inhibitors, can be added to the mixture to increase viability. It is also possible to add colored particles and fillers. However, if you want to use flooring fillers on tiles, there are a few things you need to consider, which we'll discuss in more detail below.
Epoxy resin flooring material on tiles.
To coat the floor with epoxy resin on bathroom tiles, you will need the following materials:
- Floor cleaning container
- Epoxy resin: consists of a resin and a hardener.
- Putty and putty can be used to smooth out cracks, gaps and unevenness.
- Two buckets for masonry or large ones for mixing
- Drill with stirring attachment
- Great roll to use
- If desired, decorative elements such as glitter particles or stones
Instructions for coating tiles with epoxy resin
Applying epoxy resin as a new coating to old tiles is easy. You only need to pay attention to a few things. In the following step-by-step instructions, we will show you how you can coat tiles with epoxy resin.
Prepare the tiles
Before you can fill the bathroom tiles with epoxy resin, you must first clean the room by removing all objects and furniture from it. When all the tiles are accessible, you can begin preparing the base. Make sure that the floor where the flooring will be applied is free of dust and dirt. If there are gaps, cracks or holes, they must be filled with putty. Make sure the entire floor is level.
Once you have completely cleaned the floor of dirt and dust, remove all remaining oil, grease and solvents. Otherwise, the epoxy resin will not be able to cure completely. You should also make sure that the base and joints are completely dry. Moisture often accumulates in the joints, so you should allow them to dry for several days before pouring the tiles. The areas you repaired with putty should also dry completely.
Once the surface is clean and dry, a primer should be applied to ensure the epoxy adheres well. You also let the primer dry.
Apply primer
It is advisable to apply a primer to almost all surfaces. This prevents the applied epoxy from seeping into the substrate and creating an uneven surface.
Choosing the Right Epoxy Resin for Flooring
To achieve the best results, it is important to use the correct epoxy resin for your flooring. Use only products specifically designed for this application. You can use pre-colored or clear products. Pay attention to high quality.
Mixing Epoxy Resin
Once you have prepared the base, you have all the necessary materials. This is important because you only have a limited amount of time, called pot life, during which you can process the epoxy.
Now you can mix the two components: resin and hardener. You can find this ratio in the manufacturer's information. Make sure you mix the epoxy resin exactly according to the instructions so that the base can cure optimally. If you add too little hardener, the floor covering may not cure completely. On the other hand, too much hardener can result in porous areas on the floor.
You can mix the two ingredients in a bucket. Be sure to mix them thoroughly. A drill with a mixer attachment is best suited for this. Mix the two ingredients thoroughly for several minutes at approximately 400 rpm. It is also recommended to pour the mixture two or three times so that the resin and hardener are completely mixed.
Now the pot life begins, so the epoxy must be applied quickly.
Apply epoxy resin
You apply the epoxy with a roller, which should be clean and dust-free. Make sure you distribute the resin evenly. Apply resin from front to back, then left to right using a roller. This ensures an optimal result and removes air bubbles from the mixture. For fine distribution at the end and removal of air bubbles, it is necessary to finally treat the resin with a special ventilation roller. Be sure to pay attention to the pot life because once it expires you will no longer be able to use the epoxy resin.
After applying the first coat, allow it to dry for 24 hours. During this time, the room should be well ventilated. For best results, apply a second coat and let it dry for 24 hours.
Scattered decorative elements
If you want to make your flooring unique, you can sprinkle decorative elements such as glitter particles, small stones or flakes. This should be done before starting the drying process.
Sealing tile flooring
Although epoxy resin flooring is extremely durable, especially compared to most other flooring materials, its light resistance is not optimal. However, you can increase this by using an optional clear epoxy resin seal. This not only increases light resistance, but also protects the floor from unsightly yellowing and imparts a pleasant shine. In addition, this seal increases the stability of the flooring and minimizes wear and tear.
Curing Epoxy Floor Coating
Each coat of epoxy resin applied should dry and cure within 24 hours before it can be used as normal. However, this time also depends on the ambient temperature. Let the flooring dry a little longer. If you want to be on the safe side, you can let the floor dry for seven days for optimal drying and hardening.
Alternative: painting the tiles with 2K paint.
If you prefer not to apply an epoxy resin floor coating, a two-part tile varnish is a suitable alternative. Available in many different colors and easy to apply. In addition, it is relatively inexpensive and has high opacity. However, two-part paint also has some disadvantages compared to epoxy resin coating: for example, the durability is less than that of epoxy resin.
This is especially true when it is used as a floor covering. In addition, with this flooring, the grooves at the joints of old tiles remain visible. Weigh the pros and cons of both types and choose your favorite.
by acrylgiessen
As you can see, epoxy floor coating is quite possible. We hope we were able to help you with this guide.
Master class on working with epoxy resin
Curing of epoxy resins
Leymon-epoxy Team September 3, 2021
How Long Does Epoxy Resin Take to Cure - A Complete Guide to Epoxy Resin Drying Times Are you looking to create...
Read more
glow powder in epoxy resin
Leymon-epoxy Team September 3, 2021
Glow in the Dark Epoxy Resin - Glow Powder in Resin Exclusive, glow in the dark items add an exotic touch to your…
Read more
How to Remove Epoxy Resin
Leymon-epoxy Team September 2, 2021
Best Epoxy Remover Epoxy resin is an extremely versatile material and working with it offers a number of...
Read more
How to cure sticky resin
Leymon-epoxy Team September 2, 2021
What to do if your epoxy resin is sticky and won't cure When using epoxy resin, you may sometimes find that...
Read more
Epoxy resin for wood
Leymon-epoxy Team September 2, 2021
Epoxy Resin for Wood - Examples of Uses of Epoxy Resin for Wood Epoxy resin offers many options that...
Read more
DIY epoxy table
Leymon-epoxy Team August 27, 2021
Tutorial: How to Make a DIY River Table from Epoxy Resin and Wood In this tutorial I will show you step by step how...
Read more
How to make cup holders from epoxy resin
Leymon-epoxy Team August 26, 2021
Resin Coasters Tutorial - How to Make Epoxy Resin Coasters Resin crafts have recently found themselves in the spotlight...
Read more
How to make an epoxy resin ring
Leymon-epoxy Team August 26, 2021
Tutorial for Making Epoxy Resin Rings Want to try a new hobby and don't know what to do? Working with resin...
Read more
Preserving flowers in resin
Leymon-epoxy Team August 26, 2021
Pouring Flowers in Epoxy Resin Resin is a very versatile substance and has many uses, but for...
Read more
DIY epoxy resin tabletop
Leymon-epoxy Team August 17, 2021
How to Make an Epoxy Countertop Many homeowners want to transform the surface of their countertops in their...
Read more
3D epoxy floor
Leymon-epoxy Team August 17, 2021
How to Make a 3D Epoxy Floor Are you looking to give your new home or office a makeover or create something special?…
Read more
Is epoxy resin waterproof?
Leymon-epoxy Team August 17, 2021
Your guide to waterproof epoxy resin. Epoxy resin has many useful properties, including being...
Read more
Epoxy clear coat
Leymon-epoxy Team August 16, 2021
Best Top Coat for Floors, Pictures, and Countertops Once you've coated your floor with epoxy, there comes a time when you can...
Read more
Types of Resins - All about the different types of epoxy resins
Leymon-epoxy Team August 16, 2021
Resin has so many uses that it can be shaped and molded into any structure or shape, it can be used as...
Read more
Thinning epoxy resin
Leymon-epoxy Team August 16, 2021
How to properly dilute epoxy resin? Epoxy resin is a durable material that is used in many applications such as...
Read more
Epoxy resin for garage floor
Leymon-epoxy Team August 14, 2021
Epoxy Garage Floor Coating Tutorial Using epoxy garage floor coating has many...
Read more
Polishing Epoxy Resin - Instructions for Mirror Smooth Resin Surfaces
Leymon-epoxy Team June 2, 2021
Epoxy Resin Polishing - Instructions for Mirror Smooth Resin Surfaces Anyone who has ever made a piece of...
Read more
Sanding epoxy resin - step by step to a perfect surface
Leymon-epoxy Team June 2, 2021
Epoxy resin sanding - step by step to a perfect surface To achieve a perfect surface on an epoxy resin part after...
Read more
Epoxy Resin Lamp - Resin Wood Lamp Instructions
Leymon-epoxy Team June 2, 2021
In this blog post you will find an exclusive tutorial on how to make epoxy resin lamps from wood. I'll show you step by step...
Read more
Stabilize Wood With and Without a Vacuum Chamber [Instructions]
Leymon-epoxy Team May 28, 2021
Wood is a material that can be used to make furniture and tableware, as well as works of art.
However, the tree also has... Read more View all publications on this blog