Polyurethane foam - properties of the material and its varieties
The consumer characteristics of polyurethane foam for sealing long linear gaps make one sincerely perplexed as to how they managed without it before, before the era of developed chemistry. Basic properties of foam sealants include:
- Excellent adhesion, and selective in nature. With the main building materials (concrete, brick, cinder blocks, cement, plaster, etc.), polyurethane foam forms a very strong, virtually permanent connection . But it sticks much worse to moisture, ice, polyethylene, silicone and oiled surfaces. This eliminates accidental sealing of foreign elements;
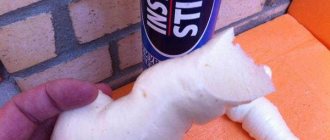
- The volumetric primary expansion when the composition “leaves” the cylinder reaches 50 times, and for the most modest manufacturers - no less than 20 times. The process takes only a few minutes and proceeds quickly, with a characteristic hissing and violent filling of the sealed openings. Just one spray is enough to fill deep and long joints. This is very convenient when working at heights, in hard-to-reach places, when plastering slopes with your own hands, when sealing ventilation pipes, when repairing balconies, etc.
- Solid secondary seal. It is not enough to know how to seal the foam - it is important to consider that it changes in volume for several hours after application. For cheap manufacturers, this change is of a shrinkage nature - as a result, gaps may form between the door jamb and the dried foam. High-quality sealants are not characterized by the formation of “slot gaps” after hardening;
- The viscosity and full installation volume of polyurethane sealants strongly depend on application conditions - temperature and humidity, the presence of wind, etc. There are “all-season” modifications of foam compositions, but they are optimally used at air temperatures from +5 ˚C to +35 ˚C, moderate humidity and in calm weather.
In addition to direct installation tasks - that is, sealing gaps, filling seams, insulating dissimilar joints, etc. – hardened foam has good thermal insulation and acoustic protection.
When installing window frames made of wood and plastic, pay attention to the flammability class of the sealing mixtures used; it can be fire-resistant, flammable and self-extinguishing.
When labeling the flammable properties of dried polyurethane foam, some manufacturers show a certain cunning. They write on packages, cans and adapter tubes only the numerical name of the flammability class, without verbal explanation. The average consumer may not know that:
- B3 is a flammable composition that ignites even better than a wooden frame;
- B2 is a self-extinguishing foam, and it can smolder for quite a long time;
- B1 – non-flammable mounting composition. Of course, the non-flammable property will affect the price of the sealant in the direction of a significant increase.
The greatest damage to polyurethane sealants is caused by direct sunlight. The influence of atmospheric precipitation and mechanical vibrations also adversely affects the durability of the treated joint, but to a lesser extent. Before sealing the polyurethane foam, you need to make sure that the additional protection is resistant to ultraviolet radiation.
How to hide polyurethane foam?
– hardened foam has good thermal insulation and acoustic protection.
When installing window frames made of wood and plastic, pay attention to the flammability class of the sealing mixtures used; it can be fire-resistant, flammable and self-extinguishing.
When labeling the flammable properties of dried polyurethane foam, some manufacturers show a certain cunning. They write on packages, cans and adapter tubes only the numerical name of the flammability class, without verbal explanation. The average consumer may not know that:
- B3 is a flammable composition that ignites even better than a wooden frame;
- B2 is a self-extinguishing foam, and it can smolder for quite a long time;
- B1 – non-flammable mounting composition. Of course, the non-flammable property will affect the price of the sealant in the direction of a significant increase.
The greatest damage to polyurethane sealants is caused by direct sunlight. The influence of atmospheric precipitation and mechanical vibrations also adversely affects the durability of the treated joint, but to a lesser extent. Before sealing the polyurethane foam, you need to make sure that the additional protection is resistant to ultraviolet radiation.
How to protect polyurethane foam from the street - the main protection options
Author: Olga Bilovitskaya · Published 11/05/2018 · Updated 10/09/2018
When carrying out construction and repair work, polyurethane foam is widely used. The material has good sealing properties, improves the thermal insulation characteristics of structures, and is used for fixing products indoors and outdoors. The product has a long service life, resistance to moisture and temperature. To prevent the composition from losing its beneficial properties, it is necessary to prevent exposure of the treated surface to ultraviolet rays. There are several ways to protect polyurethane foam from the street and protect the sealant from the negative effects of sunlight.
Protecting polyurethane foam with putty
Wait until the foam has completely expanded and dried. When ready for use, it has a wave-like shape and often excess foam appears in unusual points and positions. It will not be possible to hide such fragments with plaster, so they must be removed first. For these purposes, excess foam is cut off slightly deeper into the wall in order to use putty.
The polyurethane foam should be cut no earlier than 12 hours after application, but it is better to check the drying time. They are indicated on the can.
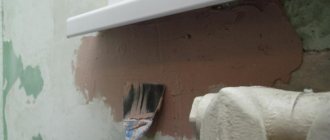
Before applying the plaster, apply regular masking tape around the areas of upcoming work to protect the clean surface that does not need any finishing from stains. Remove the tape after the plaster has been completely applied and dried.
Introduction to the topic
After installing windows and doors, the resulting gaps are sealed with installation sealant. The composition, which is in a cylinder under pressure, expands as the substance interacts with atmospheric moisture. Therefore, excess foam remains on the inside and outside of the structure. They are carefully trimmed with a construction knife, after which the polyurethane foam needs to be protected from the sun.
Ultraviolet rays destroy the structure of the mounting sealant if the surface is not treated with anything. The use of different methods of protection allows not only to preserve the properties of the porous mass, but also to give the installed structure a decoratively attractive appearance. For finishing treatment, painting, puttying, plastering, and priming are used.
Properties and varieties
Polyurethane foam has important technical characteristics that allow the material to be used for a wide range of repair work. Long service life, convenient application and good adhesion to different surfaces are the main advantages of the composition. The product also has other useful properties:
- Primary expansion - the sealant increases in volume up to 50 times in a few minutes.
- Secondary compaction continues for some time; high-quality sealants do not shrink or form gaps.
- The substance firmly adheres to surfaces of different nature and structure - concrete, wood, cement, cinder block, brick.
Foam is used to seal cracks, seal gaps, install doors and windows, seal joints and joints. After final hardening, the polyurethane substance acquires optimal strength, density and a uniform porous structure.
Sealant protection options
Despite the excellent characteristics and properties of polyurethane foam, all products in this category are destroyed when exposed to sunlight. First, the material acquires a brown tint, decreases in volume, and then gradually spills out of the joints and gaps. Polyurethane foam in the sun is destroyed by sunlight. Negative processes can last from a year to several years. This depends on the quality of the sealant, the angle of exposure to ultraviolet radiation, the thickness of the applied layer and other factors. How to protect mounting foam from the street from UV rays:
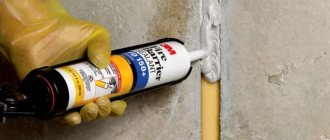
- Treatment with putty compounds. These include liquid plastic, finishing plaster with the inclusion of frost-resistant additives, window putty with the addition of liquid glass. The mixture is applied with a spatula from bottom to top along horizontal and vertical seams.
2.You can paint the installation sealant with paint or treat it with varnishes for exterior use. The best way to protect a polyurethane product is an acrylate composition, which has high adhesion to installation sealants. To obtain long-term protection, the foam is first treated with putty, and then with acrylate paint.
3. Mounting tape. This is a temporary measure, since the material will be constantly exposed to precipitation and temperature changes. In a hardware store, you can choose adhesive tape to match the color of the window frames or the frame of the front door. But every few months the tape needs to be re-glued.
Fire-resistant foam can be protected with a layer of plaster 8 cm thick. But the best option is to prime and paint the surface. To prevent the destruction of the polyurethane foam, a cement-sand mortar is sometimes used, to which a small amount of white grout is added to improve decorative characteristics.
On video: Protecting foam from ultraviolet radiation.
Features of polyurethane foam protection from the sun
Some repair tips seem obvious, but the truth does not fade with repetition. Before you putty the polyurethane foam or tint its top layer, wait until the composition has completely dried.
Further, protecting the polyurethane foam from sunlight and atmospheric adversities begins at the preliminary preparation stage, namely:
- First you need to decide how to protect the polyurethane foam - putty, special tape or paint. The fact is that for putty or other volumetric protection you will need to cut a recess in the sealant; if you are not used to it, this is difficult. Paints, tape and varnishes are applied to a flat surface;
- Using a sharp knife, cut off any excess material protruding beyond the dimensions of the slope or jamb. It is most convenient to take a special shoe knife with an oblique triangular blade - then it is easier to maintain an even cut line. And don’t rush to quickly cut off the sagging. This is dangerous due to accidental cuts to hands, feet and damage to hardened foam or a brand new frame;
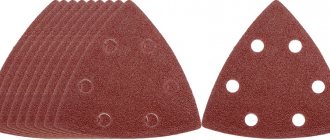
- After the cutting stage, the grinding procedure begins (it is not needed when puttying seams). The dried foam is cleaned with fine sandpaper. You will have to act manually and carefully - grinding mechanical devices can damage the frame, slope, door jamb, etc.
Protection of polyurethane foam: basic repair methods
Any polyurethane foam will decompose when exposed to sunlight. Initially, this looks like a darkening of the material, after which it becomes brittle and falls out of the cracks, like leaves in the wind.
Of course, even the maximum four years is an unacceptably short period of time for a major overhaul. And replacing windows, doors, installing ventilation, etc. must be no less durable than installing a shower tray - it makes sense to create comfort for decades to come with your own hands. When the preparation of the outer layer of foam is completed, we proceed to process it using one of the selected methods:
- Putty. How to cover polyurethane foam on windows? Firstly, modified finishing plaster - with the addition of frost-resistant additives. Secondly, with special liquid plastic. Thirdly, ordinary window putty with the addition of liquid glass. All compositions are applied from the bottom up with neat strokes using a regular spatula, the excess is wiped off with a sponge;
- Special mounting tape. The fastest and cheapest method of protection is also the most questionable from an aesthetic point of view. Even if you choose the adhesive tape to match the color of the frames, you won’t be able to paint over it (painting compounds will cause the tape to peel off). If you are ready to glue all the joints with new tape every few months, you can try a quick decoration;
- Paints and varnishes. It is best to choose an acrylate paint composition; it has good adhesion to polyurethane foam. The paint is applied with a thin brush, moving from bottom to top to the corner of the frame or jamb. If you want especially durable protection of the foaming sealant, you can combine putty and acrylate painting - then the service life of the polyurethane foam will be comparable to the durability of the entire house.
Why do we need protection?
The use of foam helps solve various construction and repair issues. The composition penetrates deeply into the surface being treated and adheres reliably to it. The connection can withstand significant mechanical and deformation loads. Under the influence of external factors, the installation product loses its qualities. The structure of the sealed composition is influenced to a certain extent by precipitation, but most of all the foam needs protection from ultraviolet radiation. Using a protective layer allows you to:
- Extend the service life of the sealant.
- Prevent moisture from getting on the foam.
- Maintain the integrity of the structure of the substance.
- Prevent the formation of mold and mildew.
- Give the surface a decorative look.
To effectively protect the foam from precipitation, primers and impregnations are used. The substances penetrate deeply into the porous structure of the foam substance and, after treatment, do not allow water to pass through. The sun coloring composition is better placed on the primer layer. A primer alone cannot provide UV protection, but it will prevent moisture penetration.
What do we protect polyurethane foam from?
Polyurethane foam is an excellent sealant. It firmly connects almost all building materials. You can foam concrete surfaces, block, brick, plastered, wooden, etc. Foam not only fills voids, but also protects the room from heat loss and performs waterproofing and soundproofing tasks.
But the quality of polyurethane foam, such as strength, is fully manifested in certain conditions. More precisely, foam is susceptible to the influence of precipitation, chemical reagents and ultraviolet rays. Under the influence of external factors, the installation sealant rapidly loses its strength characteristics.
After three to four years, the unprotected foam begins to crumble and crumble. Voids and cracks form in the seam. And the polyurethane foam should “work out” for more than a dozen years!
When the sealant dries, it turns slightly yellow. This is fine. But if the foam turns dark orange, yellow-brown, then the process of destruction is in full swing. You can check its stage by picking up the foam with a knife. In any case, when painting this way, it is recommended to completely remove the damaged sealant and re-seal the seam.
Puttying process
After choosing a protective agent, the foamed surface should be prepared for processing. Even with the most careful foaming, the installation sealant does not apply evenly as a result of the composition increasing in volume. Excess foam must be cut off with a knife. This can be done half a day after applying the product. The puttying process is easy to perform:
1. It is convenient to cut the foam with a knife with a triangular-shaped oblique blade.
2. Remove excess installation that extends beyond the boundaries of the slope.
3. It is necessary to go deeper into the thickness of the layer - a place for putty.
4. Foam for painting should be sanded with sandpaper.
5. If the surface is treated with putty, sanding is not necessary.
6. The surface is impregnated with a primer and allowed to dry.
7. Cover the polyurethane foam on the outside of the window along the joint with masking tape.
8. Apply the putty in a thin layer - first the starting layer, then the finishing layer.
For more reliable protection, after the putty has dried, the mounting foam can be painted with acrylate paint. The work must be done carefully so as not to stain the frames, double-glazed windows, or the front door; it is convenient to cover the gaps with masking tape. The tape is removed after the putty has dried or painted, depending on the chosen method of protection.
How work is done to protect polyurethane foam.
If you decide to use putty to protect the polyurethane foam, then the algorithm for your actions will be as follows. First, wait until the polyurethane foam has completely dried; this process usually takes about 10 hours. The remaining foam that protrudes above the window level must be cut off with a special construction knife with a sharp oblique blade. When removing excess foam, you need to go deeper into it a couple of centimeters. Clean the surface of the assembly seam from debris and prime it. When the primer has dried, you can apply putty, just do not make a thick layer. Wait for the primer to dry, then apply the finishing coat of putty.
Now you need to clean the putty surface with sandpaper, prime and paint. If you do not use putty, then cut the foam flush with the window, sand it with sandpaper and remove all dust. After this work, you can paint the mounting frame. For this technology, it is better to choose an acrylate coloring composition. It must be applied from the bottom up, moving towards the corner of the frame or jamb. If you use two methods of protecting polyurethane foam at once - putty and paint, then the service life of the polyurethane foam will not be inferior to the service life of the building itself.
Here are some simple ways to protect polyurethane foam, however, remember that high-quality protection is only possible if the work is done in a timely manner.
Protection Features
To increase the service life of the sealant, you need to choose a high-quality putty. The working mixture is prepared according to the manufacturer's instructions - the proportions of the solution with water are indicated on the packaging. The solution should have a thick, uniform consistency. The mixture must be applied perpendicular to the seam - this ensures a more dense filling of voids and cracks.
The putty is distributed not level with the height of the joint, but with a slight excess. Before painting, the excess compound is sanded with sandpaper or construction mesh for finishing work. The putty should be rubbed down after it has completely dried so that the solution does not “smear.” The result is a smooth base on which the paint lies smoothly. It must be resistant to low temperature and moisture, suitable for external processing of products and structures.
Protection of polyurethane foam by puttying step by step
To hide the mounting foam, any of the existing types of putty is convenient. However, the preparation process and the proportions of dilution of the mixture depend on the choice of manufacturer and specific model.
After mixing is completed, the mixture has acquired a thick, uniform consistency; it is applied to the polyurethane foam.
They make a small, protruding excess, which is then eliminated with a spatula, but you should not go too deep, otherwise you will get a notch, a depression, which will have to be eliminated again.
The excess, when it dries, is simply wiped off using sandpaper or a special construction mesh, which is used for finishing work with plaster.
Begin washing after the putty has completely dried. In this case, the chances of causing damage are minimal; moreover, apply force to erase in order to quickly obtain the desired result.
Other methods of protection
If you need to process a large number of seams filled with polyurethane sealants, using putty is not always appropriate. This requires a lot of consumables and time. A simple option to protect the polyurethane foam from sunlight is to make a cement mortar. To ensure that the seams do not stand out against the general background of the wall, white grout is added to the mixture. After the cement has dried, the surface is painted in a suitable color.
How else to protect the foam:
- Trim off excess mounting sealant.
- Rub in the dense substance evenly.
- Apply light paint in several layers.
In this case, it is not necessary to use putty. A thick layer of paint will protect the foam from ultraviolet radiation for a long time. If the decorative component is not important, and the foamed area is constantly in the shade, the mass is only trimmed and not treated with anything else. Also, UV rays do not affect sealant covered with metal sheets, plasterboard, boards or roofing felt.
Basic recommendations
If you are not sure that the foam will not be exposed to sunlight outside, the sealant must be puttied and painted. Experienced craftsmen advise adhering to some rules in their work:
- The putty mixture must be thoroughly mixed until a homogeneous thick consistency is obtained.
- To speed up the process, you can use an electric drill with an attachment or a construction mixer.
- A small depression is made in the foam under the protective layer. And the mixture itself is applied with a slight excess.
- For external work to protect polyurethane foam, use frost-resistant putty in a layer of at least 5 mm.
- The tool must be cleaned immediately after work - dried putty is difficult to remove.
According to its technical characteristics, polyurethane foam is ideal for filling joints and gaps. The service life of the material increases significantly when a protective layer is applied against UV rays. Surfaces can be treated with putty and acrylate paint, which is “not afraid” of frost and moisture.
UV protection of foam (2 videos)
Protection of polyurethane foam with plaster: all the nuances
When preparing the solution, you should be careful, stir the mixture thoroughly to eliminate the appearance of lumps that will spoil the aesthetics.
Depending on what functions the plaster layer performs, prepare a place for it. If it is protective, then remove the excess foam with a recess of several centimeters in order to plaster it efficiently. If the layer is decorative, then a large recess is not needed; a depth of no more than a centimeter is sufficient.
If you need to hide the foam outside, take into account that even the impossibility of moisture getting on the protective layer does not eliminate the chance of damage from other atmospheric factors. Severe frost also causes damage to plaster. You should take care of this problem in advance and purchase a frost-resistant mixture. If the work is to be done indoors, this is not necessary.
Regardless of which recess is prepared for plaster, the holes are plastered so that the layer of the mixture is at least 5 mm. If you use a smaller layer, this will lead to the appearance of cracks on the surface of the plaster and its subsequent destruction.
If the layer exceeds this value, then the plaster is applied in several stages, waiting for the initial drying of the previous layer.
Grouting is not done after the plaster has completely dried; it is enough to allow time for proper hardening.
When working with plaster, do not forget to use gloves and glasses. Dried mixture on the skin is difficult to wash off, and contact with the eye leads to serious consequences.
Don't forget to clean the tools after completing the work. If the mixture has not hardened, do this simply by washing them in water; if it has dried out, it will have to be cleaned mechanically.
How to protect polyurethane foam from external influences
We are asked:
Good
evening, can you tell me how to protect the mounting foam, which is located on the outside, from exposure to UV rays and precipitation?
We answer:
Hello
! Indeed, the question of how to protect polyurethane foam from external influences often arises in modern repairs. True, to be fair, it must be said that such a need arises in cases where units using polyurethane foam are not properly conceived or are not brought to full completion. Therefore, the simplest recommendation that can be given is to design the assembly in such a way that the foam is hidden by the finishing structure - an overlay, cladding, etc. For example, the seam where the window joins the opening is closed by installing external and internal slopes.
An equally common and reliable option is plaster. Plaster compositions, both gypsum and cement, reliably adhere to polyurethane foam (this plastic forms the polyurethane foam) and form a durable, protective coating.
For reliability, I recommend adding PVA emulsions to the plaster mortar (approximately 7-10% of the mixing water). It would not be amiss to reinforce the plaster with fiberglass mesh, especially if the applied layer does not exceed 5-7 mm. For exterior work we use cement-based mixtures; for interior work, gypsum is also suitable.
The best protection is plaster followed by painting
A good effect is achieved by using special repair mixtures and universal cement-based compounds with the addition of water repellents (say, CN-83 produced by Ceresit). Such compositions are not cheap, but they have a number of advantages: they are stronger, set faster, are water-resistant, and are frost-resistant.
If a gap limited by structures is being filled, then the foam is selected to a depth to provide space for a reliable layer. After drying, the plaster is painted with acrylic or alkyd paints.
For a durable layer, excess foam must be cut off
Frost-resistant silicone sealant is also used to seal narrow cracks.
Finally, as the cheapest option, we can recommend simply painting the foam in several layers with acrylic paint. If this is an external seam, then a façade seam, any one from the inside will do. But it is water-polymer, since both alkyd and nitro enamels destroy polyurethane foam.
How to cover with polyurethane foam for protection
There are a lot of ways to hide the polyurethane foam so that it doesn’t damage it or interfere with its aesthetics. A common one is to putty.
This method is simple. One thing, BUT, these materials do not fit together, so plaster is applicable in 2 cases:
- If fire safety is at the forefront. Then apply a layer of plaster, which is 80 mm. In this case, use putty only with fire-fighting foam, which resists fire for 120 to 240 minutes. Although the fire inspectorate will still have complaints;
- For decorative purposes. In this case, putty is not so much protection, but as an aesthetic coating. This is the way to finish the work, making it aesthetically pleasing and pleasing to the eye.
If additional protection from mechanical stress is provided, plasterboard sheets are used. The seams between them are plastered, the foam is hidden. Then they are not afraid of damage and shedding of the plaster.
Protection of polyurethane foam: basic repair methods
foam when exposed to sunlight . Initially, this looks like a darkening of the material, after which it becomes brittle and falls out of the cracks, like leaves in the wind.
How to cheaply protect polyurethane foam from the sun? My experience.
Of course, even the maximum four years is an unacceptably short period of time for a major overhaul. And replacing windows, doors, installing ventilation, etc. must be no less durable than installing a shower tray - it makes sense to create comfort for decades to come with your own hands. When the preparation of the outer layer of foam is completed, we proceed to process it using one of the selected methods:
- Putty. How to cover polyurethane foam on windows? Firstly, modified finishing plaster - with the addition of frost-resistant additives. Secondly, with special liquid plastic. Thirdly, ordinary window putty with the addition of liquid glass. All compositions are applied from the bottom up with neat strokes using a regular spatula, the excess is wiped off with a sponge;
- Special mounting tape. The fastest and cheapest method of protection is also the most questionable from an aesthetic point of view. Even if you choose the adhesive tape to match the color of the frames, you won’t be able to paint over it (painting compounds will cause the tape to peel off). If you are ready to glue all the joints with new tape every few months, you can try a quick decoration;
- Paints and varnishes. It is best to choose an acrylate paint composition; it has good adhesion to polyurethane foam. The paint is applied with a thin brush, moving from bottom to top to the corner of the frame or jamb. If you want especially durable protection of the foaming sealant, you can combine putty and acrylate painting - then the service life of the polyurethane foam will be comparable to the durability of the entire house.
Sources:
https://xn46-vlcakkhgh5a.xnp1ai/ogorod/chem-pokryt-montazhnuyu-penu-dlya-zashhity.html
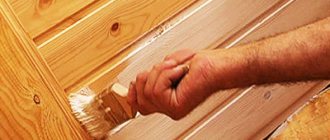
How to paint polyurethane foam outside
It is necessary to paint the polyurethane foam, how to do it correctly and what paint is suitable.
First, you need to decide where you need to paint the foam, indoors, or is it outdoor work (for example, garden figures made from polyurethane foam, or when caulking they used foam instead of tow, the foam must be protected from ultraviolet radiation).
In general, of course, it is more correct to protect the foam not by painting directly, but, for example, by plastering the foam, or by puttingty using a paint mesh and painting (after priming) over the putty.
If we are talking about exterior work, then we need facade paints, if we are talking about interior work, then paints for interior work, or universal paint.
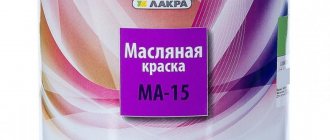
I tried to paint the polyurethane foam with oil-based paint, the paint did not adhere well, there was partial peeling, and it was not durable.
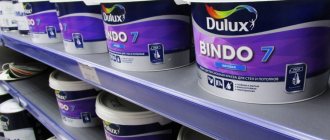
Stopped at this one
For external and internal works.
You can immediately buy a primer-paint, or a separate primer; if the paint is acrylic, then an acrylic primer is also needed.
We clean the surface of dust, then (if the foam is not trimmed) apply a primer and dry it.
The paint is aerosol, so it is applied by spraying.
Shake the can of paint and apply it to the surface in an even layer.
Drying and the second layer, usually the finishing one.
In the end we get a durable coating, the paint is moisture resistant and resistant to various weather conditions.
Of course, this is not a paint for foam (such a thing simply does not exist), but it “lays” well on the foam; a primer under the paint improves adhesion, among other things.
What do we protect polyurethane foam from?
Polyurethane foam is an excellent sealant. It firmly connects almost all building materials. You can foam concrete surfaces, block, brick, plastered, wooden, etc. Foam not only fills voids, but also protects the room from heat loss and performs waterproofing and soundproofing tasks.
But the quality of polyurethane foam, such as strength, is fully manifested in certain conditions. More precisely, foam is susceptible to the influence of precipitation, chemical reagents and ultraviolet rays. Under the influence of external factors, the installation sealant rapidly loses its strength characteristics.
After three to four years, the unprotected foam begins to crumble and crumble. Voids and cracks form in the seam. And the polyurethane foam should “work out” for more than a dozen years!
When the sealant dries, it turns slightly yellow. This is fine. But if the foam turns dark orange, yellow-brown, then the process of destruction is in full swing. You can check its stage by picking up the foam with a knife. In any case, when painting this way, it is recommended to completely remove the damaged sealant and re-seal the seam.
Polyurethane foam - properties of the material and its varieties
The consumer characteristics of polyurethane foam for sealing long linear gaps make one sincerely perplexed as to how they managed without it before, before the era of developed chemistry. Basic properties of foam sealants include:
- Excellent adhesion, and selective in nature. With the main building materials (concrete, brick, cinder blocks, cement, plaster, etc.), polyurethane foam forms a very strong, virtually permanent connection . But it sticks much worse to moisture, ice, polyethylene, silicone and oiled surfaces. This eliminates accidental sealing of foreign elements;
- The volumetric primary expansion when the composition “leaves” the cylinder reaches 50 times, and for the most modest manufacturers - no less than 20 times. The process takes only a few minutes and proceeds quickly, with a characteristic hissing and violent filling of the sealed openings. Just one spray is enough to fill deep and long joints. This is very convenient when working at heights, in hard-to-reach places, when plastering slopes with your own hands, when sealing ventilation pipes, when repairing balconies, etc.
- Solid secondary seal. It is not enough to know how to seal the foam - it is important to consider that it changes in volume for several hours after application. For cheap manufacturers, this change is of a shrinkage nature - as a result, gaps may form between the door jamb and the dried foam. High-quality sealants are not characterized by the formation of “slot gaps” after hardening;
- The viscosity and full installation volume of polyurethane sealants strongly depend on application conditions - temperature and humidity, the presence of wind, etc. There are “all-season” modifications of foam compositions, but they are optimally used at air temperatures from +5 ˚C to +35 ˚C, moderate humidity and in calm weather.
In addition to direct installation tasks - that is, sealing gaps, filling seams, insulating dissimilar joints, etc. – hardened foam has good thermal insulation and acoustic protection.
When installing window frames made of wood and plastic, pay attention to the flammability class of the sealing mixtures used; it can be fire-resistant, flammable and self-extinguishing.
When labeling the flammable properties of dried polyurethane foam, some manufacturers show a certain cunning. They write on packages, cans and adapter tubes only the numerical name of the flammability class, without verbal explanation. The average consumer may not know that:
- B3 is a flammable composition that ignites even better than a wooden frame;
- B2 is a self-extinguishing foam, and it can smolder for quite a long time;
- B1 – non-flammable mounting composition. Of course, the non-flammable property will affect the price of the sealant in the direction of a significant increase.
The greatest damage to polyurethane sealants is caused by direct sunlight. The influence of atmospheric precipitation and mechanical vibrations also adversely affects the durability of the treated joint, but to a lesser extent. Before sealing the polyurethane foam, you need to make sure that the additional protection is resistant to ultraviolet radiation.
Polyurethane foam is a sealant that connects building materials. It is exposed to ultraviolet radiation. The first sign of its destruction is a color change from orange to brown.
Polyurethane foam protection
Ways to protect foam sealant:
- Sealing tape (PSUL). It is often used in new buildings when installing windows, which is glued to the frame at the time of installation.
- Diffusion waterproofing tape. This material is used for waterproofing joints and seams. This tape comes in two types: single-sided (with one adhesive base) and double-sided (adhesive strips on both sides), which protect the base from condensation and moisture. They are applied before installation begins, before applying foam.
- Sealing materials: plaster, putty, cement and sand mortar, polyurethane sealant, liquid plastic, acrylate paint or window putty.
The most reliable option for protecting the foam is to use putty followed by painting with an acrylate composition.
How does polyurethane foam protect itself?
Protection of polyurethane foam occurs at all stages of window installation. Externally, polyurethane foam is protected from climatic precipitation and ultraviolet radiation, and indoors from condensation and steam. Now in new buildings they use the so-called PSUL - this is a pre-compressed sealing tape. It should be glued to the window frame before installing the window. If you want to protect the foam in older homes, you can use diffusion waterproofing tape. This tape is glued on both sides and works like a membrane. Such a tape can protect the polyurethane foam from condensation inside the room and from moisture outside. Both the first material and the second must be glued before installing the window and applying foam.