Types of decorative stones for wall cladding
The classification of decorative stones is simple: they are either artificial or natural. The latter have a high price, so they are not so in demand. Especially if the budget is tight.
But the artificial version is a popular material. It is presented on the market in two modifications:
- made of concrete;
- from plaster.
They try to use the second one for finishing rooms, but not wet ones. Or for cladding external walls located under a canopy or a wide roof overhang. The thing is that gypsum is a hygroscopic material, that is, it absorbs moisture well, under the influence of which it reduces its technical and operational characteristics. But this variety has its advantages :
- low price;
- low weight, that is, not such large loads on the surface of the walls;
- ease of installation;
- ease of cutting to required sizes.
The concrete version has high strength, so this stone can be laid in any room. But it is more expensive than plaster and its weight is large.
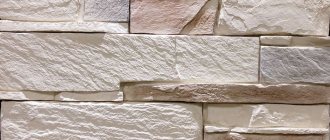
As for the varieties of appearance, today both artificial and natural materials are presented on the market in a huge assortment. The main thing is to choose the right one for the design of the facade or room.
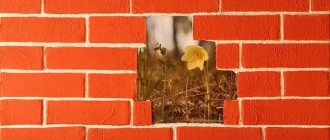
A huge variety of decorative stone Source avatars.mds.yandex.net
Cladding of plasterboard and wallpapered walls
It is not recommended to glue this facing material to wallpaper. First, the walls are trimmed with stone, and then wallpaper is pasted. The slabs of the side rows are glued in such a way that they overlap the wallpaper by no more than 2 cm. If the walls are already covered with wallpaper, some of the canvases are removed for finishing with stone.
Plasterboard walls can withstand loads from 10 to 60 kg per 1 m2. This allows you to stick decorative stone slabs on them, which are lightweight. To ensure reliable fastening, many experts recommend reinforcing the structure with reinforcing mesh. Especially when the load per 1 m2 is 30 kg or more.
Stone wall cladding technology
Before placing decorative stone on the wall to be finished, it is necessary to prepare the latter. What construction operations will need to be carried out for this?
Preparing the wall for cladding
It should be noted right away that the wall surface should not be as flat as possible. Because stone is a material that can be used to level any surface. But some requirements for evenness are still imposed. Because the evenness of the plane will depend on the consumption of the adhesive composition on which the stone is “set”. And the smoother the wall, the less glue you will have to use.
As for the adhesive component, cement or gypsum-based adhesives, or liquid nails can be used to cover walls with stone. Each type has its own consumption, which is indicated on the packaging. Therefore, this material is purchased based on the area of the wall that will be decorated with stone slabs.
Attention! If the wall still needs to be leveled, it is better to do it with plaster solutions rather than putty. The latter can be used if gypsum material is chosen for finishing.
Leveling the wall with plaster Source b-online.ru
See also: Catalog of house projects with artificial stone finishing
So, the wall is leveled, now it must be covered with a deep penetration primer. Her responsibilities include increasing the adhesive properties of the plastered wall, plus increasing the strength of the plaster layer. After all, stone is a heavy material, which means that the plaster will be subject to serious loads. If the walls are finished in damp rooms, then additionally before applying the primer it is recommended to use a liquid waterproofing material, which will create a moisture-proof film on the wall.
Some craftsmen additionally install a mesh on the wall, which is attached to the surface with self-tapping screws. This increases the bearing capacity of the surface.
So, we've sorted out the preparations. Let's move directly to the question - how to put a stone on a wall.
Mesh for plaster to increase strength Source stroykarecept.ru
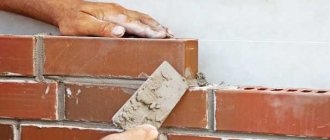
Wall cladding with stone
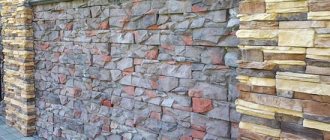
Facing stone is a tile material. Accordingly, the technology for laying it is no different from the methods of using other tile materials. For example, ceramic tiles, facing bricks and others.
But there is one very important nuance here. If they try to lay ceramics and bricks evenly, adhering strictly to the evenness of horizontal and vertical seams, then this is not necessary with stone. In this case, you can mix stone tiles according to size. That is, lay both large and small sizes on one wall. There is, of course, a certain difficulty in this in terms of fitting material with different sizes. Therefore, it is recommended to first lay out the cladding on the floor and then transfer it to the wall plane.
The stone can be placed in discord Source www.interkam-pro.ru
See also: Catalog of companies that specialize in facade materials
Where to start
First of all, you need to purchase tiles based on the surface to be covered, taking into account the cutting of the material and damage during transportation. Therefore, 10% must be added to the wall area. Please note that corner tiles are sold by the meter, while regular tiles are sold by the square meter.
Next, an adhesive composition is purchased, which is prepared strictly according to the instructions indicated on the package. It is better to prepare the glue in portions, because it hardens quickly.
Before laying artificial stone, you need to decide where to apply the glue: on the wall or on the back surface of the tile. In principle, it makes no difference whoever is comfortable. Here it is important to apply the adhesive component to a certain thickness - no more than 5 mm. To do this, use a notched trowel with slots of this size.
Glue is applied to the stone Source i.ytimg.com
Laying stone
Laying tiles on the wall should start from the corner. The direction of facing is from bottom to top. Although some masters prefer to do it the other way around. They believe that this is how it will be impossible to stain the stone elements located below the row being laid.
If the finishing needs to be done incompletely, that is, part of the wall or not starting from the floor, then a support must be installed under the stone tiles. More often this is a metal profile that is used for installing plasterboard boards. It is subsequently removed as soon as the finish adheres well to the wall surface.
As for the seams between finishing elements, there are no strict standards here either. Masters advise sticking to a width ranging from 5 to 8 mm. And the larger the stone, the wider the seam.
An important component of the process is facing the corners. For this purpose, specially made corner elements are used, which are more expensive than regular tiles. But it is with their help that the process of facing corners is greatly simplified. Although it should be noted that finishing a corner with ordinary ordinary elements is not a problem. The labor intensity of the process simply increases due to cutting the stone. Accordingly, material waste increases. The masonry technology itself is no different from the basic one.
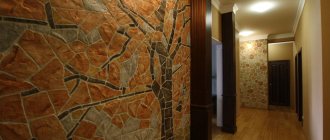
Decorative stone in interior decoration
Before laying decorative stone on the wall, it is recommended to review the texture options in the interiors in the photo. Imitation of natural stone fits perfectly into any style, from classic to modern. In many cases, this is the best solution for finishing walls and doorways, arches, fireplaces, and partitions.
Natural and artificial stone harmonizes with the design of a private house or apartment:
- Long corridor adjacent to the hallway;
- Kitchen combined with living room;
- Small hallway;
- Insulated loggia;
- Bathroom;
- Billiard room with fireplace.
If desired, you can partially lay out a wall near an aquarium, in a greenhouse, a mini-pool, or part of a “living” wall with green plants in an eco-style.
The right choice of texture can add a touch of aristocracy, extravagance or cold urbanism, depending on the design concept. Laying artificial stone on the wall in an apartment is the easiest way to update the interior.
Imitation of natural stone fits perfectly into any style, from classic to modern.
Pros and cons of application from living room to balcony
It is important to lay decorative stone on a flat surface. All difficulties with the implementation of the technology are more than compensated for by the aesthetics and long-term operation of the coating.
Advantages of installing decorative stone on the wall yourself:
- When laying “wild” stone (other varieties) yourself, repairs are relatively inexpensive;
- The material is quite reliable, although it is produced on the basis of concrete and gypsum;
- The coating does not require complex care (vacuum cleaning and washing with a soapy sponge);
- Environmentally friendly raw materials do not contain harmful additives;
- A “stone-like” wall can be easily restored if a part is destroyed by mechanical force;
- Synthetic stone is lighter than its natural counterpart, so it is possible to lay the stone on a wall made of plasterboard or partitions made of foam blocks;
- The boards are not subject to corrosion and do not contribute to the development of mold, mildew, or pathogenic microflora;
- In terms of aesthetics, the stone is completely self-sufficient and suitable for various design solutions.
It is worth remembering the disadvantages of such cladding. Some methods of installing artificial stone on a wall are difficult to perform without the help of specialists. Special equipment is required for cutting slabs.
The boards are not subject to corrosion and do not contribute to the development of mold, mildew, or pathogenic microflora.
Sealing seams
This is another important stage of wall cladding with tiled material, which should not be overlooked. For this, gypsum putty is usually used, which is applied to the seams with a spatula. Today, more and more often, specialists use large plastic syringes. They are easy to use, and the finish itself never gets dirty, which cannot be said when using a spatula.
Since gypsum putty is white in color, it does not always satisfy the customer. The situation can be corrected with water-based paint, to which pigment is added. The latter is a huge variety of color shades. So choosing the right color will not be difficult. The paint is applied with a thin brush in one or two layers.
Sealing joints of stone cladding Source test.ecostoneart.ru
Finishing
And the last thing that is recommended when the question of how to lay the stone is raised is the protection of the cladding itself. Usually acrylic varnish is used for this. It is simply applied to a wall already finished with stone in two or three layers.
Stages of constructing a retaining wall made of natural stone with your own hands
When planning to create stone retaining walls in your garden, you should figure out what parts the structure will contain. To build it you will need:
- Foundation is the part of the wall that is located under the ground. The foundation will bear the main load coming from earth pressure.
- Body. This is the name of a vertical structural element (the wall itself).
- Drainage. This is a drainage system that is needed to strengthen the strength of the wall and prevent water from destroying the structure.
Also an important step is the calculation of the retaining wall.
Since the structure will be affected by soil pressure, it is designed to have sufficient resistance to this level of pressure. If you do not carry out proper calculations, there is a possibility that the soil will collapse along with the wall. In most cases, a retaining wall on a stone site is created in height from 30 centimeters to 1 meter. You can install such structures yourself, without the help of specialists.
If the area intended for the stone composition has a sufficiently large surface difference, and the height of the future project is more than 1 meter, then geotechnical surveys will be required. In this case, you will need the help of specialists.
Creating a retaining wall from stone: where to start
The first thing you need to do is prepare for the construction of the foundation. For capital structures, the foundation should be filled with cement mortar, but in our case, you can get by with a cushion of pebbles or gravel. Make sure that its thickness is not less than 1/3 of the height of the structure. You will definitely need to dig a trench. Its depth should be 20-35 centimeters greater than the calculated norm. When the trench is dug, it is advisable to compact the earth and fill it with a bed of pebbles and gravel, which also needs to be thoroughly compacted.
Do not forget about the construction of drainage. The first creation option is to lay plastic pipes that will pass through the wall and go outside. The second method is simpler; it involves forming a vertical hole between the stones in the wall. This is where the water will flow.
Stage two: laying the stone
Laying stones can only be done after the cushion has been completely compacted. Large cobblestones should be laid first. Then the second layer is completed; it will be built at a slope of 5-10 degrees. Thanks to this solution, the structure will be quite durable.
Stones between the rows can be connected, for reliability, using cement mortar.
When forming the masonry, make sure that there are no vertical or long cracks left in the wall. Otherwise, it will affect the strength of the structure itself. The gaps that remain between the cobblestones must be filled with soil. Grass seeds are added to it. A retaining wall made of natural stone can also be decorated with moss.
"Dry" retaining wall made of stone
Most retaining walls are created by what is called dry planting. This type of wall is built from flat-faced stones or heavy boulders and is not bonded with any mortar. The weight of the stone itself will be the factor holding the wall in place.
Using dry masonry, several cobblestones are driven into the ground with a long part. Thanks to this solution, the structure is securely connected.
Large gaps in structures can be fixed with wire mesh, and moss mixed with soil is placed inside. To prepare such soil you will need:
- 1/3 part loamy garden soil (or purchased topsoil);
- 1/3 part sphagnum peat moss;
- 1/3 gravel or coarse sand.
Having formed such soil, it fills the formed cracks between the stones. It is very important that the dry stone wall is tilted back - by 10-15 degrees. This will be able to retain natural precipitation, directing it between the stones.
Such “dry” walls allow you to create incredible stone structures.
Ground cover plants are carefully planted in the cracks with soil so as not to damage the roots. While the plants take root, they should be watered systematically. To do this, it is better to use a small type sprayer. Strong splashes of water can wash crops away from the desired location.
Do-it-yourself retaining wall made of rubble stone
To form the structure, you will need to take strong stones that can withstand powerful levels of pressure. Granite is usually used for such purposes, but sandstone can be used. To create such a structure, you will need to form a solid foundation, which is filled in advance.
After the foundation is formed, you can proceed to the masonry process. The wall is laid at a slight angle, which allows it to withstand pressure well. Corrugated pipes are laid in front of the wall, which will serve as drainage. Remember also about waterproofing; it is placed on top of the soil and prevents moisture accumulation.
Stages of construction of a stone structure:
- The foundation stones are the large, flat stones that will serve as the base for the wall.
- Once you select these stones, place them in several different orientations to see which one looks and fits best. Building this type of wall is essentially a big puzzle, so try as many combinations as possible.
- Base stones should be placed with care to ensure the tops are level. This will give you a nice flat surface on which to build the rest of the wall.
- In the masonry, cobblestones should be tied so that oblong openings do not appear in the wall. They affect the strength of the structure.
- The higher the wall rises, the less stones are used.
- After the structure reaches its full height, the voids between the stones can be filled with earth, moss or small pebbles.
Knowing how to make a retaining wall from stones, you will be able to create a decorative, functional element that will perfectly complement the landscape design of your site.
Brick wall decoration
Brick has also always been considered an artificial stone. And today this building material is very popular when the task is to finish the walls. You need to solve the problem of how to lay decorative bricks in exactly the same way as in a situation with stone.
That is, first of all, the wall plane is prepared. And then the material is installed taking into account all the rules described above. It just needs to be noted that the brick must be laid so that all the seams match exactly both horizontally and vertically. Therefore, one of the main tools in this process is the building level. And although experienced craftsmen can carry out brick finishing almost by eye, it is not recommended for novice craftsmen to let go of the level.
Options for using natural stone in masonry (photo)
Leave your tips and comments below. Subscribe to our newsletter. Good luck to you and good luck to your family!Using Flexible Stone
This finishing material has recently appeared on the market. It has not yet gained particular popularity, but many designers began to use it when decorating interior walls. Firstly, this is not a stone in the full sense of the word. This is a composite material based on fiberglass, and the outer finish is a thin section of rock, usually sandstone. That's why this material looks so much like stone.
It is actually flexible, which makes it possible not to cut it when facing corners. It is simply bent to the shape of the corner of the room. And it doesn’t matter whether it’s an external or internal corner. An adhesive composition is also used as fasteners.
Advantages:
- light weight of the product;
- long-term service life, manufacturer’s warranty – 35 years;
- withstands temperatures from -45C to +65C;
- it is an environmentally friendly material;
- ease of installation;
- ease of maintenance, which does not require large time and material costs;
- makes it possible to implement the most unusual projects.
There is only one drawback - the high price.
Step-by-step instructions for creating a stone fence
First you need to lay the foundation, just like for a brick wall. The minimum width of the stone wall should be 450 mm, and the foundation should be laid with a margin of 120 mm on both sides. After the foundation hardens, draw with a pencil the contours of the future stone wall.
Step 1
Feel like a sculpture, giving the stone the desired shape
Sort through the pile of stones and select potential "corner" or cornerstones that will hold the wall pieces. If there are no such stones among the mass of cobblestones, you can make them yourself. To do this, you need to chop off part of the material with a mason's hammer or an ax. Be sure to wear safety glasses and gloves when doing this work.
Step 2
Cornerstones - the basis of a stone fence
Apply the mortar to the foundation and install the corner stones in the appropriate places, strictly along the drawn lines.
Step 3
It is better to lay flat and wide stones first row
Continue placing stones between the two cornerstones as shown. It is not necessary to use stones of the same height or even size.
Step 4
For greater naturalness, you don’t have to adjust the stones to the level
Lay the stones as if you were laying regular brickwork. Use a level to ensure the corners are vertical. Bring the number of stones on one corner to the desired height and align it with the opposite corner. After this, you can stretch the rope between the two corners - they will serve as a guide for further laying.
Step 5
The stones have different heights and widths, so they should be stacked like a mosaic
Since the material used is non-standard, the parameters of the stone wall may vary slightly. After one side reaches a height of 500 mm, move on to the second part of the wall. It should also be about the same height. Use jumper stones for guidance. Knowing their height, the remaining (smaller) stones will be much easier to lay.
Step 6
Metal rods give the structure additional strength
Reinforce the stone wall with metal rods spaced 900mm apart. The height of the rods must be at least 450 mm. Free cavities are filled with fine crushed stone and cement.
Step 7
Dragon teeth - this is also sometimes called this decoration method
All that remains is to crown the stone wall with decorative elements. However, their role may be fragments of brick or slab. One of the simplest methods is to alternate small and large stones, which are installed vertically in the solution. Before the solution dries completely, you need to scrape off the remaining stones and cement with a spatula and brush.
How to glue stone to concrete walls
Stone is a heavy type of cladding. Weight 1 sq. m of large-format artificial stone can exceed 50 kg. Therefore, additional load will fall on the walls, foundation and soil foundation of the house.
Conclusion: include the option of stone cladding in the design of the house at the stage of its design, selection of the type of foundation and walls.
The most rational approach is to build a “box” of solid brick or concrete under the stone cladding . This will give a margin of safety. This is exactly what a portal user with the nickname swin1983 did.
swin1983
I built a modern house with a flat roof using monolithic technology. The foundation is FBS blocks laid below the freezing depth. Wall thickness – 140 mm. The “box” is insulated with extruded polystyrene foam and polystyrene foam 100 mm thick. The façade was finished with artificial stone. Some stones weigh 25 kg. I thought for a long time about how to stick such a stone so that it would not fall off.
swin1983 mansion.
House area 315 sq. m.
Main stages of construction:
- Construction of the foundation.
- Construction of walls and ceilings.
- Installation of insulation.
- Stone sticker.
Alexandr__RUser FORUMHOUSE
How did you glue the stone onto the façade?
swin1983
My stone gluing technology step by step:
- If the foam has yellowed from the sun, clean it with a brush.
- Mechanically attach the reinforced fiberglass mesh to the foam.
- Using a spatula, prime the surface with the same glue you use to glue the stone. Layer thickness 5-6 mm.
- Moisten the surface.
- Glue the stone to imitate random masonry. The gap between the stones is as thick as a finger. The bottom stone must have support.
- Sand the seams.
The user advises gluing the stone at an outside temperature of + 10 degrees Celsius and low humidity. It is better to grout the seams in the morning. The stones hung on the facade for several seasons and did not fall. The strength of the masonry is shown in the video.
For 1 sq. m of insulation it took 5-6 mushroom dowels 10x140 and 10x160 mm. If you are insulating the walls with EPS, you MUST sand it with a hacksaw on both sides. This will remove the smooth top layer from the slabs and improve adhesion to the adhesive mixture.
“Dry” and “wet” stone laying
Builders practice “wet” and “dry” masonry using a mortar based on:
- construction glue;
- sand-cement mixture;
- clay kneading
It is better to lay hewn stone of the same size on 2-3 levels without any mortar, carefully adjusting each block according to the shape of the adjacent material.
Garden and park hedges with dry stone masonry look very natural, especially if the back side is covered with earth to resemble natural terraces. The stone is gradually overgrown with growth and a picturesque landscape is obtained, reminiscent of the ruins of an ancient fortress or castle.
In “dry” masonry there is only a large stone of arbitrary shape, close to cubic. It is more important not only to fit each stone to each other, but also to calibrate the building material so that a wall is formed in width and height. If a stone fence is made to be filled with earth from the back side, then it is important to level only the front surface - using a plumb line. In the same way, you can make low laying of ceramic stone.
The largest stones are laid on the lower level, but the rows must be maintained, as with wet masonry. Such work is somewhat reminiscent of a puzzle connecting fragments, and dry masonry is no different. The voids or seams between rubble or stone blocks can be filled with compacted soil if it is low masonry in the form of a garden border or fencing for a flower bed. The bottom row of stones is sometimes partially dug into the ground, like a foundation.
For buildings more than half a meter high, only wet masonry is used, based on one of the types of binder mortar. If natural stone is used for low hedges in mixed-type agricultural buildings, for example, as the basis of adobe masonry, then it can also be fastened with a clay mixture with the addition of dry cement. This guarantees the masonry durability and stability.
Important: It is not recommended to mix sea sand into the stone masonry mortar. Preference is given to well-sifted river sand - it has the best characteristics for adhesion and mixing, and does not emit salt.
Benefits of stone finishing
Artificial stone is made from gypsum and cement; it imitates the structure of natural material and serves as an interior decoration for country houses and cottages.
Raw materials have advantages over other materials:
- They produce a large selection of colors and textures, the material is easy to match to any room design;
- environmentally friendly materials that are not susceptible to fungal infections are used for production;
- easy care;
- long service life, more than 10 years;
- light weight;
- relative ease of installation.
Gypsum-based products are suitable for use in dry, heated rooms, and cement-based material is suitable for finishing walls in kitchens, bathrooms, baths, and saunas.
Types of natural stone
Types and characteristics of natural material:
| № | Type of material | Characteristic |
| 1 | Quartz | Durable, has a long service life. Does not fade under the influence of ultraviolet radiation. Not subject to deformation. When processing, you need to spray the stone with water to reduce dust. The respiratory organs are protected with a respirator. |
| 2 | Sandstone | There are 3 shades: brown-chocolate, green, red. It can have a fine-, medium-, or coarse-grained structure. Hewn stones are placed on the wall in the form of a mosaic pattern, carefully selecting the details. |
| 3 | Marble | It is used for the production of decorative tiles, which are used to decorate large halls in restaurants, administrative and public buildings. It is distinguished by a rich range of colors. |
| 4 | Limestone | It is an alloy of stones of different sizes, laid in one row. It comes in pink, yellowish, white, and gray shades. |
Natural stone is more expensive than artificial stone and weighs more. Natural material looks beautiful when decorating large spaces.