The walls of some rooms in the house were painted with ordinary water-based paint. To ensure that the colors on the walls retain their former luster and shine for many years, we want to apply a water-based varnish on top. How to coat walls with water-based varnish?
It is extremely important to know that water-based paint is not classified as “ordinary paint” or “not ordinary water-based paint”.
Water-based paint can be:
If by “ordinary” you meant silicate water-based paint (not moisture resistant), then there is only one answer, no way.
Water-based varnish will simply remove the paint.
If your walls are painted with moisture-resistant water-based paint, then which one?
Well, in general (so as not to guess), the surface is cleaned of dust and dirt, it makes sense to even wash the walls and dry them.
Next (if it is acrylic moisture-resistant water-based paint),
Water-based varnish is applied both with brushes and a roller, most often in two layers with drying between layers.
Remember about the concept of vapor permeability of some water-based paints; there may be a problem after applying varnish to the paint.
Only acrylic water-based paint needs to be coated with water-based varnish; other types of emulsions have their own film after finishing work with them, so they do not need additional protection. In terms of composition, water-based varnish is only suitable for acrylic emulsion paint, because it itself is made on the basis of acrylic additives.
Water-based acrylic varnish is generally produced to cover wood to protect it from fungus, moisture, and mold, but if you really need it, you can also use it to cover acrylic water-based emulsion.
When working with water-based acrylic varnish, you should use a roller so that the varnish is distributed in a thin, even layer over the entire surface. There is no need to take tinted water-based acrylic varnish, as it will have wood tones, which will serve as a muting effect when covering walls with water-based emulsion with it (the exception is the brown color of the emulsion).
Water-based acrylic varnishes of the following type are best suited for the job: colorless, universal, for stone.
Features of working with water-based varnish
- No solvents are used, only water is needed for dilution.
- Before use, shake the container with varnish thoroughly until a homogeneous mass is formed.
- It is always necessary to check the varnish for compatibility with the previous coating before starting work; for this, use a small area in an inconspicuous place. Even if, according to the characteristics of the composition, both types of coating are compatible, a preliminary check should still be done.
- For good, uniform drying of the varnish, it should not be exposed to sunlight or draft.
If you think that painting takes a maximum of half an hour and the walls become like new, we will have to disappoint you. Painting a surface is a job that is not without its nuances: the process can be delayed due to the wrong paint, roller, or layer applied at the wrong time. The time of day at which you pick up the instrument also matters. Training, of course, is the best way to achieve success, but we recommend avoiding the mistakes of others - we’ll tell you how.
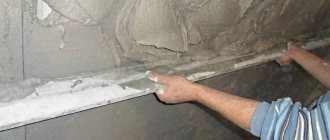
Mistake #1: Painting unprepared walls
Minor defects, dust, grains of sand, and brush fluff from a previous painting may appear under the paint and negatively affect the result. All the imperfections will be visible under the layer of paint - all you have to do is either accept it or clean the wall and paint it again. And possible greasy stains will appear, no matter how many layers you cover the surface. Defects will be especially noticeable if you use glossy paint.
What to do:
To avoid double work and unpleasant surprises, prepare the wall in advance. Take sandpaper or a special plaster sanding tool and go over the uneven areas and defects. Afterwards, brush off the dust with a brush or broom. Stains can be removed by wiping the wall with a damp cloth and soap.
What is withering?
Works painted using the multi-layer painting technique often have faded areas, matte areas and uneven shine. Most often, dark areas suffer, losing the depth of color of the work. Topcoating varnish helps correct these troubles. Withering of the paint layer occurs in two cases:
- Bad primer - it draws oil out of the paint, leaving the pigment semi-dry. In such places, the paint becomes withered and dull, losing its shine and color saturation. And even subsequent varnishing cannot always correct such places. Therefore, the primer for painting must be very reliable and of high quality. Learn more about sizing and priming canvas.
- Applying paint to the previous layer that has not dried. An undercoat of paint that is not completely dry can also pull oil out of the paint, just like primer. This causes a rapid change in color tone and leads to fading. And on top of that, over time, the work may develop microcracks in these places due to uneven drying of the layers. Old and new layers shrink differently when dry. Learn more about the oil painting technique.
Mistake #2: Ignoring Primer
Don't use primer before painting walls? Don't be surprised if you end up with an unevenly painted wall or overused paint. The fact is that the primer provides a lower hygroscopicity of the surface, which allows you to save paint. The base also gives the surface “adhesion” to the paint, which improves the painting of walls.
What to do:
choose the appropriate primer for the walls. Apply it with a brush vertically in small stripes, and then horizontally - perpendicular to the first layer. After the base has dried, you can cover the surface with the first layer of paint.
Different varnishes are needed, different varnishes are important
In its most general form, varnish is a liquid solution of various resins, which is applied in a thin layer to various surfaces and, after drying, gives them shine and protection from external influences. With the help of varnishing, a significant aesthetic effect is achieved, the service life of many products and the durability of repairs are increased. Varnish compositions are very diverse in terms of area of use:
- Furniture - used indoors to cover any wooden products (not just furniture); they often act as a finishing layer after sealing cracks in a log. They may contain coloring pigments immediately or be supplemented with tinting before use, thereby immediately giving the wood the desired shade during the varnishing process. They are economical in cost, but have low wear resistance;
- Parquet. Used on floors made of natural wood, including factory-treated floors. Parquet varnishes are compatible with parquet itself, solid boards and ordinary floorboards. Their cost is quite noticeable, as is their high abrasion resistance. The common property of furniture and parquet varnishes is low moisture resistance - this is why it is recommended to wipe parquet, furniture and varnished floors with mastic or special compounds, and not wash them with buckets of water;
- Yachting. They are the antipodes of their predecessors in terms of moisture resistance, because they can resist prolonged exposure to sea spray, salty winds and ocean waves for a long time. They are used not only in shipbuilding, but also in land-based household repairs, for example, when varnishing garden furniture, gazebos, stands for wooden canopies or carved trim outside windows. The cost of yacht varnish is several times higher than the price of parquet varnish, so it must be used wisely and carefully;
- Universal or decorative. They occupy an intermediate position between the above-mentioned compositions, allow application indoors and outdoors, and have moderate durability and cost.
What to varnish with?
I wrote in detail about each varnish in the article “Varnishes and thinners for oil painting.” So you can read there. And here I will briefly go over the names of varnishes that are used to coat finished works.
Dammar and acrylic-styrene varnishes are most often used. You can also take pistachio varnish, it is also very good. They also use retouching, but it is used more for correcting faded areas, and not as a finishing varnish.
All of these varnishes are glossy and the work coated with them is very shiny. But under the glossy varnish the colors are bright and rich. Unlike matte, where everything looks a little duller. In our stores in Belarus, matte varnish is rare. In any case, I didn't work with them. However, you can achieve a matte effect yourself. To do this, just dilute the varnish with a small amount of pinene.
Main types of varnishes by composition
By studying the label (or other accompanying inscription) on the packaging of a container of varnish, you can glean a lot of useful information about its components and compatibility with paint. The formulas of varnishes and the technologies for their production are very diverse:
- Oil based, based on organic (natural or synthetic) oils and resins. They are best compatible with wood surfaces; this material absorbs oily substances well and has high hardness after hardening. Unfortunately, the hardening of oil varnishes itself can take several days;
- Alkyd - produced from alkyd resins and synthetic solvents. In terms of moisture resistance and wear resistance, they are better than oil ones, and dry a little faster. They have universal qualities - they can be used to varnish interior items and products located outside. They can be applied using all known methods – from miniature brushes to rollers and sprayers;
- Acrylic – environmentally friendly and absolutely fire safe (available on a water basis). Completely transparent acrylic varnishes well protect any wooden surface and acrylic painting on plaster or plaster, however, their durability depends on the stability of the microclimate in the room;
- Nitrovarnishes are advantageous because they harden quickly and adhere quite “tenaciously” to the surface being treated . The disadvantage of nitro varnishes is toxicity and the ability to corrode the painted base, so before varnishing you need to stock up on a respirator and test the nitro varnish in an inconspicuous place, what if instead of a glossy layer, rags of new paint form?
- Polyurethane is a universal and convenient composition with high resistance to mechanical, natural and chemical influences. Well compatible with various materials and paints. Among the “disadvantages” of polyurethane varnishing, one can note its technical complexity and high cost;
- Epoxy. They are inferior to polyurethane in aesthetic qualities, comparable in strength, and dry faster. Typically used for varnishing wooden products in rooms with high humidity (baths, saunas, steam baths, swimming pools).
Whether it is possible to varnish acrylic paint is determined by the identity of its composition with the painted surface, that is, acrylic varnish will obviously be compatible with acrylic paint; it is also permissible to use polyurethane and some types of alkyd varnishes.
How to varnish acrylic paint - step by step diagram
Step 1: Choose a varnish
Be sure to check whether the varnish you like (acrylic, polyurethane or universal) is compatible with the type of base - wood, plaster or putty. It is highly desirable that the varnish composition with acrylic components be fresh, that is, no more than 90 days have passed since its manufacture. All other things being equal, it is better to purchase a matte composition instead of a glossy one, because... acrylic paint rarely needs additional shine.
Step 2: Getting ready for varnishing
Protective film, cellophane, glass, etc. need to be carefully removed without damaging the acrylic base. If dust is found on the surface, remove it with a vacuum cleaner (without contact with the base!) In extreme cases, you can use a feather whisk. Moreover, movements should be as careful and measured as possible. Mechanical sweeping with rags is strictly prohibited - acrylic paints are quite delicate and can fly around with petals of multi-colored hopes even before varnishing.
The varnish itself should be heated to a temperature of 40-50 ˚C before applying it to a dust-free surface. It is best to perform this operation in a water bath. If you don’t have a thermometer at hand, then you can stick to the empirical ratio: a three-liter jar of varnish in a boiling liter of water heats up to a temperature of 40-50 ˚C in about five minutes. During heating, the varnish composition must be stirred several times with a smooth lath.
Step 3: Varnish!
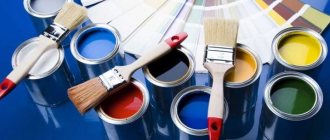
It is important to set the lighting correctly; in the dark, the best painter will not be able to cope with the task. The optimal light source is at the top and to the right, even if the room is sufficiently illuminated. It is best to work with a wide fluted brush - from 50 to 150 mm wide, depending on the volume of varnish. Take a small amount of varnish onto the brush (so that it does not drip onto the floor or flow over the product) and apply it to the surface with wide, smooth strokes, moving from top to bottom. The trajectory of the brush movements should be parallel to the upper border of the varnish. After processing 0.5-0.7 m2, the varnish layer must be polished.
Polishing is done with a dry flute brush using top-down movements. When the dry brush begins to stick to the surface being treated, you should move on to varnishing new areas. The finished product should be protected from dust accumulation until the varnish layer hardens. This is done by installing visors, film frames, etc. It is better to try self-varnishing with acrylic paints on small products; once you acquire skills, you can move on to decorative elements with a significant surface area.
Varnishing: arguments for and against
Despite the fact that acrylic paint itself forms a durable and flexible coating, the answer to the question of whether acrylic paint can be varnished is often answered in the affirmative. Varnishing provides the following additional advantages:
- The painted surface receives additional protection from abrasion and moisture.
- The varnish layer prevents contamination, preserving the original characteristics of acrylic.
- Thanks to the varnish, the gloss of the surface is evened out, the color becomes brighter and more saturated.
- The varnish layer protects the base from fading under the influence of solar ultraviolet radiation.
The varnish composition is convenient to apply with a brush Source proekt-sam.ru
- The varnished surface is easier to care for.
The following arguments are put forward against varnishing:
- Acrylic is a polymer and was not originally intended for varnishing. If the varnish is applied carelessly, it can cause the base to peel off over time.
- The varnish layer complicates restoration work, no matter whether it is a painting, a wall or furniture.
See also: Catalog of companies that specialize in paints and varnishes and related work