Preparing walls for wallpaper involves achieving the correct geometry of each surface, matching the length and width, and only having right angles at the joints. This is necessary both in terms of aesthetics and to comply with the technology of laying the finishing coating. It is not difficult to carry out this work, but only if you follow the rules for passing each stage, use high-quality materials and special tools.
When is it necessary to putty the corners of the walls?
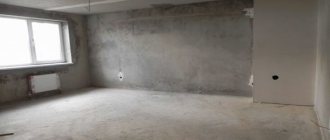
Any cosmetic or major renovation begins with the dismantling of the old finish. When it is removed, all the defects that were on the base are exposed. You cannot immediately apply a topcoat to it, because it will lie unevenly, and the end result will be sloppy and unsightly. Therefore, a set of actions is carried out to strengthen, disinfect and level surfaces.
One of them is puttying the corners of the walls.
This event is carried out for the following purposes:
- elimination of curvature at the joints of plates;
- surface leveling;
- sealing large defects;
- giving structures a given shape.
Adjustment of joint areas is carried out after applying plaster to the walls and hardening of the solution.
The main nuances of puttying corner joints
During repairs, there is a need to putty the internal and external corners of the walls. It is important to choose the right mixture, taking into account the type of surface and room.
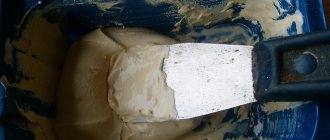
The putty is sold ready-made and dry. In the first case, labor costs are less, but the costs are more expensive. Nuances of puttying:
- An ideally even angle can be achieved only by grinding the surface, but not by puttying.
- It is necessary to control the size of the putty fraction - the larger it is, the thicker the layer.
- Initially, measure the depth of the drop. If it is less than 1 mm, use a finishing solution.
- Perforated corners are required for external corners; they are not needed for internal corners.
- To determine the vertical skew in the corner, install a ruler along the laser line of the level.
- After the putty has dried on the internal corner joints, they need to be adjusted with a sanding float.
Tip
It is not recommended to align corners if significant distortions are detected. The material consumption will increase, but will not give a noticeable result. Here it is better to use a gypsum mixture.
How to do the preparatory work
Not only the quality of the repair, but also the amount of possible consequences and losses depends on the correctness of the preparatory work. Plastering is a process during which a solution is used, splashes fly, and long devices are used. There is a high risk of damage to furnishings.
Based on this, before putting putty on the internal corners, you need to carry out the following steps:
- remove as many furnishings as possible from the room;
- cover the windows with plywood or cardboard;
- cover upholstered and cabinet furniture with mounting film;
- cover the floors with dense material;
- provide good lighting and ventilation;
- Treat surfaces twice with an antiseptic and a deep penetration primer.
In order for the puttying of internal corners to be done not only efficiently, but also without injury, you need to take care of purchasing a stable stepladder, an installation helmet, safety glasses and gloves.
Tools
To make an even angle, it is necessary to use several devices at once to ensure that precise geometry is maintained vertically and horizontally and the creation of smooth surfaces.
The following tools will be required:
- mixer or powerful drill;
- straight spatulas with blades 100 and 250 mm;
- roulette;
- oil level;
- corner spatula;
- paint brush;
- roller;
- bath for solution (pump room);
- grinding float with a set of meshes;
- rule 200 cm;
- pencil;
- scissors.
Knowledge and understanding of the process of how to putty corners is the basis for flawless completion of the task.
Materials
An important aspect of puttying surfaces is the correct choice of materials.
To putty the walls efficiently, you need to purchase:
- antiseptic;
- deep penetration primer;
- starting mixture;
- finishing composition;
- plastic or steel perforated profiles for external fastening;
- serpyanka mesh to strengthen the inner corner.
The solution to the problem of how to properly putty the corners of walls lies in the competent selection of mixtures, the sequence and technology of their application. Products are available for sale in powder and paste form. The former need to be diluted to the desired consistency, the latter are ready for use immediately after opening the container.
Based on the composition of the binder, putty is divided into gypsum and cement varieties. The first ones are lighter, softer and set quickly. Therefore, before leveling the corners, prepare a small amount of paste so that you have time to apply it before it hardens. Cement products are characterized by increased strength and water resistance. They are suitable for use in damp areas.
Tools
To perform puttying work you need to prepare the following tools and equipment:
- two straight spatulas with a width of 100 and 250 mm;
- a special corner spatula made of two plates located at right angles;
- drill with a blade attachment for mixing the working solution;
- sanding float complete with sanding mesh P100-P120;
- bubble building level;
- measuring angle;
- plaster rule or flat lath 2000 mm long;
- knife and pencil;
- stepladder or small table.
To secure the surface of the walls and improve adhesion, you will need to perform priming (we wrote about the need for this stage here), which means you will need a pump room and a paint brush.
Do-it-yourself corner filling technology
The method of plastering walls and joints involves observing the sequence of application of solutions, the timing of their gaining strength, rough and finishing.
So, a primer should be used at the beginning and end of the process. The liquid is absorbed into the surface, strengthens it, increases adhesion and prevents the removal of moisture from subsequently used solutions. The application of layers is carried out after the primer has completely dried.
The starting putty is intended for rough leveling of the base and is applied in a thick layer. It is used when there is a significant violation of the geometry of walls and ceilings. If you need to level a corner with small defects, then only the finishing compound is used. It is not particularly durable, but this property is improved with the help of a high-quality primer.
For novice craftsmen, it is advisable to use universal plaster, which is sold in the form of a paste with a consistency precisely selected by the manufacturer.
How to draw outer corners on a wall when puttingty
It is advisable to carry out work on the outer corner last, so as not to destroy it by careless action when finishing the walls and their internal junction.
The algorithm for deriving a smooth edge is as follows:
- try on the profile, cut off the excess;
- apply a small amount of paste to the surface;
- attach the corner to the protrusion, press it so that the solution comes through the perforated holes;
- using a level, check the vertical position of the profile, make corrections by adding paste and pressing in protruding places;
- using an angle spatula, apply the solution to both walls;
- wait for the mixture to dry, process it with a grater;
- wipe off dust, apply antiseptic and primer.
If the cement-based paste is cracked, then you need to re-putty, polish and primer.
How to remove internal corners with putty
It is more difficult to remove internal joints, especially when their size is larger or smaller than 90°.
The work must be carried out in the following sequence:
- using a level and rules, take measurements and determine the degree of curvature of the surface;
- make and display beacons from the starting solution;
- apply putty first to one and then to the second wall;
- level both surfaces one by one;
- glue sickle tape along the entire length of the protrusion;
- display an internal straight line with precise vertical alignment;
- draw a line using a spatula with adjustable blades;
- wait for the mixture to dry, process it with a grater;
- wipe off dust, apply antiseptic and primer.
If the walls are piled inwards, then you need to be prepared for the fact that removing them will require spending more than one bag of mixture and several days of hard work.
Curvilinear corners of arches
These designs are becoming more and more in demand; they are made in corridors, interior and balcony openings. Plasterboard sheets are used as a frame. Manufacturers produce flexible perforated profiles specifically to strengthen the walls of the arch.
The work is performed in the following sequence:
- grind off the arched edges as smoothly as possible;
- After priming, apply the finishing solution to the contour;
- give the profile the desired shape, press it into the putty;
- adjust the circles using a template or relying on your own eye;
- go through the corners with a rectangular spatula;
- wait for the mixture to dry, process it with a grater;
- wipe off dust, apply antiseptic and primer.
When creating an arch, the master needs to decide on the profile material. Plastic does not rust, but its elasticity can make installation difficult. Metal is more pliable, but due to dampness it can develop corrosion, which can lead to the appearance of brown spots.
Where the wall meets the ceiling
The joints of walls and ceiling tiles are among the most difficult places to work, since the master is at a height with his hands constantly raised. There is always a risk of losing your balance or hitting your head on the ceiling. Therefore, this type of activity must be approached especially responsibly.
The fitting principle is similar to wall alignment; it is the same internal corner, only horizontal. The adjustment is carried out after the walls are completely smooth. In most cases, the slabs are flat and a minimal amount of mortar is required. If the differences are significant, then the plaster is applied in several stages.
Sequencing:
- determine the lowest angle in the room;
- using a level, draw a closed line along the walls in accordance with the found point;
- attach beacons with appropriate height differences to the ceiling;
- fill the gaps between the beacons with solution,
- draw clear demarcation lines at the joints;
- process the surfaces with a grater;
- coat the surfaces with primer.
The maximum permissible layer of putty on the ceiling is 5 cm. It is unacceptable to increase it, as this is fraught with the appearance of cracks and peeling.
How to putty the outer corners of arches
Aligning the outer corners of curved arches is a more difficult task and requires even more attention in preparation. When leveling, you have to constantly control the angle on the edge.
Puttying of internal curved corners is carried out as follows:
- Before puttying, we cut the angle at 45 degrees for better adhesion of the gypsum board and putty.
- We tighten the screws that secure the drywall and the metal profile so that the screw head sinks 1-2 mm into the drywall.
- It is necessary to install a special perforated corner for non-linear corners. It is made of plastic and has special shapes so that it can be bent without problems. This device can be secured to the arch using staples.
- Next, putty to the required condition. After the mixture has dried, the corner is treated with a regular grater.
To draw a right angle from the end, you can use a square and control the corners of the walls at several points. From the side of the flat wall everything is as usual:
- apply putty with a spatula;
- We apply the serpyanka mesh, having previously trimmed it for easy installation;
- smooth the putty along the inner corner with a spatula 5-6 cm wide;
- let it dry overnight;
- grind the corner using an abrasive float.
If puttying or sanding is necessary at a height of more than 180 cm, then you must use a ladder or a kitchen table.
If the grinding area is large and the terrain is complex enough to optimize the work in terms of quality and time, an eccentric grinder is suitable. Modern grinding machines are ergonomic, so working with them is a pleasure, as your hands don’t get numb. Some models are equipped with convenient retractable handles that allow you not to use a stepladder, but even reach the ceiling and upper corners while standing on the floor.
There are also grinders equipped with a vacuum cleaner that removes the resulting dust, while you can work without glasses or a dust mask.
When the corners are ready, there are no protrusions or flaws, the walls shine from good sanding. Working with putty is not the cleanest, but looking at how the walls and corners are painted, you have no doubt that all this is reliable and will last. The installed metal corner makes the reinforced corner stronger, and the applied serpyanka mesh will not allow cracks to appear on the internal corners.
Internal corners and puttying planes (1 video)
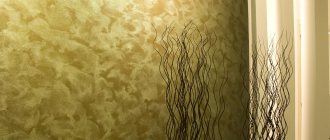
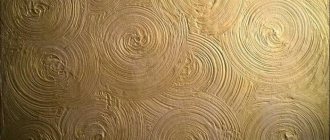
Different types of putty (20 photos)
How to properly putty a corner if it is initially uneven
This is a common occurrence, especially in houses that have stood for more than 10 years and have undergone shrinkage.
To align initially crooked corners, the following methods are used:
- Step-by-step filling of uneven areas with mortar and spatula. The mixture should be applied from bottom to top. For orientation, vertical lines marked on adjacent walls are used. Initially, the holes and cracks are sealed, and then the depressions are filled.
- Grinding down protruding parts. The process is long, labor-intensive and dusty. The work is carried out with a grinder or grinder. After this, the surfaces are primed and plastered.
- Sealing in stages with starting and finishing putty. The volume and duration of the procedure depend on the degree of surface deformation.
When using multi-layer coating, technological intervals must be maintained. For cement mixtures they are 12 hours, for the finishing composition - 6, and for starting putty - 3.
When to carry out follow-up work
If several layers of gypsum or cement putty were applied, then you should wait 5-6 hours until it dries completely and continue working.
The maximum drying time for such putties is 12 hours. If polymer-based putty was used, you should wait a few days.
It is better to plaster very uneven wall corners, then prime them and then putty. And the corners between the ceiling and the wall can first be puttied, then reinforced with metallized tape, and then puttyed again.
The nuances of puttying drywall corners
It is easier to work with drywall, because it has smooth planes that do not need to be changed.
The procedure is as follows:
- Make even corners for the putty. To do this, the joints are ground down using a float or grinding machine until the correct mating geometry is achieved.
- Treat the material with a primer. After drying, repeat the procedure.
- Seal the screw caps with varnish or PVA glue. This will prevent them from corroding and staining.
- Cover the corner with a sickle mesh. To do this, it is better to use plastic acrylic glue in tubes. The mesh will prevent sheets from diverging and cracks forming.
- Reinforce the joint with a corner profile. It is better to attach it to finishing putty. Correct the position of the product. If necessary, secure it with tape.
- Treat the entire wall with primer.
- Plaster the surfaces and putty the corners, leaving 0.5-1 mm of solution on the profiles.
- Clean the surfaces with a float and sandpaper.
Finally, mandatory measures in such cases are carried out - removing dust and priming the plastered surfaces.
Forming an angle
There are two types of corners: external and internal. They differ in their formation technique. Particular attention must be paid to the former.
Outer
Making an outside corner perfect is not an easy task. Therefore, it is better to use special corner pads, which make the work much easier and faster.
External corner trims
Attention! Such products should not be confused with other materials. They are used exclusively for 90 degree angles.
There are several types of overlays:
- Metal For production, aluminum alloy or thin steel is used. All products are perforated. This reduces weight and also allows it to be sunk much deeper into the wall. Unfortunately, there is often corrosion that can appear on the surface.
- Plastic Almost identical to metal ones, but are not subject to destruction processes. They are used only when applying a fairly thick layer, several layers. This is due to their significant thickness of the sides.
- Flexible parts These products are used to work on curved surfaces. They can be used to align the edges of the arches. They do not form cracks and easily take on the desired shape.
Arched corner
Work technology
Working with corner elements requires adherence to a certain technology. It consists of the following:
- The putty is applied to the wall - along the entire height of the corner.
- The corner element is applied and pressed well into the previously applied solution.
- Now you need to use the level. They are used to measure the correct fit and level it if necessary. To do this, add the solution in small portions.
You need to wait a little, the solution should set. It is advisable to measure it again by level. Often the solution exhibits slight shrinkage, which needs to be compensated.
Puttying the outer corner using a metal perforated corner
The work doesn't end there:
- Now you need to apply the solution to the pad itself. To do this, alternately, it is thoroughly coated on both sides. This can be done easily with any medium-sized spatula for wall putty.
- All excess solution is removed. After which you can finally level the walls.
We are waiting for the surfaces to dry completely. After this we proceed to thorough sanding. This must be done carefully. Excessive force in the places where the corner is installed leads to its bleed through, which means that the work will have to be repeated again.
Next, everything should be well soaked with primer. And you can apply a decorative layer. The corners will be even, and making them turned out to be not so difficult.
Advice! You can often hear that you need to chamfer a corner. Yes, this is a justified procedure that will avoid its destruction. But the appearance is lost. This can be avoided if the final covering is wallpaper. Or further strengthen the corner using PVA glue added to the putty.
Interior
Aligning internal corners is not always as easy as it may seem. Although it is believed that they can be given a little less effort.
- Before you putty the corners, you need to decide how curved they are. It is almost impossible to find perfectly straight corners. They can often be sharp or rounded.
- You need to understand that large differences can only be corrected by applying plaster. It will not work to do this exclusively with putty, and even with a finishing layer.
- Before puttingtying the corners of the drywall, they should be glued with special paper or serpyanka mesh, thus ensuring a reliable connection of the two sheets at the junction.
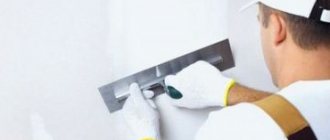
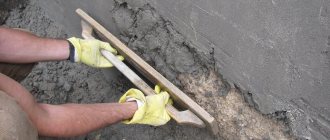
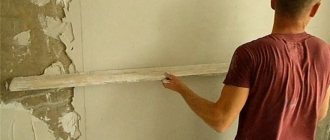
Puttying a wall should always start from the corner
Leveling technique
Each master has his own leveling technology using putty. The following is often used:
- Work starts from the corner. The fact is that this way it is possible to draw out the walls most evenly. If you start from the walls, you will have to put in a lot more effort.
- The walls can be piled up or down. Therefore, the angle is constantly checked.
- The solution is first applied to one wall, then to the other. It is better to immediately capture a significant section of the wall. A small rule comes to the rescue.
- The process needs to be constantly monitored.
We recommend: Nuances and features of sealing drywall joints
It is almost impossible to form an ideal angle; the result is a slight rounding. It is removed by grinding. This is done in several stages:
- A hand grater works well. Sandpaper is attached to it. It is important that it overlaps the edge of the tool.
- Sanding begins from one of the walls. One by one you need to move on to the next one. Grouting is carried out with the side on which the sandpaper is wrapped.
- By making quick and energetic movements, you can achieve an even angle.
The final stage of puttying corners is sanding
Puttying plasterboard corners
Often, when working with plasterboard walls, a problem arises: cracks form in the corners at the joints of the sheets. To avoid this, you will need:
- Cut and clean the seams.
- Fill with a special adhesive solution using a spatula.
- A 60 mm wide mesh is mounted in the corner.
- After which processing is carried out according to the usual instructions.
The installation of the mesh must be carried out with great care so that it fits well on the site. To prevent the solution from spreading after application, it is necessary to maintain the same temperature in the building until the composition finally hardens.
As you can see from the article, it’s not too difficult to putty the corners with your own hands, you just need to follow the instructions. Thanks to the photos used in the article, you can see how this procedure is performed in practice.
The working process
The entire arrangement procedure is carried out in several separate and sequential stages. As a rule, during the finishing process the following activities and actions are performed:
- first of all, the working plane is measured and the required result upon completion;
- then the unevenness is eliminated, or an additional amount of building mixture is laid;
- the next step is to sew on a construction corner, which fixes the flat plane of the corner joint;
- Subsequently, at the final stage, it is necessary to fix the level and distribute the putty composition evenly.
At the very end, it is necessary to re-measure and, if necessary, add a sufficient amount of compound to give the required flat plane for the finished corner joint.
Important. After completing these works, the surface is treated (scraping with a spatula or sanding with sandpaper, or a drill with a diamond disc).
Possible errors in operation
Some mistakes when working with putty can shorten the service life of the coating:
- Don't neglect preliminary markings. The optimal method for removing corners (plaster or putty) will depend on the depth of the difference. This factor also affects the type of composition (universal, finishing, starting).
- Cover the layer of starting putty with the finish. Starting compositions are distinguished by a large fraction, which allows them to be applied in a thick layer. They are difficult to grind and do not form a smooth surface.
- Do not neglect reinforcing materials. Some building bases can shrink, which leads to cracking of the putty and chipping. Serpyanka and metallized tape help prevent cracks; it is better to choose non-shrinking compositions.
- Do not try to manually fill joints and cracks in corners. Follow the technology for laying the putty, squeezing the composition with mechanical force onto the spatula. The solution will lie evenly and cover defects.
- Do not putty the corner joints of drywall without first jointing it. The structure must be disassembled and the seams cleaned. They are filled with adhesive and then stitched together. First, the serpyanka is attached, then puttying is done.
Advice
Lay the mesh as carefully as possible, trying to give it a rectangular shape. Maintain the same temperature in the room so that the putty does not flow or shrink.
Grouting and grinding the corner
This event is carried out without fail, as it allows you to remove excess material present, and in addition give the surface the necessary properties. As a rule, this process is performed using an appropriate tool. A construction spatula, a regular stationery knife, or a drill with a special diamond disc can be used here. The procedure is performed evenly on both sides, while visual monitoring of level indicators is carried out.
Internal corners
It is easier to level internal corners, but still, without the proper skill, you cannot immediately cope with this task, so we recommend that you read the information below.
- Determine how crooked your corners are; maybe the curvatures are insignificant and you shouldn’t bother too much with straightening the corners to perfection.
- Often, if your corners are quite crooked, you will have to use plaster, because putty will not be enough to cope with large differences, so keep this in mind.
- If you are putting putty on the corners of plasterboard, then you should use reinforcing tape, which will perfectly hold the sheets and prevent the putty layer from cracking.
External corner of walls - how to achieve an even joint?
Drywall is not used for external leveling work. Only dry building mixtures are suitable for external corners.
- First you need to check the outer corners for evenness. All protruding irregularities must be removed with a hammer.
- The next step is to prime the walls using special deep impregnation compounds.
- To strengthen external corner joints, it is necessary to use perforated metal corners, which will strengthen the joint and help avoid damage. They are pressed into the gypsum solution and subsequently leveled with putty.
- Excess mixture must be removed using a spatula. Then you need to make sure that the metal profile is installed accurately vertically.
- Using gypsum beacons on both sides, the corner is leveled and puttied.
Different ways to align external corners are discussed in the video below:
Correcting uneven external corners
Any angles can be curves. But the unevenness of the protruding surfaces especially spoils the appearance. Therefore, special attention should be paid to aligning external corners.
Without the necessary qualifications, it is quite difficult to achieve a perfectly even convergence of two walls at an angle of 90°. The task is facilitated by the use of special corner pads that are installed on the surface to be treated. There are several types of corner pads:
- Galvanized metal or aluminum. They are thin and light, have a perforated edge, which allows them to be completely drowned in the solution. Due to this, they adhere well to surfaces and become invisible.
- Plastic corners. They have an external resemblance to metal ones, but are made of durable plastic. They are very popular due to the fact that they are not subject to oxidation and corrosion. However, they are thicker than metal ones, so you need to apply a larger layer of putty.
- Flexible pads. Used when finishing curved elements, for example for semicircular arches. Such overlays bend well, but the angle is strictly 90°.
Unfortunately, you will have to deal with obtuse and sharp corners without overlays: in original designer homes, work is carried out only with a spatula. In this case, puttying the corner of the wall will require more skill and labor from the owner.
USEFUL INFORMATION: An alternative to a roller and brush: to paint walls, choose a spray gun
Conclusions on the topic
Thus, we have dealt with the topic of how exactly to level corners, be it concrete walls or plasterboard walls. If the material was useful to you, please leave a comment.
It is also worth noting that many points come solely with experience. If something doesn’t work out for you, then you just need to practice and then everything will fall into place and your angles will turn out perfect. Believe me, it’s not so easy to do everything perfectly the first time.
If you can’t do it and you don’t want to continue, then you should hire professional finishers who will cope with the task quickly and efficiently. It costs money, but the results will please you for years to come.
Good luck with your renovation!