Hanging the surface is the essence
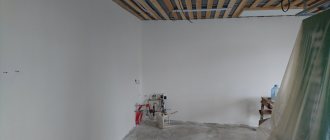
Surface hanging technology is carried out after preparing the surface for plastering. The purpose of hanging is to clearly show the worker the future surface after leveling (plastering).
Based on the hanging done, the worker places marks and/or beacons for high-quality plastering. This means that hanging as a stage is important and should be carried out in any convenient design.
Hanging options
Professionals divide plastered surfaces into nailable and non-nailable. As the name suggests, you can drive a nail into nailable surfaces. You cannot drive a nail into something that is not nailable (concrete).
For this type of surface, two types of landmarks are used:
- Beacons made of nails and slats;
- Marks from solution;
- Lighthouses made of metal.
Weighing is a measuring stage and is done, in all cases, using a plumb line or a long level or a laser.
Hanging on a nailable surface
We look first at the vertical surface (wall), then at the horizontal surface (ceiling).
Plumbing the wall surface
The tools for hanging the wall, to begin with, will be a plumb line, nails and a cord.
The first nail is driven into the corner of the wall at a distance of 30-40 cm from the vertical and horizontal lines of the walls.
The nailing depth is the thickness of the intended plaster.
The second nail, similarly, is hammered into the second upper corner of the wall.
From the upper nails, plumb lines are lowered to the bottom and the lower measurement nails are hammered in similarly.
Important! The plumb lines lowered down should not touch the wall. Moreover, the minimum distance between the plumb line and the wall should not be less than the permissible plaster layer.
Obvious bumps on the wall are cut down (knocked down).
The result is a rectangle of four nails.
We connect the upper nails with a cord and hammer a row of nails along its line every 1-3 meters. We distribute the nails evenly along the line.
From the top nails, similarly, we throw plumb lines down and hammer in the bottom row of nails.
One transverse line and two diagonals will not interfere with hanging the surface. Pulling the string over the nail heads will help in the work.
As a result: a grid, real or visual, should appear on the wall, the lines of which will not touch the wall and recede from the wall to the required thickness of the plaster.
Hanging the wall surface is complete!
Hanging the ceiling surface
As you understand, a plumb line on the ceiling does not work and hanging on the stream is done with a long level, laser or spirit level. Here you need to start work by determining the lowest place on the ceiling. The first nail is driven into such a low place.
Next, from there, with the horizon measured, measurement nails are driven along the rectangle, and along the lines dividing it into uniform sections from 1 to 3 meters.
As a result: a grid, real or visual, should appear on the ceiling, the lines of which will not touch the ceiling and recede from the surface of the flow to the required thickness of the plaster.
Technology of hanging wall surfaces for plastering.
Hanging of the wall surface is carried out immediately after preparation. You can learn how to prepare various surfaces by reading the article Technology for preparing various surfaces for plastering .
Hanging the surface, installing marks and beacons.
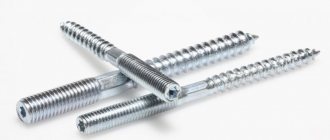
We drill four holes in the corners of the wall with a diameter of six millimeters with distances from the floor and ceiling of 15–20 centimeters, depending on the method of installing the plaster beacons. We insert the dowels and screw the screws into them to the approximate thickness of the plaster. They should be a couple of centimeters longer than the dowels. These will be the first “sign marks”.
There is the possibility of adjustment, so self-tapping screws when hanging walls are well suited for adjusting the thickness of the plaster layer.
We take a long level and align the screws in the same plane vertically, first on one side and then on the other. If you don’t have a long level, you can use a regular level paired with a rule, a straight board, a profile of the required length, or an ordinary plumb line. These will be the far left and right beacons.
Many people believe that it is more convenient to use a plumb line in the absence of a laser level, and the level may be wrong, unlike the plumb line, hence the name plumbing.
We stretch the horizontal cords along the upper and lower screws. To do this, next to the sign marks, we drill more holes for dowels, hammer them into the wall, insert self-tapping screws into them and tie a cord to them. The twine should go over the screw heads. If the rope is far from the surface, then evenly tighten the screws on the side where the gap is larger.
Make sure that the marks on both sides are in a vertical plane. It is necessary to achieve a distance from the cord to the wall equal to the minimum thickness of the plaster to reduce the consumption of plaster mortar and money, respectively. To do this, you will need to tighten or unscrew the screws on one side or the other. In this way we will get 4 supporting “marks”.
The beacons are installed vertically, parallel to each other, with a distance less than the length of the rule by 15 - 20 cm. This makes it possible to move the rule not only up, but also from side to side.
We draw the wall with vertical stripes, mark intermediate beacons, the distance between them should be approximately 100-150 cm, the optimal distance is considered to be 130 cm. And where the stripes intersect with the cord, we mark the intersection points.
This means that for the remaining beacons we drill holes for dowels (marks) at the marked intersection points. Insert the dowels into them and tighten the screws to the level of the cord. Check the level of the vertical plane of the corresponding lower and upper “marks”. Then you need to add marks in the middle, between the upper and lower established points.
If there is a need or you are not confident, then you can install additional marks-signs vertically for plaster beacons, also controlling them with a rule or a plumb line according to the above-mentioned marks already set.
Then fix purchased or install homemade plaster beacons using different technological algorithms.
You can find out what types of plaster beacons are and how to install them by reading the article Installing plaster beacons on a wall with your own hands, types of beacons and installation methods .
Hanging concrete (non-nailable) surfaces
In this technology, instead of nails, marks from plaster mortar are thrown onto the walls and leveled.
As a result, the wall or ceiling must be covered with such cement pads. By applying the level to any vertical, horizontal, or diagonally located areas, you should see the level bubble exactly in the center of the marks.
INSTRUCTIONAL - TECHNOLOGICAL CARD on the topic “Hanging the surface, installing marks and beacons”
INSTRUCTIONAL - TECHNOLOGICAL CARD
on the topic “Hanging the surface, making marks and beacons”
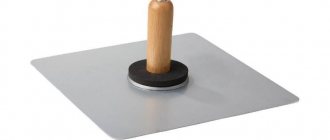
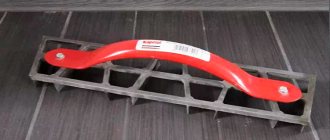
Equipment, tools, materials:
table - scaffolding, plaster trowel, hammer, nails, water level, bubble level, cord, plumb line, brush, usually, mortar box, plaster mortar.
Name and sequence of labor actions and operations
Labor activity of students
Technical requirements and instructions for self-testing
1
Inspection of the prepared surface and planning of upcoming work.
Inspect the surface being prepared, compare it with the standard and outline a plan for the upcoming work.
I plan the work based on the result of examining the surface and comparing it with the standard
2
Organize a workplace for applying the mortar with a plaster spatula
Obtain the necessary tools and materials and check their suitability for use in this work.
Plan and organize your workplace.
Stir the solution.
There should be no nicks or bends on the tool blade. The fastening of tools with a handle must be strong.
3
Hammering the first nail
hanging the walls with a plumb line in the upper corner at a distance of 30-40 cm
1
is driven from the husk of the wall and ceiling so that its head is spaced from the wall surface by the thickness of the plaster layer.
4
Hammering the second nail
Lower the weight from the head of the first hammered nail, let it stop, and drive in the second nail. 2
at a distance of 20-30
cm
from the floor.
The head of the driven nail should lightly touch the cord stretched plumb. If the room is higher than 2.7 m
3
between two nails , but so that its head touches the tightly stretched cord along the two previously driven nails. Thus we hammer a row of nails under the first lighthouse.
5
Hammering the fourth and fifth nails
After this, in the opposite corner of the wall we begin to hammer nails under the second lighthouse. First we hammer the nail 4
, then along the cord
5
and between them
6
.
6
Surface check
When two rows of nails for two beacons are hammered into the corners of the wall, we begin to check the surface of the wall. Pull the cord between the nails 1
and
5
, then between
2
and
4
.
If the surface of the wall is flat, then we begin driving nails to install intermediate beacons. If the cord touches the wall anywhere, then the wall is uneven and there are bulges that need to be cut down. When this cannot be done, then on one side the nails are pulled out to such a distance that the minimum permissible thickness of the plaster remains in the convex places. The nails are installed plumb again. After checking and correcting the unevenness, we pull the cord tightly from the nail 1
to
4
in order to fill the nails (in this case
7
and
8
) for the intermediate beacons.
If the walls are long, you have to hammer in not two, but several intermediate nails, since the distance between the beacons should be about 2 m
.
Then we pull the cord onto nails 3
and
6
and hammer in the intermediate ones -
9
and
10
.
11
and
12
are hammered in the same way , pulling the cord over nails
2
and
5
. All nails driven vertically must be located one below the other on the same straight line.
7
Hanging with a level
Using a level with the rule, we hang the walls in the same sequence as with a plumb line. It is recommended to use a level with two sights, since they can be used to hang not only walls, but also ceilings. To work, the level is strengthened with wire or twine on a rule, the length of which should be slightly less than the height of the room. When hanging surfaces using a level (Fig. 24), a nail is driven in at the top of the wall 1
to the thickness of the plaster.
The second nail at the bottom of the wall is driven in randomly. 2
with level
3
is applied to driven nails . If the level sight is positioned incorrectly, then its air bubble will be shifted away from the central mark. In this case, the lower nail must be driven in or pulled out to such an extent that the air bubble of the sight is positioned exactly between the marks.
Then a third one is driven in between these two nails, the head of which should be in the same plane as the previously driven nails, i.e. the rule should lie exactly on all three nails. In the next corner of the wall, the second row of nails 1 is driven in level. A cord is pulled along them, the surfaces are checked and intermediate nails are driven in.
8
Hanging ceilings
We hang ceilings with a level with a rule up to 3 m
, spirit level or water level.
Before hanging, it is necessary to check the accuracy of the ceiling plane. To do this, we drive four nails into the corners of the ceiling, the heads of which should be spaced from the plane of the ceiling at a distance equal to the thickness of the plaster. We pull a thin, strong cord tightly over the heads of the nails. If a bulge is found at any point on the ceiling, it should be cut down. If this cannot be done, the nails are pulled out to such an extent that in the most convex place the distance from the cord to the convexity is equal to the minimum allowable thickness of the plaster. Hanging should begin from the most convex place into which the nail is driven. Before hanging on the ceiling, it is best to mark the line for the location of the beacons, along which the nails are then driven. When hanging ceilings with a level, at a distance of 2-3 m
from the nail driven into a convex place (depending on the length of the rule), we drive in a second nail and set the rule with a level on the nail heads. If the level finder is exactly in the center, then the nails are left; if the finder shows a deviation, then the second driven nail is driven in or pulled out by the amount necessary for the level finder to be installed in the exact position without deviations. Then, at the same distance from the second nail, we drive in the third, usually placing a level on the second and third nails; The accuracy of setting the level is adjusted only with the third nail. Behind the third nail we hammer in the fourth, etc. We hang the ceilings in the same way using a spirit level. The ceiling is also hung with a water level (Fig. 26) using nails driven in at a certain distance from one another. One nail is permanent, the rest are installed according to the first one. If the plane of the hung ceiling is horizontal, then the water in the tubes will stand at the same divisions when the ends of the glass tubes are placed against the heads of driven nails.
9
Construction of marks and beacons from solution
We establish a rule for driven nails, which must stand exactly on the heads of the nails without hesitation. To rule 1
was stable, the nails are coated with a solution - grades
3
and
4
(Fig. 27).
We make stamps from plaster mortar or pure gypsum dough, which we apply around the nails in the form of small round tubercles with a diameter of 80-100 mm
and always 3-5
mm
.
As soon as the solution has set, we cut off the top of these tubercles to the level of the nail heads, giving the marks an even plane. The sides of the tubercles are cut off on four sides and a square is formed with sides 30X30 or 40X40 mm
.
Often the sides of stamps are cut off to a slight cone. The more accurately the marks are arranged, the more accurate the beacons will be. After the stamps are made, we proceed to the installation of beacons 5
.
To do this, rule 1
is applied to stamps
3
and secured with clamps or frozen with a solution.
The length of the rule should be 10-15 cm
.
to gap 2
between the wall and the rule, which should completely fill this gap. Remove the applied mortar from the sides with a plaster spatula and grease the areas not filled with mortar. After the solution has set, the rule is removed by first tapping it. It is best to hammer a small wedge under the rule, which, when moving upward, will force the rule to move away without tearing the mortar from the lighthouse. We cover the sinks on the lighthouses with a solution and clean them with a trowel. Strengthen the rule with clamps.