Tools and preparation
When planning to dismantle the tiles, each of us wants to cause minimal damage to the wall. Some also call minimal damage to the tile itself so that it can be reused. The choice of installation method largely depends on the goal : either you are trying to preserve the tile, or you don’t care what happens to it.
In addition, the method of removing the tile also depends on how and on what surface it was attached:
- If the tiles were installed on a cement-sand mixture , and even with plasticizers, and even by experienced craftsmen who did their work with the highest quality possible, then it will not be possible to remove the tiles without damage with a 99% probability. In this case, only a hammer drill with a chisel attachment will help. Even specialists will not be able to maintain the integrity of the tiles;
- If the tile was attached with tile adhesive , then the probability of removing it without damage is much higher. Be prepared for the fact that there will be losses in any case. It will not be possible to maintain the integrity of all tiles. Sometimes some of the elements damaged during dismantling reach 50%, so weigh carefully whether the game is worth the candle;
- from concrete and brick surfaces It is possible to remove the tile, but if you have it glued to drywall, then get ready for large-scale destruction. In the best case, the tile will be completely broken, in the worst case, the plasterboard partition will have to be replaced.
Experts have one simple way to determine whether there is a chance of removing old tiles without damage . You need to go over the entire surface of the tile and tap it with a spatula and a rubber hammer. The movements should be light so that you can detect the presence or absence of voids under the tiles. If they exist, and in large quantities, then you can try to remove the tiles using more gentle methods to preserve the tiles and further use them, for example, in the country.
Tools you may need:
- a hammer drill with a chisel attachment, some use attachments in the form of a drill, bit, or chisel;
- chisel or chisel;
- spatula, maybe several. Preference is given to more durable products;
- hammer;
- chisel and scraper for removing grout;
- You may also need a screwdriver with a handle that is convenient to strike;
- not necessary, but a grinder with an attachment for cleaning the seams between the tiles may be useful;
- container with warm water, sponges;
- drill with 6 mm drill bit;
- hardened wire with a diameter of 3-4 mm.
Of course, not all of these tools can be useful at once - it all depends on the chosen method.
Don't forget to take care of your personal safety. Use safety glasses, a mask or gauze bandage, thick gloves, and even better, work in a protective suit.
Removing mortar and glue residues
A scraper will help to clean the surface of the tiles for reuse, as well as remove residual mortar and adhesive from the walls. First, the surface must be well moistened. It is even recommended to soak the tiles in water for several hours. It is advisable to use warm water with soap dissolved in it.
But soap solution will not cope with cement mortar. To soften it, salt is used, which makes the cement loose, destroying its crystal lattice. Final cleaning is carried out with a metal brush. There are special solutions on sale that will help greatly facilitate the process.
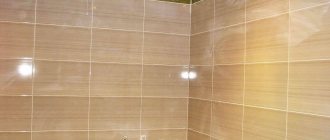
Having mastered the basics, it’s easy to dismantle ceramic tiles with your own hands, not only in the bathroom, but throughout the apartment. For example, dismantling an apron in the kitchen is done in a similar way.
No. 1. How to remove tiles without damaging them
Before you try to carry out this experiment on the scale of your apartment, I would like to remind you once again that it will not be possible to remove all the tiles unharmed . There will be losses in any case . The result depends not only on the composition on which the tiles were attached, but also on the quality of the preparatory work. The preparation is as follows:
- prepare a warm soapy solution and thoroughly wet all the seams between the tiles;
- Use a chisel, spatula, paint knife or triangular screwdriver to carefully remove the old grout. If you have the skill to work with a tool, you can use a grinder and run a disc along the seams;
- wipe the edges of the tile with a sponge soaked in the same solution. If you have a drill and a special brush attachment, you can use them - the result will be achieved more efficiently;
- leave the tile for a while so that the water slightly soaks the glue or mortar.
You don't need a hammer drill - you'll have to use a hammer and chisel. It is slow, difficult and painstaking, but if preserving the old coating is important, this is the only way. The procedure is as follows:
- if the top, side or bottom row is not open, you will have to sacrifice one tile to ensure normal access. As a rule, this is not required, but if suddenly the tile covers the entire surface of the wall, then use a spatula and a hammer to break the tile somewhere on top;
- when normal access to the tiles is open, you need to drive a chisel, a chisel with a thin blade or a spatula between the tiles and the adhesive layer and tap the tool with a hammer. The blows should be careful, but strong. If, after several blows, the tile remains firmly in one place, there is a chance that subsequent blows will cause it to crack. Try prying it from the other side. If she doesn’t give in again, you’ll have to accept that you can’t remove her whole and finish her off. Remember, no one promised you a 100% result? If the tile moves away from the wall, then you need to be especially careful when it is knocked off by 2/3 - this is that dangerous moment when you need to make every effort to keep the corners of the tile intact. Pry the tiles from different sides;
- the tiles are knocked down from top to bottom;
- from one row to another, move from top to bottom. This reduces the likelihood of tiles falling and injury;
- You can clean the wall of old glue or mortar using a hammer drill.
In a similar way, it will be possible to remove tiles that were laid with glue, or those that were installed incorrectly on the mortar.
Removing tiles with a hammer drill
Using this tool with a special attachment, the tiles can be removed quickly enough, but in this case the tiles will be completely damaged and not suitable for reuse. When using a rotary hammer, you need to be prepared for a huge amount of dust and noise that is generated when the device is operating. The tool connected to the mains should be placed against the gap between the tiles, and you can begin to quickly and completely remove them.
No. 2. How to remove tiles without damaging adjacent tiles
Imagine that only one or two tiles on the wall are cracked. Or you need to gain access to wiring or other communications. It would be stupid to remove all the tiles. But how to remove several elements without damaging adjacent tiles? The task is further complicated by the fact that during the dismantling process you will have to try to preserve those elements that you remove. If the tiles are old and you don’t have spare samples, it will be difficult to find a suitable replacement in the store. Even if the collection is still in production, there is no guarantee that the color will match. In general, this is, without exaggeration, a piece of jewelry.
Procedure:
- moisten the seams around the tiles that will need to be removed, and also moisten the seams between them;
- wait a while, clean the seams as described above;
- moisten the seams with soapy water and try to pry off the tiles with a spatula or chisel. By tapping with a hammer, the tiles are carefully knocked off the surface;
- if the classic method does not work, you can use tempered wire, curved on both sides. Hooks cling to the edges of the tiles. Now all that remains is to pull the wire with the tile towards you, applying force perpendicular to the wall. If you pull at an angle, the tile can break;
- when all the elements are in place, it can be very difficult to act - there is nowhere to catch on, so you may have to sacrifice one element. They break it with a spatula and a hammer, or drill a hole in it with a drill. To replace damaged tiles (if there are no more tiles like yours in stocks and stores) you can choose a tile of the same size with a characteristic image. If you remove a few more old tiles randomly in different places and put them there elements depicting coffee, dishes, palm trees, flowers or something else, it will turn out stylish. It's as if it was meant to be! So there is always a backup option;
- When cleaning seams and trying to remove tiles, act extremely carefully so as not to damage adjacent tiles.
Whatever the outcome of dismantling the tiles, remember that even experienced craftsmen do not give any guarantee whether they will be able to be preserved or not.
Dismantling nuances
When performing work, you should follow the instructions. However, there are a number of subtleties that will allow you to avoid mistakes in the process of dismantling tiles in the bathroom.
Off the wall
In this case, work should begin from the top row of cladding. If the surface is only partially covered with tiles, this simplifies the dismantling process. To remove old tiles from a bathroom wall, simply place a chisel under the tile in the outermost row of the covering. When dismantling the finishing from the upper areas, you must remember to hold the tiles. This means that the work must be done with an assistant: one person removes the cladding, the second keeps the material from falling. This will keep the tile intact.
From the floor
To tile the bathroom, you should first assess the proximity of the communications, for example, if the room has a heated floor or the pipes are sewn into the rough base. Building codes are not always followed, so when carrying out work it may turn out that the cables/wiring of the water supply system are located closer than necessary.
This factor should be taken into account if you plan to perform dismantling using power tools (grinder, drill, hammer drill). In this case, you can remove the old tiles from the floor only after checking the rough base.
If the walls are made of plasterboard
The adhesion of this material and the adhesive composition is so high that it is extremely difficult to remove the coating layer from the surface of a gypsum fiber board structure. Despite this, it is still possible to remove tiles if the following details are followed:
- It is necessary to remove one product from the top row using a chisel and hammer. Then, using a spatula, you need to remove the remaining tiles.
- Suture joints are pre-soaked with a special solution.
- Do not apply intense pressure to the surface of the GVL.
Sometimes the drywall becomes partially warped during the tile removal process. The top layers of material can be removed. Correct the situation using a putty mixture. In some cases, a section of the partition is replaced.
No. 3. The easiest way to remove old tiles
If you don’t care about the integrity of the tiles, you can significantly simplify and speed up the whole process. However, even if you initially planned to save at least part of the tile, but during the process it turned out that this was impossible, then this method will also be useful to you. Arm yourself with a hammer drill and follow this order of work:
- Cover the floor with polyethylene, cardboard, plywood or polystyrene foam if you do not plan to repair the floor covering in the near future. Pieces of falling tiles can cause irreparable damage to the finish;
- Communication pipes are also better protected; you can use the same plywood;
- do not forget to protect your eyes, hands and respiratory tract;
- the base under the tiles must be strong (brick or concrete);
- Using a hammer drill with a chisel attachment, break off the tiles one by one, moving along the horizontal rows and moving from top to bottom. The nozzle should be at an angle to the tile, as if prying up the lining.
Replacing one tile
Sometimes it is necessary to replace only one fragment of masonry, for example, if it has a defect.
Also, communications can pass behind the tiles and if they are damaged, dismantling is not necessary. To carry out all the work with minimal damage, you need to remove one or more tiles without damaging adjacent ones. It is recommended to proceed as follows:
- Separate the tile to be removed from the rest of the tile. To do this, you need to clean the grout using any method indicated above, taking into account the hardness and composition of the mixture.
- Tap the tile. If there are voids underneath, you can simply break the fragment with a hammer. If there are no voids, drill a hole in the center of the tile with a diamond crown (or use a drill to make several holes over the entire area) and knock down the finish with a hammer and chisel.
- To put a new fragment in its original place, you will need to remove the old glue. Removing the adhesive is necessary to ensure that the new tile is in the same plane as the undamaged areas.
- Prepare the surface for installation of new tiles: sweep away dust and prime.
If it is not possible to purchase a replacement tile with the same design and color, we recommend using decorative tiles with a pattern that will match the bathroom interior.
No. 4. How to remove tiles from drywall?
Many specialists do not like to bother with dismantling tiles, and as soon as they hear that the tiles are glued to drywall, they often refuse. The fact is that the glue literally eats into the drywall, so it can be removed along with the tiles. However, it is possible to separate the tiles from the wall. But no one can give an accurate forecast of what drywall will look like after such an execution. No one undertakes to guarantee the integrity of at least some part of the tile.
If the tile was laid several days ago, then it is still possible to remove it without much damage to the surface and the tile itself. In other cases you will have to suffer. The procedure is similar to the classic method:
- preparation of seams;
- First, you can dismantle one tile in the top row so that it is convenient for you to work. A hammer and a spatula/chisel/chisel/chisel will come to the rescue - everything is as described above;
- the remaining tiles are removed one by one with the same set of tools;
- don’t be alarmed if the tiles fall off with part of the drywall;
- It is almost impossible to remove tile adhesive from drywall. If this is important, then remove the glue gradually with a grinder, just work very carefully;
- when the work is completed, assess the damage;
- if the partition has minor damage, then the pits and glue residues can be hidden under a layer of putty. After it dries, it will be possible to install new tiles. If the tile is removed “with meat”, then a complete replacement of the partition may be necessary. You need to be prepared for this right away.
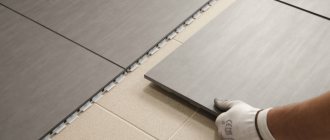
How to prepare the floor and walls for laying tiles
You removed the remaining adhesive along with the tiles. Now your task is to prepare the base for fresh cladding. We will describe what manipulations need to be done with the floor, and which ones with the wall.
Preparing the floor before laying tiles
After removing construction debris, you can begin repairing the foundation. We will describe step by step the sequence of actions for preparing a concrete floor.
- Using a hammer drill, knock down the protrusions and bumps. Prime cracks and large depressions and repair them using building mixtures based on epoxy resin or polyurethane.
- Vacuum the surface and remove dirt.
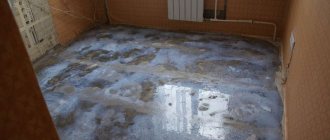
- Cover the floor with waterproofing. In rooms and in the corridor, it is necessary to cover the joints of concrete slabs and walls with the floor, areas around pipes and radiators. In the bathroom and kitchen, waterproofing is applied to the entire area, covering 5-7 cm of the walls.
- Determine the amount of curvature of the floor. If the slope is small - up to 3 cm - use a self-leveling mixture, if more - a cement-sand screed.
- Prime the floor to increase its adhesion to the tiles.
We talked about the concrete base, because tiles are placed on wooden flooring in exceptional cases and there is no guarantee that it will be fixed securely. It is better to remove the coating and work with concrete.
Basic removal tips
To carry out repair work quickly and efficiently, you must adhere to the following recommendations:
- the grout softens faster and is removed with a spatula if it is moistened with water;
- complete dismantling of the cladding begins from the edge of the room;
- the adjacent room should be covered with film to prevent debris from entering;
- You can carefully remove the tiles only when there is no rush and with full concentration on the work at hand;
- it is also important to pay attention to the exit points of pipes and fasteners;
- By following safety precautions, you can protect yourself from injury.
Even with careful removal of the coating, it will not be possible to completely preserve it. Most often, you can save about 80% of the material.
Preserving tiles
Sometimes the tiles in the bathroom no longer look attractive in appearance, they are outdated, but they are still in quite good condition to be used in the country or somewhere in a closet, where aesthetics are not so important.
In this case, you can try to remove the tiles carefully, keeping the maximum amount intact.
In this case, a power tool is not suitable; you need to work more delicately.
Tools you will need are a hammer, chisel, chisel or large flat head screwdriver, metal spatula, knife or perhaps a grinder with a diamond wheel.
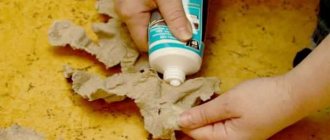
To keep the maximum number of fragments in the bathroom intact, they must be isolated from each other. To do this, first the seams are unstitched - the grout for the seams is removed. Sometimes it is soft and can be picked out without problems with a knife or spatula. If that doesn't work, you can try to wet it.
If it is a high-quality mixture on a cement or acrylic base, a knife and spatula will not take it, and it will not be possible to soak it.
In this case, you will have to carefully unstitch the seams with a grinder. The diamond wheel is ideal, it bites into the stone perfectly
But sometimes the seams in the bathroom are too thin for it, in which case you can try working with a thin ceramic wheel.
After jointing, you can start beating.
Each fragment is carefully tapped with a hammer and chisel and tapped on all sides.
If the glue is weak, then you can count on a large percentage of intact tiles.
If the master tried his best, it is unlikely that he will be able to save even half of the tiles.
It is worth remembering that the procedure will take a lot of time, it will take a lot of effort, and the result is doubtful. In some cases, it is cheaper and easier to buy the required volume of new cheap tiles than to bother with ceramic tiles in the bathroom.
Assessment of the quality of old coating
The duration and complexity of dismantling will directly depend on the quality and method of laying the old tiles. Therefore, first you need to evaluate the previous coating and find out what products were used for installation. If the tiles were laid with an adhesive composition, then there should be no difficulties with removal.
If you make every effort, you will be able to keep all the elements intact.
If the tiles were set on cement mortar, you will have to tinker - you cannot do it without special equipment and certain skills. The overall dismantling process will take much longer, and the chances of saving the entire tile are minimal.
Advice! To understand how firmly the tile adheres to the base, you can try tapping it with a rubber hammer or the handle of a spatula. A dull sound upon impact will be a sign of voids in the base.
Preparing for the dismantling process
Dismantling tiles is certainly accompanied by increased dust levels and large accumulations of debris and waste. Therefore, first of all, it is necessary to take care of the safety of the premises and minimize the damage that unforeseen situations may lead to.
It is recommended to cover the floor with plastic film or any other material intended for construction work. You need to wrap a soft cloth around the plumbing fixtures. Wall items that cannot be removed can be hung or wrapped in rags.
Don't forget about the respirator!
Preparing tools and materials
As a rule, dismantling work does not require complex “exotic” tools - almost all of them can be found in the arsenal of a home craftsman.
What exactly you will need:
- two hammers - one medium and the second heavier;
- several spatulas - it is better to choose devices with a narrow but durable blade;
- chisel - for working with the space between tiles;
- construction knife with a set of interchangeable blades;
- chisel - will become a basic tool;
- a screwdriver with a special handle designed for striking.
If you plan to work with tiles laid on cement mortar, a grinder and a hammer drill may be useful.
For hard-to-reach areas, you need to select attachments for the hammer drill in the form of a chisel, bit, drill or pick.
Pre-treatment of seams and surfaces
Dismantling work will be carried out faster if the seams between the tiles are well prepared for removal:
- moisten the space between the tiles around the entire perimeter with warm water and soap - it is most convenient to use a foam sponge for this purpose;
- when the contents of the seams become soft and plastic, the old grout can be removed by scraping it out with a thin spatula, knife or chisel;
- After removing the grout, the edges of the seams are treated with a special brush mounted on a household drill.
If you can’t find a nozzle for sanding the seams, you can treat them again with soapy water, removing any remaining grout.
Basic methods
There are several ways to dismantle tiles, which you need to figure out in advance.
How to quickly remove without damage
Sometimes people have to remove an entire tile
To remove it carefully and not damage it, perform the following sequence of actions:
Get rid of the grout. To do this, wipe the seams with a damp sponge or fine sandpaper. Cut seams. This work can be done using a grinder. Pry off the tile
To carefully pry off the slab, use a small spatula. Get rid of any remaining base. When the slabs are removed, the surface is cleaned of any remaining glue or cement.
How to remove tiles without damaging adjacent tiles
There are several useful recommendations that will help you carefully get rid of tiles:
You should not try to tear the tile from the surface by force, especially if it does not give in initially. This can break the tiles that are laid near the stove. It is recommended to loosen the fastening of the tile material in advance.
To do this, carefully pry the edges of the material with a chisel or spatula. You should not use a hammer drill or other electric tools, as they will damage the material.
Hammer
To remove tile material with a hammer drill, adhere to the following recommendations:
- Work with the tool is carried out at an acute angle. This is done so as not to damage the base and surface of the wall.
- Dismantling work must be carried out from top to bottom. If you do the work the other way around, the tiles located on top may collapse.
- To remove tiles laid over communications, it is better not to use a hammer drill. Instead, use a chisel and a hammer.
Using metal hooks
A common way to remove ceramic tiles is to use iron hooks. This method is used to carefully remove tiles. To make hooks, use stiff wire or unnecessary screwdrivers. Before using iron hooks, you need to get rid of the grout between the tiles
Then the metal products are run under the tile, pry it up and carefully remove