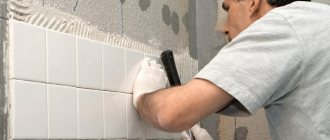
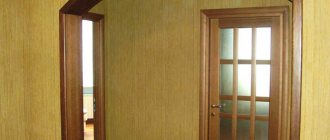
Chipboards (chipboards) are a structural and finishing material and are used in construction, repair and restoration work. They are used for leveling ceilings and walls, and for constructing partitions using prefabricated screeds. This material is very simple and easy to use, but it needs to be puttied before facing. To understand whether it is possible to putty chipboard, it is important to familiarize yourself with the technology of work and the subtleties when choosing a suitable putty. It is necessary to understand what types of putties will be required for this and how to use them correctly in order to obtain a high-quality coating.
Why do you need to putty chipboard?
There is a large selection of putties on the market used for particleboard and other wood-containing boards. It is necessary to choose formulations containing small fractions. In addition to chipboard, for repair work they use:
- Fiberboard (fibreboard);
- OSB or OSB (oriented strand board);
- Plywood.
Types of particle boards for construction
Puttying the boards is necessary for two reasons:
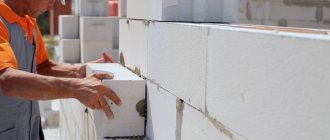
- After the slabs are assembled, seams are formed between them. To make the surface appear as a single whole, first fill the gaps between the sheets.
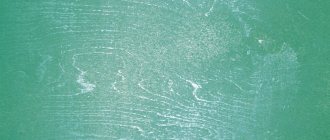
- The slab has an uneven, rough surface that needs to be “smoothed.”
Before puttying, the surface of the sheets must be primed in order to:
- greater adhesion to putty;
- prevention of mold;
- prevent swelling.
Basic requirements for putty
Before construction work, you must purchase putty for chipboard, having first read the instructions on the package. The mixture must meet the following requirements:
- good adhesion (sticking) to the base;
- no shrinkage;
- have no cracks after drying;
- contain only small fractions;
- drying for no more than a day, for ease of application of repeated layers.
After drying, the putty should be easy to sand (sand).
The mixture for construction work should be chosen carefully so that sanding the walls after puttying goes flawlessly
Selecting a primer according to its purpose
The choice of primer for particleboard depends on the location:
- In a living space, where it is always dry, you can use any primer designed for materials containing wood.
- In a humid environment, use soil with deep impregnation and an antiseptic composition, which will protect the canvas from mold and swelling.
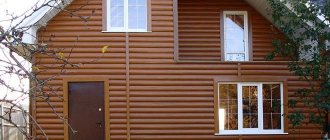
- To cover outdoor slabs, a special primer for exterior use is required. This composition will protect the sheets from moisture, rotting, UV radiation and temperature changes.
Video description
How to edge and process chipboard.
Finishing with paper-laminated polymers
Various materials are used for lining chipboard with polymers, which are laid in layers. This can be paper, veneer, fabric and other fillers. Processing with paper-laminated polymers involves the use of paper, which has good strength and ductility, and also improves the appearance of chipboard. Before finishing, a board of the required size is cleaned of dust using brushes and compressed air to achieve maximum adhesion between the chipboard and the polymer. The cladding takes place under pressure.
The process can be cold or hot. In the first case, PVA dispersion glue is applied between the wood board and the paper-laminated polymer. In the second case, PVA or urea-based glue is used. Due to the need to use large areas, with the same results, cold pressing is less in demand compared to hot pressing. Special equipment and high temperatures ensure the final stage of cladding, during which the formation of the desired geometry with the addition of bends occurs.
Veneering
Finishing chipboard sheets with natural veneer is actually called veneering. Not only particle boards, but also furniture panels are processed in this way. The result is furniture that is superior in quality to laminated furniture. However, laminate is more durable than veneer.
Appearance of veneered (veneered) particle board Source Vicebskreg.by
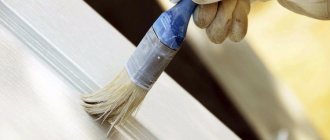
Nitrocellulose varnish
Applying the substance to the surface of chipboard is one of the ways to protect against moisture. At the same time, the properties of nitrocellulose varnish are similar to those of polyurethane. After applying varnish, the board becomes unstable to mechanical damage at the maximum permissible level, and water does not penetrate inside the chipboard. Nitrocellulose varnish does not require preliminary surface preparation before application, but treatment with a primer will improve the result.
Chipboards will last a long time if combined protection is used. Before applying paint and varnish to the surface, it is necessary to impregnate the chipboard sheets with a protective composition.
Nitrocellulose varnish is an effective protective agent for any type of wood and wood boards Source Kraski-net.ru
For more than 50 years, sheet material has been used as a floor covering. Over time, production technologies improve the quality and structural characteristics of chipboards.
The slabs are made from environmentally friendly material that can withstand moisture and mechanical damage. Low cost, explained by production from wood residues, combined with good quality, has made chipboard a leader among similar materials. The rough option of using slabs as flooring will extend the life of any floor.
Types of soil by composition
Based on its composition, soil is divided into two types:
- acrylic;
- alkyd.
Acrylic primer is used for treating indoor surfaces
Alkyd primer suitable for outdoor use
Acrylic is used for interior work, alkyd for exterior work. Both types of formulations are non-toxic, easy to apply and contain antiseptics. The only difference is the drying speed - alkyd primer takes longer to dry.
How to make a composition with your own hands
Many private craftsmen, when making repairs with their own hands, do not spend money on a special primer, but use alternative means:
- a mixture of turpentine and wax;
- liquid wax;
- a mixture of PVA and wood powder.
Components for making homemade primer
Before priming, the sheets are cleaned of dirt and dust, the surface is sanded with sandpaper or an abrasive mesh - first coarse-grained, then fine-grained. Then degrease with solvents or an alcohol-containing composition. All these manipulations are necessary to increase adhesion.
Preparatory stage
To paint furniture yourself, it is recommended to do it in a separate room. The process may take several days, so it is better to have the furniture in another room. In this way, it will be possible to protect your home from dust. It is also recommended to wear safety glasses, gloves and a gown while working.
To prepare the furniture you will need:
- wood putty;
- sandpaper;
- rubber spatula;
- acrylic primer;
- brush (roller).
Furniture surface preparation is as follows:
- the product is disassembled;
- remove paint and varnish;
- primed, puttied.
The first step is to replace or repair all mechanisms. To do this, the furniture is disassembled into individual elements, handles and hanging parts are removed. Disassembly of interior items is also necessary in order to paint all elements evenly and completely. It is impossible to do this while the furniture is assembled. When the restoration of the mechanisms is completed, you can begin preparing the surface for painting.
If it is impossible to disassemble and remove decorative elements and fittings, masking tape will help protect them from paint. On products with drawings and pictures, all decorating elements are also sealed with tape, and after painting the furniture, they are carefully removed.
Disassembling furniture before painting
Old paint must first be removed
Primer of wooden furniture
putty
How to get the job done - types of putties
Before you putty the chipboard, you need to figure out what specific compounds can be used. Manufacturers of mixtures have created a decent range for all occasions.
Oil and oil-adhesive
Designed for interior work. The choice of this composition is very well suited for wallpapering and sealing seams, especially those containing polymer glue. When sealing seams, it does not shrink and levels the surface of the slab well. Dries within 1-2 days. It usually includes:
- chalk;
- water;
- auxiliary substances for quick drying;
- carboxymethylcellulose (glue);
- substances to impart plasticity.
Oil-adhesive and oil-based putties help to efficiently seal the joints between chipboard boards
In addition to the main composition, manufacturers can add all kinds of modifiers, thickeners, antiseptics, dyes, etc.
Latex
Used for interior work. They have a lot of advantages, provide ease of use and give high-quality results for wallpapering and painting. They consist of modifiers, plasticizers, fillers and water. The binding component is latex. An antifungal compound may be added.
Latex putty is excellent for finishing chipboard, as it has a number of positive qualities
Polyester
The compositions are used for both internal and external work. Due to the content of ordinary resins and polyester masses in them, they have a lot of positive properties:
- dry and harden quickly;
- model corners and edges;
- sand well;
- have excellent adhesion.
Polyester putty is suitable for eliminating various defects on the surface of chipboard
The composition can be applied in fairly thick layers, which is important in the case of large surface differences. The putty is offered for sale in combination with a hardener. Different manufacturers add fiberglass, aluminum powder, and glass microgranules as fillers.
Polyester mixtures are available in two types: starting and finishing. The only drawback is the high price.
Acrylic copolymers
Used for both interior and façade work. Due to their versatility and low price, they are most often used in construction, and their quality is not inferior to alternative compositions. Among the shortcomings, we can note the sale only in white, which is eliminated by adding color. There is also one drawback - they are not suitable for topcoating with varnish.
Acrylic putty is highly elastic
Epoxy resin
Epoxy resins are resistant to many chemicals, some acids, alkalis, and have high adhesion, including to chipboard. Depending on the brand, liquid epoxy resin can have shades ranging from clear to burgundy. When hardeners are added and dried, it becomes a harmless component to health, which cannot be said about liquid resin.
Epoxy resin has a high level of adhesion, so it is easily attached to chipboard materials
This expensive material consists of oligomers.
Oligomers are a molecule in the form of a chain consisting of a small number of units that are repeated many times. This is in contrast to polymers, where the number of units has no limit.
In its uncured form, epoxy resin is quite toxic and can be harmful to human health. In its hardened form, although it is harmless, when a solvent is used, sol fractions are formed, which also have a poisonous effect. But the most poisonous are the hardeners themselves, especially those used at room temperature - amine ones.
When working with this material, you must use protective equipment:
- latex gloves;
- a gauze mask to protect the respiratory tract or a respirator;
- protective glasses;
- workwear.
When working with epoxy resins, it is necessary to use protective equipment
Epoxy resins are amenable to chemical and physical modifications, which impart elasticity, strength, rigidity, nonflammability, and resistance to UV radiation. They are used for the manufacture of adhesives, varnishes, plastics, filling materials, and are added to concrete to eliminate its shortcomings.
After mixing liquid epoxy resin with an amine hardener, it is necessary to apply a thin layer to the surface of the chipboard. After 24 hours the coating will be completely dry. Additives in the form of fiberglass or metal shavings also add strength.
Technology for gluing rolled products
You can wallpaper wood panels only with your own hands. In order for all procedures to be performed correctly, it is necessary to observe accuracy and sequence of actions.
Materials and tools
For pasting work you will need the following materials and equipment:
- Primer. It is necessary to choose a composition with deep penetration. The best option is polymer mixtures. You can also use “concrete contact”.
To treat the base, exceptionally deep penetration soil is used. - Wallpaper. The variety is selected based on the wishes and style of the room. Single-layer paper products should be abandoned.
- Glue. For each type of material there is a special composition.
- Putty. It is recommended to purchase acrylic or oil-based putty for chipboard that is elastic. This is especially true for newly built houses. Ready-made solutions are preferred.
The putty must be intended for wood or wood-based materials - Serpyanka mesh. Required for reinforcing slab joints.
- Brushes and roller. To apply primer and glue, several types and replaceable nozzles should be provided.
- Set of spatulas. You will need a small, medium and wide tool.
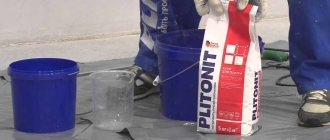
- Containers for mixing solutions.
- Devices for smoothing wallpaper.
Minimum set of tools for wall putty
Everything you need is purchased in advance. If used tools are used, they are first cleaned of previous materials.
Surface preparation
The application of roll products to different panels may vary slightly, so it is necessary to proceed from the specific situation. Preliminary work includes a number of procedures, individual for each type:
- Chipboard. This base needs sanding. The fact is that the upper structure is not always uniform, particles can flake off. To prevent them from interfering with work in the future, they are removed with sandpaper.
- Fiberboard. Gluing wallpaper to fibreboards is much more difficult. This is explained by the fact that the front side of the hardboard is impregnated with a paraffin-based composition to increase moisture resistance. When gluing decorative products, this creates difficulties, so the slabs are processed with a grinding machine, evenly removing a very thin layer.
- Chipboard. The laminated coating also makes adhesion difficult, so this surface is carefully sanded - as in the previous version - until a rough base is obtained.
All wood-based materials must be sanded before finishing. - MDF. To hang wallpaper on an MDF panel, you will need to perform similar procedures, but be careful: the surface only needs light sanding.
General preparatory processes after completion of preliminary work:
- Padding. Using a roller, the surface is covered with two layers of the composition, each one is dried.
The primer is applied with a brush or roller - Sealing seams. When working with fiber boards, the edges of adjacent ends are cut at an angle with a construction knife. Chipboard walls are not subject to jointing. Next, the seams are filled and the excess is removed.
The seams and fastening screws are puttied first. - Laying serpyanka. It covers the front and corner joints (there is a special variety), and a thin layer of the mixture is applied on top, completely covering the reinforcing mesh.
Serpyanka fiberglass mesh significantly increases the level of adhesion to the surface - Puttying. The base should be puttyed as follows: the solution is scooped onto the blade of a wide spatula and distributed over the surface using arcuate movements from top to bottom. The procedure is repeated, after which the coating is primed.
The putty dries for at least 2 – 3 days
The walls are left until completely dry.
On a note! If the vertical structure has a deviation, then it is initially recommended to plaster the surface, and then lay the finishing layer of putty.
Pasting
Work begins with assessing the adhesion of the putty; for this, the surface is tapped a little. If there are no delaminations, proceed to the process:
Wallpaper pasting tool
- The work area is pre-prepared and all unnecessary items are removed. Wallpaper should be cut taking into account the fit of the pattern.
- It is recommended to start gluing from the window opening. The first strip is carefully measured, since the remaining fragments are oriented towards it.
- The glue is evenly applied to the underside of the wallpaper, after which the sheets are folded in half. This will avoid drying out and ensure the desired level of impregnation. If required, the wall is also treated with the solution.
- The strip is placed in its place, adjusted from above and pressed. For smoothing, use a rag or rubber spatula.
- The remaining elements are glued in a similar way.
The algorithm for gluing wallpaper does not change depending on the type of base
There is a recommendation that surfaces should be varnished. Indeed, this can be done, but achieving the desired decorative effect will be difficult. In addition, the face layer will become heavier, which can lead to peeling.
You should know! If the strips are connected end-to-end, then it is advisable to attach a special intermediate tape.
Is it possible to use gypsum putty?
Gypsum putty can be used, but only for interior work in rooms where there is no high concentration of moisture:
- in living rooms and common rooms (except bathrooms and bathrooms);
- in loggias;
- for sealing cracks and flaws;
- for masking seams, corners and joints;
- for leveling the surface for painting, wallpapering and other facing materials.
It is convenient to buy a ready-made mixture for finishing work. But they have a drawback - after opening the package, the period of use is no more than 6-12 hours.
For work, it is recommended to purchase ready-made gypsum putty
If you are not sure that all the material will be used up, then it is better to purchase a dry mixture and make the required amount.
Advantages and disadvantages of different types of putty
To make it convenient to choose the desired putty composition, you can use the table showing their advantages and disadvantages.
| Putties | Oil and oil-adhesive | Latex | Polyester | Acrylic copolymers | Epoxy resin | Plaster |
| Vapor permeability | low | high | low | low | low | high |
| Moisture resistance | low | low | high | high | high | low |
| Plastic | high | high | high | high | high | high |
| Adhesion (sticking) | low | high | high | high | high | high |
| Hardening | 1-2 days | 24 hours | fast | 36 hours | 24 hours | fast |
| Strength | low | high | high | high | very high | average |
| Temperature loads | low | short | high | high | high | up to +800ºС |
| Hue | with yellowness | different shades | white | white | transparent or white | with yellowness |
| Environmental friendliness | low | high | low | high | low | high |
| Price | low | high | high | inexpensive | high | low |
For more accurate information, it is necessary to study the composition annotation on the packaging when purchasing the product, because each manufacturer adds components to the composition recommended by technologists at a specific production.
How to putty chipboard
To work with putty, the master must master the technique of applying it to a plane. To do this, you don’t need to be an experienced finisher, just desire and hard work.
Before you start processing chipboard, you need to study the technology of applying putty
For painting
After collecting and covering the slabs, the surface is sanded with sandpaper or an abrasive mesh. Having cleared the surface of dust, the surface is primed and allowed to dry, after which the main work begins.
If the surface is not treated in any way, then all the irregularities after painting will be visible, and the surface will look untidy.
Procedure:
| 1. Before applying a layer of primer, first seal the seams and joints between the sheets with non-shrinking putty. | |
| 2. Then fiberglass or painting mesh is placed on them, which must be painted over with oil paint. The heads of the nails that secure the frame must also be treated with paint so that they do not rust later and the rust does not come out. | |
| 3. Then apply several layers of putty to the slabs, the thickness of which will be no more than 3 mm. Movements with a long spatula should be vertical, horizontal and circular. | |
| 4. Only after complete drying should the surface be sanded and cleaned of dust. |
When assembling chipboard sheets, there should be no cracks or height differences, since it is impossible to correct severe base defects with putty.
Under the wallpaper
Wallpaper can hide minor defects in the work, especially large textures, so when processing seams and joints you can do without fiberglass overlay and painting mesh. All other manipulations are the same as before painting.
To paste slabs with wallpaper of a large texture, you can avoid using putty at all, and instead treat the surface with wallpaper glue.
If old thin wallpaper is pasted onto the chipboard, it must be removed by moistening it with a wet cloth. Thick wallpaper should be removed with a spatula, after which the surface should be sanded.
Remove old wallpaper from chipboards using a spatula
Procedure for painting chipboard
Before you paint chipboard furniture with your own hands, you need to:
- remove old coating;
- remove dust and dirt;
- prime and wait for the primer to dry;
- Cover with masking tape all areas that should not be painted.
You should also prepare all the tools and materials in advance and study the instructions for them. If possible, it is better to work outside or on the balcony. Then you can paint a table made of laminated or varnished chipboard with high quality, giving it an attractive look.
Padding
If the furniture does not need pre-treatment (removal of old coatings, cleaning of dust and debris, then you can safely begin the priming stage. This should be done like this:
- Sand the entire surface with fine-grit sandpaper. This is necessary for better adhesion - especially important for varnished boards. You can use a grinder, but be careful, otherwise there is a risk of damaging the material.
- Clean the furniture surface from dust. A handheld vacuum cleaner or dry brush is suitable for this purpose.
- Coat the chipboard with a primer - for now only the first layer. Wait until dry.
- Inspect the product carefully. If there are any unevenness, chips, cracks, they need to be puttied. It is better to use a soft rubber spatula to avoid damage.
- Sand the putty areas.
- Apply remaining coats of primer before painting. There can be 2 or 3 of them - no more are required.
After this, you can repaint the cabinet from any chipboard, choosing any paint you like.
Preparation of varnished or painted coatings
Repainting varnished chipboard (or previously painted) requires pre-treatment. It goes like this:
- Treat the old coating with hot air. If you don’t have a heat gun on your household, a simple hair dryer will do just fine. Heating softens the old paint or varnish, after which the coating can be easily removed with a metal spatula.
- If the furniture is large, then it is better to warm up a small area and clean it immediately - before it has time to cool down.
- If you cannot remove a layer of old paint, you can use “heavy artillery,” namely devices with higher temperatures than a hair dryer. A torch or blowtorch is the most affordable choice.
The above method is convenient for vertical surfaces. It is better to iron a horizontal surface (for example, a tabletop) with an iron through a sheet of foil.
An alternative method for removing paint or varnish is to use a solvent. It must be applied in an even layer (for example, use a brush) and left for a while. Then you can easily scrape off the softened paint with a spatula and choose how to paint a cabinet made of laminated or varnished chipboard.
Cleaning polymer veneers and laminated paper
Before you paint laminated chipboard at home, you need to clean it properly. The same applies to veneered and laminated boards. The paint on laminated chipboard furniture looks good without preliminary stripping, but it doesn’t stick very well.
Laminated and veneered boards should be processed as follows:
- Rub the coating with coarse sandpaper until the material becomes rough. This is necessary to increase adhesion. You must act carefully so as not to damage the base of the slab.
- When the coating becomes uniformly rough, use a large brush or low-power vacuum cleaner to remove dust and small residues.
- Continue sanding with finer sandpaper.
- Feel the cleaned surface for damage or unevenness. If they are found, they need to be puttied.
Then you need to vacuum the room before priming and repainting the furniture. Removing dust is very important, otherwise it will rise into the air and can settle on the surface of the product, making the painting uneven (where there is more dust, the paint will look more matte).
To make a cabinet repainted white look good, you need to choose both a putty and a white primer. This way they will not show through the paint, reduce its consumption and give the coating a uniform color.
Puttying
The surface can be puttied during priming or preliminary cleaning. If at any preliminary stage defects were found that need to be “fixed”, use any wood putty and a spatula. Excess is removed so that the surface becomes smooth. Be sure to apply at least one more layer of primer on top.
Coloring
Painting old furniture yourself is not difficult if it has been properly prepared. They operate in this order:
- Choose paint. The most important choice is for laminated chipboard - this type of board can remain smooth even after sanding, and many types of paint will not demonstrate good adhesion. If the “degree of roughness” is unsatisfactory, then it is better to take alkyd paint for better adhesion.
- Prepare paint according to instructions. This stage may include diluting with water, tinting, stirring - everything according to the instructions.
- Apply paint with a roller, dipping the entire roller into the paint container. It should be applied in one roll, not “rub in” too much. Rolls must be done in one direction.
- After rolling, squeeze the excess paint off the roller and wet it again.
- When the main layer is applied, carefully brush the ends and other hard-to-reach areas.
- Wait until the first layer is completely dry.
- Apply the second one in the same way as the first.
Instead of a roller, you can use a spray bottle - the coloring result will be even better. But a person who has not previously worked with a remote control should practice on something unnecessary (old broken furniture, a piece of cardboard). It is better to fully master the device before moving on to painting chipboard. The greatest attention should be paid to selecting the distance between the device and the surface - so that the paint does not splash in all directions and at the same time does not flow down the slab.
Sealing joints between slabs
Particular attention should be paid to sealing joints, because compounds that do not shrink (according to the manufacturer) do not always turn out to be such. In this case, it is better to apply the mixture 2-3 times with a metal spatula, pushing it as deep as possible into the seams between the plates - it will be easier to apply the main putty on them later. After each layer, let it dry a little.
After complete drying, the protrusions should be cleaned off with a spatula. When the last layer has dried, seal the seams with a special material for construction work and paint with an oil-adhesive composition. To seal corner seams, a special corner spatula is used.
Tools and materials
How to paint furniture to get a quality product that will last for many years? The process is quite serious and has some peculiarities. The production uses special painting equipment. You can purchase it or make it yourself. In the latter case, you will need diagrams and drawings for the paint booth.
If you are painting furniture yourself, you need to understand what types of paints there are and how they interact with different materials. Tools and materials needed for painting furniture:
- putty knife;
- sandpaper, a piece of whetstone (grinder or other alternatives);
- dye;
- varnish;
- brushes or roller;
- masking tape;
- putty;
- primer.
In addition, you will need the product itself and protective equipment: gloves, clothing and glasses. To apply paint in an even layer, you can use a spray gun or spray gun. Such tools are mainly used when the surface area to be painted is very large. They will help speed up the process and save time and effort. For small products or their parts, it is recommended to use brushes or a roller. The paint is applied in one direction. One layer is often not enough, so the work is repeated 1-2 more times. The second and subsequent layers can be applied only if the previous layer has dried well.
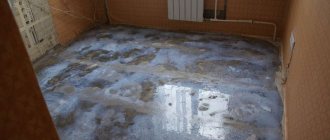
Puttying the ceiling and corners of chipboard
Before working with the ceiling, you first need to:
| 1. Clean the surface of old paint or putty. | |
| 2. Seal cracks and seams. | |
| 3. Caulk the connection to the walls. | |
| 4. Prime. |
Puttying the ceiling is more difficult to do, as it is not very convenient to do. The composition is applied and rubbed with a wide spatula, first along, then across. It is convenient to seal the junction with the walls using a special spatula for corners. After complete drying, the surface is sanded.
Degreasing surfaces
The paint can usually indicates which degreasing and paint thinner should be used for a particular surface. You can use universal products such as white spirit, gasoline or acetone. When working with plastic, choose soft, gentle products, for example, Piton or APP WK900.
How to work with chipboard furniture
You can make furniture yourself using chipboard sheets, which should first be cut, then primed, puttied, painted, and then assembled. The principle of working with the surface is the same as when working with walls, only the sheet must be processed on both sides.
Furniture elements made from chipboard are processed on both sides
The nuances of painting taking into account the material
When the primer is dry, you can paint the furniture. When choosing one color, no questions should arise. What to do if you need to paint furniture with your own hands in two colors, for example, black and white.
Wardrobes, chests of drawers, bedside tables are made from different materials. Painting the surface and decorating a wooden furniture wall is as easy as shelling pears. But sometimes questions arise about how to paint veneered furniture, plastic products, chipboard, plywood, and laminated chipboard furniture.
Recommendations for work
Before working with mixtures, you must carefully read the instructions on the packaging and follow these recommendations exactly. If the technology is not followed, a good result may not work. This condition especially applies to epoxy resin and polyester putty.
Upon completion of repair work, inspect the working surface. If shortcomings are identified, try to eliminate them. Clean, wash and store tools. Remove construction waste. Now you can start finishing the cladding.
The puttying technology is quite simple, but in the process of work, nuances may arise that a beginner will not always be able to cope with. For quality repairs, it is advisable to hire an experienced specialist. He will advise which putty to purchase in a given situation and make the repair quickly and without hassle.
Use of liquid formulations
Note. To strengthen the surface of lumber, they are primed with liquid compounds, without fillers, using a paint brush, foam pad or spray. Depending on the recipe, this method is used for both transparent and opaque finishes.
Manual method
Priming lumber: a) with a brush, b) with a swab
Before you begin priming any lumber, you should remove all chips, cut edges and dust from its surface. The surface is polished using rasps with different numbers (depending on the complexity of the processing) and sandpaper, after which the dust is removed with a napkin. Particular attention should be paid to the corners and joints of parts.
The solution should be applied in two directions - along and across the fibers, so that the primer is well absorbed into the pores of the wood, and there are no stains, stripes or drips left. In those cases. When you use a paint brush, you need to make sure that it has soft bristles, and if it is round, it is better to tie it in the middle with a string so that it picks up less liquid. Before applying the primer with a brush, rinse in white spirit or turpentine.
Spraying
Using a spray gun
To work with any type of sprayer, you also need to prepare the surface to be treated by stripping and sanding (depending on need). Also, before starting work, you should check the operation of the spray gun using an unnecessary piece of lumber. When applying the composition to the surface, the spray nozzle should be 250-300 mm away from it, and sometimes more, so as not to create drips.
For large areas, such as primer for an MDF cabinet, it is better to use a gun with a flat torch, applying the composition in stripes, while for small areas it is better to use a round torch. Depending on the viscosity of the soil, you can use nozzles with a hole diameter of 1.8-2.2 mm, to which liquid is supplied under a pressure of 2.5-3 atmospheres.