Tile covering is one of the most reliable options for decorating floors in the bathroom or kitchen. It is not afraid of moisture, is quite durable and will serve for decades without complaints if everything is done correctly. When laying tiles, it is important to follow certain rules, then the base will be reliable and durable. When installing this material, you should use a composition such as a tile floor primer. It will ensure a reliable connection of the finishing coating to the subfloor.
Floor primer for tiles
Laying ceramic tiles on the floor
Why do you need a primer?
The stage of preparing the surface for laying tiles has several main points that must be completed so that the finishing material holds firmly. And priming the surface is one of them, and a mandatory one at that.
For this work, a composition such as a primer or primer mixture is used. It is a mixture of special components, which, when dry, create a kind of film on the rough base. The composition of the primer mixture includes drying oil, various polymers, organic compounds, as well as synthetic resins. It looks like a cloudy white liquid or is available in powder form, which must be mixed correctly to obtain the desired consistency.
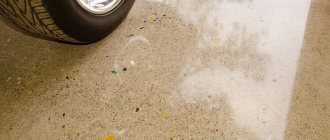
Applying primer to the base
The primer is applied to the floor prepared for work immediately before laying the tiles and is necessary to improve the adhesion between the subfloor and the finishing material.
On a note! A primer is not only a composition that improves adhesion, but also a material that increases the water-repellent properties of the base and has an antiseptic effect.
In the photo, a roller is the main working tool when applying primer
Previously, priming surfaces under tiles was done with ordinary PVA glue. Now a lot of professional compounds from various manufacturers have appeared on the market, which have much better abilities than glue.
Stages of installation of floor panels
The sequence of actions is as follows:
- floor tiles are laid using a special comb trowel;
- using a pencil or marker, linear markings are applied to the floor surface, defining the position of the rows and the boundaries of the application of glue;
- then tile adhesive, to increase adhesion, is applied in a thin layer to the floor and the back surface of the tile;
- after laying several “beacon” panels or a whole row of them, the solution is allowed to set for 25–30 minutes;
- the hardened solution will prevent the “beacon” tiles from moving when laying the next rows.
Installation of floor tiles
Advice. Floor tiles must be laid with immediate removal of tile adhesive from the joints. This will greatly simplify the process of cleaning the tiles from dirt at the end of the work.
Next, tile adhesive is poured onto the place where several tiles are laid and evenly distributed with a comb spatula. The laid panels are fixed in the specified position with a light touch of the palm. For a more dense fit into the solution, use light tapping on its edges with a mallet made of wood or rubber. To obtain the correct pattern and thickness of the seams, special plastic crosses are used.
Attention! For the correct placement of the pattern, the tiles must be placed in strict accordance with the direction of their laying. The direction of installation is indicated by corresponding arrows on the back surface of the floor tiles.
After all the panels have been laid, remove the plastic crosses. Then the empty joints are filled with tile grout. At the end of the grouting work, the tiles are cleaned of any remaining mortar and dirt.
Thus, self-leveling flooring allows you to reduce the time several times and significantly improve the quality of work when laying floor tiles.
Pros and cons of primer
The primer is undoubtedly a necessary material; it has a lot of advantages and only one drawback. Thanks to the composition, it is possible to significantly increase the adhesive properties of the treated surfaces, remove dust from the base, reduce the consumption of adhesive components, and therefore reduce work time and labor costs. And the only disadvantage of using soil is that you have to spend money on it. However, in light of the advantages the mixture has, we can safely say that buying a primer is a worthwhile investment.
Primer application process
Attention! There is no point in sparing the primer during application, but a layer that is too thick (especially deep penetration primers) entails the risk of the applied layer peeling off.
Features of the work
Before laying the tiles, it is necessary to thoroughly treat the surface and this is what a primer will be used for. In order for installation to proceed properly, you must adhere to these tips:
- Before treating with a primer and laying tiles, the surface must be cleaned of dirt, dust, old materials and greasy stains.
- The primer must be diluted exclusively in the proportions indicated on the packaging by the manufacturer. Otherwise, the material may lose its properties and its use will not lead to any result.
- The tile primer should be applied using a roller, but hard-to-reach areas can be treated with a thick brush.
- Further finishing work, including laying tiles, can only be carried out after the primer mixture has completely dried. The exact drying time can be found on the packaging, but please note that it may vary depending on the condition of the surface and temperature conditions in the room.
- If the wall in the bathroom is puttied, then after that you can re-prime it. If you are laying ceramic tiles, then puttying is not necessary.
Thus, priming the walls for tiles is a mandatory step in finishing work in the bathroom. The use of this construction mixture improves adhesion and achieves durability. For the bathroom, it is best to use special water-repellent primers that can provide reliable protection against mold and mildew.
- Interior decoration Ceiling
- Walls
- Doors, arches
- Window
- Stove, fireplace
- Kitchen decoration
- Bathroom, toilet
- Corridor, hallway
- Balcony, loggia
- Other rooms
- Finishing of buildings Country and private houses
- Wooden houses
- Baths, saunas
- Finishing materials Drywall
- Cladding panels
- Wallpaper, cork
- Tile
- Laminate, linoleum
- Decorative plaster
- Finishing work Plaster
- Primer
- putty
- Painting, whitewashing
Decorative plaster is a general name for a group of building materials that are used for finishing surfaces.
Lining is one of the most popular materials for finishing work on loggias and.
The question of how to glue the ceiling plinth to the wallpaper arises when all the finishing work is completed.
Do I need to prime the subfloor before laying tiles?
If you ask this question to a professional tile layer, he will most likely be very surprised. And his answer will always be the same - yes. It is quite simple to understand why a primer is needed before laying tiles - just analyze its properties.
Applying acrylic primer before laying tiles
For example, the floor will receive additional protection from moisture and the development of microorganisms, since a protective film will appear on it due to the soil. The adhesive solution will adhere much stronger to the treated base. Also, the soil will reduce the amount of dust on the surface of the subfloor, which means it will be more comfortable to work, and the quality of work itself will increase significantly.
If you refuse to use a primer, the rough surface will quickly dry out the adhesive composition - it will draw out all the moisture from it. Accordingly, the glue applied in this way will simply begin to peel off over time. And also without primer, the consumption of the adhesive composition increases significantly.
Primer of joints between tiles
On a note! On a subfloor treated with soil, the risk of mold growth is minimal.
To prime or not
But let’s still figure out whether it is necessary to prime the surface before laying the tiles or not. This question is controversial and incorrect for some experts. However, the answer to it is almost always “ Yes ”.
A primer before laying tiles is simply necessary, especially if tiling is carried out on a porous or crumbling surface. The only case when a primer can be neglected is when facing a dense concrete base. And even in this case, a coat of primer will not hurt.
Let's talk a little about the general properties of all types of primer. In total, there are three advantages that the primer provides:
- First of all, strengthening the surface and increasing adhesion. This effect is achieved by impregnating the pores of the material with the composition, which strengthens the structure. Thus, the base becomes more resistant to various loads, and the possibility of infection is also significantly reduced.
- The amount of materials required for work is also reduced. In particular, we are talking about further cladding. And this, accordingly, allows you to save money.
- By increasing adhesion, the primer can significantly increase the quality of the future coating. This way you can be sure of the durability of the cladding.
Types of soil
Now a huge number of different types of primers have appeared on sale, differing in price and quality. However, they can all be divided into certain categories depending on the properties they possess.
Various types and types of primers
First of all, all compositions can be divided into those that are suitable for absorbent surfaces (brick, concrete, plaster, etc.), and those that are used for treating non-absorbent substrates (plastic, metal, paint). Primers intended for use on absorbent surfaces also include deep penetration primers.
Deep penetration acrylic primer
The primer is also divided into special and universal . The latter can be used to treat surfaces both inside and outside buildings, and the former are used to impart certain properties to the surface. Such compositions are not recommended for purchase and use by beginners in the world of construction and finishing works. The main difference between the two types is that they have different degrees of stability and ability to protect the surface of the rough foundation from external factors.
Attention! Each primer can only be used directly for its intended purpose. It is important to follow the instructions on the packaging. Otherwise, the coating will not have the declared properties.
Applying primer to the floor
Also, all soils can be divided into certain categories depending on their composition.
Table. Types of soils.
| View | brief information |
| Alkyd | Allows you to create a reliable and durable layer, penetrating deep into the structure of the rough base. Ideal for applying to the floor before laying tiles. But you shouldn’t apply an alkyd primer to drywall or plaster. |
| Acrylic | The most common type because it is a universal composition. Can be used to treat any surface. |
| Based on gypsum, cement and lime | Suitable for porous plastered surfaces, brick or concrete. Suitable for drywall too. |
Advice! When choosing soil, you should not settle for the cheapest option. It is also not recommended to buy formulations whose instructions for use state that re-application of the product is necessary. It is also not recommended to apply such primer under the tiles.
For porous and loose materials, it is recommended to purchase strengthening types of primers. They can reduce the absorbency of the floor. Adhesive compounds based on acrylic and latex are suitable for tiles.
Deep penetration strengthening primer
The best brands with review and cost
The choice of soil is influenced by the type of surface. For application to brick bases, plastered surfaces and plasterboard sheets, it is recommended to use the following products:
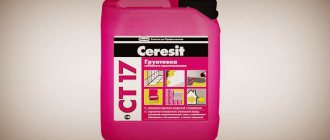
- "Knauf Tiefengrund" is an acrylic composition that is ready for use. It belongs to the means of deep penetration. The mixture can be applied to highly absorbent surfaces. The cost of 1 kilogram is from 65 rubles.
- Eskaro Aquastop Professional is a highly concentrated moisture-proofing primer. Thanks to its use, it is possible to avoid moisture entering the structure of the main wall. The composition is perfect for treating bathroom walls and other rooms with high humidity. With its help, it is possible to increase the adhesion of the finishing layer and the base. The cost of 1 kilogram is 300 rubles.
For application to concrete surfaces, the following products should be used:
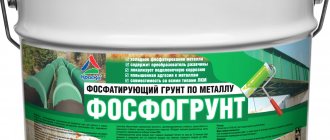
- Knauf "Betokontakt" - used for treating concrete bases before finishing. On average, you need to use 350 grams per 1 square meter of surface. The cost of 1 kilogram is 100 rubles.
- “Prospectors Beton-kontakt” – suitable for surfaces made of heavy concrete. With the help of this substance it is possible to improve the adhesion of the finishing finish and the base. 250 grams of product are required per 1 square meter of surface. The cost of 1 kilogram is 70 rubles.
See also
What is marker paint for drawing on walls and application rules
If you want to purchase a primer for different types of surfaces, you should pay attention to the composition “Prospectors Universal”. This primer is designed to increase the adhesion of any facing materials. Thanks to its use, it is possible to save materials. A 10-liter canister will cost 400-500 rubles. It is enough to treat a surface of 50 square meters.
Composition from folk craftsmen
Many novice craftsmen do not want to spend money on a professional primer and decide to experiment with improvised means. Or rather, with some of the materials intended for laying tiles. There is a recipe for “folk” soil, which was previously successfully used by experienced builders, who have now switched to professional-grade compounds.
So, to create a primer with your own hands, a little cement is mixed with water and PVA glue. First, it is recommended to mix glue and water in a ratio of 1:8, then add cement to the composition. After mixing, the mixture is filtered through cheesecloth and it is ready for use. The shelf life of this composition is 24 hours, so you shouldn’t make a lot of it.
DIY primer
Preparation of adhesive solution
Glue preparation technology:
Technology for preparing adhesive solution
- the dry mixture is diluted with clean warm water while mixing the components;
- the proportionality of adding the dry mixture and water is set strictly in accordance with the instructions indicated on the packaging.
- after preparation, the tile adhesive is left to stand for several minutes and then mixed again;
- After mixing is completed, they begin laying it.
For your information. It is recommended to make the consistency of tile adhesive slightly thinner than specified by the manufacturer. This increases adhesion and ease of tile laying several times.
Priming procedure: features
Despite the fact that priming from the outside looks like a completely simple and quick process, it has its own characteristics. So, for example, for highly porous surfaces, it is necessary to purchase a strengthening primer, which contains more adhesives than usual. For concrete slabs or drywall, the popular “Betonokontakt” mixture can be used, which can make the surface somewhat rough due to the sand and various additives it contains.
"Betonokontakt"
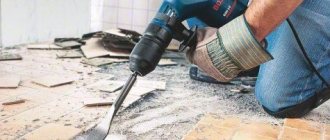
Before starting the priming procedure, it is recommended to make small notches on the concrete floor at a distance of about 3 cm from each other, which will allow the tile to better adhere to the base. The easiest way to make notches is with an ax or chisel and hammer.
Advice! Dust from the notch cavity can be easily removed using a brush dipped in water.
In rooms where air humidity is high, it is recommended to use soil that has water-repellent properties. This is especially true if the surface being treated is made of brick. Also, such a base must be treated with a mixture of at least two layers. And the second layer is applied after the first has dried (this information is also relevant for other surfaces, not just brick).
Preparing the base for tiles
All holes, cracks, and chips on the floor larger than 10 mm must be sealed with mortar before priming. Otherwise, the primer consumption will be increased, as the mixture will begin to flow into the gaps.
It is very important and correct to prepare the priming mixture if it is available in powdered or concentrated form rather than ready-made. If the mixing technology is violated, then the composition will be of poor quality, which means that the expected result will not be achieved.
It is convenient to use such a tray for work
Types of compositions
There are several types of ceramic tile floor primers used in residential areas.
They are united by a similar application, but the chemical composition and properties differ significantly from each other.
Before choosing a material, it is recommended not to buy products that are low in cost and produced by little-known manufacturers. This will allow you to protect yourself from purchasing counterfeit, low-quality goods.
Acrylic
Acrylic penetrates deeply into the surface and forms a durable film
The composition is designed for high-quality and reliable adhesion of the base surface to tile adhesive. Use will avoid roughness and porous areas.
After drying, the composition turns into a homogeneous film, firmly connected to the material. It has the properties to penetrate deeply into the concrete structure and completely fill all voids.
Many specific mixtures, the composition and technical characteristics of which are regulated by GOST, have protective properties. They perfectly prevent the penetration of dampness and moisture through the concrete floor, thus playing the role of a waterproofer. Depending on the purpose for which the material is used, there are several types of compositions:
- Strengthening - consists mainly of binding elements. It glues the surface perfectly, but is not a deep penetration primer.
- Deep - characterized by the ability to penetrate deeply into the base and well saturate its structure. Popular when finishing surfaces made of concrete or low-quality cement-sand mixture. It is more expensive than a strengthening one, so when choosing, you should weigh the pros and cons of its use.
- Adhesive – creates a special roughness of the base, which improves adhesion to the glue. It is produced according to the German standard and is environmentally friendly and recommended for use in residential premises. For more information on how to prime a floor, watch this video:
In some cases, acrylic primer can penetrate to a depth of 10 cm.
Alkyd
Alkyd mixtures can be used to prime any surface
Alkyd primer for floors under porcelain tiles is a universal impregnating composition.
It is widely used for application on concrete or brick bases, as well as on any other surfaces.
In this case, you can use one of two types of such compositions:
- Perchlorovinyl - intended for processing on concrete, brick, plaster or metal. When dry, it creates a protective film with moisture-repellent properties. In addition, it prevents the growth of fungus, mold and putrefactive bacteria inside the concrete structure.
- Glyphthalic - consists of coloring pigments and filler. Used for any type of work: external or internal. This general purpose primer forms a protective film on the surface with excellent anti-corrosion characteristics. Increases the strength of the base and promotes good adhesion.
When applying alkyd primers, you need to take into account their high toxicity and the possibility of easy fire, so it is recommended to work in a respirator and protective gloves.
Epoxy
Epoxy compounds will ensure the best adhesion of the tiles to the base
It is considered the highest quality and effective composition used for subsequent laying of tiles. Provides maximum adhesion of the coating to the base.
The chemical structure is based on a resin, which is used primarily in the production of epoxy paint.
Due to its great popularity, today we can distinguish a whole range of epoxy primers designed for different purposes:
- standard - is the best option for processing under tiles and creating a self-leveling floor;
- winter – Used for work at ambient temperatures below 0⁰С;
- fast – characterized by fast absorption and drying times.
A primer made on the basis of epoxy components is a leader among analogues, characterized by high quality and an affordable price.
Composition from folk craftsmen
The composition for non-absorbent surfaces is quite expensive. And the point here is that it is usually sold in large containers. It will not be possible to use everything up for a one-time “operation”, and the mixture gradually deteriorates.
And paying for something that is not needed in full is doubly offensive.
Craftsmen proposed an alternative option, which proved to be no worse. They mix a regular adhesive mixture with a penetrating primer. The consistency should be like liquid sour cream, and in this case this homemade primer will be no worse than a special composition for non-penetrating surfaces.
Preparing the surface for tiles
Before starting work, it is recommended to thoroughly prepare the surface of the subfloor. If it was previously painted, then it is important to remove all the paint. To do this, you can use washes or traditional methods using a hair dryer and a spatula. There should be nothing unnecessary in the room where work is being carried out. It is recommended to remove all furniture and other interior items from there. Otherwise, they may be injured during floor finishing work.
Removing Old Paint from Wood Floors
Tiles are a material that requires a level base, and this aspect should not be neglected. Otherwise, the coating will simply break or even come off over time. Therefore, before priming, the floors should be leveled - all protrusions should be removed. You can check the evenness of the base using a long rule - it is laid on the floor, and there should be no gaps of more than 2 mm between it and the floor level. If there are any, the base needs to lay an additional leveling layer - for example, pouring a self-leveling mixture in the case of a concrete base or laying sheets of plywood, chipboard, gypsum fiber - for wooden surfaces.
Stages of using self-leveling mixtures
The bathroom floor is filled with self-leveling mixture
Also, the base should be well cleaned of debris and dust. It is recommended to collect large debris with a brush and broom, and remove dust with a vacuum cleaner. Only a damp cloth can remove the smallest dust particles, after which the base must be dried.
Before you start priming, you should tape the baseboards, jambs and sections of the walls with masking tape or pieces of plastic film. This measure will protect surfaces that do not need priming from getting the composition on them.
Immediately before starting work, it is important to ensure that you have the necessary tools. It can be:
- wide roller - for applying primer to the floor;
- brush – for treating hard-to-reach places and areas along walls;
- tray - the primer mixture will be poured into it for convenient wetting of the roller.
On a note! A plastic bottle with the side cut off can replace the primer tray.
Instead of a tray, you can take a plastic bottle with the side cut off
FLOOR PREPARATION
Tiles for thresholds on the street, what is necessary before installation 3 videos
What causes cracks to appear on the screed and how to avoid it?
There are many reasons. The most common is the absorption of water into the base of the screed due to improper preparatory work. In this case, cracks appear in the contact zone between the base and the screed, after which they spread upward. Water can leave the surface of the screed due to intense evaporation—this gives rise to surface shrinkage cracks. Cracks may appear due to drafts when the material hardens.
Read more: Do-it-yourself concrete-cement screed
Shrinkage deformation at the points of contact between the wall and the screed leads to the appearance of large radial cracks, distributed from the wall to the periphery of the screed. To avoid this, it is recommended to fence off the wall around the entire perimeter with damping tape when laying the screed.
Local cracks can occur due to improper mixing of the mixture in large portions, when moisture is unevenly distributed throughout the object. Defects appear during the evaporation process where there is a lack of water. You can reduce the likelihood of cracks if you completely eliminate contact between the screed and the base. For example, lay a waterproofing polyethylene film between them.
Is it possible to do without mixtures for finishing floor leveling?
Laminate, parquet and parquet boards require a perfectly flat base.
It is difficult to achieve this with a classic cement-based screed, so a self-leveling floor on top of the screed is desirable. It eliminates small differences and gives a completely flat horizontal surface. But the cost of such a base is significantly higher, and only professionals should work with it. Self-leveling flooring over a large area requires special equipment; In addition, the compounds are often toxic.
What should be the thickness of the leveling layer if there is a high-quality rough screed?
The minimum thickness is 2 mm. There is no point in leveling above 100 mm: firstly, it is expensive, and secondly, the load on the base increases sharply. In this case, other engineering solutions, such as logs, are more effective.
You can lay insulation between them and cover the top with thin sheet material.
What should be the base for the self-leveling floor, is it necessary to cover it with soil?
1. The base must be clean, dry and strong. It is a priori assumed that self-leveling floors are laid on a concrete base. If this is the case, then soil must be used. In some cases, when the quality of the surface is unsatisfactory (for example, there are oil inclusions), the self-leveling floor is arranged along the separating layer of the screed.
2.After the soil has been applied to the surface of the screed, I recommend pouring water on it - it should even stand for a while without being absorbed immediately. A few hours after the base has dried, the self-leveling floor can be applied.
How much time should pass between pouring the cement-sand screed and applying the leveling mixture?
The deadline for the work is usually indicated on the packaging; each manufacturer has different information. The finished floor from our company can be poured onto the screed within a week. .
Is there a difference in the application of cement and gypsum mixture?
Cement mixtures shrink when hardening; this must be taken into account and expansion joints must be left.
1. When gypsum hardens, on the contrary, it expands. This allows you to do without expansion joints in the absence of heated floors.
2. Cement screeds are more or less viscous in consistency and do not have good mobility or fluidity. And they are laid accordingly; it will not be possible to level the layer with a mop or a needle roller. Self-leveling gypsum mixtures are fundamentally different - they are a highly mobile material, similar in consistency to liquid sour cream or yogurt. When poured, they spread, after which you need to go over the layer with a needle roller, which will displace the air involved in mixing from the mixture. If this is not done, then during hardening the air will give increased porosity to the base.
What mixtures are best to use in wet rooms?
Based on cement or mixed binder. You can also use gypsum, provided that the tile joints are thoroughly grouted and there is no heated floor.
How much time must pass after pouring the leveling mixture before laminate or parquet can be laid?
It all depends on the temperature in the room and the thickness of the layer.
You can usually walk on cement floors within a day, but on plaster floors within two to four hours.
If the layer thickness is small (2-3 mm), I recommend laying the coating no earlier than five to seven days after pouring the leveling mixture.
Priming the floor before laying tiles
Step 1. Work begins with cleaning the floor surface and clearing the room where the repairs will be carried out. Everything that can be taken out is removed to another room. The floor should be as empty as possible so that nothing interferes with work. Next, large construction debris is removed using a dustpan and broom, then dust is removed using a vacuum cleaner. It is especially recommended to clean hard-to-reach places, corners, and joints between the wall and the floor.
Preparing the floor surface
Step 2. The surface is inspected for damage and cracks - all of them must be repaired before priming work begins. It is recommended to grind off large protrusions, since the floors should be as smooth as possible.
The base should be as level as possible
Step 3. The primer mixture is used according to the instructions given on the package. It is poured into a tray or other container for greater ease of use. The first layer of primer is applied, and although the layer should be quite thin, there is no need to skimp on the primer. Processing begins from the corner farthest from the exit from the room. It is not recommended to go back and re-coat something.
Applying primer mixture
Advice! Do not stir (dilute) the entire primer mixture at once if it is released in concentrated or powder form. It is better to prepare a small volume and then make a new dose, rather than simply throwing away the spoiled material. Not all soils are stored for a long time.
Step 4. Use a brush to coat hard-to-reach areas well. It is important not to leave empty uncoated areas.
Priming hard-to-reach places
Step 5. Dry the first coat of primer well before applying the second coat.
The first coat of primer should dry well
Step 6. Exactly the same as the first, apply a second layer of primer and leave until completely dry.
The second layer must also dry completely.
Advice! Excessively loose surfaces require a third layer of primer.
After the mixture has dried, you need to make sure the quality of the work. To do this, run your hand over the treated surface. If the palm remains clean, then the primer does not need to be reapplied, but if it smears, then another layer of the composition is needed.
Video - How to prime floors
Prices for primer for concrete surfaces
primer for concrete
How long does it take to dry?
The drying speed depends on the composition of the primer, surface material, temperature and humidity in the room. The approximate drying speed is:
- Acrylic - 8-9 hours.
- Alkyd - at least 11 -13 hours.
- Concrete contact – over a day.
The drying speed of the primer mixture largely depends on the ability of the walls to absorb moisture. At the same time, it is impossible to determine externally whether the surface is ready for further work, so it is best to follow the instructions on the packaging.
Cleaning the surface from primer
The primer for the walls under the tiles in the bathroom may get on the previously laid floor covering, then it is advisable to quickly wipe it off with a damp cloth. If the tile has been stained for a long time, then they resort to wiping with water, soaking the surface; for this, several wet rags are left on the stain for several hours, and then they try to wipe it off.
If these methods do not produce results, then use a foam cleaner or a diluent containing alcohol. Leave the product to soak for a while, then remove the layer from the tile with a scraper.
Priming the surface before gluing the tiles ensures reliable fixation of the materials and also performs other protective functions. Professionals clearly say that the priming stage should not be skipped. The process is simple and takes little time, for this reason you can do it yourself, without turning to specialists, saving your family budget.
Types of primers, which one is best?
The whitish translucent liquid is based on water, drying oil, synthetic resins, various chemical compounds, and a substance that speeds up the drying process. A peculiar thread-like structure remains on the surface, facilitating the bonding of the base to the fill. All soil compositions differ in their composition, characteristics, properties, protection against fungal mold, and methods of application.
According to the intended purpose, the primer can be universal, specific, deep and normal penetration, sold in dry, liquid and paste form. Dry mixtures are diluted with water before use; emulsions in liquid and paste states are ready for use immediately.
Important! To destroy pathogenic fungi and bacteria, chemicals in the form of fungicides are added to the mixture, for better adhesion to a slightly porous base - latex, for resistance to moisture - silicone.
The self-leveling composition can be based on acrylic, alkyd synthetic resin, epoxy, or glyphthalene mixture.
- Acrylic primer is one of the most versatile. It can be used on wood, concrete, brick, chipboards.
- Alkyd mixture is intended for wooden surfaces. It already contains means to combat fungi, mold, and corrosion. The drying time of alkyd resins reaches 16 hours, but the service life of the floor increases.
- Glypthal mixture is suitable for surfaces made of wood and metal. Can only be used in dry rooms, not suitable for the bathroom. Drying time 24 hours.
- The epoxy primer mixture strengthens concrete components well and levels gypsum and wooden surfaces.
The primer is applied both under self-leveling floors and on their finished surface. The composition of the soil should match the self-leveling floor, so they better complement each other.
Why is deep penetration soil needed?
Let's consider what properties soil mixtures have and whether it is necessary to prime the self-leveling floor. Priming the base for self-leveling floors requires careful preparatory work. Without thorough cleaning of varnish, paint, oil and bitumen compounds, and removal of dust, there cannot be a high-quality filling of leveling material. Using a primer:
- the remains of small particles bind;
- the base of the floor is strengthened;
- adhesion improves;
- the uniformity of spreading of the self-leveling coating increases;
- the base's ability to absorb water decreases.
The primer helps prevent air bubbles, cavities, small cracks, bumps, and other defects in the fill. It clogs microscopic pores and improves the mobility and spreadability of the solution.
Note! The primer is an integral part of the process of self-leveling floors, regardless of the basic components of the surface and its further laying with any of the coatings.
Is it possible to paint tiles?
From time to time you want to update your interior, and the hardest thing is with coatings that are difficult to replace. These include tiles. And it would be necessary to change it, but when you remember the expenses, the dirt, and you don’t want anything anymore. Therefore, when you are tired of the old tiles, have not yet decided to lay a new one, but want to refresh the appearance, we begin to think about whether it is possible to paint the tiles. In principle, it is possible. But this is a temporary option. And, as a rule, it is not very durable. Everything looks decent from a few months to three to five years. The period until everything looks good depends on:
- Type of tiles. On a glazed surface, there is a high probability that the paint will begin to peel off quickly and peel off. If the surface of the tile is rough, then properly selected and applied tile paint will last for some time.
- Preparing the base. Smooth - glazed - tiles must be made rough. All the rest - wash well and degrease. There will certainly not be a normal result on a dirty or greasy surface.
Paint for ceramic tiles - a way to change its appearance without replacement - Selected materials. The choice of paint for tiles and primer must be approached carefully and thoughtfully. There are not so few materials and new ones are constantly appearing. Read the description carefully, even if you were told that this is what you need.
- Compliance with technology. Materials for painting tiles are produced by famous companies. In any case, we recommend buying these. They often post technological maps. They describe in detail where, when, how and in what order the work should be carried out. If you follow the recommendations, the result is guaranteed. And, it’s better to read the technology of the work before you buy it. Just believe me.
Let’s say right away that cheap paint for ceramic tiles is a fantasy. There is no such option. The price for materials is decent. Maybe just a small area will help you avoid spending too much.
Treatment of non-absorbent surfaces
To apply the composition to non-absorbent surfaces, you also need a roller, brushes and a special container. After opening the container, the composition must be thoroughly mixed, since it includes a polymer component and a certain amount of quartz sand, which can separate.
The composition is applied to the base using a brush. This is a fairly simple job that does not require any special qualifications or experience.
After finishing work, all tools must be thoroughly washed, otherwise they will become unusable.
This type of soil is not used very often. Since it is sold in large volumes, after the work is completed, most of the material, as a rule, remains unnecessary. Many advanced renovation specialists use primer to prepare tile adhesive, which is simply mixed with a deep penetration primer until it becomes liquid sour cream. This mixture is applied to the surface with a brush and can fully replace unique and expensive polymer mixtures with quartz filler.
Cooking features
It is worth noting that in order for the mixture to really penetrate deeply, it must be applied in two layers, without drying. Prepare the composition of the first layer in a ratio of one to sixteen (1:16) and apply in sufficient quantities. Wait until the first layer is absorbed and immediately apply the second layer, prepared in a ratio of one to twelve (1:12).
If the order of application is violated, in the case when the first layer has had time to dry, the second layer will no longer be able to absorb well and the resulting layer of protection will already be small.
When using compositions with a higher concentration, a film may form on the surface of the wall, which can be easily picked up with a sharp object and peeled off. And the strength of the material’s fastening can directly depend on the strength and reliability of the wall obtained during the film’s operation. But if you do everything correctly, as described in the first case, then even with double application you can avoid the appearance of a film. The prepared soil will perfectly saturate the base and hold even a weak solution together.
It is worth noting that when laying tiles on any base, the use of a primer will be simply necessary. This mixture will remove excess dust, create a water-repellent layer and provide better quality finishing work.
Do you need primer for a self-leveling floor before and after pouring?
It is especially important to apply a primer for loose mineral screeds. Without it, sand and cement dust stain the concrete, reducing the strength of the pour. Surfaces made of wood, stone, brick, concrete, when a solution is poured onto them, strongly absorb water, thereby contributing to the rapid thickening of the mixtures. This affects the hardening time and the consumption of the amount of fill.
Note! Without the adhesive properties of the primer, cracks, cavities, air bubbles, and separation from the base base may form on the self-leveling layer. Uneven spreading of the solution is also possible.
The water present in the emulsion, together with the adhesive, is able to penetrate deeply into the pores of the base before evaporation. The polymer composition together with the resins, remaining on the surface, holds the base together without interfering with the passage of air masses through them. This is of great importance for apartments and residential premises.
The process of preparing the mixture
To obtain the best performance, primer for concrete under tiles should be prepared strictly according to the manufacturer’s recipe. If you need to deeply saturate the surface with a primer solution, you can apply it in two layers. In this case, the second layer will be applied before the first one dries.
Then two compositions of different concentrations are prepared, for the starting layer the ratio is 1 to 16, for the finishing layer 1 to 12. But there is no need to apply a second layer of primer solution to the dried floor covering or walls; then you won’t be able to get the desired effect.