Concrete flooring is an excellent base for laying almost any finishing surface. In any case, in the rooms of a residential building or apartment, where concrete floors, as a rule, are not left bare. It’s a different matter for utility rooms or buildings, workshops, garages and other similar structures. If the concrete screed is made carefully, the floor surface is smooth and durable, without flaws, then you can save on the coating - it is not always so necessary.
Painting a concrete floor
But we must not forget that leaving the concrete surface completely without any protection is also impossible. And one of the obvious ways to create such a “protective shell” could be painting the concrete floor. If, of course, it is made with special compounds intended specifically for such purposes, and in compliance with the recommended technology. This is what we will talk about in this publication.
Why does dust form?
The surface of the concrete pavement takes on a huge amount of loads. During its long-term operation, as well as as a result of mechanical and chemical treatments, the integrity of the concrete floor is compromised. During this process, dust appears.
This process is accelerated if:
- not following the correct masonry technology;
- incorrectly replace the composition of the concrete solution;
- select low-quality materials.
Concrete sooner or later breaks down, the surface wears off, strength decreases, and dust forms, but with the help of hardening and special treatment, the shelf life can be significantly extended.
If during the preparation of concrete there is cement that has not had time to mix with water, then it will remain in the structure of the building material in the form of dust, breaking out from time to time.
Low quality concrete can collapse without the intervention of external forces. Corrosion can also occur for various reasons. Thus, if carbon dioxide and lime in concrete begin to interact, the reaction will produce dust particles.
A decent base for laminate floors
Requirements for the base for installation
Laminate is a set of multilayer panels equipped with special locking systems on all four sides. Devices that close with a click speed up and simplify the work, but require special care from installers during the preparation of the room for arrangement.
In case of differences in the height of the “relief” of more than 2 mm on a floor area of 2 m², the locks may become loose and even break during operation. The consequences are quite disappointing: accumulation of dust and dirt under the coating, creaking, large, gradually increasing cracks and similar troubles.
We allow a uniform slope of the subfloor plane within 4 mm per 2 m². However, it is worth noting that it is not advisable to place furniture in areas with a slope.
There will be no stability in the position of furnishings that rest on 4 legs; in cabinets and chests of drawers, the doors will no longer close due to distortions.
Dust protection: primer and impregnation
With the help of various impregnations, solutions and primers, concrete floors acquire aesthetics, durability, strength, good adhesion to other objects, antibacterial properties, etc.
The range of impregnating and priming substances is small, so you don’t have to choose for a long time. Substances: acrylic, alkyd, epoxy, polyurethane impregnations. To obtain the same effect, topping - a dry mixture - is widely used. At home (in utility rooms), it is recommended to lubricate the concrete floor with a solution of water and glue in a ratio of 7:1 or 10:1.
All of the above variations of concrete strengthening have their own characteristics of preparation, application and final result.
Concrete impregnation
Impregnations for concrete floors are divided into 2 types according to their composition:
- organics (polymers);
- synthetics (silicates).
Organic impregnations penetrate into the pores of concrete, making its surface resistant to various environments and imparting water-repellent properties. This impregnation prevents concrete from crumbling and protects against dust formation.
Inorganic substances act differently. Instead of filling the pores of the concrete, they react with external molecular compounds, which, when dissolved, become inert to other reactions. As a result, the concrete floor also stops collecting dust, becomes resistant to water and becomes stronger.
The most widespread are organic plasticizers, which are divided into:
- acrylic;
- polyurethane;
- epoxy.
Acrylic impregnations
Acrylic impregnations have a budget price, but are of good quality. They will perfectly protect concrete from moisture and chlorides. With outstanding resistance to ultraviolet radiation, these plasticizers will retain their color over long periods of use. Acrylic-based impregnations serve as a means of removing dust, but the concrete should not be subject to heavy loads.
Despite all the advantages, this method of strengthening concrete is unreliable. Acrylic impregnations require regular updating (about once every 2-3 years).
Polyurethane impregnations
Such plasticizers will last longer than acrylic ones, but their price is higher. High strength, resistance to chemical reactions, dust removal from concrete, protection from water - all this is provided by polyurethane solutions. They can cover not only concrete, but also brick, cement screeds and metlakh tiles. Plasticizers penetrate to a depth of 0.5 cm and are used both in utility rooms and in open areas, but under a canopy.
However, the integrity of the concrete will be compromised if a large amount of moisture gets into it; to do this, a waterproofing layer should be installed under the base of the concrete, which will limit the access of water to the concrete structure.
When using plasticizers, new properties will appear:
- strength will increase to M600 regardless of what strength was previously;
- wear resistance will increase by 9-10 times;
- Impact resistance increases 3 times;
- water resistance and resistance to strong chemicals will increase;
- absolute dust removal of the concrete floor;
- ease of care;
- best look.
These impregnations gained popularity due to their simple composition and application method, and low cost. After one day, you can already move on the floor on foot, and after 3-5 days - by transport.
Epoxy substances
Plasticizers on this basis can be either bleached or colored. It is much more convenient to use them indoors, because under the influence of ultraviolet radiation the tint becomes yellowish. Epoxy impregnation consists of a mixture of two substances: epoxy resin and hardener. Most often, the hardener is phenols, amines, etc. The hardener can be mixed in different proportions, depending on what effect you want to achieve.
Epoxy impregnations have similar properties as other compounds, but they have a number of advantages:
- increased protection against abrasive effects;
- maximum protection from moisture;
- low degree of shrinkage;
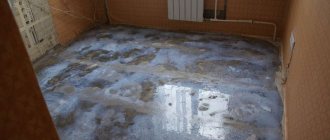
- Such plasticizers can give concrete a smooth, shiny surface, creating the effect of “wet concrete.”
Epoxy solutions do not emit a pungent odor, but are less resistant to chemical and mechanical irritants; Suitable for shopping malls, hospitals and businesses.
So, having examined the impregnations, we saw their main features:
- hardening;
- protection from moisture;
- dust removal;
- coloring
How to make impregnation at home?
Concrete impregnations work well on concrete grades M300 and higher. The higher the brand strength, the better the plasticizer appears, and the less material is consumed. Silicate impregnations are not effective on mosaic floors.
With a standard work plan, about 200-400 ml per square meter is consumed. m.
The process consists of two stages:
- Preparation of tools for work (brushes, rollers, containers, means for chemical effects on the body).
- Material processing: cleaning concrete from the loose layer, sealing holes and cracks, grinding to improve concrete adhesion. Grinding depth - 1.5 mm.
- Preparation of the solution. Instructions are usually included with the container. Mixing the elements is done with a construction mixer.
Mix the solution in a small volume so that you can use up all the additive in an hour.
You need to apply the plasticizer with a mop or thick cloth. Impregnations for deep penetration are applied in several layers.
If all technologies and rules are followed, the concrete floor will withstand aggressive chemicals, abrasives and capillary moisture.
Specifics and procedure for installing a laminate floor
Select a layout and make calculations
In order to evenly distribute the load and optimize the reliability of the connections, the laminated dies are shifted in each subsequent row, relative to the panels of the previous row. There should be no cross-shaped joints in the assembled covering.
If you look at it in plan, the picture of the correct laying of the laminate should resemble brickwork with a butt seam strictly above the center of the panels of the previous and subsequent row.
This is what professionals do; in contrast, home craftsmen shift the butt seam to the length of the segment remaining after laying the last die in the previous row. It's smart and economical, but not very pretty and less durable.
However, this method has become very popular among the people, although it allows you to reduce consumption by 2-3 laminated elements. For the most part, home craftsmen carry out installation this way, and manufacturing companies do not advise to philosophize by reinventing the wheel. The main thing is not to forget about the clear rules according to which:
In order to comply with the listed rules, it is wise to draw by hand a small and simple plan with the dimensions of the room being equipped. It is advisable to apply all architectural details, protrusions, stoves, openings, etc. to it at once.
Let's take into account that along the perimeter of the room being finished it is necessary to leave 1 cm for a damper space, then we will estimate how many whole panels will fit in one row, and how many cm will have to be filled with trim.
We will put the remaining cm from the first trimmed strip in the next row and, by analogy, fill all the space drawn on the paper. The longitudinal ridge of the first row is sawed off flush before laying. This must be taken into account when making calculations.
We invite you to use our calculation calculator - perhaps it will help you:
Popular impregnations from famous manufacturers
Primer for concrete "Protector"
This soil will strengthen the concrete floor, remove dust and protect against chemical attack. Most often, this impregnation is used on roads, floors and pedestrian sidewalks. Produced in 20 liter cans: 1 liter costs 180 rubles.
Impregnation "Retroplate"
Retroplate is used as a strengthening and dedusting agent for low quality concrete. To work with it you need to follow the rules:
- Use only on mature concrete (must take at least 16 days).
- Impregnation cannot be applied at temperatures below +5 degrees.
Produced in containers of 20 liters: the price of 1 liter is about 400 rubles.
Impregnation "Protexil"
It is mainly used to cover concrete floors in enterprises. Thanks to the additive, floors can withstand heavy loads.
Characteristics:
- penetrates to a depth of 5-10 millimeters;
- consumes 300 ml per 1 sq. m.;
- withstands temperatures from –40 to +70 degrees.
- dries in 6 hours (at +20 °C).
The price for 1 liter is up to 200 rubles.
Multifunctional impregnation "Monolit M-20"
This additive is non-flammable as it is water-based. The plasticizer increases the water resistance of concrete three times, reduces wear and increases strength, removes dust, and increases adhesion. How is Monolit M-20 consumed: 1 liter per 3-4 square meters. m. Price for 1 liter - 120 rubles.
"Aquastone"
The additive removes dust from concrete and helps protect the surface from water. Recommended for use on smooth tiles and cement-sand screeds. Can be applied to surfaces with high humidity. Price - 230 rubles per liter.
"Aquasol"
This plasticizer tends to repel moisture and eliminate any atmospheric influences on concrete tiles. 1 liter costs 200 rubles.
Leveling is a guarantee of long service life
Regardless of the type of rough foundation, it must be leveled in accordance with the building code regulations:
The old concrete floor needs to be repaired, expanded and cracks filled with cement-sand mortar.
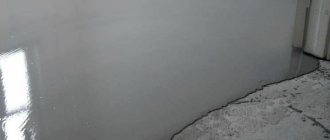
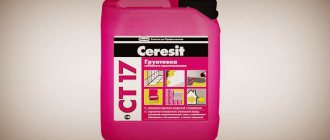
If there are large exfoliated pieces, they are removed and the recesses are filled with a self-leveling mixture. After hardening, its floor is either polished or filled with a finishing screed. The newly poured cement screed is primed, for example with Ceresite ST 17 or 15, so that the upper weak concrete layer does not “dust”, so that the sand separated from the concrete body for some reason does not creak under laminate
The old wooden floor is repaired and damaged parts are replaced. If it is possible to reduce the height of the ceilings, level them with plywood.
Minor irregularities are “cut off” from the new plank flooring and from the plywood leveling with a grinding machine, after first deepening the fastener heads into a countersunk hole.
The listed types of rough bases, as well as new linoleum without waves and loose areas, evenly laid tiles, are thoroughly washed and dusted with a vacuum cleaner before laying laminated panels.
Liquid glass processing
Liquid glass is a thick, glue-like mixture created on the basis of sodium silicate, potassium silicate and water. The main distinguishing quality among other methods of concrete processing is the extension of the life of the building material. On average, the coating lasts about 6 years on concrete. And this is only with a cheap choice of liquid glass.
Features of using liquid glass:
- With its help, concrete can more easily withstand rain, snow, dust, temperature changes and other natural phenomena. Increases strength and wear resistance: this is especially important for plinths.
- Water resistance will increase significantly: glass will prevent walls, platforms, and gables from getting wet.
- The composition of the substance will protect against chemicals: salts, acids, alkalis.
- Thanks to the alkali contained in glass, the substance acts as an antiseptic.
- Low cost.
- There are no climatic restrictions for working with the material.
Flaws:
- The solution hardens quickly, which limits working time.
- A layer in the form of a thin film is formed, which does not allow the application of other protection.
The price is based on 50 rubles per 1 kg. However, it all depends on what material you want to purchase: cheap or high-quality. On average, you will need 1,300 rubles per cubic meter.
How to do it yourself?
There are two types of liquid glass treatment of concrete: in “pure form”, and with addition to the mixed solution.
In the first case, the glass is diluted in water in a ratio of 1:10. This method allows the substance to penetrate into the pores of concrete to a depth of 2 to 5 mm. When applying three layers, a completely waterproof film is formed. After drying, a crystalline mass is created that closes the pores of the building material. Mastic and bitumen can be applied over the film.
In the second case, liquid glass with water in a ratio of 1:10 is mixed with a solution of cement and filler. The resulting material dries quickly, so the time of use is limited. This solution is used to treat concrete walls, seams, and joints of structures.
Safety precautions
Fortunately, the composition of liquid glass is non-toxic and the substance is not flammable, but if it gets on exposed areas of the body, you need to rinse the area with warm water.
Glass should be stored in a dry and cool room at a temperature from +6 to +40 degrees. But there are types of additives that can withstand frost down to -30 degrees without loss of quality. Under no circumstances should liquid glass be poured into the ground, sewers or water bodies: it, like other household waste, must be disposed of.
Anti-dust coating
Inorganic compounds are one of the floor treatment options. Its durability and strength make it the best choice for warehouse applications. Floors treated with this substance are easier to paint. It's quite easy to apply:
The main component is fluate, which should be diluted in water. For processing, you need to maintain the following proportions: per 1 sq. m. apply 200 ml.
The solution spreads from wet areas to drier areas until it is completely dry. To make the work easier, use rubber scrapers and brushes. The liquid is absorbed after 15-20 minutes from the moment of application, and the remains are removed with a rag or mop.
You cannot paint the floor until at least a day has passed. Compaction lasts up to 2 months, after which the floor will be practically impervious to chemicals and deformation.
