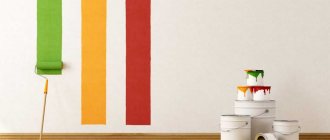
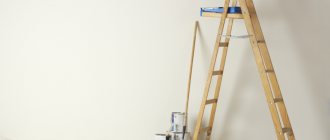
Painting the walls yourself is a great creative work to realize your fantasies and create comfort in your home. Painted surfaces are convenient; if they get dirty, you can safely wash them. Even with mechanical damage, you can always paint over the damaged part of the wall.
Original wall painting
How to paint the walls in an apartment with your own hands? It is important to properly prepare the surface and follow a certain sequence. Before you start painting, make sure you have purchased the necessary painting tools and materials.
Which paint to choose
The most widely used are alkyd paints and water-based emulsions.
Water-based paints include:
- Acrylic - covers walls well, is very durable, without an unpleasant odor;
- Vinyl - gives the walls a pleasant matte shade and can be combined with various types of surfaces. Disadvantages: they do not allow water vapor to pass through well, and surfaces covered with them are easily contaminated;
- Acrylic-vinyl paints - have the properties of the two previous types;
- Latex is very durable, has excellent covering characteristics, and dries quickly. Disadvantage: characteristic odor;
- Acrylic-latex - very durable, they are used for painting rooms with high humidity. Ideal for corridors and staircases.
Usually water-based paints are white. To get different colors, tint is added to them.
Some prefer mineral water-dispersion emulsions. They are:
- Limestone (based on slaked lime) - surfaces painted with them cannot be washed, so now they are rarely used, although their price is budget;
- Silicate (based on lime and liquid potassium glass). The coating is durable, easy to clean and has vapor permeability. These paints are more often used for painting facades;
- Cement (binder - cement). The coating is durable, but the color fades quickly.
A separate group consists of alkyd enamel paints. Unlike aqueous emulsions, they are diluted with acetone or special solvents. These paints hide stains very well. Usually they are used to paint wooden walls. These include:
- Oil or chlorinated rubber paints. The coatings are durable, shiny and easy to wash.
- Acrylic enamels are abrasion-resistant and allow walls to “breathe.”
- Structural paints are innovative paints; they give walls a decorative texture. To apply a thick, plastic mass, special tools are used. These paints allow you to realize any decorative idea.
Unusual wall painting in the nursery
How to add decor to water-based paint to paint a ceiling
The process of tinting the material is carried out in several stages:
- The water-based paint in the container must first be refreshed and mixed again with a mixer attachment and an electric drill. A large number of air bubbles are formed in the liquid, which significantly improves the process of mixing with liquid colorant;
- We fill the syringe with toner and add it in small portions, literally drop by drop, to the water-based paint. After each addition of color, mix the material until the liquid in the container acquires a uniform shade.
The tinting procedure is carried out immediately before starting to paint the ceiling; the entire container needs to be tinted. You cannot tint in parts; during the painting process, you can tint the material for the first layers in a separate container.
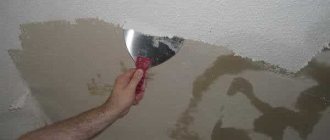
Preparing walls for painting
Proper preparation allows you to paint interior walls without streaks and avoid mistakes that can require hours of tedious cleaning. Preparatory work also helps ensure the quality and durability of the painted coating.
How to paint walls with water-based paint? First, prepare the room for renovation. Take out all decorative items and remove curtains. Ideally, it is better to remove sockets, switches, handles and locks from doors, or disguise them.
You don’t have to take the furniture out, but simply move it away from the walls and cover it. Cover the floor with paper or plastic film.
Here are a few key steps to take when preparing your walls for painting:
- First, clean the surface of the walls. Use a stiff brush to remove any drips or splashes of plaster. New and damp plaster may have alkalis, so solvent-based paints should not be used. This applies to any type of wall.
- If the surface is to be repainted, carefully scrape off the peeling layer of paint and fill the resulting unevenness.
- Then smooth the surface with fine sandpaper.
- Prime the entire wall completely to ensure a smooth surface with no dull spots in the treated areas.
- A previously painted wall that is in good condition can simply be washed or vacuumed.
If you decide to paint the wallpaper, check how firmly it is glued. If they do not lag behind the wall anywhere, painting over the wallpaper is allowed.
Before painting the wall, it is necessary to dry it as best as possible. Once you have completely prepared the wall and room, you can start painting the walls.
Unusual wall painting in the living room
Preparatory work
To paint the ceiling with water-based paint and achieve an ideal result, first examine the condition of the surface. It is necessary to eliminate all defects, level and smooth the base, otherwise they will appear under the paint. The process of preparing the surface with your own hands consists of the following activities:
- remove a layer of old paint or wash off the whitewash;
- large seams are cleared and sealed with plaster;
- then small cracks are covered with putty;
- Be sure to fill the joint between the walls and ceiling;
- the entire surface is leveled with a special mixture and smoothed;
- Finally, cover with a layer of primer.
When painting the ceiling with water-based paint, you can reduce material costs and ensure better adhesion to the surface. To do this, you need to prime the base to create a dense layer and close all the pores. To do this, use a liquid primer or a mixture made with your own hands from PVA glue and water.
Typically, ceilings are painted before walls are finished. Therefore, splashes are not dangerous for them. But it is better to cover the floors with polyethylene or old newspapers or paper. This will make them easier to clean after work.
2.1 Removing old coating
Before proceeding with the main activities, the surface should be thoroughly prepared. To remove whitewash (chalk, lime), you need to generously moisten the ceiling with a paint roller. After this, scrape off the material. All that remains is to wipe with a damp sponge to remove any remaining finish.
But if the ceilings have already been painted with water-based paint, you will have to spend more time. This is due to the fact that these compounds are practically insoluble in water, so they cannot be completely scraped off. Using a spatula you can remove a small layer of paint. To make the process easier, it’s worth remembering a number of tricks:
- 1. It is necessary to moisten the old coating with water. Both a roller and a sprayer are suitable for this. The procedure is repeated a second time after 20-30 minutes.
- 2. Create a draft in the room by opening windows and doors.
- 3. Under the influence of moisture and air, the composition will begin to swell.
Use a spatula to remove the old layer of paint. You need to act as quickly as possible so that the surface does not dry out.
Then, if there are traces of rust or smudges on the ceiling, they need to be treated with a 5% solution of copper sulfate.
2.2 Leveling process
After completely cleaning the ceiling, it should be leveled. It is best to use a thin layer putty. This composition attracts with its excellent adhesion characteristics and high plasticity. This is what allows him to create a perfectly flat surface. The mixture is applied using a spatula.
Some novice builders use a special putty-whitewash made on an oil-based adhesive. You just need to spread it evenly over the surface with a roller or thick brush.
Having completed the work, all that remains is to seal any cracks and crevices by filling them with putty.
2.3 Primer
The next step is priming the ceiling. You can use the selected water-based paint by applying the composition in a very thin layer. Work is carried out only after the putty has completely dried.
2.4 Nuances and rules
To do all the work efficiently, you need a certain set of tools.
These include:
- a paint brush, which is used to paint corners and seam joints;
- narrow brush for correction;
- fur roller;
- bath for mixing the composition;
- ribbed surface, which is required to distribute paint over the roller.
Many people do not know how to accurately carry out painting work, what to take into account, for example, the direction of light, and other nuances. As a result, the surface turns out to be uneven, covered with strange dark or light spots, and transitions from the roller are visible.
To prevent this from happening, you need to know important coloring rules. Work begins from the corners, the junction between the ceiling and the wall. Take a wide paint brush, wet it halfway with paint, and squeeze to remove excess liquid. Make a “passage” up to 5 cm wide along the entire perimeter of the room - due to this, when painting with a roller, the areas between the walls and the ceiling will not be damaged.
It is important to remember that each new layer of paint should be applied only after the old one has completely dried.
Preparing the Paint
Before use, stir the paint thoroughly. You can use an electric drill for this. Acrylic paints are usually sold thick and can be thinned with clean water before applying the first coat. Information about the required proportions can be found on the packaging of this paint.
Pour the finished paint into a bucket or paint tray. If there is any paint left in the can, close the can carefully to prevent the paint from drying out.
Choose paints only for interior work, because the house must be environmentally safe. Information about consumption and the required number of layers, paint drying time is on the packaging.
Beautiful wall painting
A little about the types of rollers
First you need to say a few words about which rollers are used, in what cases and why. About sizes: for quick painting of large surfaces, rollers with a width of 250 mm are used, and for painting wooden frames, narrow rollers with a width of 30 mm are suitable. All other intermediate sizes are selected based on ease of use.
Foam rollers are used when working with water-dispersion paints, varnishes and primers. Emulsion paints should not be applied with foam rubber - small bubbles form on the surface to be painted, which, when dry, have an unpresentable appearance.
Short-pile rollers (velor) are used for applying oil-based paints and emulsions. The result is an even, smooth film, the only drawback is that the paint does not pick up much and you have to dip it often.
Fur coats are made from both natural fur (sheepskin) and artificial fur. Sheepskin lasts much longer, but is also more expensive. The more pronounced the relief of the surface to be painted, the longer the pile of the fur coat should be. The disadvantage of fur rollers is that the lint falls out and sticks to the paint. Used for applying oil paints and enamels.
Thread rolls are similar to a terry towel. Their great advantage is the complete absence of falling lint. They are easy to wash and, if handled correctly, can last quite a long time.
Preparing walls and rooms for painting
I would like to remind you that walls before painting must be thoroughly puttied; this is discussed in detail in the article “How to properly putty walls.” Let's move on...
You need to cover the floor with polyethylene to avoid accidental damage, you never know what can happen. Based on the surface area that needs to be painted and the paint consumption per square meter (this parameter is indicated on the can), the total amount of paint required for the job is calculated. If you have small packaging, pour the required amount of paint into a dry, clean plastic bucket. This is necessary in order to exclude different shades of paint on the walls, even if it is all from the same batch.
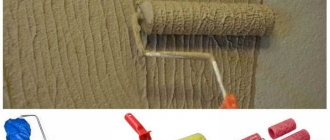
How to paint walls with a roller
If you decide to apply paint with a roller, first paint with a brush near outlets and switches, behind radiators and around baseboards. Place a wire mesh on the bucket, with its help you can remove excess paint. The paint tray already has a ribbed part, after dipping the roller into the paint, run it up and down along the ribbed part of the tray, this will help remove excess paint and ensure it is evenly distributed. How to paint a concrete wall? Painting the walls starts from the windows and ends near the doors. To paint walls with water-based paint without streaks, alternately roll vertical and horizontal stripes. The roller evenly adheres to the surface and distributes the paint itself.
For painting walls with water-based paints, a felt roller is most suitable. If you are using a new roller, roll it over the sticky side of the duct tape to remove any lint.
How to choose and prepare water-based paint to paint the ceiling
There are a huge number of water-based materials on sale from a variety of manufacturers, from domestic chemical plants to foreign brand companies. For a person unfamiliar with the process of painting with water-based paints, selecting a material can be a real problem. It’s not enough to be able to properly whitewash the ceiling with water-based paint; you also need to choose the material wisely. The easiest and worst way to learn more about paint is to listen to the manager - the salesperson in the salon. If you have patience, then it’s better to read the instructions on the can, the manufacturer’s recommendations, or talk to professional painters.
How to paint brick walls
Whitewashed brick walls have become a popular and fashionable interior decoration. How to paint a brick wall? When painting it, consider several important details:
- Clean the surface with a wire brush and wash the wall with soapy water. You will have to wait at least a week for all the moisture to leave the pores.
- Fill large flaws.
- Choose a paint: Acrylic or oil paints work well for painting brick.
- Prime the brick wall, select the primer taking into account the choice of paint. Apply the primer in a thick layer. Do not start painting until it is completely dry and has created a strong, water-repellent film.
Experts recommend painting a brick wall with a brush. The direction of painting is horizontal. You can also paint it with a roller to get a fashionable effect of a carelessly rolled layer.
To achieve the effect of old masonry, it is recommended to apply the paint with a sponge. Using a sponge, you can add spots of contrasting colors to the wall.
How to protect the ceiling from absorption of water-based paint before whitening
In the process of painting the ceiling surface, problems may arise due to uneven absorption of liquid by the concrete, plasterboard or wooden base. The best way to avoid stains is to pre-prime the surface. The acrylic primer can be diluted with a small amount of water and rolled with a foam roller in two layers, according to the scheme used when painting with water-based emulsion.
Advice! It is best to prime with a hard brush - a brush, the quality of the surface is beyond praise.
Sometimes it happens that it is not possible to buy primer, but you need to paint the ceiling now and then. As a primer, you can use a water-based emulsion diluted with water twice. The material will need to be applied to the concrete surface of the ceiling with a brush, intensively rubbing the liquid until bubbles form.
On concrete, it is better to prime with paint brush.
Painting the walls in the bathroom
A bathroom with painted walls looks beautiful, but due to high humidity, painting the bathroom walls requires special attention. How to paint the walls in the bathroom? It is important to choose the right paint suitable for painting walls in damp rooms and to eliminate dampness and fungus.
In such places there is always a reason for waterlogging, which must be eliminated before painting begins. The presence of mold or mildew on the walls can be due to constant leaks or due to the lack of proper ventilation in the room, as well as due to hydraulic problems.
You can use a sponge, cloth or brush to remove mold. After mechanical treatment, dry the area thoroughly and treat with an antiseptic. In the future, ensure free air circulation in the bathroom to prevent mold from reappearing. It is better to paint the walls in the bathroom with your own hands using a roller.
Painted walls in the bathroom
How to choose a color
Since the natural color of water-based paint is white, and if you need to give it the desired color, you can use one of two methods: using a special apparatus or diluting it with your own hands. The first method implies that many points of sale of paint and varnish products offer a free paint coloring service. All you need to do is buy paint from them and select the desired color or shade, paying additionally for the coloring pigment.
In the case of the second option, you will have to purchase jars of coloring pigment yourself and dilute it with your own hands using a construction mixer. At home, this is done in this order: the colors are diluted with water-based paint in a small container, and then the resulting composition is gradually added to the main bucket of paint, thoroughly mixing with an electric drill with a mixing attachment until the desired color consistency.
A little advice: Before you start painting, apply a test water-based paint to an inconspicuous small area of the wall, since the color of the paint in liquid form has a brighter shade than in dry form. Please note, prepare enough paint to cover the entire area of the room, since in the future it will be much more difficult to achieve the desired shade.
Painting the walls in the kitchen
How to paint the walls in the kitchen? The best paint for kitchen walls, which does not wash off for a long time and is easy to clean. Kitchens, like bathrooms, fog up quite quickly, so it is better to paint them with latex or acrylic-latex paints, which are excellent at resisting moisture and grease and are easy to clean. These paints absorb moisture well and prevent the formation of mold.
Walls are painted with alkyd if you want a glossy shine to the walls. They are not afraid of excessive humidity, but when dry they emit an unpleasant odor, so they can only be painted in a well-ventilated area.
Painted walls in the kitchen
How to remove stains
When washing painted walls, it is important to properly remove any stains. The latter arise for many reasons, but often as a result of the adhesion of grease along with dust. Such contaminants can be cleaned in several ways, using different compositions. Before treating any stain, you need to make sure the product is safe. To do this, it is tested on an inconspicuous area. Otherwise, there is a risk of ruining the finish and leaving streaks.
If there are children in the house, then traces of small, dirty hands often remain on the walls. Source domovei.com
Dish gel
Dishwashing detergent diluted in warm water will help get rid of even heavy dirt on a painted wall. To remove old greasy marks, it is recommended to use undiluted products. Fairy, Aos and Frosch are great choices. They are applied to the problem area (in concentrated form) and left to dissolve residual fat. After using most of the gels there are no traces left.
After a while, the product and dirt are wiped off with a rag. Moreover, intensive wiping of the base is not required: the rag is only moved up and down. If excessive soap is produced, it must be washed off carefully. Then it is important to dry the wall with a paper towel.
Fairy dishwashing gel does an excellent job even with old greasy stains; it should be used in concentrated form Source r-ulybka.ru
Starch or talc
Perfectly removes fresh stains: oil splashes, traces of food residues. First, press a napkin tightly onto the contaminated surface so that it absorbs as much moisture as possible. Then the spot must be sprinkled with dry starch or talcum powder and left for a couple of hours. After the specified time, the base must be thoroughly cleaned with a broom. If there is still any mark left on the wall, you can use the dish soap method.
Dry products are often used to remove greasy stains on painted walls: they absorb moisture and grease and are then easily removed Source domovei.com
Ethanol
An alcohol-containing composition will help get rid of rust, ink and grease stains. First, a piece of cloth is generously moistened with liquid, then the smeared area is thoroughly wiped. If necessary, the wall can be washed later. It is also possible to use an alcohol wipe: carefully remove dirt from the surface without damaging the base.
Shaving foam
Perfectly dissolves various contaminants, including greasy ones. A small amount of foam is squeezed onto the coated surface, rubbed a little, and left for three hours. As soon as the stain has dissolved, the remaining product along with the dirt should be removed with a soft cloth. If necessary, it can be slightly moistened.
Shaving foam copes well even with complex stains on the surface of a painted wall Source domovei.com
Painting the walls in the nursery
How to paint the walls in a nursery? For a child's room, you need to choose the right water-based paint with the KID or “for children's rooms” marking on the package. They are very easy to use, quickly applied to any surface, absolutely environmentally friendly and non-toxic.
If your child has allergies, buy special hypoallergenic paints that contain silver ions. The surface painted with such paints does not absorb dirt and has a bactericidal effect.
By knowing a few tricks on how to properly paint indoor walls, you can update your home and get results as good as a professional's.
Painted walls in the nursery
Painting technique
To make the work go faster, you need to make a layout. The layout shows the overall picture; you can think through small details that are not immediately noticeable. It will be easier to understand where and with which tool it will be easier to work.
Then choose the paint:
- matte;
- glossy;
- textured.
Texture, color, tone - will create an atmosphere and flavor. In addition to selecting the necessary dyes, you need to choose a tool and use it correctly.
The roller has a knurled, smooth surface in one direction, and a rough surface in the opposite direction. This must be taken into account if the handle grip pattern is changed. Sometimes you can break away from tradition:
Choosing a tool for painting the ceiling
All rollers differ in their functionality: paint absorption, size, length of pile, its type. The price will vary depending on these parameters.
Why it would be better to paint the ceiling with a roller than with a brush:
- After paint is applied to a ceiling or any other surface with a brush, characteristic stripes remain on it, and it is impossible to paint over them.
- After careful use of the roller, there will be no marks, as it evenly distributes the paint on the surface.
- The roller gives the texture of an eggshell to the surface being painted. However, if you are slow, paint that is not rolled out quickly can form small bumps that can only be removed by sanding.
Today, manufacturers produce different types of rollers. The quality of a tool depends entirely on the manufacturer and its design.
Rollers can be:
| Photo | Types of rollers |
| Foam rubber should not be used for priming, however, neither should a smooth-haired tool. |
| Rollers made of Sintex material are more suitable for facade work. |
| Polyacrylic pile is denser, but is not resistant to aggressive environments. The material does not leave any lint behind. |
| Perhaps the best solution for thick oil paints and other enamels and varnishes. |
| The thread fur of their polyester has nothing in common with natural fur. |
| A thread roller is suitable for any paint. |
| The polyamide roller holds the paint perfectly, so the coating is uniform. |
| Suitable for any flat surfaces. |
Let's determine the main properties of such rollers.
Foam rubber
Foam rollers are quite popular and are actively used for water-dispersion paints and varnishes. They are valued for their good elasticity, which allows the instrument to retain its original shape for a long time. After using such a roller, there are no air bubbles left on the surface, so the paint layer is applied evenly.
Smooth-haired
Such rollers stand out from the rest in that they practically do not roll, which means that the paint will not scatter to the sides. The disadvantage is that they are only suitable for perfectly flat and smooth surfaces, since their short pile may not periodically reach all the depressions.
The type of paint for such a roller is selected depending on the material. For example, velor is suitable for alkyd, oil and water-based paints.
Long pile rollers
This type can easily be called the most versatile of all. They perfectly absorb any type of paint. Any surface, even uneven, will be painted. Among the disadvantages, it can be noted that from time to time the threads can peel off, remaining on the ceiling.
How to choose the right roller
Before purchasing a smooth roller, you need to check its quality. To do this, carefully examine all the joints of the seams of the material, which should be neat, and the seam itself should not stand out too much, otherwise when working with such a tool, paint gaps will inevitably appear on the ceiling.
If you choose a fluffy roller, you need to check its quality this way: pull the fluff towards you and see if it peels off.
The design itself is very important. Check for a locking bracket that will securely hold the roller on the axle.
Taking into account all of the above, we can conclude that before painting the ceiling with a roller, it is necessary to initially assess the condition of the ceiling surface and choose the right type of tool.
Choosing a paint roller
Choosing the right roller helps prevent streaks.
The design includes a clasp that holds the handle and a cylindrical nozzle. The length of the part may vary. Sometimes the clasp is supplied without a core. This roller is used to apply paint from a short distance. The user can select the handle of the required length. When choosing a means of distributing finishing material, the following parameters are taken into account:
- Pile adhesion force. If, when you try to pull the threads, they are pulled out, you should not buy such a tool. When using the attachment, lint remains in the paint.
- Diameter. A large cylinder can capture a large amount of coloring composition. At the same time, the weight increases, which makes repair work difficult.
- Presence of joints. Nozzles made of artificial materials have evenly spaced pile. Products with large distances between threads cannot be selected. When using them, dark streaks remain.
Roller classification
Tools for applying water-based material are made from different materials, including:
A long-pile synthetic roller is the best choice in terms of price/quality ratio.
- Foam rubber. Nozzles are used to distribute thick finishing materials. When using liquid compounds, they get wet, which causes smudges to appear.
- Synthetic with long pile. The cylinder absorbs a small amount of paint, evenly distributing the composition over the surface. When using this material, spots or streaks do not form. The finishing agent is applied in a thick, even layer.
- Natural fiber. The nozzles have a long service life. They do not leave lint or smudges. A sheepskin cylinder has a higher cost.
Types of rollers
Products are usually divided into categories according to:
- design features;
- the material used to make the work surface.
Regardless of the type, the tool has a handle with special recesses that provide a tight grip. There is a stop on the front of the handle that prevents the hand from slipping and contaminating the brush with paint. The clasp is connected to the handle due to a tight fit; manufacturers rarely use additional screws.
By design
According to this criterion, the instrument is distinguished:
- Classic clasp, frame made of metal. The product is designed for a fixed-width roller. The diameter is determined by the distance between the axle and the handle.
- Double-armed, with increased rigidity, the roller axis is connected to the frame at the side points.
- With a frame roller, the fur coat is put on a metal frame and secured with clips.
- Universal without a solid axle, designed to accommodate rollers of various widths. The design provides a mechanism for smoothly adjusting the distance between the side edges with protrusions for the roller.
Existing roller designs.
According to the material of the fur coat
Depending on the coating material, tools are divided into types:
- Pile, intended for applying oil-based or water-based paints. Due to the shortened pile, the risk of fragments sticking to the coating is reduced. The paint layer is of uniform thickness and has no drips or streaks (if the material is properly diluted with a solvent).
- Foam rubber, suitable for acrylic paint or water-based materials. It is characterized by reduced cost and ease of cleaning. The set includes replacement covers.
- Made from natural or artificial fur, intended for applying synthetic or oil paints. Allows you to apply the coating without streaks, but lint may stick.
- Polyamide, characterized by elongated pile. Designed for applying water-based or synthetic enamels to pre-plastered plasterboard partitions.
- Special, without a fur coat. The rotating element is made of elastic material with a laser-cut pattern. Allows you to apply a symmetrical pattern to the wall.
Types of rollers.