Drywall can be used to insulate walls inside a building. Use either moisture resistant or wall.
Moisture-resistant can be used in dachas or for rooms with a high degree of humidity: bathrooms and kitchens.
Important! Moisture-resistant plasterboard, the best solution for rooms where heating is not provided.
This material is not at risk of cyclical temperature fluctuations. After installing the sheets, you only need to apply a waterproof primer or protective paint to the front part. You should also treat drywall with an antiseptic to kill harmful germs and bacteria.
Wall types are suitable for living rooms where the humidity is no more than 70%. Sheets are marked in blue on a gray surface.
As for the sizes of sheets, it is best to purchase products 2.5-3 meters long and 1.2 meters wide. In terms of thickness, canvases of 12.5 mm are perfect (9.5 mm is the ceiling type).
- ordinary;
- moisture resistant;
- moisture and windproof;
- enhanced strength;
- fire resistant.
Frame insulation method
There are 3 insulation methods:
- Glue method. The sheets are attached directly to the wall using gypsum or polymer-cement glue. With this finishing, the area of the room does not become smaller. The only disadvantage of this method is that it is impossible to lay thermal insulation, and the walls must be strong.
- Frame method with thermal insulator.
- Frame method without insulation.
The last two methods of installing drywall are used most often. In order not only to insulate the room, but also to achieve good sound insulation performance, you will need to use profiles. The only drawback is that the room is significantly reduced in size.
Choosing insulation
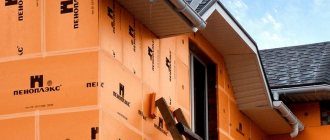
Polystyrene foam, mineral wool, and penoplex are used as heat-insulating materials.
- Polystyrene foam is an artificial material. It is characterized by average hygroscopicity, thermal conductivity and density. Without special additives it is highly flammable. They are used to insulate external walls, balconies, and basement floors.
- Mineral wool is a time-tested material. It is characterized by high hygroscopicity and an average degree of thermal conductivity. Rarely used as insulation under drywall for interior spaces.
- Penoplex is a modern material obtained by thermal processing of foam plastic. It is characterized by low hygroscopicity and thermal conductivity. Has high density. Thanks to special additives, it practically does not burn. They insulate apartments, balconies, and basement floors.
The optimal insulation for interior work is penoplex.
How to mount the frame
The frame serves as the base on which plasterboard insulation is carried out. Compliance with technology will ensure structural strength that will last for decades.
Before insulating the wall, the surfaces are first prepared, all weak areas of the plaster are removed or restored. To prevent the formation of fungus and mold, it is necessary to treat with a primer with antiseptic additives.
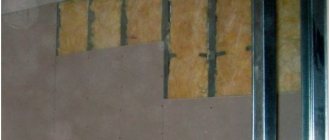
The assembly of the frame begins with the installation of guides, which are made from a UD profile. These slats are attached to the floor and ceiling in parallel, 50-60 mm away from the walls. The space under the frame will be used to lay the heat insulator.
The guides are fixed using a nail-type dowel, which provides reliable fastening to brickwork and any other.
After installing the profiles on the floor and ceiling, proceed to the installation of the slats with the CD profile. These strips are the basis for attaching plasterboard sheets. To ensure that they are rigidly fixed to the wall, direct hangers are mounted, and they are also secured with dowels and nails. For a standard apartment with a ceiling height of 2.5-2.6 meters, 3-4 hangers per profile are sufficient.
Installation of the main frame rails is carried out as follows. A section of the rack profile is inserted into the guides. The ends are fixed using small flea screws. The edges of the hangers are folded from the sides, which are also connected to the slats. The spacing between the frame profiles is maintained so that there are 3-4 slats per sheet of drywall.
To enhance the rigidity of the entire structure, you need to make transverse jumpers from the same material (CD profile). This is done according to the following algorithm.
Jumper to strengthen the structure
The profile is measured and cut so that its length overlaps the neighboring rivers by half. Use metal scissors to cut off the shelves. The resulting blanks are fixed with fleas onto the frame.
When the frame is completed, begin laying the heat insulator.
Wind barrier installation
After laying the mineral wool, all walls are covered with a windproof membrane. The use of vapor barrier materials is undesirable, especially if it concerns a wooden wall. The technology for insulating brick or concrete walls allows for the installation of a vapor barrier film, but for mineral wool the best option would be a diffuse membrane. Its unique structure does not allow water to pass through to the insulation. But from the side of the walls and the mineral wool itself, the membrane creates a free escape of water vapor. Thus, the insulation fibers always remain dry.
The membrane is stretched onto the wall with overlapping edges of at least 150 mm. The seams are glued together with tape. The walls, along with the insulation and membrane, are drilled and plastic umbrella dowels are inserted. Their wide hats press the entire “pie” against the wall.
A counter-lattice is mounted on top of the wind barrier to the frame elements. It will help create a ventilated space, and the siding will be attached to it.
The insulation has been laid, a windproof membrane and a counter-lattice for attaching the siding have been installed.
Advantages and disadvantages of mineral wool
The spread of mineral wool is primarily due to its advantages:
- low thermal conductivity;
- non-flammability;
- mechanical stability - does not change its properties when exposed to it;
- soundproofing characteristics;
- resistance to temperature deformation;
- biochemical resistance;
- convenience and ease of installation.
However, despite the impressive list of advantages, building regulations do not recommend using ordinary mineral wool for insulating premises . This is caused by the presence of phenol in its composition, which has a detrimental effect on human health. For internal insulation, craftsmen advise using ecowool or stone wool.
If installed incorrectly, exposed areas of mineral wool come into contact with the ventilation system, resulting in hazardous particles being released into the surrounding air.
Selecting a location for installing the thermal insulation layer
Initially, you need to decide how best – from the inside or outside – to fix the mineral wool. In this article I will talk about the second type - external insulation and give some subtleties of the technology.
| External insulation |
| When installing mineral wool on building facades, there is no need to dismantle and subsequently restore the interior decorative finish. |
| If “wet” technologies are used to insulate a house, the wall can only be insulated in the warm season. |
| Facade insulation allows you to protect enclosing structures from freezing. The timber wall will not be subject to successive cycles of freezing and thawing, which significantly extends its service life. |
| A wooden wall, in contact with the heated air of the room, accumulates thermal energy, which it then releases back when the air temperature outside decreases. |
External insulation has more advantages than internal insulation.
Of course, how to attach mineral wool - from the inside or outside: which is better is up to you to decide. But, in my opinion, the only negative in external insulation is the loss of decorative functions by the facade of a timber house. But I will fix this with the help of a block house mounted on top of the insulation.
Thermal insulation of walls from the inside with plasterboard: technology
Currently, insulating walls with plasterboard from the inside of a room involves the use of frame technology. In simple words, its essence boils down to initially installing a frame on the wall, laying a special insulating material inside it, and only then covering the resulting structure with plasterboard.
Such a “sandwich” - plasterboard with insulation - will help to significantly reduce heat loss in the apartment through the walls and ensure the preservation of heat for a fairly long period. At the same time, there is no need for large financial expenses, since all the materials and tools for such insulation technology are quite inexpensive, and they can be purchased at any hardware store.
Installation of the frame for subsequent installation of thermal insulation
Materials for insulating apartment walls with plasterboard
It should be noted that absolutely any insulation for plasterboard partitions can be used, the main thing is that it must be distinguished by its vapor permeability (otherwise moisture will be retained inside). Mineral wool, which has a high level of thermal insulation, low cost and ease of installation, is best suited for such work.
Unlike the same polystyrene foam, mineral wool (and all thermal insulation materials in the form of wool) is an excellent insulation material for drywall, fits perfectly into the frame, and does not lead to the appearance of mold, mildew and other similar troubles. Also, such a heat insulator does not burn, does not emit dangerous gases and is not afraid of emergency soaking.
The process of installing insulating material with your own hands
In order to insulate walls with plasterboard yourself, you will need the following materials and tools:
- thermal insulation material;
- plasterboard sheets;
- guide profile;
- rack profile;
- acrylic primer composition;
- gypsum-based putty;
- sealing tape;
- dowel-nails;
- reinforcing tape;
- level;
- plumb line;
- perforator;
- trace cord;
- screwdriver;
- scissors for working with metal;
- hammer;
- roulette;
- stationery knife.
Types of plasterboard insulation
All gypsum board is produced in sheets of size: 2.6 – 3.0 m*1.2 m. There are two thickness options:
- 12.5 mm wall;
- 9 mm ceiling.
Depending on the purpose, the following types of plasterboard are distinguished:
- ordinary;
- waterproof for wet rooms;
- hardened;
- windproof for outdoor use;
- fireproof.
The following methods of insulation with plasterboard are widely used:
- Sticker directly on the wall. An adhesive composition based on gypsum or polymer is used. In this case, the area of the room is not “eaten up” and sound insulation is improved. There is no need to talk about any noticeable insulation. The method is applicable only in regions with warm climates.
Mounting on frame guides. The guide system consists of vertical metal profiles or wooden blocks fixed to the wall. Sheets of gypsum board are attached to them with self-tapping screws. This method leads to a reduction in the usable area of the room and provides good sound insulation. The air gap between the gypsum board and the wall plays the role of thermal insulation. The impact of such insulation depends on the windproofing of the space under the sheets - if there are drafts in it, the efficiency will drop to zero. This way you can insulate walls in regions with a temperate climate.
Laying a special heat-insulating material into the guide system under the gypsum board. Only this method is a real insulation of walls with plasterboard; it will work in any region. The thickness of the slabs of thermal insulation material is selected based on the depth of the frame in order to lay them with the highest possible density. In particularly cold regions, insulation is laid in two layers. In narrow places, for example, behind the radiators of a heating system, sheets of foamed plastic are attached.
The most widely used materials for insulating internal walls under plasterboard are:
- Polystyrene foam, or polystyrene foam. Effective, easy to install and cheap material. Its disadvantage is high fragility and chipping. When smoldering and burning, it emits toxic gases and aerosols.
- Extruded polystyrene foam, PPE. Does not crumble, has high strength. Not susceptible to getting wet. It costs more than polystyrene foam and has better thermal insulation. Also, when smoldering, it releases harmful substances.
- Basalt wool. Good thermal insulation performance, ease of installation. Does not burn, does not emit harmful substances. Needs vapor barrier.
- Glass wool. The indicators are comparable to basalt. It has an important drawback: when wet, it loses its thermal insulation properties. Requires special attention to vapor and waterproofing. During installation work it emits dust that is harmful to the respiratory system and mucous membranes; it is necessary to work in protective clothing and a respirator.
- Penofol. Foamed polyethylene sheets are flexible and ideal for installation in hard-to-reach places. On one side it is laminated with a layer of foil, which reflects heat back into the room. Does not require additional vapor barrier.
Basalt wool is used under drywall to insulate walls.
To protect the insulation layer from water vapor, synthetic membrane materials or thin sheets of foam foam are used.
Mineral wool is supplied in slabs measuring 600*1200 mm or in rolls. The slabs are more convenient for laying into guides mounted with a standard pitch of 600 mm. Bowl rolls are used for thermal insulation of floors and for laying in guides with non-standard pitches.
Insulation from the inside: pros and cons
Insulating walls with plasterboard from the inside is a technology that goes against the basics of heating engineering. However, there are situations when it is impossible to carry out work outside. In this case, this technology is indispensable.
The disadvantages include:
- Dew point offset. There is a high probability that the walls will get wet.
- Reducing the volume of the room. The metal frame, insulation and drywall “eat up” the usable area.
- Reducing the threshold of maximum loads on the wall. Insulation has a lower density than brick or concrete. When installing heavy shelves on a wall sheathed with insulation, anchoring may be required.
Insulation with frame
The procedure for choosing this installation method will be as follows:
- The wall surface undergoes minimal processing: poorly adhering elements of the old coating are removed.
- The frame is marked: a strip is drawn on the ceiling, then using a plumb line it is transferred to the floor. These are the guide attachment lines. The location of the vertical posts is marked on the wall in 60 cm increments.
- The guides are secured with dowels. The fastening step is 25–30 cm.
- Vertical elements are mounted. They are screwed to the guides with metal screws. The deviation is adjusted using direct hangers located every 50–60 cm. The position of the racks is checked with a building level.
- Glue the penoplex to the wall in the same way as with the frameless method. The insulation boards are rolled with a roller with needles, and an adhesive solution is applied. Then they are tightly inserted between the vertical posts and pressed for 40–60 seconds.
Advice. Pieces of insulation are placed in the metal profile to prevent heat transfer through the studs. Another option is to fill them with foam.
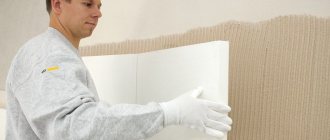
- Sheets of drywall, if necessary, are cut into the required fragments. Docking of gypsum boards occurs strictly on racks. Fixation is carried out with self-tapping screws in increments of 25–30 cm. In order not to damage the surface of the drywall during installation, a special bit is placed on the screwdriver, limiting the depth of screw tightening. You can find it in construction stores.
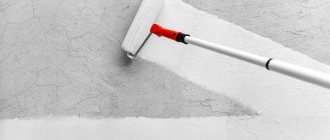
- The seams are sealed using reinforcing tape and putty. After grouting, the entire wall is covered with two layers of a special primer for drywall. The second layer is applied after the first has dried.
Thus, it is quite possible to insulate the walls of an apartment from the inside using penoplex and plasterboard with your own hands. If you do everything correctly and carefully, the desired effect will definitely be achieved. The process can be seen in detail in the following video. And if you have any questions during the work, ask them in the comments.
Required materials and tools
To install insulation under drywall you will need:
- Directly the penoplex itself. For internal wall insulation, products marked “C” with a thickness of up to 30 mm are used.
- Reinforcing mesh, plaster and putty. They are useful both for leveling the base surface and for finishing drywall.
- Deep penetration primer and special for gypsum plasterboards.
- Glue intended for fastening penoplex.
- Vapor barrier.
USEFUL INFORMATION: Drywall adhesive: which one to choose?
For the frame method of installing drywall, penofol with a foil surface is ideal. It will reflect heat into the room.
- Dowels. The insulation boards are fastened to their disc-shaped type, and the metal frame profiles are fastened to dowel-nails.
- Guide and rack profile for creating a frame.
- Metal screws for fastening elements, direct hangers and other necessary fasteners.
- Silicone sealant.
Tools:
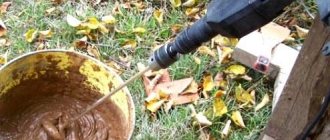
- Drill with mixer and container for preparing adhesive solution.
- A hammer drill with a drill for drilling holes for dowels on which we will attach profiles.
- Metal scissors.
- Screwdriver.
- Painting knife.
- Spatulas and graters, sandpaper.
- Roller and brush for applying primer.
- Marking tools: level, plumb line, tape measure, pencil.
Selection of internal insulation
Let's talk about insulation under plasterboard sheets. There are mainly three types of insulating materials that are well suited for this purpose. This includes:
- basalt wool;
- glass wool;
- Styrofoam.
Due to constant debate among experts about the health hazards of polystyrene foam and expanded polystyrene, their use is now not as widespread as it once was.
The external similarity between basalt and glass wool is undeniable, but at the same time they have many differences that need to be paid attention to. The first is, of course, the composition. The basis of glass wool is glass fibers, the basis of basalt wool is rock of igneous origin. Second: thermal conductivity coefficient. For basalt wool, this indicator is lower than that of the “opponent”, so it manages to retain heat much better.
A significant difference between these two materials is also visible in the fire resistance indicator. When exposed to fire and high temperature, glass wool simply sinteres into a single mass, while basalt wool remains virtually unchanged.
In work, again, basalt wool is more convenient than glass wool. Very fine fibers of glass wool can cause unpleasant itching, so good care should be taken with protective clothing, goggles, gloves and a respirator. When working with basalt wool, it is enough to wear only gloves.
Important! If glass wool fibers get on your skin, be sure to wash them off with water. You cannot use a washcloth!
If we talk about savings, then the balance certainly tips in favor of glass wool, which is on average three times cheaper than basalt. But don’t forget that glass wool needs to be laid in two or even three layers.
Manufacturers offer to buy insulation both in slabs and in rolls. Plates are much more convenient because they do not need to be cut during the insulation process. Usually their width does not exceed 60 cm, which makes it possible to attach them between the posts of the so-called skeleton without any problems.
If you still have doubts, it would be a good idea to watch a couple of videos that will help you imagine what and how.
A simple option for insulating a frame house
Frame houses are almost ready-made structures, the elements of which can be immediately covered with siding. Essentially, these are structures made of vertical posts tied with beams from below and above. The photo below shows the frame of such a house.
Frame of a wooden house Source gran-nt.ru
To insulate such a house, you simply need to lay a 100 mm thick layer of thermal insulation material between the posts. After that, vapor barrier is laid in horizontal strips along the racks. Laying is carried out from the bottom up with an overlap of the upper strips on the lower ones in the amount of 10-15 cm. The joint is covered with self-adhesive tape.
After this, wooden slats with a cross section of 50x50 cm are placed vertically along the racks. They will create a ventilation gap between the insulation and the siding. And siding is installed along the slats and attached to them.
Wall covering with plasterboard with insulation, video
Drywall is a material that appeared relatively recently and has a number of undeniable advantages over other finishing materials. The main thing is that it is very easy to process, and if you decide to cover the walls with plasterboard with insulation, then you have chosen the right option, because the thermal insulation of the walls
This material holds heat well, is beautiful and inexpensive!
Contents of the article about do-it-yourself wall insulation with plasterboard
- Who produces and sells drywall?
- Which drywall is best to buy?
- Thermal insulation of walls under plasterboard
- Thermal insulation of a balcony or loggia with plasterboard yourself!
- Thermal insulation of walls with plasterboard video
Who produces and sells drywall?
We suggest that you familiarize yourself with the leading brands if you decide to do wall insulation with your own hands, these are:
- Knauf – Germany (market leader);
- Rigips, Nida Gips, Giproc – France;
- Lafarge - Poland.
Russian manufacturers also offer us good products:
- trademark "Volma" - Volgograd gypsum;
- GIFAS trademark – OJSC Sverdlovsk Gypsum Products Plant;
- Abdullingips trademark – Arakchinsky Gypsum LLC;
- Trade mark Utah Gypsum – “Combine of building materials and structures” (Republic of Bashkortostan).
Which drywall is best to buy?
For better orientation, let's look at the markings of drywall. This way you can quickly choose the brand and type, depending on the work to insulate the walls from the inside with plasterboard:
Types of drywall
| Type of drywall | Length, mm | Width, mm | Thickness, mm |
| GKL | 2500 | 1200 | 10 or 12.5 |
| GVL | 2500 | 1200 | 10 or 12.5 |
| GKLV | 2500 | 1200 | 10 or 12.5 |
| GKLO | 2500 | 1200 | 12.5 |
| GKVLO | 2500 | 1200 | 12.5 |
| GKLV – floor element | 1500 | 500 | 20 |
If you decided on TM Giproc drywall, then you need to know its markings:
| № | Type | Marking |
| 1. | Standard | GH-13 |
| 2. | Moisture resistant | GN1-13 |
| 3. | Increased strength | GEK-13 |
| 4. | Wind and waterproof | GTS-9 |
| 5. | Repair | GN-6 |
Thermal insulation of walls under plasterboard
For corner apartments and large office premises, covering the walls with plasterboard with insulation is very relevant, since it is unrealistic to insulate the outside. Then there is only one way out - internal thermal insulation of the walls, and if you prepare everything correctly and use innovative technologies, you can insulate the walls with plasterboard yourself.
Video about installing drywall
The main steps for thermal insulation of walls under plasterboard:
1. Procurement of materials and tools.
The materials you will need are drywall itself, insulation (foam plastic or mineral wool), metal or wooden profiles, slats for the frame, fasteners, self-adhesive tape, vapor barrier membrane, anti-fungal liquid.
preparing drywall for insulation
The tools you need to have are: a screwdriver or drill, a hammer drill, a hammer, metal scissors, a building level or a plumb line.
2. Preparing the walls
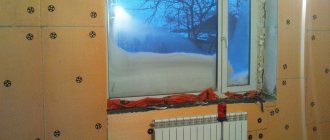
– they need to be cleaned, cracks sealed, dried well, and traces of fungus or mold removed with a special brush or grinder. Dry the walls either with a hair dryer or a heater.
Stage 2. cleaning old paint and plaster
3. Treating walls with waterproofing putty
– an additional measure to prevent the appearance of dampness. Apply the 1st layer vertically, the 2nd horizontally.
4. Marking the room for installing the frame
- using plumb lines.
5. Frame installation
– we still recommend choosing a metal frame, since it will last much longer than slats made of timber. Before installing the frame, glue self-adhesive tape to the profile, which will not allow the transfer of cold.
installation of a metal frame
6. Installation of insulation
– the principle here is the same as when insulating with mineral wool with your own hands. In addition to mineral wool, consider foam, EPS, or fiberglass insulation. Attach the insulation layer very tightly, without gaps. It can also be glued to the wall.
7. Applying a layer of vapor barrier - use penofol, which retains up to 97% of heat.
8. Drywall fasteners
– umbrella dowels are often used. For an ordinary apartment, buy gypsum board, but if there is high humidity, don’t take risks, but buy gypsum board right away. Read about attaching this and other heat-insulating materials to the wall in another article. Decide on the type of gypsum board based on the type of edge and size. Consider what the most popular manufacturer offers.
Drywall sizes offered by TM Knauf:
| Type of drywall | Decoding | Leaf color | Features of use |
| GKL | Regular plasterboard sheet | grey | -wall covering |
| - dropped ceilings | |||
| – arrangement of partitions | |||
| – decorative items | |||
| – products for sound insulation | |||
| GKLV | Moisture-resistant plasterboard sheet | green | – in conditions of high humidity |
| – finishing of kitchen, sauna, bath, garage | |||
| – prevents the development of fungus | |||
| GKLO | Fire resistant plasterboard sheet | grey | – finishing of industrial premises with increased requirements for fire resistance |
| – contains reinforcing components | |||
| GKLVO | Plasterboard sheet is moisture and fire resistant | green | – finishing of industrial premises with increased requirements for moisture and fire resistance |
| – the sheet consists of 2 layers, between them there is gypsum dough with reinforcing additives | |||
| GKL-fireboard | Gypsum plasterboard sheet with increased fire resistance | grey | – holds fire for more than an hour |
| – reinforced with fiberglass | |||
| GKLF | Facade plasterboard sheet | green | – façade arrangement |
| – resistant to temperature and precipitation |
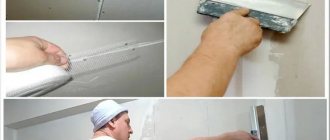
9. Applying plaster mesh
on the joints of drywall sheets and putty. It is better to apply several layers of putty, but wait for the previous layer to dry.
10. Enjoy
warmth and comfort in the room!
Thermal insulation of a balcony or loggia with plasterboard yourself!
Insulating a balcony or loggia will improve the thermal insulation of the walls in the apartment and will help you add additional living space, rather than cluttering the room with unnecessary things. For this purpose, drywall is good because it is multifunctional:
– resistant to temperature changes;
– helps to realize design fantasies: arches, multi-stage ceilings, etc.
All stages of work are, in principle, the same as when insulating walls with plasterboard, but there are several important tips:
- insulate the floor - the wires are laid before pouring concrete;
- do not use plasterboard for the floor, preferably tile or laminate;
- install the metal frame horizontally in increments of 60 cm;
- fasten the guides with dowels;
- First, insulate the walls where a single sheet can be placed;
- dowels are fixed in increments of 20 cm;
- drown dowels for easy plaster;
- Rolled foil is perfect for vapor barrier.
What you shouldn’t skimp on is quality repairs. Subsequent alterations may cost even more of your money and nerves.
When is it necessary to insulate indoor walls?
The most effective option for wall insulation is installing thermal insulation on the outside of the façade. But only owners of private houses can afford this. This method is also expensive.
In apartment buildings, if they are not insulated from the outside with thermal insulation materials, residents have only one choice for insulating the walls themselves - internal thermal insulation. Private homeowners also often choose this option as an economical one.
They prefer to use plasterboard for wall cladding because it has a number of advantages over other finishing materials:
- lightweight and easy to handle;
- has thermal insulation properties;
- allows you to quickly create perfectly smooth surfaces;
- under such a coating you can place any type of insulation, even soft ones;
- its cost is not high.