Home / Ceiling design / Crack in a plasterboard ceiling - how to fix it?
The fact that gypsum compositions on ceilings are now practically the most popular does not require confirmation - everything is obvious. However, one trouble often happens to them: cracks appear on the plane. Therefore, for many it is very important to know how to fix everything in such cases and repair cracks in a plasterboard ceiling. There are quite a few options for solving such problems and therefore, here we will consider only the most popular and simple ones.
Causes of crack formation
Building subsidence
This phenomenon can provoke the formation of a fairly large number of cracks. The peculiarity of sealing such faults is that the operation can be performed only after the process of subsidence of the house is completed.
Installation method and volume of space
The problem in question may occur under the following conditions:
- a fairly large room;
- installation of drywall was carried out sheet by sheet, excluding seam displacement;
These circumstances somewhat reduce the stability of the ceiling structure relative to possible vibrations. Thus, significant vibration can provoke the formation of cracks on the mentioned surface.
Incorrectly selected fasteners
Experts do not recommend using dowels, which are sold with screws in one set, when installing a metal frame. These fasteners cannot withstand heavy weight due to the significant discrepancy between the diameters of the parts. This situation causes the fastening system to be gradually pulled out of the ceiling, which can lead to sagging of the panels.
Errors in installing a metal profile frame
In the case where the U-shaped suspensions were fixed not with the help of special jumpers, but directly behind the ears, cracks may also form on the plasterboard ceiling. This is due to the retraction of the suspension mounted behind the mentioned ears. This process leads to the destruction of the integrity of the putty present on the surface of the ceiling.
Mistakes made during finishing
Before applying the putty, it is necessary to seal the joints between the panels of the building material. Otherwise, during the drying process of the mentioned substance, as well as the GPC sheets themselves, microscopic deformation occurs. At the same time, the absence of a monolith provokes a displacement of the finishing elements. Such instability causes the formation of the cracks in question.
No primer
The absence of a special primer composition on the working surface prevents sufficient adhesion of the putty directly to the drywall. This also contributes to the occurrence of corresponding defects.
Force Majeure
Cracks on the ceiling made of GPK panels can be a consequence of the following circumstances:
- earthquake;
- a flood created by neighbors above;
- other similar situations;
Recovery process
Before repairing cracks in a plasterboard ceiling, it is important to find out the exact cause of their formation. There are situations in which eliminating the faults themselves is ineffective. We are talking about the following circumstances:
- Long-term deformation of the floor;
- There are reasons to believe that the specified change in form may not stop;
- In such cases, the ceiling structure must be redone. Dismantling and re-equipment of the structure will also be required under the following conditions:
- When pressed, the ceiling emits air;
- The pressure causes some movement of the ceiling system.
Tools and materials
Tools for repairing cracks
In the process of deciding how to repair cracks in a plasterboard ceiling, you need to prepare the necessary equipment in advance, along with the required materials.
Sealing cracks requires the following construction tools:
- sandpaper;
- a knife with which cracks will be repaired (a chisel can also be used here);
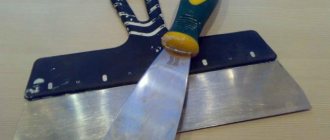
- hard spatula;
- wide spatula for finishing the surface;
- diamond mesh;
For high-quality finishing of the faults in question, the following building materials will be needed:
- soil composition;
- Fugenfüller;
- satengypsum;
- dye.
If the ceiling is being painted, it is necessary to provide an appropriate roller. In this case, you need to cover the entire surface of the ceiling system with a paint substance. This will prevent stains from forming.
If it is necessary to replace a specific section of the floor, you will need to purchase a complete set of tools for installing a plasterboard ceiling. This situation may arise as a result of errors made during the installation of the frame.
If the metal frame of the structure is being strengthened, the process of finishing the required area includes manipulations performed when working with cracks. In this case, a monolithic surface is created by masking the seams between the GPC sheets.
Getting ready
Sealing cracks involves the following preparatory manipulations:
- first the crack must be widened. To do this, use a chisel, spatula or knife. Expand to 5-10mm;
- scrape the putty down to the drywall;
- remove all crumbling elements, as well as those that do not adhere well;
- remove 1-3 cm of paint from the edges of the crevice. This is easily done with a knife or spatula;
- after this we process the edges with sandpaper;
- remove all dust with a brush or broom;
- then prime the edges and let dry;
Note! Any brand of primer can be used.
Joining cracks
Before repairing a crack in a plasterboard ceiling, you should joint it. This operation requires the use of one of the following tools:
- knife;
- putty knife;
- chisel.
The existing putty is eliminated. The surface is cleared down to the plasterboard sheet. In this case, the crack itself must be widened to 5 or even 10 millimeters.
In the case where the fracture is somewhat wider than the specified parameters, it is necessary to carefully remove the falling off finishing elements. This is done to prevent the formation of a new crack directly next to the sealed one.
Joining cracks
The edges of the embroidered crack must be cleaned of paint. In this case, the following tools are used:
- diamond mesh;
- knife;
- putty knife;
- sandpaper;
- chisel.
Such manipulations will improve the quality of adhesion, as a result of which the new layer of putty substance will adhere more reliably and firmly. Along with this, the surface of the seam must be thoroughly cleaned of any dust present. For this purpose, the following devices are used:
- broom;
- special brush;
Next, the seam is treated with a primer. The specified substance must dry completely after application. Only then can you begin to seal the resulting crack.
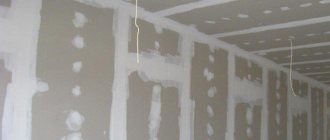
What to do to prevent drywall seams from cracking
Before you begin to putty the areas between the gypsum boards, you should prepare all the necessary materials and tools.
The following materials will be required:
- Putty suitable for further finishing of the ceiling
- Acrylic primer
- Perforated paper tape or serpyanka
- PVA glue
It is important to use high quality materials, otherwise the areas between the sheets may crack and cracks that are not pleasing to the eye will appear.
Tools you will need:
- Narrow and wide spatula with flexible blade
- Grater for leveling the surface
- Brush and roller for applying primer
- Construction knife
The work is carried out in the following sequence:
- At the edges of the plasterboard, chamfers are made with a construction knife at an angle of 45° and a depth of 5 mm. This is required for better adhesion of the putty to the drywall;
- The surface is cleaned of dust. The screw heads must be recessed into the gypsum board, but not more than 5 mm;
- The ceiling is primed;
- Next you need to putty the seams well. You need to plaster so that the composition completely fills the void. It is also necessary to putty the screw heads;
- Further work depends on the chosen material: serpyanka or paper tape. If neither of them is used, the joint will crack. If serpyanka is chosen, then after applying the putty composition it is applied to the joints of the sheets and pressed down along the entire length. Then you need to run a spatula over it to remove excess composition. If another reinforcing material is used, the applied putty must first dry completely. Then PVA glue is applied to the paper tape and to the joint. The tape is glued, smoothed out, air bubbles are removed. Further work can be done after the glue has dried;
- After the first layer of putty has dried, it is necessary to re-plaster the joints;
- After drying, the surface should be sanded;
- Now you can plaster the entire surface of the ceiling.
If the technology is violated, the joint may crack, and you will have to putty everything again
It is also necessary to pay attention to the quality of the putty. If it is of poor quality, it can quickly crack
If you do everything correctly right away, then nothing will burst.
Sealing the seam
The crack can be repaired using regular putty. In this case, it is necessary to use a special adhesive tape. This element is used for additional finishing of the problematic surface. Only after this should the finishing layer of satengypsum be applied.
putty
Using a fugenfüller when sealing a crack allows you to do without the aforementioned adhesive tape.
It is important to note that fugenfüller is a special putty mixture that has a shorter setting period. In addition, this composition provides the finished surface with a fairly rigid structure. This circumstance determines the frequent use of this composition in the process of sealing cracks in plasterboard ceilings.
When working with a fugenfüller, you should perform all relevant manipulations as carefully and carefully as possible. If there are certain defects at the sealing site, they will appear after the completion of the manipulations in question.
Such consequences can be avoided by correct installation of the putty mixture. When applying fugenfüller, you should press the working tool firmly enough to the surface. In this case, the level of putty must correspond to the level of the GPK sheets. This technology involves preserving a certain space for installing satengypsum. Only in this case will the seam be masked as efficiently as possible.
Putty process
The composition applied to the crack must dry thoroughly. This process takes approximately a day. After this, you can begin to carry out further surface treatment. In this case, an additional layer of primer is applied. It also needs to be allowed to dry completely.
Then the treated area of the ceiling is covered with satengypsum or putty substance. Typically, this operation eliminates the need to sand the working area of the floor using sandpaper. This is due to the use of a wide spatula, which promotes high-quality smoothing of the surface.
When the finishing putty is completely dry, the ceiling is covered with paint. In this case, the colorful material is applied to the entire ceiling as a whole. This helps prevent differences in cladding tones.
How to remove a crack in a plasterboard ceiling - tips
- Building shrinkage is the most common reason why a crack occurs. Moreover, the ceiling is not the only surface in the room that is destroyed by this.
- The close proximity of transport routes leads to vibration of the structure, and this also causes the ceiling to crack.
All surfaces suffer from building shrinkage
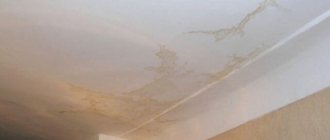
- Other force majeure circumstances, which include earthquakes, explosions, flooding.
The finishing material ages, and this is attributed to the natural reasons why a crack appears or the plaster begins to peel. Over time, the material changes structure and depolymerizes. Peeling of the putty indicates that the master ignored the priming step, or the proportions of water and dry mixture were not observed when mixing. Important
! To find out why the crack appeared, and to exclude the strength of the guides from the possible reasons, press on the surface of the binder.
Backlash with a characteristic rustling sound will be revealed by poorly fixed dowels in the ceiling. Important
! Sealing of cleaned areas is carried out using a wide spatula, which covers the entire surface of the area to be restored. This way the crack will completely disappear, because you will get a flat plane without differences.
You will have to putty two or three times, since when drying the material shrinks slightly and the seal becomes noticeable.
Prevention
It is also worth mentioning how to avoid cracks in plasterboard ceilings. To do this, when carrying out major repairs, you need to pay attention to all the details of this process. It should be remembered that the smallest seam can provoke quite serious problems. This situation threatens not only the aesthetics of the room, but also the safety of staying in it.
When installing a plasterboard ceiling, you must strictly adhere to all established rules and regulations. This will help you avoid the question: “How to remove a crack in a plasterboard ceiling?”