Is it possible to make craquelure on the wall with your own hands?
Application methods are simple and you can do the job yourself. To do this you will need:
- Textured plaster.
- Primer.
- Craquelure varnish.
- Acrylic paint or special grout.
- Putty knife.
- Brush or sponge.
- Protective varnish.
Choose paint and grout in contrasting colors to make the pattern stand out and be brighter. Cracks can be of different shapes: if you apply the varnish with a brush, the pattern will be deep and parallel, but if you apply it with a sponge, you will get a fine mesh.
Craquelure varnish can be:
- One-component - easy and simple to apply, dries quickly.
- Two-component - the application technique is more complex, the drying time is also more complicated. A hair dryer is often used to speed up the process.
Surface preparation: requirements
Craquelure is a finishing coating and is applied to the prepared wall. To do this you need:
- clean the surface from the previous coating. Wallpaper and paint are removed to the base;
- You need to use putty to fill in the defects. When it dries, sand the flaws with sandpaper;
- prime the wall;
- putty, approximately two millimeters thick;
- when the composition has dried, clean the surface again from dust and dirt;
- carry out all communications, wiring, etc.
Application technology
One coat of paint is applied to the wall using a roller. The layer should be thin and uniform, without smudges. Dries within five hours. After this, a one-component craquelure varnish is applied, or you can use a special craquelure primer. Depending on the position of the cracks, the varnish is applied either horizontally or vertically. To obtain a chaotic pattern, apply with strokes in different directions. The more varnish, the deeper the ornament.
The dried wall is covered with Venetian or textured plaster using a wide spatula. You can use acrylic paint, applied with a roller.
The surface must be coated quickly, as cracks begin to appear five to ten minutes after application. When working on a large area, work in vertical stripes.
Within 24 hours, the cracks will completely form and dry out. Next, the surface is coated with a protective varnish. The finished wall is treated with decorative varnish using a sponge or natural wax, this will give a finished look.
If the work was done with textured plaster, then after the cracks have dried, the surface should be cleaned with sandpaper and sweep away the dust with a brush. Sanding must be done carefully. The finishing touch is the application of protective varnish.
Venetian plaster also needs to be sanded, dust removed and finally coated with wax.
Application of two-component varnish
Working with this varnish is the most labor-intensive, but the resulting result justifies the effort. The surface is painted in a certain color, after which a thin layer of craquelure varnish must be applied to the dry wall. After the first layer has dried, the next one is applied. When it dries, the wall is covered with a finishing coating: paint or plaster.
The surface dries within 24 hours; if you use a hairdryer, the cracks will be deeper. Grouting is done when the top layer has dried; before that, dark-colored oil paint, gold powder or colored dry pastels are suitable. Rub the product into the cracks with a sponge, remove the excess with a cloth soaked in vegetable oil. Wipe the finished surface with a dry cloth and apply a protective varnish.
How to make craquelures with your own hands
The name “two-step” (two-component, two-phase) did not arise because of the second stage - grouting the craquelure with pigments. Initially, two separate components were used to create artificial cracks on the varnish surface: the varnish itself and a coating that tightened the varnish layer when drying.
For example, you can coat an object with an alcohol solution of shellac, and use gum arabic (a solution of acacia resin) as the second component. This is how forgeries of famous ancient paintings were made: not only the artist’s work was copied, but also the traces of time on the canvas.
Artificial cracks on furniture. Photo from makeityours.co.uk
The development of the chemical industry made it possible to simplify the process by combining both components in one bottle, but the name “two-step” remained. Although even today most of the offered range of products for such craquelure really consists of two parts, including shellac and gum arabic. And for one-step, there are not only intermediate craquelure varnishes, but also paint that cracks itself, without varnish as an underlying layer.
To create this “antique” effect, decorators use not only finished products: craftsmen also have improvised means in their arsenal. Thus, the one-step craquelure effect can be achieved using PVA glue, using it as a craquelure “varnish” or mixing it with finishing paint in a 50:50 ratio. Also, use regular construction varnish, and not from the assortment of art stores - it’s cheaper. A cracked surface will also result if the paint is applied to a layer of egg white, gelatin, washing gel or dishwashing gel.
Crackle effect obtained using glue. Photo from aolop.us
And if you wipe acrylic paint with 9% vinegar, it will partially dissolve the paint coating, creating peculiar microcracks. The choice of product depends on what effect you want to get.
By the way, crackle can be made not only with varnish and paint (although varnish will still be required, but only as a final coating). This method is a good practice for fine motor skills because the cracking is created by the eggshell inlay.
Eggshell craquelures. Photo from blog.alexanderlamont.com
And in conclusion, I suggest watching a video about how to get craquelure on the surface of furniture using professional tools. You have the power to give new life to old things by updating them, or, conversely, to make “antique” out of faceless modern furniture. There are many ways to change your interior. If you are interested in this topic, check out other publications on our website from the series about old furniture:
- We update old furniture. New life for your favorite things
- We update old furniture. Aging with dyeing
- We update old furniture. Painting: preparatory work
- We update old furniture. Painting: what paint to choose
- We update old furniture. Painting: what do you need besides paint?
- We update old furniture. Painting: decorating ideas for inspiration
- We update old furniture. Decoupage
Simple wall decoration has long been of no interest to anyone. Decorative plaster, tiles, wallpaper made of liquid glass and bamboo and other equally interesting materials have become fashionable. To beautifully and unusually decorate the interior of your home, you can make craquelure on the walls with your own hands - an original and not too difficult to make antique decor.
DIY craquelure on the walls
Contents of step-by-step instructions:
How to care
In order for the coating to last for a long time, special care is required: do not wet it excessively, only wash it with abrasive agents and clean it with special chemicals. Carry out wet cleaning once a week with a soft cloth.
Craquelure looks impressive and gives a special atmosphere to the room. With proper application and care, the coating will last a long time and with high quality.
Useful video
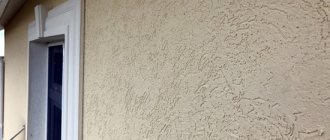
Cracks are often associated with the visible breath of time. Trying to give antiquity to the appearance of the walls, they are covered with a pattern with artificially formed cracks. This finish is quite decorative and is found in many design styles. Craquelure is especially welcome in interiors in country and classic styles. To form crackle (a pattern of cracks), craquelure plaster is used. This name refers to the technique of plastering work and the decorative plaster compositions used.
Advantages and disadvantages
If we talk separately about the pros and cons of such coverage, then it is enough to highlight the following advantages:
- pronounced decorativeness;
- uniqueness (it is impossible to predict exactly what shape artificial cracks will take);
- versatility of use (the compositions fit well on surfaces of any kind - concrete, brick, plasterboard);
- appropriateness in the interior (crackle can decorate the ceiling, columns, walls, plinths);
- moisture resistance of the coating;
- the possibility of enhancing the effect or eliminating it by painting;
- environmental friendliness of the crack-forming composition;
- can hide small defects in walls;
- durability.
Necessary materials
The effect of cracks in antique plaster is based on the time difference between the drying of the materials “for craquelure” and its coating, which cracks. An under-dried craquelure composition intensively “pumps” water out of the paint and varnish material and water-based plaster composition, becoming a “slippery” base for the coating. Working materials are selected with this in mind.
To create a finish with a craquelure effect you will need to purchase the following compounds:
- one- or two-component craquelure varnish (consumption per 1 m2 in one layer – 50 g);
- acrylic paint of the desired color for the “base”;
- special grout (if you want to make cracks clearly visible, grout should be purchased in contrasting colors);
- textured plaster mixture (Venetian can be used);
- primer;
- protective varnish composition.
General principles and rules of repair
How to repair a crack in plaster? When making repairs, you should follow a number of rules formulated by experts:
- for repairs, if possible, find a plaster mixture of the same brand and manufacturer that was used for finishing;
- the vapor permeability of the plaster layer should be no lower than that of the wall material;
- finishing and repair of cracks is carried out at a humidity not higher than 80% and a temperature not lower than +5°C;
- cement plaster on the entire wall must be applied and repaired in one go, without interruptions,
- there is no point in repairing cracks that have arisen due to increased and variable humidity until the cause of the vibrations is eliminated; they will soon appear again;
- if poor-quality plaster is cracked, it is not repaired, but replaced with a new one;
- Cracks resulting from building settlement should be repaired after natural stabilization or repair of load-bearing structures.
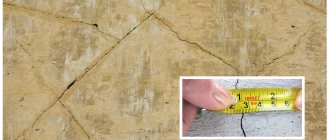
Cracks in plaster due to settlement of the building
In order to assess the dynamics of the building's movement, “beacons” are installed on the crack: alabaster plugs or glued strips of paper. By their destruction, you can monitor the movement of walls and ceilings.
Tools for work
The shape of the cracks depends on the type of tool used to apply the varnish. When applying craquelure varnish with a soft brush, the cracks appear in the form of parallel deep grooves. When applying varnish with a sponge, a pattern is obtained in the form of a fine mesh with thin cracks. Taking this into account, you should select a tool for applying varnish.
The work will require:
- narrow and wide spatulas;
- roller to apply primer and paint;
- large brush with soft bristles;
- sponge;
- fine-grained sandpaper;
- spray gun;
- masking tape;
- hair dryer;
- clean rags.
Application technique
The conditions under which you make your own craquelure coating affect the final result. Therefore, it is necessary to create a constant temperature (18-25 ° C) and humidity conditions in the room, avoiding drafts until the finished coating with craquelure has completely dried. The surfaces to be finished should not be cold or excessively hot. They should not be exposed to direct sunlight. The room should be dry (humidity up to 70%). Therefore, it is advisable to time the work to coincide with the spring or autumn season.
The technique of making craquelure requires dexterity and certain skills. The logic of things dictates that you should first practice on a piece of fiberboard or plywood, previously puttied and coated with a primer. Observe how, where, what kind of cracks form.
The basis
The basic basis for craquelure is gypsum putty or plaster. It should be applied in a layer no thicker than 2 mm, otherwise it may peel off under the influence of deforming craquelure varnish. The putty is dried and cleared of lumps with sandpaper. After this, the wall is dried. The base is covered with a layer of acrylic paint of the color chosen for the cracks, or the color is added to the putty.
Another base for craquelure can be acrylic paint. It is applied with a roller without allowing smudges. After painting, the wall is left to dry for at least 5-6 hours.
A layer of varnish
There are one and two-component varnishing. With one-component varnish there is only one layer of varnish, with two-component there are two (they are applied with a break for drying). The following describes the one-component varnishing process.
Apply craquelure varnish to the dried base using the selected tool, avoiding smudges or clots. If you leave them, the conditions for the formation of craquelure will be uneven. In places where there are leaks, “correct” cracks will not work; the overlying plaster layer will be undermined during processing, and this is an irreparable defect.
The technique of applying the varnish composition determines the direction of the cracks that form. If the composition is applied strictly vertically, diagonally or horizontally, then the main direction of the finished cracks will be appropriate. Therefore, for greater decorativeness, the roller is applied in different directions.
The depth and width of future cracks depends on the thickness of the varnish.
The varnish coating is allowed to dry for at least 4 hours (it is better to give it a day). After finishing varnishing, wash the tools (spray gun and brushes) immediately, because if the varnish dries, it will be difficult to remove. The remaining varnish is stored in the original container.
Sometimes, in order to get craquelure not on the entire surface of the wall, but in the right places, varnish is applied locally. Then cracks form in the intended places. The pattern and size of the cracks are also determined by the direction of application of the varnish mass and the thickness of the varnish film.
The interval between drying the varnish and the subsequent application of the topcoat should not exceed 1 week, because the ability of the varnish to form craquelure on the walls is lost.
Check with the seller when purchasing such an important parameter as the operating time of craquelure varnish.
Finish coating
Smooth acrylic (Venetian, Moroccan) or embossed decorative plaster, as well as textured paint, are used as a finishing coating. If the plaster composition has the consistency of cream, the layer is thinner, the cracks are narrow and their network is thicker. With a thicker composition, cracks form less frequently, but they are wider and deeper.
Under the same materials and operating conditions, the area of cracks that form on the wall is approximately the same: more small cracks are formed, their network is denser, and there are fewer large cracks.
There are certain rules for creating the craquelure effect on walls:
- since the main decorative element of craquelure is cracks, relief patterns should not interfere with their perception (the relief is made shallow, the pattern is not too expressive);
- the finishing layer should have a thickness of no more than 2-3 mm for the plaster composition, 1 mm for the paint layer.
- To apply and level the plaster composition, spend no more than 10 minutes per backlog (you should work quickly);
- The sections are joined “in the raw”;
- If the wall is not plastered, but painted, there should be no more than 1 minute between passes;
- Apply protective varnish no earlier than the top coat has dried;
- The finishing coat of plaster is allowed to dry for at least 2 days, paint - for at least a day.
Prevention measures
Like any malfunction, cracks are better prevented than repaired. A number of causes of annoying defects are completely controllable. To do this, you must carefully follow the technology for designing and applying the plaster mixture, as well as select the right material. Correct selection of the mixture composition for vapor permeability, especially in houses made of aerated concrete. allows you to keep the plaster intact.
When applying the plaster layer, the following rules must be followed:
- Moisten the surface before applying plaster. To do this, use a brush or spray.
- Observe the internal climate conditions of the room during application and until complete drying: humidity not higher than 80%, temperature from +5 to + 25 ° C, absence of drafts and direct sunlight.
- When the layer thickness is over 20 mm, it is mandatory to install reinforcing mesh on the beacons.
- The next layer is applied only when the previous one is completely dry.
- It is not recommended to apply a layer of gypsum mixture thicker than 15 mm, and a layer of cement thicker than 20 mm.
- It is necessary to strictly follow the instructions formulated by the manufacturer of the mixture. This applies to mixing proportions, application thickness and drying time.
- It is important to maintain compatibility between wall material, primers, sealants and other substances. Thus, applying nitro enamel to acrylic putty can lead to cracking not only of the paint layer, but also of the plaster. On a stone and concrete wall, the first layer is applied no thicker than 5 mm, and on a wooden wall - up to 9 mm. It is also necessary to use mixtures for external and internal work strictly for their intended purpose.
To prevent cracks from appearing in the plaster, you must follow the rules for applying plaster.
Cracks in plaster are an obvious nuisance, but not the end of the world. If you correctly determine the cause of the defect and fulfill all the requirements of the repair technology, then eliminating it will not require much time and money.
Application of two-component varnish
The technology for creating craquelure when applying a two-component varnish is more complicated. The craquelure varnishing stage consists of applying two layers with a break between them for drying. Two types of varnish are used: craquelure and regular or patinated. Conventional varnish, when applied over craquelure, cracks, like plaster, and when applied under craquelure, it limits the depth of crack formation, preventing them from reaching the base. In the third option, only craquelure varnish is used, applying it in two layers.
The first layer of varnish is dried for about an hour. During this time the varnish becomes transparent. A second layer is applied to it, which is dried for 4 hours (until completely dry).
You can get acquainted with this technique using the following example.
- Decorative enamel of gold color is applied to the prepared wall (a composition of bronze or silver colors can also be used). Before application, the enamel is mixed. Apply with a roller, from which the excess is removed by rolling on the lid of the bucket. After applying the first layer of enamel, it is dried for 30 minutes, then the second layer is applied. The base is dried.
- The first coat of varnish is applied. The craquelure varnish composition has a fairly liquid consistency, so it easily forms streaks on the surface when applied. It should be applied quickly and carefully, without leaving streaks or thickening.
- The second layer of varnish is applied after an hour, allowing the previous one to dry. Application of the third and fourth layers is also allowed. As a result, the size of the cracks increases.
- For this technique, Moroccan or Venetian are used, which fit well, burst easily and give beautiful cracks. The plaster is applied in a layer of 2 mm. Here the evenness of the coating is not required; on the contrary, the strokes are applied to form low ridges along the edges. Application of strokes is multidirectional. When the plaster mass dries, initial cracks appear where the scallops were left. These cracks are larger and deeper than the cracks that appear in the flat areas of the strokes. Decorative plaster with cracks must be dried, otherwise defects may occur in the next stages.
- Dried, cracked plaster is smoothed using sandpaper No. 320, which hardly scratches, but removes protrusions well. Remove dust with a cloth or brush.
- The plaster is ironed. The blade of the instrument is wiped with a damp cloth. Before ironing, use your fingertip to check the smoothness of the blade, where there should be no burrs or other defects. When ironed, a shine appears.
- To finish decorative plaster with a cracked effect, thick wax is used. It is applied in two layers with a break of 20-30 minutes. Everyone is polished. Wax tinted to resemble gold (or silver, depending on the color of the base) looks more impressive. It is applied with a spatula, completely removing the excess by scraping off. The wax is dried for 24 hours.
Features of the material
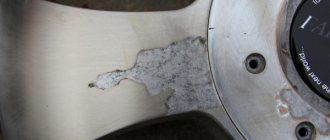
Craquelure will help hide some defects in the base
. Decorative craquelure plaster can be applied to any surface:
- walls made of concrete or plasterboard;
- cardboard and plywood;
- brick and ordinary plaster.
It has excellent covering properties and is able to hide small defects.
Before applying the decorative composition, it is necessary to perform high-quality surface preparation using two types of primer compositions.
After applying the composition, cracks appear in a random order, which allows you to create a coating that is unlike anything else.
One of the primers must be of deep penetration, which will become a reliable protection against fungus and mold, and the second is covering, thanks to which the level of adhesion significantly increases.
The main feature of decorative plaster with a cracked effect is that cracking creates an original and unique pattern. Cracks appear in a random order and the resulting pattern does not depend on anything, turning out differently each time. Of course, you can use craquelure to decorate wallpaper; this makes it possible to choose a pattern yourself and greatly facilitates the work.
However, Venetian craquelure plaster is guaranteed to give the room individuality, highlight the created interior and endow it with solidity and even elegance. In other cases, this finishing technique allows you to achieve the effect of aging walls.
For this, not only a special plaster composition is used, acrylic paint or varnishes are also required.
They are among the products that do not emit toxic fumes, are resistant to various types of negative influences, and fit well into any interior, combining with various types of finishes.
However, such a decorative coating requires careful preparation of the wall surface before applying the composition.
Mechanized application
The varnish composition can be applied to the surface of the walls with a spray gun. In this case, the most natural crackle pattern appears. A spray bottle with a nozzle (nozzle) of 1.4 mm is suitable for work. To use a spray gun, water-soluble varnish is diluted by adding water (up to 10%).
When spraying on a wall, you need to take into account some features:
- At the very beginning of work, clots of varnish mixture come out of the nozzle. Therefore, at the beginning, a little of the varnish mixture is sprayed onto the probe (with the nozzles in a vertical and then in a horizontal position).
- Once you start spraying on a wall, do not take breaks, stopping only when the entire wall has been treated. Otherwise, spots and unevenness will occur.
- To complete the job, move the sprayer away from the wall and only then turn off the spray gun.
- When working, try to maintain the same distance from the nozzles to the wall.
Video with an example of mechanized application of craquelure plaster.
Craquelure effect on wall surfaces
Manufacturers produce compositions with a craquelure effect in the lines of Venetian and textured plasters. Such compositions do not require careful leveling of the base before applying them to the wall. The walls are primed to increase adhesion and close the pores of the base so that the wall does not draw moisture out of the plaster.
They work with these compounds at high speed, so, as a rule, they work together: one applies the material to the wall, the other rubs the plaster mixture with a spatula.
The maximum thickness of the applied layer, allowing the formation of large cracks, is 3 mm. Processing is carried out without the formation of joints. After application, the plaster composition is smoothed. A fan is installed in front of the wall to speed up drying. The air flow is directed towards the wall at an angle of 45°. After some time, cracks begin to appear on the craquelure decorative plaster. Craquelure forms on the walls within about an hour, after which the blowing is stopped. The finish will dry for another day. After which wax or varnish is applied to it for protection and decoration. The cracks are tinted.
Photos in the interior
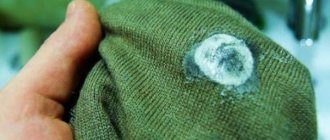
Decor in the form of cracks in plaster can easily be applied to a “classic” or “Provence” style interior. Vintage furniture can also be aged with craquelure paint.
The colors of the top layer of trim and cracks can be absolutely any, but it is better that the contrast is noticeable. The craquelure technique is also suitable for Venetian decorative plaster, when colored veins appear on a smooth glossy surface.
Cracking is caused by a special varnish that is applied between the base finish and the top decorative layer.
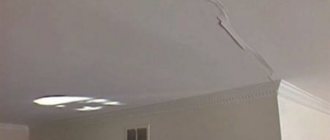
Causes of cracks in plaster
Most often, cracks appear due to deformation of building structures: walls and ceilings. When the shape of the plastered planes changes, the plaster layer, having low elasticity and high fragility, cannot deform along with them and cracks.
In addition, cracks often appear on walls made of aerated concrete that do not experience serious deformations. Due to the fact that the vapor permeability of the base material is significantly higher than that of the plaster layer, excess moisture begins to accumulate under it during temperature changes until condensation occurs. Such processes can lead to weakening of the contact between the plaster and the wall, its peeling and cracking under its own weight.
Another reason for the appearance of cracks is increased humidity in the room. Moisture settles on the plaster in the form of condensation and begins to seep into its depths. Microcracks appear and begin to grow, increasing the permeability of the material. In this case, peeling and cracking also occur.
A fairly widespread reason is a violation of finishing technology. According to the rules of construction work, the surface of a wall or ceiling must be completely plastered in one work shift. If you take a long break, the adjacent plastered areas will have different humidity, temperature and degree of hardening of the solution. In this case, both surface and deep stresses will inevitably arise in the plaster layer. They will almost certainly lead to deformation and cracking of the plaster.
Cheap plaster mixtures can crack when exposed to bright sunlight: the plasticizers they contain do not withstand exposure to ultraviolet rays.
Application technique
You need to start finishing by preparing the base.
The basis
The basis for craquelure can be ordinary gypsum plaster or putty, painted in the desired color.
After applying the base, wait until it dries completely (at least 24 hours).
A layer of varnish
Next, a thin layer of craquelure varnish is applied to the base, avoiding smudges. There are three ways:
Material consumption - 50 g/m2 per layer.
The varnish is applied in two layers with intermediate drying for at least 1 hour. During this time, the first layer will become transparent.
Dried varnish is difficult to wash off the tool, so after finishing varnishing, rinse your brushes or spray gun thoroughly. The roller attachment can be discarded.
It is better to store leftover varnish in its original packaging. To prevent dirt from getting into it, pour the varnish into a paint tray and dip the tool into it.
Complete drying of craquelure varnish takes 4 hours.
Decorative plaster must be applied no later than a week, otherwise cracks will not appear.
Finish coating
Decorative plaster can be embossed or smooth - Venetian. It is also possible to apply textured paint. Each case has its own methods and techniques of decoration, but there are basic rules for craquelure:
- The thickness of the finish should not be more than 2 - 3 mm when plastering, and 1 mm for water-dispersion paint, otherwise there will be smudges.
- Since the main finishing elements will be cracks, you should not create another pronounced texture. You can leave small layers or shagreen.
- You need to work quickly and join sections “in the wet.” Leveling the plaster and creating the texture should take no more than 10 minutes. If the wall is being painted, then the time between passes is no more than 1 minute, otherwise the paint will pull off behind the tool.
Drying of the finishing coating: decorative plasters - 48 hours, paints - 24 hours. Application of protective varnish is possible only after the finish has completely dried.
Formation of cracks
- The direction of movement of the tool determines which direction the cracks will go.
- The thinner the layer of plaster, the smaller and more uniform the cracking. Torn and sparse craquelure is obtained with a layer of 2 mm.
- Also, the shape of the cracks depends on the thickness of the intermediate varnish layer and the type of plaster (paint). Materials from different manufacturers will give different effects.
- If you apply paint with a spray gun, you will get the most even network of cracks.
The appearance of cracking begins:
On plaster - after 10-15 minutes, completed after 5-6 hours.
On paint - after 5-10 minutes, completed after 1-2 hours.
Protective varnish and wax
You can choose one of the popular brands: Decrazza, Dali, San Marco, Olimp, etc.
Toner is added to the transparent varnish to add shades to the coating or glitter (glitter) for a shimmering effect.
Apply the varnish using a foam roller , which is rolled along the wall in different directions, filling all the grooves of the texture with the composition.
Decorative wax is applied with a brush or soft spatula . Then it is rubbed over the plaster with a sponge. After the wax has dried, the surface is polished with a soft cloth in a circular motion or polished with a trowel.
Using glazing compounds, you can highlight cracks on the main background if the base for the plaster has not been painted . This will greatly simplify the entire finishing process. The process will look like this:
Craquelure varnish is applied to ordinary gypsum plaster. For example, acrylic plaster or paint is applied to it, or just white. After cracking and drying, the wall begins to be covered with tinted wax or varnish. It is rubbed into cracks and depressions, and the excess is removed with a sponge.
In this way, the entire texture is highlighted in the finish and the white cracks on the surface are tinted. But it is worth remembering that painting the base with enamels and paints will give a more contrasting craquelure with bright colors.
Why do microcracks appear on the plaster layer?
Plaster can serve both a decorative and adhesive role. Experts unanimously agree that if cracks appear on plastered walls, the reason for this lies in a violation of the plaster application technology. There may be several reasons:
- The plaster was applied in one layer. Most often, this is the main reason for the formation of a network of cracks on plastered walls.
- The second reason is the use of an old mixture. For example, if a bag of plaster was opened to remove some plaster, but was then not closed tightly.
- A minimal amount of water was added to the mixture during preparation.
- The absence in some cases of a reinforcing frame for layers of plaster.
These and other reasons can cause cracks to form on the surface of the plaster. The problem seems to be quite complex and cannot be dealt with using elementary methods, but in reality everything is much simpler.