Advantages and disadvantages of whitewashing
Painting the ceiling with water-based paint has its pros and cons. The advantages include:
- no unpleasant stench;
- the smell of dampness disappears after airing;
- whitewash components are non-toxic;
- easy to use (easy to dilute, stir, tint and apply);
- the ability to get any color after adding color;
- easily washed off from the body, clothes, floor;
- can be done by non-professionals - it is possible to whitewash the ceiling with water-based paint yourself;
- low cost of finishing;
- combination with various types and types of interior.
The disadvantage is:
- inability to withstand low temperatures - when exposed to frost, the paint surface may crack;
- large labor costs in preparing the ceiling for whitewashing;
- the painted surface quickly becomes dirty and loses its original appearance.
Leveling the ceiling surface and priming it
If the ceiling is fairly level and even with side lighting there are no significant surface defects, the steps below are necessary.
- Coat the ceiling with a penetrating primer. In this case, it is better to use a brush so as not to miss a single depression or irregularity.
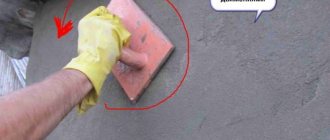
- After the primer has dried, remove any unevenness with finishing gypsum putty.
- After 5-8 hours, level the putty areas, first with a coarse and then with a fine mesh grout.
- Prime the leveled putty areas.
Primer of leveled putty areas
If cracks have formed at the joints of the slabs , and the old plaster is crumbling, then the algorithm will be slightly different.
- Clean down to concrete using a spatula or hammer drill. There will be less dust if the surface is pre-moistened.
- Coat with penetrating primer.
- Re-plaster, checking the quality of work with a level and a steel meter. Cover the filled cracks in the joints with reinforcing mesh.
- After a day, putty and finally level the surface with trowel mesh.
Gluing serpyanka mesh to the ceiling
After leveling is completed, the surface is primed with water-based paint diluted with water.
What factors affect drying time?
How long acrylic paint dries depends on the rate of evaporation of water from it. And this process is influenced by:
- temperature,
- air humidity,
- air speed,
- Atmosphere pressure,
- base structure,
- thickness of the paint layer.
Temperature
The range of 18-24°C is optimal for the evaporation of water and other solvents from the coloring composition. At 10°C the evaporation of water practically stops, and at 0°C it begins to turn into ice, which destroys the film. In hot conditions, at temperatures above 24°C, the lower layers of paint do not have time to dry after the upper ones. As a result, a liquid composition remains under the dried solid film, which, evaporating, breaks the film. Those. the coating is cracking.
Airflow speed
A thick cloud of vapor forms around the drying surface; air humidity near the freshly painted surface quickly increases, which slows down further evaporation. The more intense the air movement that blows the vapor cloud, the shorter the drying time of acrylic paint.
Atmosphere pressure
There is a direct relationship - the higher the atmospheric pressure, the faster the paint dries. Water molecules seem to be “squeezed out” more strongly from the base.
Base surface
Bases that intensively absorb moisture speed up the drying of water-soluble paint. The same acrylic composition on a plastered, puttied surface, paper, drywall or canvas does not dry as long as acrylic paint dries on wood, metal, plastic or glass. From smooth, water-repellent surfaces, evaporation continues several times longer.
Paint layer thickness
This parameter directly affects how long the paint composition will dry. You can reduce the thickness of the paint by adding a small amount of water or solvent.
Useful tips
Before you start painting, you need to remove all pieces of furniture. If this is not possible, you should cover it with newspapers or cloth. In addition, it is recommended to protect the floor with the material if no further alteration is planned.
It is not so difficult to remove water-based emulsion from clothes: if the stains are fresh, you just need to wipe the area where the paint got in with a solution of water and detergent in a 1:1 ratio. If the stain is old, alcohol or regular hairspray will come to the rescue. The product must be applied to a cotton pad and applied to the paint stain for a while, after this procedure the paint is washed off with plain water.
However, despite the fact that the paint can be easily washed off, when preparing for finishing work you should take care of protecting your clothes and wear a protective suit or some old wardrobe items that you don’t mind ruining.
Before carrying out work, it is important to carefully prepare the surface for it. It must be smooth and clean, so you must first remove all remnants of the previous coatings, putty and level the wall or ceiling, sand if necessary, and then wash, removing any remaining dust and dirt
After the layer of putty material has completely dried, the walls must be carefully primed.
It is necessary to apply paint in several layers. Depending on the manufacturer, there may be 2 or more. However, the best option is to apply 3 thin layers of material, with the direction of brush strokes or roller movements on each layer being different. The first layer must be applied parallel to the sun's rays falling through the window, the second layer must be applied perpendicular to the first, but the third must be applied moving in the opposite direction from the window.
If it is necessary to paint in different colors, it is necessary to use a white water-based emulsion and a color with the desired shade
Mixing the coloring matter should be done carefully and slowly: it is better to subsequently add the missing part of the pigment than to immediately get a shade that is too dark
Preparing for painting
Whitewashing the ceiling using old paint or wallpaper is possible, which is why many people do it. However, the result of such a decision will be visible literally the next day: the snow-white surface of the ceiling with a different structure of applied paint immediately catches the eye and neutralizes the entire effect of the repairs.
In order for a matte or glossy ceiling to look aesthetically pleasing, it must first be prepared for painting. The entire process of preparatory work step by step is as follows:
- walls, floors, windows and doors are protected from dust with plastic film;
- previous finishing materials (paint, wallpaper, tiles) are removed;
- the surface of the ceiling is repaired and, if necessary, reinforced with fiberglass;
- the ceiling is treated with a primer and then puttied.
The entire preparation process is described in detail in the article “How to prepare a ceiling for painting with water-based paint?”
How long does paint take to dry and how to choose the right one?
If, when choosing paint, you discard personal preferences regarding color and cost, guided more by practical issues, we recommend paying attention to how long the paint takes to dry.
Are there “universal” paints with the same surface drying time?
The answer is clear - no. Universality is just a myth used by unscrupulous manufacturers solely for advertising purposes. At best, you buy paint with a one-time or very short-term effect.
Therefore, you should not believe the manufacturer’s promises that the paint is equally ideal for repairing the paint surface of a car, for heating radiators, and for decorating a kitchen or bedroom. An excellent result will only be achieved if the paint is used for a specific purpose.
In other cases, you will get a mediocre result and simply throw money away.
Often, when choosing, the decisive question is how long the paint takes to dry. This is objectively and directly related to its composition and the environmental conditions in which drying should occur. Why is it important? The pace of paint and varnish work has a direct impact on the overall speed of repair. For example, it is not recommended to carry out any other finishing work while the paint is drying. Otherwise, dust and other construction debris will simply stick to the painted surface.
How many times should you paint the ceiling so that streaks are not visible?
Painting the ceiling is an important point in the renovation of any room.
Therefore, to avoid visible defects, you should prepare. How to choose tools and materials?
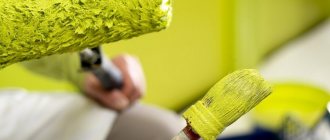
- The roller must pick up a sufficient amount of paint, so you should choose a roller with long pile.
- To evenly impregnate the roller, you will need a molar tray, with which it is rolled out for high-quality painting without streaks.
- It is recommended to use acrylic-silicone based water-based paint. Its advantage is the ability to wash the ceiling multiple times.
Coloring
When purchasing a water-based paint composition for the ceiling, it is especially important to have a good understanding of the assortment.
Currently it is represented by five main types of products:
- with acrylic;
- with latex and acrylic;
- with silicone;
- with polyvinyl acetate;
- with silicates;
- with mineral supplements.
The cheapest water-based mixtures are with polyvinyl acetate, but the surface painted with them cannot be washed. The most expensive compositions are those containing silicone - they adhere well to plaster even without a primer, and the coating they form can withstand wet cleaning with detergents. Due to their good permeability to water vapor, they are ideal for kitchen and bathroom ceilings. Medium-priced and durable coatings are acrylic and latex-acrylic paints; They are also the most in demand. Silicate compositions are intended for painting the surface of concrete and brickwork; they are durable, but not moisture resistant.
The modern range of water-based paints is quite large
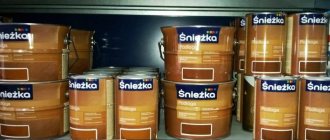
The main manufacturers of water-based paints entering the domestic market produce products that vary in both price and quality.
Table. Rating of water-based paints according to consumer reviews.
| Company name | Review statistics |
| "Tikkurila", "Dufa", "Dulax", "Caparol" | An expensive product with guaranteed impeccable quality. |
| "Tex" | Average priced products with good quality. |
| "Snowball" | A wide range of prices, but the most popular varieties are often below all criticism. |
| "Lakra" | Average and low prices, unstable quality - depending on your luck with the batch. |
To choose the right water-based paint and purchase it in the right quantity, you should carefully read the information text of the label. It must contain the following important parameters.
- The purpose of the paint with a list of types of work.
- Consumption per square meter – allows you to calculate the required purchase volume. In this case, the paint must be purchased with some reserve, since the tone of different batches may differ noticeably.
- Covering power is the ability to completely, without gaps, paint over a much darker base.
- Abrasion resistance is the main indicator of durability and resistance to cleaning and washing.
In addition, you should read additional inscriptions, often in the smallest font.
- "Recommended for use in dry areas." Such products are not suitable for either the bathroom or the kitchen.
- “Indelible” or “Highly durable”. The painted surface can be washed exclusively with water without additional detergents.
- “Abrasion-resistant”, “Dirt-repellent”. The coloring composition forms a layer that can withstand wet cleaning using detergents.
Having carefully selected a water-based composition that is suitable in terms of properties, manufacturer, price and purchased it in the required quantity, you can begin painting the prepared ceiling surface.
When choosing paint, pay special attention to the label information text
The process goes in the following order.
- Thick paint must be diluted with water to a kefir consistency. If you want to make a colored ceiling, the color should be added little by little so as not to immediately get an overly saturated tone.
- Using a wide brush, paint the corners, areas around the perimeter of the ceiling lamps, the joints of the ceiling with the walls and, if any, ceiling cornices. In this case, it is useful to use masking tape so that the paint does not get on the areas of the walls directly adjacent to the ceiling. The direction of movement of the brush is parallel to the light, from the wall with the window. If there are windows in more than just one wall, choose the direction from the one that gives maximum light.
- Pour not too much paint into the cuvette tray, immerse the roller in it, be sure to roll it repeatedly along the corrugated inclined surface, squeezing out the excess paint composition.
- Evenly and gradually, in parallel strips, offset each time by 2/3 of the width, apply the coloring composition to the ceiling perpendicular to the direction of light using small zigzag movements. Before it thickens, it is useful to roll a roller without paint over the painted surface to remove any possible sagging. Paint over small defects and gaps with a narrow brush. The first layer should be allowed to dry completely at room temperature for several hours - usually from 8 to 12. There should be no strong drafts. The freshly painted surface should also be protected from direct sunlight. The roller, brushes and tray must be thoroughly washed immediately before the paint dries on them.
Applying the first layer of water-based paint
How to paint a ceiling with water-based paint. Step-by-step instruction
If all preparatory operations were carried out carefully enough and the painting process went correctly, the new water-based ceiling coating will be smooth, uniform and durable.
Video - Preparing and painting the ceiling with water-based paint
How to prepare the surface?
Before painting, you need to try to empty the room, cover the rest with plastic wrap.
Start by removing any plaster that is peeling, after wetting it. Major renovations often involve complete removal of the plaster. Clean the fungus-affected parts down to the concrete base using a spatula and treat with an antiseptic primer. To avoid problems in the future, in a damp room it is better to treat the entire ceiling at once.
After waiting for the surface to dry, proceed with a penetrating primer for better adhesion to the putty, which then needs to be used to fill the uneven areas. When the ceiling is dry, sand it.
Now you can begin to putty the entire plane, preferably in two layers using a wide spatula. Each layer must dry. Then the ceiling is carefully sanded.
The next stage is re-priming, so the surface will be more durable and paint consumption will be reduced.
How to avoid stains
The headache of any painter is the appearance of streaks. This problem is especially acute for beginners in the painting business. How to paint a ceiling with water-based paint without streaks? Firstly, strictly follow the painting process. Secondly, follow these tips:
- remove all heating devices (this especially applies to lighting on the ceiling), turn off the batteries or cover them up during work;
- prevent drafts;
- conduct constant monitoring of the quality of painting either with the help of light or move to the side, changing the viewing angle;
- do not interrupt work for smoke breaks and respites;
- do not paint directly above your head;
- do not jump from place to place.
Following the technology allows even a beginner to get a perfectly painted ceiling surface.
What else you need to know
Water-based paint is an excellent answer to the question of how to paint the ceiling in a room. However, in order to get the most neat surface possible, among other things, you should follow these rules:
You only need to buy new paint. The old one may have a heterogeneous consistency.
Before you start painting, you should check the roller. The fibers of this tool should under no circumstances lag behind.
Before painting, seams and unevenness on the ceiling should be eliminated, and its surface itself should be primed.
How to dilute acrylic paint if it has dried?
In some cases, it will not be possible to dilute acrylic paint; the manufacturer must indicate this on the packaging. The required thinner is also indicated there. In the case where the packaging has not been preserved, you can use a universal solvent for acrylic resins. Since solvents can be glossy or matte, be sure to inform the seller about this when choosing. The solvent is added in small portions to the dried paint, after which it is necessary to knead it until the lumps completely disappear.
To restore acrylic paint, you can use warm alcohol with water or vodka, but before diluting all the paint, you need to experiment with a small amount of paint. As experts advise, it is better not to experiment, but to buy a special solvent, while the paint will completely retain its original color.
When the paint is completely dry, it must be kneaded to a powder state. Then you need to pour boiling water into the paint container. When the water has cooled, it should be drained through cheesecloth. This procedure must be repeated several times until the paint absorbs the required amount of water. After each heating, the paint must be stirred until it becomes sufficiently liquid.
It is very difficult to dilute heavily dried acrylic paint, but one must remember that its original qualities will not be fully restored, even if the desired thickness and uniformity is achieved. First of all, the shade of the paint may change; it will no longer apply so smoothly and will have an uneven color, which is very noticeable on large surfaces to be painted. They are quite suitable for painting small surfaces, but it is still better to purchase new paints or prevent them from drying out completely, checking them periodically and diluting them if necessary.