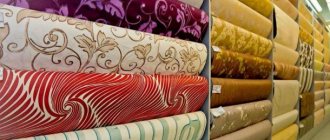
How to remove bubbles
There are many ways to properly remove bubbles from wallpaper.
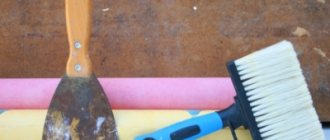
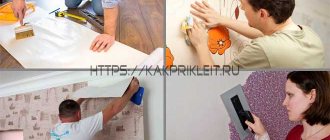
But if there are too many of them, the only way is to re-glue the covering. If blisters have formed after pasting with vinyl wallpaper, you will need to use a spatula or brush to remove them. By pressing these tools on the finish, you will be able to remove any remaining air and get rid of defects.
If the blisters have formed after the coating has dried, it will be a little more difficult to remove them. First you need to determine the reasons for their appearance. If the wallpaper is swollen due to air accumulation, you will need to pierce the damaged area with a small needle. Then, using a spatula, the finish is leveled.
Another way to get rid of bubbles is a syringe through which glue is injected under the wallpaper. It will help ensure a tight fit of the finish to the surface and get rid of blisters. To remove excess glue, use a slightly moistened sponge.
What to do if the bubbles are large? To remove them, you need to make a cut in any direction. You will need to use a sharp construction knife, glue is introduced under the finishing, and the canvas is securely fixed.
To avoid glue getting on the front of the canvas during work, you will need to wrap it with tape or tape around the perimeter. After the procedure is completed, they are removed from the wall.
To avoid problems with bubbles in the future, you must carefully follow the instructions while working. You also need to prepare the surface for processing. It must be leveled, clean and primed. Only if all factors are observed will it be possible to avoid the formation of bubbles under the wallpaper. Using the following video, you can see in practice how to properly remove blisters from wallpaper.
Removing bubbles using pressure with a brush
Removing bubbles from paper wallpaper
Bubbles should be removed immediately after they form. For paper sheets, a dry, clean cloth is often used to avoid damaging the material. With its help, the air is gently squeezed out, and the swelling disappears.
If bubbles appear immediately after gluing, you need to wait until it dries; sometimes the wallpaper shrinks over time. This is especially true for paper-based coatings.
Standard syringe methods can also be used for this finishing. With its help, the bubble is pierced and the glue is released. After which the finish is smoothed out and the bubbles should disappear.
Removing bubbles from non-woven coverings
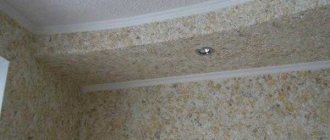
Bubbles on non-woven wallpaper appear less frequently than on other wallpapers. This is due to the fact that this finish is of higher quality and more durable. For their production, non-woven components are used, and cellulose serves as the base. Polymer substances are added to connect materials.
The advantage of this finish is that it is applied to the surface already treated with glue. Why does non-woven wallpaper bubble? There may be several reasons for this:
- Air between the canvas and the wall. To avoid this, gluing must be done using a roller. It will be used to level the material and thereby expel any remaining air from inside.
- Poorly leveled surface. If glued wallpaper on non-woven steel bubbles, the best solution is to remove it, level the surface and re-glue it. Otherwise, gaps may form where mold and other harmful bacteria can spread.
Scheme for eliminating bloating
You can get rid of bubbles on already dried wallpaper using a syringe and a sharp construction knife. A cut is made with a knife and a small amount of glue is put in there. After that, the area to be treated is glued so that the visibility of the seam is minimal. This procedure can be seen in the following diagram.
Since non-woven fabrics are multi-layered, bubbles may appear due to poor absorption of glue by the material. In this case, we get rid of them using a spatula by smoothing them out. If the swelling does not disappear, you will need to peel off the canvas and re-glue it.
How to stick without bubbles?
The first thing you need to take care of is wallpaper glue and walls. Too absorbent walls and thin glue do not allow the wallpaper to “ride” on the wall for some time. The walls should be primed with a good primer, for example ST17, especially if the walls are puttied with gypsum putty - gypsum absorbs moisture well. Also pay attention to the glue - not every wallpaper glue allows you to adjust the wallpaper during gluing. It is better to take proven brands and dilute with a minimum amount of water. Even if the glue packaging indicates the same amount of water for non-woven wallpaper, but less water is needed for glass wallpaper, dilute it as for the latter, let the glue be thicker. Thick glue will not cause any harm to the quality, except that consumption will increase.
As a result, the prepared walls and glue should make it possible to “scrape” the glued wallpaper a little on the wall for at least a minute. If you cannot achieve this effect, you should think about another glue.
So, when the glue allows us to adjust the wallpaper, the problem of bubbles is practically solved - during gluing, the bubbles are smoothed out with a rubber roller or a plastic spatula in different directions. The main thing is to avoid strong “pretense” - when the surface of the wallpaper bends sharply on a wrinkle. The easiest way is with the first stripe on the wall - there is no joint with the next wallpaper and you can smooth out the bubbles as much as you like.
When the second and subsequent strips are already glued, you still need to watch the joints. Here you need to change the sticker method a little. As a standard, the strip is glued without completely unrolling the strip (or roll), starting from the top, the wallpaper is unrolled, joined to the previous one and glued to the floor. In our case, the joint will expand over time and by the time we reach the floor, there will be an overlap on the upper section of the seam. There is an overlap at the top, a butt at the bottom - the result is a skew, leading to “cutters” and bubbles.
In order to join the strips well, you need to glue not the entire wallpaper, but only 20 centimeters to the joint, from the ceiling to the floor. This must be done as quickly as possible and with a small gap to the already pasted strip (the gap is about 1 mm). It turns out that a strip of 20-30 cm is glued to one edge; the interlining will quickly expand and there will be no gap left in the seam. Since we can adjust the wallpaper, the seam is quickly adjusted to the ideal butt position. The seam is formed, you can start gluing the main area of the strip - smooth it or roll it away from the seam in the opposite direction, holding the opposite, hanging edge.
The procedure may seem complicated for the first time, so it’s best to practice together. When you have glued several strips using this method and “feel” the material, you can begin gluing alone.
When gluing, small bubbles may still form and not smooth out in any way. It's okay, the bubbles will stretch out in a day or two after the walls dry. The main thing is to avoid sharp bends in the wallpaper, which could damage the delicate decorative layer.
What to do if rolls fall behind?
If a similar problem arises, you need to know how to resolve it correctly and glue the peeling sheets:
- You cannot work with PVA glue. It is practically insoluble in water, so it will not be easy to remove the coating from the walls before a new renovation. After working with this glue, yellow spots may appear on them (you can find out why the wallpaper turned yellow after gluing and how to fix the problem here).
- It is advisable to use wallpaper glue. But it must be liquid.
- If the canvases do not stay in place at the joints or in the corners, it is recommended to use special glue. It is sold at any building materials store. The high-quality composition will not leave streaks and will provide strong adhesion.
To work you will also need:
- brush;
- roller;
- narrow spatula;
- syringe;
- hair dryer;
- dry clean rags.
If the coatings come off at the joints, you need to carefully bend the edges and remove the stuck debris with a spatula. Then apply the adhesive solution and press down the edges with a roller. Remove excess glue with a rag.
If the canvases have moved away from the ceiling or wall, you will need wallpaper glue. You need to dilute it with thinner water than usual and coat the material. Then wait five minutes and stick the strip to the wall. It is recommended to keep the windows closed for two days.
Vinyl
When peeling off this type of coating, it is advisable to remember what kind of glue they were glued with. If it is simple, intended for paper materials, it is expected that the canvases will fall to the floor.
Attention: Vinyl wallpaper should be glued with special glue.
Paper
This is the most common material. Stages of work:
- First, remove debris and particles of putty from under the canvas.
- Spread the strip and wall with paste and leave for 5-7 minutes. This time is needed for the glue to absorb, so that the canvas becomes elastic, and the soil on the base dries.
- Then coat the wall and paper strips with glue again. When the canvas is thoroughly soaked, place it against the wall and straighten it with your hands, slightly stretching it and aligning it along the joints and pattern.
- Then smooth it with a wallpaper spatula or roller. If you need to glue a small piece, you can use a narrow joint roller or a clean rag. While working, make sure that there are no bubbles or creases. Remove excess paste with a soft cloth or sponge.
Non-woven
The fabrics on the non-woven fabric do not adhere due to non-compliance with the rules during operation. Manufacturers include instructions with the product that tell you how to glue them correctly.
They cannot be glued joint to joint, and glue should only be applied to the base. You must follow the recommendations after finishing work and do not open doors and windows when drying.
Non-woven wallpaper is glued with glue using a narrow spatula. Apply the paste to the wall and joints. Then wait 10 minutes and press the canvas tightly. For good adhesion, you can roll it with a roller or dry it with a hairdryer.
How to avoid problems
How to hang wallpaper without bubbles the first time? What needs to be done for this?
Practical advice from professionals:
- Choose glue according to the density and type of wallpaper.
- The room temperature should not exceed 22°C. In hot weather, close windows to prevent sunlight from entering. They contribute to uneven drying, which subsequently leads to the formation of pimples.
- Do not open windows and doors until the wallpaper is completely dry. The latter do not tolerate changes in temperature and humidity.
- Do not keep the glue on for more than 6 hours. It loses its properties, which negatively affects its main purpose.
- After applying the paste to the canvas, it should lie down and not immediately stick it to the wall.
- Using a roller or a piece of soft cloth, you can remove the bulges immediately, rather than waiting for the walls to dry completely.
- Remove excess glue, if any. To glue canvases, professionals advise using an adhesive with a color indicator. After drying, this composition becomes transparent. This way you can identify places that are not painted with glue.
Wallpapering
The appearance of bubbles leads to sad consequences. Fungus appears in them, which negatively affects the health of household members, and insects multiply. And the aesthetic appearance generally leaves much to be desired. The pimply, crumpled canvases on the walls are not at all pleasing to the eye.
Causes of bubbles
If the wall with new wallpaper is not even and smooth, you need to find out the reason for the swelling of the canvas. Most often it appears due to the following reasons:
- incorrect gluing procedure;
- deformed building geometry.
Bubbles not only spoil the appearance of the interior, but also provoke the appearance of mold and mildew. They have a detrimental effect on the health of residents, causing allergies. Various insects can live in bubbles under the wallpaper.
First, you need to find out the cause of the problem in order to prevent it in the future. Perhaps air got under the wallpaper or the master applied too much adhesive to the material. There is no need to redo everything again, unless there are too many bubbles. Small irregularities can be removed quickly and without leaving any traces. It is best to do this immediately after gluing the canvases. The less time has passed, the easier it will be to hide unaesthetic marks.
Before gluing wallpaper, you need to carefully study the manufacturer’s instructions, since each type of material has its own requirements for installation.
When gluing paper wallpaper, you need to apply the sticky liquid directly to the material. If the fabric is non-woven, the glue is distributed over the wall.
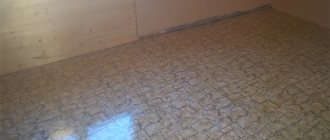
Surfaces must be well prepared for work - clean them of fungus, old wallpaper, paint, mold. You should not hope for a satisfactory result if the wall is uneven. It is best to glue the coating to plasterboard, plastered, putty surfaces. Even small cracks, chips, holes can ruin the appearance of the surface
Particular attention should be paid to the corners. If there are large irregularities, they can be removed using a grinder, and folds and dips can be corrected with plaster
The walls need to be treated with a deep penetration primer and wait until it dries. This will reduce the likelihood of mold and mildew and also ensure good adhesion between the wall and the material.
It is necessary to stock up on high quality glue that sets quickly. It must match the type and density of the fabric. For thick wallpaper, it is ineffective to apply a weak adhesive, and vice versa. It is not recommended to use PVA glue. It leaves yellow marks on the walls and does not dissolve in water, which will complicate the removal of the coating in the future.
Stores sell special pink glue that, when dried, becomes invisible. It helps not to make mistakes in the process and remove excess in time, especially if you first illuminate the work area with side light.
When choosing glue, craftsmen prefer foreign products that dissolve well and hold materials firmly on the walls. You should not buy regular glue with starch, as it leaves bubbles, yellow spots and folds.
Each type of wallpaper requires a special glue. For paper coverings, universal compounds are suitable, for vinyl – special glue for vinyl materials. The non-woven covering can be installed using non-woven wallpaper adhesive. When gluing borders, you can choose either a universal composition or one designed for vinyl materials. Some self-adhesive borders can be attached without the use of additional substances.
Wall preparation cannot be ignored
Wallpaper for the apartment
Wallpaper highlights irregularities, especially curved corners. Preparing the surface for gluing will ensure a good result. Large depressions should be plastered. It may be easier to cut down individual protrusions or cut them off with a grinder. Then level with putty. It is enough to use the starting lineup.
Do not use PVA glue for wallpapering. You will not be able to remove them during the next repair. Yes, and yellow spots may appear in the first days. It’s better to dilute it half and half with water and prime the wall twice. Then the wallpaper will stick well. The surface will become stronger and the chance of bubbles will decrease.
What to do with liquid and other materials?
You can fix unpleasant stains:
- To do this you will need a mixture of white and water. You need to moisten a sponge or cloth in this solution and treat the damaged areas. If a lot of stains have formed, you should pour the mixture into a spray bottle. The most important thing in this method is not to add too much white to the water, otherwise the wallpaper pattern will disappear along with the stains.
- Light-colored canvases can be treated with stain remover.
- Another way is chalk. If bleach and stain remover are unable to remove the yellowness, you should crush the chalk to a dust state and rub it into the stain with a sponge. The stain will be absorbed into the chalk and removed with it.
- If none of the methods help, the damaged blade should be replaced. This process is more labor-intensive, since it will require removing the damaged area and gluing a new one. The contaminated canvas is moistened with water and removed with a spatula. Then a new section is glued on. It is worth considering that the place where the yellowness appeared should be well prepared for gluing new material.
- Yellow marks on liquid wallpaper can be removed with a vacuum cleaner. Liquid ones are capable of absorbing any dirt from the walls, and if the house has recently been flooded, then it will be quite difficult to remove such traces. It is likely that once the stains are removed they will appear again.
General gluing rules
It is possible to avoid the appearance of air bubbles on the wallpaper by following standard gluing rules. Each stage of work has a number of features that are best familiarized with before directly finishing the room.
Preparing the wall
The foundation preparation process consists of several steps that must be performed in a certain sequence. These stages include:
- Primer. Coating the wall with a primer binds the surface layer, deprives the base of its ability to intensively absorb moisture and prevents dust from adhering. The primer is applied with a large brush or brush, rubbing the composition until a white foam forms.
- Repairing potholes and cracks. The defects must be specially expanded to a centimeter width, then opened with a primer and treated with cement mortar. As an alternative to cement, you can use tile adhesive as it has the required characteristics.
- Putty. At this stage, the roughness of the base decreases and the gluing area expands. When preparing walls, it is impossible to do without putty and you need to apply at least a thin layer.
- Re-priming. To complete the preparation of the base, apply another layer of primer, which will serve as the finishing surface for gluing the wallpaper.
Selection of materials
It is better to select the adhesive composition taking into account the technical parameters of the wallpaper. The best option is to use instant adhesive with a high adhesion rate to the wall covering.
See also
How to disassemble and repair an iron with your own hands, rules and step-by-step instructions
Padding
Applying a primer is an important part of the wall preparation process. Without a primer layer, the base is susceptible to destruction even under the slightest external influence.
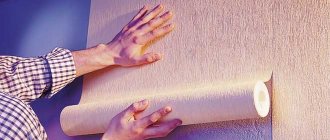
Pasting
Initially, the prepared adhesive composition is applied to the base or the inside of the wallpaper. The recommended amount of glue and the optimal location for application are usually indicated in the manufacturer's instructions. It is important to distribute the composition evenly and make sure there are no lumps, after which you can proceed to fixing the wallpaper. The canvas is applied in a vertical position, trying to ensure the most accurate placement.
Paper wallpapers get wet in a short period of time, which does not always leave the possibility of adjusting them.
Alignment
In order for the surface to be smooth and without blisters, you need to properly smooth the wallpaper. Having fixed the canvas, first remove the remaining glue and accumulated air, starting from the top and moving down. You can level the surface with a spatula or roller. The movements of the instruments are carried out from the middle in different directions. As the alignment progresses, you can adjust the position of the canvas if it is displaced.
How to smooth
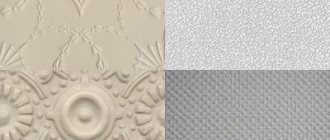
To smooth out bubbles, you will need the following:
- a piece of dry cloth (for paper materials);
- brush (for non-woven wallpaper);
- rubber roller (for vinyl coverings).
If possible, you can arm yourself with a wallpaper spatula. It is ideally suited for eliminating troubles on non-woven and vinyl materials.
To remove bubbles on the wallpaper, press on the air pockets from the middle to the ends, moving from top to bottom.
Use the spatula carefully so as not to damage the joints between the sheets. If after such manipulations the bubbles do not go away, you can use the following popular method - piercing the swelling with a needle
After the puncture, it is advisable to walk over the wallpaper with a rag, releasing the air. This method is suitable even if the wallpaper was pasted a long time ago. If glue appears on the surface during the procedure, it must be carefully removed with a sponge.
If there is air in the bubbles and not glue, the above tips will not help. You will have to take a syringe, fill it with adhesive, make a puncture in the bladder and inject a little liquid
The syringe should be held at an angle of 25–30 degrees. This way the needle will penetrate parallel to the wall to the optimal depth. Using a spatula or rag, you need to spread the glue over the entire area of the swelling. After the procedure it will disappear. If glue comes through the puncture, it must be wiped off with a cloth.
Important! When “repairing” paper wallpaper, you need to be very careful, as the material tears easily. If the bubbles are very large, a utility knife will help.
They need to make longitudinal or transverse cuts. Glue is applied under the wallpaper with a syringe, and the material is glued to the wall. Instead of a knife, you can take a sharp blade, and replace the syringe with a watercolor brush. This method, which allows you to remove bubbles from the wallpaper after drying, is not suitable for all types of coatings. Not everyone can accurately connect the cut parts without creating gaps between them. You can practice in an inconspicuous place
If the bubbles are very large, a utility knife will help. They need to make longitudinal or transverse cuts. Glue is applied under the wallpaper with a syringe, and the material is glued to the wall. Instead of a knife, you can take a sharp blade, and replace the syringe with a watercolor brush. This method, which allows you to remove bubbles from the wallpaper after drying, is not suitable for all types of coatings. Not everyone can accurately connect the cut parts without creating gaps between them. You can practice in an inconspicuous place.
On multi-layer wallpaper, bubbles may form due to the fact that the glue is not completely absorbed into the material. To get rid of blisters, you should go over them with a spatula or separate the wallpaper from the wall and stick it again. Some people use a warm iron instead of a spatula. This method is suitable if little time has passed since the wallpaper was hung.
If the wallpaper peels off, you will have to resort to drastic measures. The glued canvas is moistened using a spray bottle or roller
If the material was glued overlapping, it is necessary to carefully separate it at the adjacent strip. Wet wallpaper is removed, the wall is allowed to dry, and then a new fragment is glued
The reasons for the formation of bubbles are often negligence, inattention, and lack of attention to detail. There is no need to rush in this matter, otherwise you will have to redo everything all over again.
Timely actions to remove bubbles will help maintain the aesthetic appearance of the wallpaper and make the repair successful
Most compounds used to glue wallpaper contain a lot of water. Before installing the covering, it is necessary that the excess moisture evaporates, and only an adhesive substance remains on the wallpaper. If you neglect this, the wallpaper will not only begin to bubble, but will also peel off completely.
If small ripples appear on the wallpaper after gluing, there is no need to panic. This occurs due to saturation of the material with moisture. Once it dries, it will return to a decent appearance on its own.
Materials and tools
Even a beginner in this business can cope with gluing paper wallpaper. The main thing is that all instructions and recommendations are strictly followed, and that the necessary materials and tools are at hand.
Materials you will need:
- rolls of paper wallpaper (quantity calculation is given below);
- universal or special wallpaper glue for paper;
- primer - no matter what some experts say, it’s still worth priming the walls.
The list of tools is impressive. You can find some at home or with friends. The rest will have to be purchased, because... Most of the listed tools are consumables - used and thrown away.
The full list includes:
- stepladder If you don't have one, you can use the table. The main thing is to have access to the ceiling space;
- containers for glue and clean water. You can use 8 or 10 liter plastic buckets;
- a tray (cuvette) for primer and glue;
- a screwdriver with a mixing attachment for preparing glue will speed up the work. If not, you don't have to buy it. You can mix the glue yourself;
- rule. If you are not at home or staying with friends, you can get by;
- a roller with a telescopic handle and a small brush - needed for applying primer;
- plumb line - without it it is impossible to draw a starting vertical line. If you have a laser level, you don't need a plumb line;
- construction pencil or marker;
- 3 or 5 m tape measure - helps to cut sheets of wallpaper;
- utility knife - used for trimming and trimming trellises;
- wide metal spatula - needed for trimming wallpaper near the ceiling and below;
- wallpaper spatula in the form of a wing made of plastic or rubber - smoothes the wallpaper on the wall, removes air bubbles;
- a special wallpaper roller made of thick rubber - needed for rolling trellises to the wall. The population is accustomed to performing operations manually. This trick works with thick wallpaper: duplex. With thin ones, not always - they either tear or stretch, resulting in folds;
- paintbrush or large paint brush for applying glue;
- a towel (napkins) for hands and removing the exposed glue (the glue can be removed with the same success with a foam sponge);
- a small rubber, cone-shaped roller for rolling joints.
Calculation of rolls
There are two methods to determine the required number of tubes.
Method 1. Measure the height of the wall. In this case, you need to measure only the part whose surface is pasted over. This means that if there is a permanent floor or ceiling plinth, the length of the trellis strip will be shorter than the height of the ceiling. The length of the tube, usually 10 m, is then divided by the resulting length of one strip. This way you can find the number of full sheets in one roll.
At the next stage of calculations, the length of the perimeter is determined and divided by the width of the trellis (0.53 m). The total number of sheets is divided by the number of strips in one tube. The result is the desired number. Some DIYers may argue that there are windows and doors whose area is not deducted. The explanation here is simple: there are always unexpected losses. In addition, experienced finishers advise adding 1-2 more tubes to the obtained result. After all, by purchasing more, you can end up with another batch that has differences in color.
The above reasoning can be expressed by the formula: P = T/L x M/K + 1(2) , where:
- P—number of rolls of trellises, pcs.;
- T is the length of the perimeter of the room, m;
- L—tube width (0.53 m);
- M is the length of the trellis, m;
- K—tube length (10 m, 15 m, 25 m);
- 1(2) - additional 1-2 tubes for unexpected losses.
If the picture height is more than 6 cm, 1 trellis tube is added to all calculations for every 6.
Method 2. The height of the ceiling and the area of the room are determined, after which the desired result is taken from the table below. It does not take into account the losses for fitting the drawing.
Table 1. Calculation of the number of rolls of paper wallpaper depending on the area of the room.
| Indoor ceiling height | |||
| Standard ceiling - 2.5m | High ceiling - 2.6-3m | ||
| Room area, m2 | Number of tubes | Room area, m2 | Number of tubes |
| 6 | 5 | 6 | 7 |
| 10 | 6 | 10 | 9 |
| 12 | 7 | 12 | 10 |
| 14 | 8 | 14 | 10 |
| 16 | 8 | 16 | 11 |
| 18 | 9 | 18 | 12 |
| 20 | 9 | 20 | 13 |
| 22 | 10 | 22 | 14 |
| 24 | 10 | 24 | 15 |
| 26 | 11 | 26 | 16 |
| 28 | 11 | 28 | 17 |
| 30 | 12 | 30 | 18 |
Glue calculation
To calculate the number of glue packs, you need to use its consumption, which is indicated on the front side of the pack. Usually this is the number of rolls 10 m long and 53 cm wide, which can be glued with glue from one pack. Then everything is simple: the total number of rolls is divided by the consumption. If the exact number is not indicated on the pack, but a range is given, for example, 7-9 rolls, the average value is taken.
How to fix the situation
You can remove blisters on wet wallpaper, or you can remove blisters on dry wallpaper. These methods differ significantly from each other. If the wallpaper has not yet dried, then the resulting swellings are removed with a roller. You can also use a warm iron for this. But if the wallpaper has already dried, it will be more difficult to remove the bubbles.
The most popular method is to pierce and then re-glue. For this you will need a syringe. The thicker the glue you diluted, the thicker the syringe needle should be. The puncture should be made at a slight angle, almost parallel to the surface of the wall. The glue is distributed from the edges of the swelling to the middle. This way you can avoid dry areas. And through the hole you can squeeze out excess glue
The glue must be distributed very carefully; it must be applied evenly. Use a roller or spatula
When the glue is distributed and its excess is removed, it is necessary to press the wallpaper against the wall, smoothing out the folds. After the wallpaper dries, small blisters will smooth out.
If the air pocket is large, then one puncture will not help. To eliminate swelling, you need to cut the wallpaper with a knife and bend back the swollen area. Glue is applied to the wallpaper. If necessary, it can also be applied to the wall. After this, the wallpaper is pressed tightly against the wall surface, the air is squeezed out. If the wallpaper is paper, use a dry cloth, and for non-woven or vinyl, a rubber roller is suitable.
If the peeling area is very large, it is recommended to peel off the strip and glue a new one in its place.
Pasting
Now let's look at how to glue paper wallpaper as correctly as possible - this is not difficult to achieve.
To begin with, it is worth marking the vertical on the wall. This is easy to do using a plumb line with a cord. Thanks to this, the canvases can be glued vertically. You should start doing this, as mentioned earlier, from the window, marking a vertical line on each wall. It is necessary to coat both the wall and the panel with glue. Moreover, a lot depends on the distribution of the glue over its surface. It should be as uniform as possible, otherwise unevenness will arise, or simply some fragments will not hold well and fall off
It is also extremely important to get rid of bubbles after you have properly applied the wallpaper to the wall.
Perfect gluing of paper to the camera, everything will not be so easy for you
To do this, you need to take a rubber roller, or at least a clean soft cloth, and then start smoothing every centimeter, moving towards the edges. Then the air will gradually come out, the surface will be extremely smooth. If glue appears on the front side of the wallpaper, it must be removed with a damp sponge, otherwise, when it dries, it will look especially bad on paper wallpaper, and additional effort will be required to remove it.
Difficult places
Some places can be particularly difficult. In particular these are corners. To glue a corner, you simply need to cut the canvas so that you can overlap the other wall by 3-5 centimeters, then no more. It is also worth making several cuts with scissors, then the panel will be able to lie on the wall without folds. The next strip needs to be glued directly from the corner, but it is necessary to put down a vertical line again for the result to be accurate.
Detailing wallpaper in difficult places
Sometimes even paper wallpaper is too thick. Then the technology for gluing them is slightly different. If thin wallpaper needs to be glued right away, then for thick wallpaper you need to wait about five minutes or so until it gets a little wet, then it will lie correctly.
In general, it is better to glue wallpaper not alone, but collectively. Sometimes doing this alone is quite problematic; very often it turns out that it is simply inconvenient to hold or press something if no one helps. So, if there is a real opportunity, then ask for help.
Following actions
When you have pasted paper wallpaper, you need to make sure that it dries extremely quickly and properly. To do this, you need to prevent even the slightest draft; paper is especially sensitive to this. Many people use electric heaters, but this is a rather bad idea, because it is more suitable for thicker wallpaper. Excessive heating may cause the paper to simply move away from the wall, which is very undesirable.
Sometimes wallpaper breaks, especially thin paper. Therefore, it is necessary to eliminate the problem. Take your scraps, select the fragment that will exactly fit into the damaged area according to the drawing. If the wallpaper is plain, then everything is simple. If you choose the right fragment, then the damage will not be particularly noticeable in the future.
The result of your work will be an excellent interior
Causes of bubbles
And the reason is simple and banal - when the wallpaper begins to absorb glue, the interlining begins to expand. A high-quality non-woven base practically does not expand and does not create problems. Therefore, the main reason is the wallpaper is not of high quality. To be honest, low-quality non-woven wallpaper is a fairly common occurrence. According to the consumer protection law, you can stick up to 3 strips of wallpaper and if you are not satisfied with the result, return it back to the store.
However, returning is a very dubious proposition: it is not a fact that by returning some and buying others, you will get better wallpaper. It is possible that the problem will recur and you will have to return it again. I am silent about wasted time.
You can get out of the situation by slightly changing the gluing techniques, taking into account the large expansion of the non-woven fabric. That's exactly what I do.
Instructions on how to remove
Sometimes removing stains is mandatory not only for the appearance of the apartment, but also to ensure safety, for example, fungus and mold cause direct harm to health.
Yellow
The reason for the appearance of yellow spots is most often problems with the plumbing, so most often they appear on the light-colored ceiling or walls in the kitchen or bathroom (read about the design and wallpapering in the kitchen here). Such stains cannot be removed or removed, so they are usually covered with other materials or decorated.
To avoid the appearance of yellow streaks, it is necessary to properly prepare the wall for wallpapering:
- Use a spatula to clean the affected surface, treat it with a sponge and a special bleach solution.
- Allow the treated surface to dry, repeat the procedure if necessary.
- You should start gluing wallpaper only after the surface has been completely cleaned of yellowness (how and with what should you apply glue to wallpaper?).
Another possible cause of yellow marks could be glue, which requires a lot of time to dry; in this situation, there is no need to take any measures, but it is better to just wait until the wallpaper dries.
If stains and drips do not disappear for a long time, it makes sense to contact the store where you purchased the glue, demanding that this material be replaced with a better one. It is impossible to get rid of such stains on your own, since their origin is unknown.
here
Fat
There are several ways to remove greasy stains.
Tip: On non-woven or vinyl wallpaper, stains can be removed using water and detergents (how to properly glue non-woven wallpaper?).
You need to be more careful when working with paper wallpaper.
How to remove:
- Rub crushed chalk into the stain. Wait until the fat is absorbed into it and remove the powder. To speed up the process, you can place the powder in a napkin, paper towel or thin cotton cloth, apply it to the stain and gently iron it.
- Apply a thick solution of starch and water onto the stain for 8-10 hours, then use a brush to clean off the dried starch crust.
- Apply a solution of baking soda and water in a ratio of 1:4 to cotton fabric. Wipe the stained area several times, then remove any remaining mixture with a clean, dry cloth.
Dark
The cause of dark, brown stains is rust. There is no point in fighting stains that have already appeared: they must be removed and the wall treated as follows:
- Trim the protruding piece of metal with a grinder.
- Clean the remaining piece of metal from rust.
- Prime the surface with acrylic paint.
- Using gypsum putty, cover the problem area (how to putty walls correctly?).
- Re-prime the surface after the previous layer has completely dried.
This procedure will help minimize the risk of rust in the future.
Black
Dark, almost black spots indicate that the coating is affected by fungus or mold. In the vast majority of cases, mold is located under the wallpaper, so in order to carry out disinfection work you will have to completely change the wallpaper. How to withdraw? You must proceed as follows:
- Remove furniture from the room and treat it with an antifungal solution or hydrogen peroxide using a sponge.
- Remove the previous wallpaper and clean the wall surface with sandpaper.
- Treat the entire surface of the wall with a special anti-mold and mildew agent.
- Apply a layer of primer with antifungal and antibacterial effect.
- During work, you must use a mask and ventilate the room.
These simple measures will protect your lungs and other respiratory organs.
White
Poor quality wallpaper can fade or fade over time, losing its original color and forming white spots. In this situation, the wallpaper can be completely repainted or changed, i.e. carry out cosmetic repairs.
Here
If all else fails
But what to do if you put up wallpaper and bubbles appear that cannot be removed? The only option is to dismantle the canvases. And in the future, do not neglect the rules of gluing.
Procedure for dismantling and subsequent wallpapering:
- Prepare the base. The wall must be smooth, without cracks or bulges. To do this, you need to putty all the flaws and level the surface with two layers of putty. The finishing layer should be perfectly smooth.
- Apply primer. It is better to select primer compositions for wallpaper. It should be applied in two layers. The primer will strengthen adhesion and additionally moisten the surface.
- Dilute the glue. Prepare the paste strictly according to the instructions. It is especially important to maintain the proportions of water and powder. It is advisable to use the adhesive that wallpaper manufacturers recommend using.
- Apply glue to the canvas and wall. It is advisable that it saturates the strip well. To do this, you need to connect the two parts of the canvas and let them lie for 2 minutes.
- Sticking. Take a strip and stick it on the wall. You need to start pasting from the middle of the wall, slowly moving up and down. You can smooth the strip with a clean cloth or a special wallpaper roller.
Gluing wallpaper
Under no circumstances should you glue new non-woven wallpaper onto the old covering. The bottom strip will absorb all the glue and, when dry, will become covered with bubbles. How can I get rid of the old coating? Simply remove it with an iron spatula. It is advisable to mark the wall before pasting. This way you can avoid warping the canvases.
Self-sticking
Anyone can hang wallpaper without bubbles. The main thing is to follow the technology and not rush. When choosing glue, follow the recommendations of trellis manufacturers; dilute it only in warm water and in the correct proportions. If it was not possible to avoid this trouble, then there are ways and methods that can get rid of this problem.
Why do they arise?
It is worth immediately reassuring readers - bubbles on wallpaper after gluing almost always form for everyone.
Another question is how large their number and size are, and how to quickly eliminate defects.
- The first reason is the expansion of the paper from the moisture contained in the glue. The wet fabric changes unevenly, hence the swelling in the most stretched places. Thin, inexpensive paper wallpapers suffer most from this “disease.” Heavy multi-layer strips swell less often and to a much lesser extent.
Immediately expel the air from under the wallpaper.
- The second most common reason why wallpaper bubbles after hanging is the haste of the owners. They ignore the need to carefully remove the air from under the canvases. Therefore, in order not to get a lumpy room the next day, you should immediately thoroughly smooth out the walls, even if it takes more time.
Choose the right glue.
- Another common mistake is a mismatch between the glue and the material. For example, you have glue for thin wallpaper lying around from a previous renovation, and you purchased a multi-layer or solid vinyl finish. Or vice versa - you are trying to glue a wall with inexpensive paper with a strong composition that is completely unsuitable for these purposes. Hence the bubbles when wallpapering.
- We often carry out repairs during the holidays, that is, mainly in the summer, in the heat. It’s clear that you want to work in comfort, so open windows and a draft make the process easier. But what helps us, to the detriment of wallpaper, is that they categorically do not accept changes in temperature and humidity.
Note! If you intend to do the pasting yourself, be patient and work only indoors. Even more important is to leave the room closed for a day or two, until the material on the walls has completely dried.
Otherwise, you will experience not only bubbles, but also partially fallen off stripes.
- Blisters can also appear from excess glue, as well as from keeping the canvas smeared with it for a long time. The longer the wallpaper lies wet on the floor, the more it gets wet and stretched. Therefore, do not cover the canvas with glue in reserve. Apply it only to each strip one at a time, immediately applying it to the wall.
Walls should be carefully prepared for wallpapering.
- An improperly prepared base often causes the finish to swell. Uneven dents on the walls, loose putty. cracks will definitely have a negative effect.
- When spreading the strip that is still lying, be careful to ensure that there are no dry gaps. A very convenient category of adhesives that change color upon application. In this case, you will see the missed areas and correct the situation in time.
- There are times when the instructions included with the material recommend gluing both the wallpaper and the wall. Carefully read the text on the packaging and follow this kind of advice, then you will reduce the risk of panels falling behind.
Why do bubbles appear?
Air bubbles can appear both during and after gluing, regardless of the type of wallpaper. The main causes of bloating:
- low-quality materials;
- haste of people;
- room temperature, etc.
Important
Before carrying out repair work, you should carefully study the manufacturer’s instructions and recommendations.
During pasting
Before starting repair work, it is important to evaluate the quality of the material and glue. Bubbles on the wallpaper begin to appear when the first sheet is hung. There may be several reasons for this:
- The paper expands from the moisture contained in the glue. After applying the adhesive composition, the canvas begins to soak unevenly. In the most stretched places, swelling appears when gluing. Most often, paper wallpapers are subject to such changes; heavy multi-layer canvases swell less often.
- An attempt to glue the canvas to a damp wall without waiting for the surface to dry after priming or putty.
- Sometimes swelling during gluing appears due to the fact that the canvases lie on the floor for a long time, thickly smeared with glue. You need to apply glue to the canvas and immediately apply it to the wall.
- After spreading the strip with glue, dry gaps may remain in some places. Subsequently, these places turn into bubbles. Colored glue will help eliminate this problem; when applied, it will indicate “dry” areas.
Attention
If bubbles begin to appear during gluing, you need to try to expel the air from under the wallpaper. Otherwise, after drying, the bubbles will remain in place, and it will be more difficult to remove them.
Some manufacturers recommend applying glue to both wallpaper and walls. This point is indicated on the packaging.
After pasting
Not everyone can achieve the perfect result after wallpapering. The main reasons for wallpaper swelling after completion of work:
- Wrong adhesive selected. The wallpaper composition must match the material. For example, it is not recommended to use glue for paper wallpaper to glue non-woven wallpaper.
- Unevenness, dents and cracks on the walls negatively affect the coating. Any uneven place is a potential bubble; you should not ignore the putty and primer of the walls.
- Non-compliance with the temperature regime in the room. Before work, you need to close all the windows in the room and prevent drafts. The air temperature should be 15-23 degrees.
After repair work, it is advisable to close the rooms for 2-3 days to allow the glue to dry and the material to firmly adhere to the walls.
Useful tips and how to fix errors
Before gluing the canvas, it is necessary to prepare the surface. If the wall has undergone repairs and the application of gypsum putty, it is necessary to apply a primer, it is best to take ST17 or its equivalent. This will significantly reduce adhesion - reduce the absorption of the surface. The glue will not dry instantly or unevenly. If the walls have been cleaned of previous wallpaper, you also need to apply a primer only after thoroughly removing the previous material.
Important: It is best to choose a glue with a composition that allows you to adjust the canvas when gluing. This data is indicated by the manufacturer on the roll packaging or the information can be provided by the salesperson in the store.
If it is recommended to dilute glue for glass wallpaper in a smaller proportion than for non-woven or vinyl, it is better to stick to this consistency. Thicker glue is always easier to adjust when gluing.
The first strip must be aligned in accordance with the marked landmark and in an area without corners or other openings. Leveling should be done using rubber or plastic spatulas, rollers or a soft cloth. In this case, movements should be from the center up and to the sides, and then from the center down. But not horizontally, but as a “herringbone” is drawn - this will more effectively expel the air and connect the canvas to the surface.
Do not allow the canvas to bend sharply, as this will make the problem area vulnerable to tearing and with a visible defect. If the bubble cannot be removed, then you need to peel off the strips to the required height and re-glue it, starting from the problem area.
Due to the slight expansion of non-woven fabric as a result of contact with liquid, it is best to glue the fabric with a slight overlap. It will then separate as the glue dries, and no gaps will be visible. The excess is cut off with a wallpaper knife using dry material.
It is very difficult for one person to paste wallpaper while noticing all the nuances in a timely manner. Therefore, if you have no experience in this matter, it is better to enlist help. If two people level the canvas (one on top and glues the first 20-30 cm, and the second simply does not allow the rest of the strip to stick to the wall), then the process is greatly simplified and the number of bubbles is reduced to a minimum.
If, as a result of gluing, several small bubbles still form, they can smooth out on their own after a couple of days. If this does not happen, then you can release the air without damaging the decorative layer by puncturing it with a needle or medical syringe. Excess air is simply sucked out of the defect cavity.
When gluing non-woven or vinyl wallpaper, bubbles or wrinkles may appear. To eliminate them, you don’t need to panic or immediately change the material. It is enough to peel off the canvas and try to adjust it so that the defects are eliminated.
High-quality material, following gluing technology and selecting the right adhesive composition will reduce the problem to a minimum. If, after gluing, the wallpaper wrinkles, the creases can be eliminated by trimming or puncturing and re-gluing the problem area.
The reasons why appeared during gluing
Attention
The main reason for the accumulation of air under the coating is violation or non-compliance with gluing technology. It consists of applying too much glue, improperly or insufficiently smoothing the material after applying it to the wall.
The main reasons for the formation of air:
- non-compliance with application instructions, excess application or uneven distribution on the sheet;
- insufficient strip smoothing;
- incorrect material leveling technology.
The gluing method depends on the type of coating. After lubricating the strips, you need to wait a while before gluing them. The exact time depends on the material and is indicated on the packaging.
Pasting must be done on prepared walls : plastered, puttied or on drywall after priming.
Why shouldn’t you worry if small air bubbles appear after finishing work? This phenomenon is normal and does not require any corrective action: as the walls dry out, these bubbles will level out and disappear.
Bubbles on the wallpaper. Why do they appear after gluing? Main reasons
It is quite possible that the glue you received is of poor quality, or it does not suit your type of wallpaper. For example, the density of the glue may not match the wallpaper. It also happens that you bought the glue you need, but prepared it incorrectly, that is, not according to the instructions. If bubbles appear on your non-woven wallpaper, then it is quite possible that the pasting was done incorrectly. When gluing this type of wallpaper, you should not apply the glue too intensively, both on the wallpaper itself and on the walls.
Glue for any type of wallpaper, you just need to apply it evenly. If you smeared the wallpaper with glue, you need to have time to glue it before it dries. If you keep them with glue on them for a long time and do not glue them, then often the wallpaper simply swells greatly. Later, of course, they still dry out on the wall. But, in this case, the paper dries out greatly, displacing the air, and as a result, we again get bubbles.
Elementary drafts in the room, during the wallpapering procedure, can also “inflate” your wallpaper on the wall.
How to remove such bubbles?
The problem can be solved in different ways, that is, different tools will be needed. This can be a plastic spatula or other tools. So, if bubbles appear on vinyl wallpaper, then they need to be removed with a brush. If on non-woven ones, then with a rubber roller. And, if on simple paper ones, then use a soft cloth. You need to do this on the same day that you hung the wallpaper. To do this, take a tool that is suitable for your type of wallpaper, and with its help we remove all excess glue from under it. Next, the surface is simply wiped with a dry (necessarily clean!) cloth.
Fixing a leaking shower hose
If the wallpaper has already dried, but the bubbles on it have not disappeared, then you will need a medical syringe. It will need to be filled with wallpaper glue. Where a bubble has formed, carefully cut the wallpaper (the cut should be very small), release the air, and insert a needle there. Then, little by little, glue is poured there with a syringe, and then this area is smoothed with a soft cloth.
This should be done only from the very edges of the bubble to its center. This way you can remove all the excess glue from it, which will come out through the small hole you made.
Even a low-heat iron can be used to remove bubbles. True, you can’t use an iron for all types of wallpaper. Again, you need to slightly cut the bubble, take an iron (don’t heat it too much!), put several layers of fabric on top of the wallpaper, and iron this area through the fabric. This can be done if the wallpaper was hung quite recently, and it has not yet had time to dry completely.
This video will also help you remove such bubbles from the wallpaper. Look.
How to get rid of bubbles
During gluing, bubbles sometimes form, which can be eliminated.
Today there are several methods to solve this problem:
- Smoothing. Using a dry cloth or a special spatula, smooth the newly pasted canvas. In most cases, this will remove bubbles and unevenness.
- Using a syringe. Glue is taken into it and carefully injected into the problem area. After this, the canvas is smoothed, pushing out excess adhesive.
- Using a razor. This method is used in cases with large bubbles. An incision is made with a razor in the problem area. After this, glue is injected. All work must be done very carefully, as there is a risk of cracks.
Finishing without bubbles is quite difficult, but these methods will solve the problem.
Smoothing with a special spatula
Preventing the appearance of blisters on the wall
In order not to suffer from eliminating blisters, after gluing the materials, you need to try to prevent their occurrence.
Simple tips to prevent blisters:
- When preparing the adhesive composition, you should follow the instructions. It is not recommended to mix the glue intensively to avoid the appearance of a large number of oxygen bubbles in it.
- The density of the adhesive composition must match the finishing material. You should not use a thick adhesive composition for thin materials, otherwise the appearance of blisters is inevitable.
- The canvas is glued to the top of the wall, monitoring its location. At this time, the assistant must hold the bottom of the strip and monitor its vertical position.
- Good side light will help you apply the composition correctly to the strip. If possible, you should purchase pink glue, which will turn white after drying.
- At high room temperatures, the glue will dry very quickly. To avoid this, you should place containers of water in the room and cover the windows with thick cloth.
- Any unsealed crack or recess in the wall will lead to the appearance of blisters on the surface of the coating.
The problem of canvas swelling is easier to avoid than to eliminate the consequences. You need to prepare the walls before finishing and carefully approach the choice of materials (read about how to properly prepare wallpaper and walls for hanging here.
Glue dilution
The glue needs to be selected according to the wallpaper that will be glued. If they are paper, then any wallpaper glue will do. If it is vinyl or non-woven, you need to choose it specifically for them. It is necessary to dilute evenly, avoiding the appearance of lumps, they often lead to folds and bubbles.
Pour dry glue into a container with water in a thin stream, while simultaneously stirring the water generously with a stick, avoiding the formation of lumps. If they start to appear, stop pouring glue and mix the mixture until they are removed. It is better to add PVA glue to the adhesive mixture in the proportion of half a glass of PVA per pack of wallpaper.