Advantages
Using wallpaper for flooring has several undeniable advantages:
- Low cost . The cost of wallpaper is much lower than laminate and parquet. In addition, there is no need to spend money on the services of specialists - you can do the work yourself.
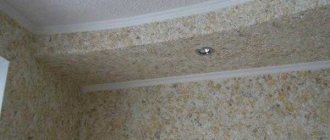
- Nice appearance. Correctly selected color and texture of wallpaper design allows you to harmoniously fit it into any room in the apartment. By choosing different designs, you can easily visually divide the room into several zones.
- Smooth surface . Varnish applied to the wallpaper will make the surface as smooth and pleasing to the eye as possible.
- Originality . The use of such a coating will create a unique atmosphere in any room.
Preparation
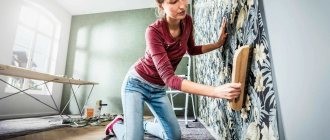
In order to stick a thin paper sheet, you need to very carefully level the plane of the base. If this is not done, all existing defects and flaws in the surface will be very noticeable and, in addition, can damage the coating. Therefore, special attention should be paid to preparing the foundation.
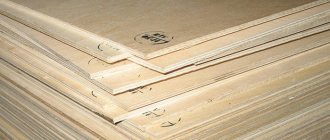
The ideal option would be a floor filled with a special compound, but such work will require significant financial costs and quite a lot of time, so most people solve the problem differently: they assemble a structure from chipboard or thick waterproof plywood. This approach allows you to get a perfectly smooth surface for gluing and the wallpaper is glued to the floor very evenly and without any problems. It is very important to lay all the parts evenly and without height differences at the joints.
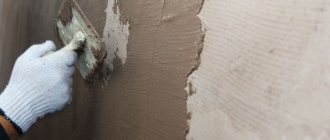
In addition to laying sheets of chipboard or plywood, another type of work will be required - puttying uneven areas and sanding joints with sandpaper. You can use a grinder. For puttying, special mixtures designed for working with wooden surfaces are better suited. Not only the joints are leveled, but also all other existing flaws - small depressions, crevices, cracks, and so on.
Advice: if you find minor irregularities not exceeding one millimeter in size. Cover the assembled structure with matte parquet varnish and it will eliminate such defects.
Surface treatment
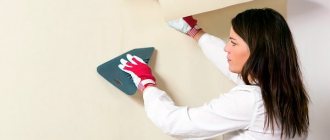
The disadvantage of wallpaper is that it reflects all the unevenness of the surface on which it is located. Therefore, you first need to carefully treat the floor. Make sure there are no uneven spots on it. Chipboard and fiberboard sheets are ideal for work. If you find cracks, crevices or gaps between the slabs, you need to putty them. Act quickly and remove excess putty in a timely manner, because once it dries, removing it will become problematic.
Important! Pay attention to protruding nails and creaking spots on the floor. The nails need to be driven in or removed, and self-tapping screws must be screwed into places that creak.
When the surface is ready, wash it thoroughly and treat it with an antiseptic composition - it will protect the floor from mold and mildew.
Pasting process
The process of gluing wallpaper on the floor is slightly different from similar work with a wall or ceiling. Since in this case the finishing material is not used directly, but after preliminary preparation.
How to paste wallpaper on the floor:
- Floors are measured.
- Wallpaper is cut into pieces of the required size.
- Each of the strips is coated on the outside with varnish.
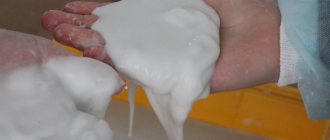
- While the coating dries, PVA glue is diluted with water. It is necessary to dilute the fastening composition with water so that the wallpaper glides over the surface more easily.
- The adhesive composition is applied to the floor and to the back of the wallpaper.
- The strip is laid out on a horizontal surface and adjusted to the walls (material glued nearby).
- Any air bubbles that appear are eliminated using a dry, lint-free rag, shoe brush or a special silicone spatula.
- Wrinkles are smoothed out well until the glue hardens. Immediately after drying, previously unnoticed voids may appear. They need to be filled with glue, this can be done using a syringe, and smoothed out thoroughly.
- Completely dried wallpaper is covered with 1 layer of parquet varnish, diluted with water in a ratio of 1:4.
- The final stage is to re-coat the canvases with 2 layers of undiluted varnish.
Wallpapering
Having dealt with the surface, you can begin the actual work.
- Cut the wallpaper into pieces of the desired length, do not forget to leave a few centimeters of margin.
- Cover the material with panel varnish - it will strengthen the wallpaper and make it quite smooth.
- Treat the inside of the wallpaper with glue diluted with water; it is recommended to use PVA glue.
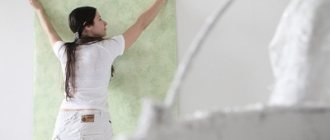
- Carefully stick the wallpaper so that it matches each other in design and creates an overall picture. Make sure that there are no air bubbles: they must be smoothed out with a spatula or an unnecessary rag.
Advice! If there is an air bubble in the middle of a piece of wallpaper that you cannot get rid of, do the following. Draw a little glue into the syringe and, piercing the bubble with the needle, inject it inside. Then gently iron and remove excess.
- After all the wallpaper has been pasted, treat it with panel varnish. You need 3 layers of varnish, each of which must dry completely.
Attention! Wallpaper on the floor must be varnished every 1.5-2 years. This procedure will avoid damage and keep the surface smooth.
Wallpapering a floor is an inexpensive and not too labor-intensive procedure. If you want to update your renovation for little money, we recommend turning to this option.
Wallpaper floor under varnish (1 video)
Homemade floors with a 3D effect from old wallpaper coated with regular varnish
Our article is about an original and very cheap flooring option. This method of renovating an apartment will undoubtedly interest lovers of austerity. It is based on ordinary wall wallpaper. They can be new or used – it doesn’t matter. The main thing is that they do not have serious damage. In addition, careful surface preparation is required. But first things first.
To work, the master will need a sufficient amount of wallpaper, PVA glue, transparent acrylic varnish, as well as a wide brush or roller. But before you start work, you need to prepare the subfloor. It needs to be perfectly aligned.
Plank floors are covered with panels made of thick plywood or OSB. All joints, cracks, and self-tapping screw heads are perfectly leveled with putty. Then the surfaces are treated with a grinding machine. Concrete floors are leveled only with screed made from building mixtures. After a few weeks, when it is completely dry, they move on to the main work.
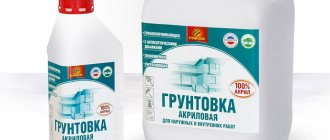
They start by washing the rough base. Even a small grain of sand or flaw will definitely appear under the finishing layer of varnish and will definitely spoil the appearance of the room. After this, several primer layers of glue or acrylic primer for walls are applied over the screed or plywood. If you don't do this, you won't be able to glue the wallpaper to the floor. Then apply another layer of PVA glue to the floor and to the back of the wallpaper. After this, they are carefully glued in separate strips.
The folds and joints of the strips are carefully aligned, air bubbles are removed by driving them out with a rubber roller. A thin layer of PVA glue diluted with water is applied on top of the wallpaper. The floor is left in this state until completely dry.
At the end of the work, the floors are covered with several layers of acrylic varnish. It is better to opt for moisture-resistant brands. This will allow you to carry out wet cleaning in the room. Otherwise, white spots will remain on the floor. Each intermediate layer of varnish is completely dried before applying the next one.
When looking at a brand new shiny floor, do not forget that it does not have sufficient strength. Heavy furniture should not be placed on it or anything should be moved on its surface. As a result of mechanical loads, such a coating will quickly become unusable. In addition, such a floor will be cold. However, for those who are not deterred by such little things, wallpaper floors are a very acceptable way to renovate an apartment.
Required tools and materials
Only paper wallpaper without decorative elements on the surface is suitable for covering the floor. Non-woven or vinyl materials are not recommended, as they are airtight and may peel off during use.
Wallpaper patterns are selected based on your own taste and the overall decoration of the room. This can be a traditional imitation of wood or natural stone, as well as any ornaments, including 3D options.
To work you will also need:
- PVA glue;
- putty;
- spatulas - small and wide;
- sandpaper;
- several brushes for applying glue and varnish;
- rubber roller;
- dry rags;
- water based varnish.
Decoration examples
Reviving furniture with your own hands and turning it from junk into a modern work of art that will harmoniously fit into the interior is the dream of any housewife. Let's present a master class in furniture decor. It will provide the basics of decoupage with aging elements for beginners.
- Decoupage of an old chest of drawers. This master class presents the technology of reviving a chest of drawers that has been in the house for a long time and is already obsolete. First, apply white paint to the prepared and cleaned surface of the chest of drawers using a roller. While it dries, cut out flower appliqués from the remaining wallpaper. Then we use sandpaper to go over the surface of the chest of drawers. Then we glue the appliqués using PVA glue. After drying, cover the areas with applications with PVA glue. This chest of drawers is suitable for a vintage style interior;
- Master class for beginners - decoupage of a chair in Provence style. Begin work by removing varnish or paint using sandpaper. Then it is treated with coarse sandpaper, gradually reducing the abrasiveness, until a perfectly smooth surface is achieved. Then we cover the chair with white acrylic paint. After complete drying, coat with paint of a darker shade. We select applications for decoupage in Provence style. Those places where they will subsequently be cleaned with sandpaper are treated with wax. We paste the appliqués in pre-designated places. Apply curls with paint of the appropriate color, adhering to the chosen style. We go through the places where the wax was applied with sandpaper, and cover everything with a finishing layer of varnish.
Decorating any furniture using the decoupage technique using wallpaper is not difficult, and the result will not disappoint.
The video shows a master class on decoupage of a chest of drawers:
Recommended Posts
Vinyl wallpaper on non-woven fabric, foam, hot stamping, ...
Washable vinyl wallpaper for the kitchen
Wallpaper for a black and white kitchen
Options for wallpapering in the living room, kitchen, bedroom
How to choose two types of wallpaper for the living room
How to glue wallpaper with your own hands
Stages of work
Step 1. Selecting wallpaper. There is only one rule - ONLY PAPER, and then - just recommendations. If you are a traditionalist and don’t like experiments, then of course choose wallpaper with a wood pattern. If you are thinking of something more creative, then remember that dark shades narrow the space, light shades, on the contrary, expand; walls and floors should “sing in unison”, but not merge. If you decide to completely surprise your neighbors with your extravagance, then use photo wallpaper for the floor covering or, as they are also called, 3D floors, with which you can depict anything you want and very realistically. But in the case of 3D floors, you cannot do without the help of professionals.
Step 2. Preparing the base. To achieve a high-quality, long-lasting result, you need to follow specific conditions, one of which is a perfectly flat and smooth floor. The basis for it can be fiberboard or chipboard (many people already have something similar).
Another important nuance is that the floor surface must be smooth and very clean, all cuts, bumps and grains of sand will be visible, so you need to wash the floors well and vacuum thoroughly before wallpapering. Next, you should check the entire area for protruding nail heads, raised sheets at the joints, burrs and other surface imperfections. All of them must be removed: the nails must be driven in or pulled out, and the chipboard or fiberboard must be sanded using a plane or sander. And if there are creaking areas on the floor, then the easiest way to tighten them is with the help of self-tapping screws, otherwise the creaking will hardly be eliminated later. Then we mix the ingredients for the putty and carefully coat all the cracks between the chipboard or fiberboard boards, immediately removing the excess solution with a wide spatula.
After the putty has dried, sand the seams with sandpaper, carefully sweep and vacuum the floors. If the flooring is made of new boards, then it should be covered with drying oil and dried; the old floor with paint should be treated with a primer solution (a solution of varnish and water in a ratio of 1: 1).
Step 3. Wallpapering.
- Apply PVA glue to the prepared strips of wallpaper and roll them up like a book. Lubricate 3 strips at once so that the wallpaper is well saturated.
- You should first glue the strip that was applied first.
- The floor should also be coated with PVA glue, preferably with a roller.
- A strip of wallpaper is applied and smoothed with a brush, roller or soft cloth, so that there are no bubbles.
- Using the same principle, the remaining strips of wallpaper are then laid end-to-end.
- After the wallpaper has completely dried, you should check for air bubbles on the surface, and if there are any, then use a regular syringe to pump glue into them and gently press them with a rag.
- Next, apply a layer of varnish diluted 30% as a primer, dry and apply another layer of pure varnish.
With proper gluing, the service life of such a floor can reach 15 - 20 years, but it is recommended to renew it (varnish) every 1 - 2 years. Thus, the paper will not be erased or damaged, the floor will look like new every time, because water-based acrylic varnish is used for painting, which is a real pleasure to work with.
Wallpapering floors is no more difficult than wallpapering walls, and in some cases it is even easier, so making a floor from wallpaper with your own hands is as easy as shelling pears. It is also important that stores have a wide selection of wallpaper, so if you choose a pattern to your liking and use the varnish wisely, then it will look no worse than expensive parquet or laminate.
AlinaAuthor of the article
Did you like the article?
Share with your friends: