How to put wallpaper on plywood to get beautiful, smooth walls? This result can be obtained if you choose the right type of wallpaper and carry out proper surface preparation. It should be said that plywood is not a very suitable option for pre-finishing walls that will be covered. If the renovation is done from scratch, this fact must be taken into account and another option for leveling the walls must be selected. However, it happens that you need to refresh the old finish, and then the tips in this article will help you make cosmetic repairs and decorate the walls with wallpaper over plywood.
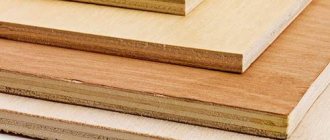
What types of plywood are used for wall decoration?
The sequence of preparing plywood for subsequent gluing depends on its type. So first of all, it is advisable to figure out which type is mounted on the walls.
There are several types of plywood for construction work:
- longitudinal and transverse - depending on the direction of the layers;
- moisture-resistant and increased moisture resistance;
- increased fire resistance;
- polished (on one or both sides) or unpolished;
- without finishing coating and laminated.
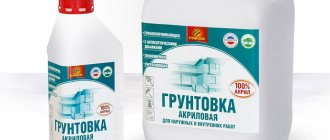
Since decorating walls with wallpaper involves working with water-based glue, the moisture-resistant properties of plywood play the most important role.
The labeling of this material will help you understand this:
- FBA and FK – low moisture resistance;
- FSF and FSF TV - moisture-resistant types;
- FB and BS – high degree of water resistance.
What wallpaper should I choose for gluing plywood?
To make the result of the repair pleasing to the eye, you need to select and paste the wallpaper onto the appropriate type of plywood. Regular paper ones won't work here. They will reveal all the imperfections of the walls, including unevenness and wormholes on the plywood veneer. In addition, the joints of the sheets will be visible, and if they are deformed and gaps appear between them, the paper sheets will simply tear.
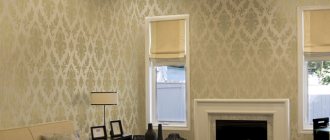
Duplex - “double” paper wallpaper with a textured surface - would be a better solution. The best option would be vinyl wallpaper on a non-woven backing with a pronounced relief. The non-woven base is many times stronger than paper and tends to stretch slightly when the base is slightly deformed, for example, when a house shrinks. Thanks to the density of such models, it will be possible to hide the joints.
You can also use more high-status wall decor: foam-based textiles, velor or jute wallpaper. But silk models have some disadvantages of paper models. They will also show the imperfections of the walls and will not hide the joints of the wood boards. Liquid wallpaper is an ambiguous material for finishing over plywood. But if one of the moisture-resistant types was used and appropriate preparation was carried out, then this option has a right to exist. Liquid wallpaper will not tear, will hide minor imperfections, and can be easily repaired if necessary.
Preparing the walls
The stages of processing plywood for gluing depend on its surface, but there are stages that are required for all types.
- The joints of the sheets are sanded. This can be done by hand, but it will be faster and easier with a sander.
- Joints and other problem areas (nail heads, etc.) are puttied. A special acrylic putty for wooden surfaces is suitable for this.
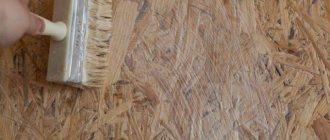
- The entire surface of the plywood is primed. The composition is selected based on the type of plywood and wallpaper. For moisture-resistant plywood under rolled wallpaper, any penetrating primer for wood is suitable.
If plywood has poor moisture resistance or you plan to apply liquid wallpaper, you need to choose a composition with water-repellent properties. One of these compositions is the Vlagopregrada primer.
If the walls are finished with unsanded plywood, it will have to be puttied and sanded completely. Another feature is the treatment for paper wallpaper. Here the joints will have to be strengthened (reinforced) with serpyanka. Although it will shine through the paper covering, it will protect it from tearing.
Serpyanka is a self-adhesive material, fiberglass mesh with a layer of glue. It is glued onto a cleaned and primed surface. It is best to do this while applying the putty, since in this case the putty composition will also act as glue. The tape is leveled along the joint and pressed well, embedding it in a layer of putty.
Advice
It is necessary to carefully handle the heads of nails or screws and any metal elements - pipes, protruding parts of fittings. If they are not covered with a protective layer of paint, varnish or drying oil, they may succumb to corrosion, and rust will show through any wallpaper.
Processing plywood sheets before wallpapering
You can impart properties to ordinary, non-waterproof plywood that make it suitable for wallpapering using a special impregnation (primer).
Manufacturers offer many types of impregnation to suit every taste. Before purchasing any of them, ask if it can be used for indoor work.
One of the popular ways to make plywood waterproof is to treat it with drying oil. Drying oil is a time-tested material, it performs its function efficiently and with a guarantee, but it has one “minus” - drying oil takes a long time to dry. For those who have “yesterday’s” deadlines for completing repairs, I recommend the semi-synthetic drying oil “Oxol” - the quality is not inferior, and the drying speed is an order of magnitude higher. Before work, heat the drying oil to a temperature of at least 60°C - it absorbs much better and dries faster.
To simplify the process, it is possible to use nitro enamel. The paint does not penetrate the entire depth of the plywood, but creates a good waterproof layer on the surface of the sheet. You can use enamel to treat the inside of the sheet before installation.
Another common way to protect wooden surfaces is to treat them with an emulsion based on PVA construction adhesive. A PVA primer creates a water-repellent film on the surface of a plywood sheet and, in addition, increases the adhesion (adhesion) of other finishing materials - putty, wallpaper glue - with the treated surface.
If you are leveling the walls with plywood from scratch, be sure to prime the ends - they are most susceptible to moisture.
What will you need for work?
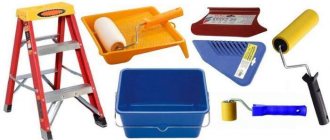
After completing the preparatory work and completely drying the primer and putty, you can glue the wallpaper onto the plywood. To do this, you need to stock up on the following tools and materials:
- wallpaper glue and a container for diluting it;
- conical roller for joints;
- a knife with a retractable blade;
- level for vertical marking of the first strip;
- a lint roller for applying glue and a cuvette;
- foam roller for pressing wallpaper;
- rags to remove excess glue.
Advice
A glue roller with a telescopic handle will be a good helper both when gluing walls and when decorating the ceiling. It will help save both energy and time.
How to glue it?
You can glue it after the primer has completely dried. It is advisable to wait two days for this.
Advice
The process of gluing plywood is no different from treating a concrete or brick surface. The quality of work depends only on compliance with the recommendations for wall preparation technology.
You will need the following tools:
- clean dry roller;
- wallpaper glue (read more about how to cook and use it, as well as where to store the paste here);
- dilution bucket;
- clean rags;
- wide brush;
- construction knife;
- rule;
- level;
- pencil;
- wallpaper rolls.
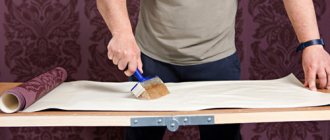
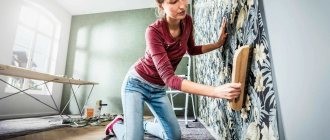
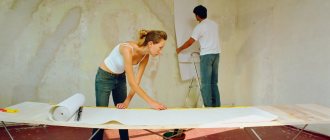
- To hang wallpaper, you need to dilute the glue according to the instructions and let it sit for a few minutes.
- Then you need to choose the place where the first canvas will be glued. You can start from a window, doorway or corner.
- To glue the first sheet, you need to make vertical markings using a level and a pencil.
- Then you can start gluing. If non-woven or vinyl wallpaper was chosen, you need to coat the wall with glue; if paper wallpaper, glue is applied to the back side of the strip.
- After gluing the canvas, press it well with a rubber roller or a dry rag to avoid the formation of stains and air bubbles (read about why bubbles appear and how to glue wallpaper without swollen areas).
How to apply coating to the ceiling?
Pasting on the ceiling is carried out in the same way as pasting walls. The surface is pre-prepared, primed, allowed to dry completely, then proceed to gluing the strips.
For finishing the ceiling, it is best to use non-woven, vinyl, bamboo or reed. The simplest option is liquid. You can start from any angle - whichever is more convenient. The main thing is to avoid uneven joints and other gluing defects (how to join wallpaper correctly?).
Step-by-step instructions for gluing
Before gluing, you need to dilute the glue, taking into account its swelling time. Manufacturers indicate it in the instructions, as well as the ratio of the dry mixture and water that needs to be added. When the glue is ready, you can proceed to gluing.
- Lay a covering film or old newspapers on the floor.
- Measure the height from floor to ceiling.
- Cut the fabric to the required length. This is convenient to do by pressing the wallpaper with a wide metal spatula.
- Make vertical markings on the wall for the first strip using a level.
- Coat the plywood with glue, covering the width of the space a little further than the markings (15-20 cm more than the width of the canvas). For convenience, the glue is poured into a cuvette (tray) in portions. It’s convenient to pick up the solution there: the roller is evenly saturated, and excess glue is easily removed by rolling it over a flat surface.
- If the wallpaper is paper, then glue is additionally applied to the canvas itself from the reverse side.
- The upper part of the canvas is applied to the wall and leveled with a foam roller in several movements. All movements are performed from the center to the sides.
- After this, smoothing is performed - air bubbles are expelled. During this operation, you need to be careful not to grab the spatula and smear the excess glue squeezed out from under the wallpaper on the front side. If they appear, they must be removed immediately with a dry cloth.
- The second strip is glued butt to the first. It should be taken into account that the pattern must match completely.
- After the second strip is glued to the plywood, the joints are pressed down with a conical roller.
- All subsequent canvases are glued in exactly the same way.
Advice
Do not forget to apply glue with a brush in the corners and along the joint strip. This operation is not labor-intensive and does not take much time, but it prevents the wallpaper from “sliding.”
Plane alignment
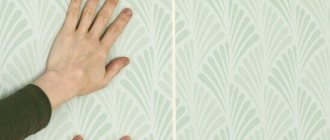
In order for the wallpaper to stick without bubbles and folds, it needs to be leveled. This may be suitable for:
- Hand in glove. Do not use rubber, as it will cling to the wallpaper. The glove fabric should be smooth.
- Roller. It must be clean, and you need to roll it out very carefully. If the wallpaper is wet through, the roller will simply tear it. This picture is typical only for cheap paper wallpaper.
- Any item with a soft and smooth surface (a piece of silk or satin fabric, a cashmere bag).
How long does it take for wallpaper to dry?
Wallpaper glued on top of plywood dries faster compared to the same wallpaper on a concrete wall. Depending on the type, you need to leave 1-3 days to dry. At this time, heating appliances cannot be turned on in the room if they were turned off before. Temperature changes, as well as a draft, will lead to peeling of the canvases. It is also impossible to install suspended ceilings, since a heat gun is used there.
During this period, it is better to refrain from installing furniture. Firstly, wet canvases are easily scratched, and secondly, furniture pushed against the wall will block air circulation. Following these simple recommendations will allow the wallpaper to dry naturally. As a result, they will hold securely for a long time.
How to learn to hang wallpaper without outside help?
How to properly glue non-woven wallpaper
A beautiful couple, or how to hang two types of wallpaper