Preparation stages
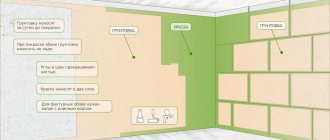
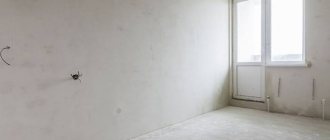
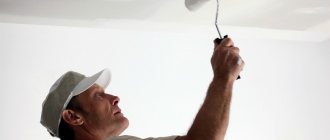
The specificity of the painting technology is that the wall must be prepared with special care. A thin layer of paint and varnish composition will not be able to hide even the smallest flaws of the surface being painted. The technology for preparing walls for painting depends on the type of surface to be painted, the material from which it is made, and the type of paint. In general terms, preparation for painting walls in a new building without preliminary finishing consists of the following steps:
- Rough leveling using base plaster.
- Surface putty: starting and finishing.
- Primer.
- Coloring.
The wall, which has already been treated by any means, must be cleaned of the old finish right down to the very base. Only after this can you begin to prepare the wall for painting.
Applying the finishing layer
Preparing walls for painting involves eliminating the graininess of their surface; this can be achieved with finishing putty.
There is no sand or other large particles in it, so it creates a smooth surface . In addition, it does not absorb moisture well, and the paint will not be able to penetrate it deeply.
The technology for its application is the same as in the case of starting putty, but the layer should be no more than 1.5-2 mm. Otherwise the coating will crack. It is much easier to make the putty perfectly even if its layer is thin.
After applying the finishing putty, you must also sand the surface. For this, use an abrasive mesh marked 60-80. Sanding must be done carefully, as the coating can be completely removed.
The finishing coat can be applied in several layers if it was not possible to obtain a smooth surface the first time. You can determine the presence of defects using a lamp. The more powerful it is, the better. Place the lamp so that its light falls obliquely on the wall.
In this position, all the slightest irregularities will cast a shadow, and you will be able to detect even small differences. They need to be removed during sanding.
General information on preparing walls for painting
You should not neglect preparing the walls for painting. This will allow you to get a high-quality and even coating. Defects and irregularities easily appear through a thin layer of paint and varnish composition. If they are not eliminated, the coating will look sloppy.
Preparation includes dismantling the old cladding, puttying, and priming. Sometimes it is necessary to additionally treat the surface with antiseptics and antifungal compounds to reduce the risk of mold development.
It is necessary to carry out preparation strictly step by step and sequentially. Before the next step, wait until the wall is completely dry.
You should not neglect preparing the walls for painting.
Types of surfaces for painting
When carrying out renovations, an important question for the apartment owner is: how to prepare the walls for painting? The work may require different materials, the choice of which depends on the base. Most often you can find concrete walls. Also, partitions made of wood or plasterboard can be erected in the apartment, the preparation of which for painting has its own characteristics.
Walls may differ in appearance:
- smooth surface leveled with plaster or putty;
- surface with relief;
- smooth, flat surface made of finishing material;
- facing with relief.
Preparing walls for painting in most cases is done by leveling and puttying.
Preparation for painting other surfaces
Often there is a need to paint walls that are already covered with other finishing materials. In this case, the specifics of the preparatory work depend on the characteristics of the surface being treated.
If you need to paint tiles, then the main task will be to give the smooth surface a rough structure, for which an adhesive primer is used. It is applied to the tiles with a roller or brush for two or three layers, after which you can begin painting the wall.
Before painting walls covered with special wallpaper intended for painting, special preparation is usually not required. Simply wipe them with a damp cloth to remove dust from the surface. True, some manufacturers in the instructions for use recommend pre-coating them with special primer compositions.
Surfaces covered with wooden panels or slats should first of all be cleaned using sandpaper or a sander. Then the wooden base is coated with special wood primers or drying oil. They reduce paint consumption and increase the resistance of wood to fungus and woodworms.
Small defects should be puttied with special compounds designed for finishing wooden parts and surfaces.
Painting indoor surfaces
Anyone can handle painting surfaces, since the process in question does not require specific knowledge, complex tools or materials. However, some complexity is caused by the fact that immediately before the painting process it will be necessary to properly prepare a particular surface.
Advantages and disadvantages of painting
Painted walls avoid many problems. They are easy to care for - wash, repair, decorate. Defects that appear can be easily eliminated with your own hands, unlike wallpaper, which cannot be made whole again.
What is the superiority of painting over other technologies?
- During the preparation process, the walls will change qualitatively, they will become solid, smooth, and there will be no cracks on them.
- If necessary, you can repaint the room in any color, and it will cost much less than putting on new wallpaper.
- Restoring chips or scratches requires minimal investment.
- Stained areas are easy to wash, and even easier - wipe with a melamine sponge, which removes traces of ink, coffee, and tea.
- Painted walls are the best choice for cat lovers. Clawed pets are not interested in such a surface.
The disadvantages of this technology include:
- the need for preliminary preparation of walls - and this is expensive, difficult and time-consuming;
- Producing a high-quality initial painting is also not easy. To do this, you need to own special equipment;
- the paint is a real “dust collector”. Its pores become clogged with tiny particles over time, so the walls must be washed regularly;
- monochromatic colors may seem boring, and the room may resemble an office. But this effect is successfully neutralized by decorative and textile interior items.
How to properly prepare walls for painting
Preliminary preparation of walls involves an impressive range of work. The result of their consistent and careful implementation will be perfectly smooth surfaces. The list includes cleaning the wall from the old coating, removing crumbled plaster and applying new one, leveling the base, filling potholes, cracks, priming, and treating with an antiseptic solution. Owners of new buildings with so-called “gray” renovations are luckier - at least they won’t have to remove the old finishing and organize garbage removal.
A new house may settle in the first few years and eventually cracks will appear in the paint. The situation will be saved by fiberglass or facade mesh for exterior use, glued to the wall at the plastering stage.
The first step is to clear the room of furniture, curtains, and hanging structures. After this, you need to carefully examine the surfaces and choose the right algorithm of action.
Let's talk about coloring technology
Preparing the wall
Cleaning seams.
- Initially, the wall to be finished is examined for the presence of white salt stains. They must be completely removed, since when painted, the layer will not lie evenly or may even peel off after drying. But before that, we advise you to find out the reason for the salt protrusion. If the new masonry is covered with efflorescence, then the mortar is to blame; the salt is simply removed mechanically.
- But if the masonry is old, then efflorescence indicates the presence of excess moisture in the wall; the cause of this moisture must be eliminated, because then stains will appear on the new cladding or the paint may peel off. Secure the flashings, inspect the roof, and check the integrity of the plumbing system in the house.
- Salt stains can be easily cleaned using a metal brush with your own hands. But now on the construction markets there are special attachments with metal bristles that are inserted into an electric drill. With their help, the process will be much faster and more efficient.
Drill cleaning attachment.
- Paint stains are removed in the same way. After cleaning, the wall needs to be washed; for this it is convenient to use a stiff brush and a garden sprayer.
- Preparing a brick wall for painting at the next stage involves fragmentary repairs. Carefully inspect the surface and fill all chips and cracks. You can use special cement-based putties, but it is cheaper to use a regular cement-sand mortar, although it will take a little longer to dry.
- If the masonry is overgrown with moss or mold, the plaque must be carefully removed and the area treated with special antiseptics.
Fragmentary surface repair.
Important: after removing vegetation from the wall, it must be thoroughly moistened and only then apply an antiseptic. If you apply a disinfectant composition to dry masonry, it can be deeply absorbed and subsequently cause efflorescence.
Application of primer
Efflorescence on the wall.
- There is a widespread belief that brickwork does not need primer; it is enough to purchase special paint. There is some truth in this statement, but it only works in interior spaces. For facade work, unheated rooms or painting stoves, application of primer is mandatory.
- First of all, primer will save you a significant amount of paint and increase adhesion, because less composition is consumed on the prepared surface. Also in favor of the primer is that these compounds have an antibacterial effect and significantly increase the durability of the finishing layer.
- Instructions for application are on any package; general recommendations include that the primer is applied to a dry surface and if there are stubborn oil or other stains, this area is covered several times.
Application of primer.
Painting walls
- First of all, let's say a few words about the instrument. It is most convenient to work with a spray gun - the compositions lie evenly and penetrate into all the pores of the wall. But using a spray gun is advisable for painting large surfaces. It is not profitable to buy a compressor and a spray gun for cladding a balcony.
- If we are painting a brick wall on a loggia, then it is cheaper and more convenient for us to use a brush or roller. A brush should only be used with hard bristles; a soft brush on a brick surface will quickly wear off. We take a roller with long pile.
Advice: it is not recommended to use glossy paints or varnishes for facade work; a matte surface will look much better.
Working with a brush.
- We apply the paint in 2 – 3 layers; the direction of movement of the roller or brush when painting the walls is not of fundamental importance, but we recommend applying the layers perpendicular to each other. Do not forget that layers are applied only to a dry surface.
Plastering
Gypsum plaster
Applying plaster involves preliminary preparation of the load-bearing surface. Depending on the material, it may vary slightly in nuances.
Step by step process
Before preparing the walls for painting, you should familiarize yourself in detail with all stages of the work. In a new house with untreated walls, it is necessary to determine how smooth they are. To do this, use a long building level or plumb line. By measuring the entire wall area with a tool in both vertical and horizontal directions, you can get a complete picture of all deviations from the norm.
According to the SNiP regulations, the permissible value of the “blockage” of the wall is no more than 0.5 cm for every 3 m. If the deviation is larger, it is necessary to level it using plaster mortar.
For ease of work, beacons are installed along the entire wall - marks made of smooth metal tubes or wooden slats. They are installed on mortar patches as follows:
- 2 starting beacons are placed in the corners of the wall.
- Twine is stretched between them in the upper and lower parts.
- The remaining beacons are placed along it every 0.8 - 1 m.
When installing intermediate beacons, they should not be pressed tightly against the stretched twine. Otherwise, there is a possibility of its gradual deviation outward. There should be a gap of 1-2 mm between the beacons and the thread.
Installation of beacons
Types of plaster solutions for different walls
Then plaster mortar is applied to the wall and left for 0.5-1 hour. After it has dried slightly, it should be pulled out using a rule or a wide spatula, and the beacons should be removed. After 12 hours, when the plaster has set, final leveling is carried out with metal grout or a wooden polisher. Plaster mortar can be purchased at a hardware store in the form of a dry mixture, or you can make it yourself - the proportions of various solutions are given in the table.
Increased adhesion
It is easiest to plaster a brick wall, thanks to its relief structure, to which the mortar clings well. In this case, the plaster can be applied directly to the wall, only by cleaning it from dirt and treating it with a primer. The need and method of priming when preparing walls for painting with your own hands will be discussed below.
For high-quality plastering of walls made of monolithic reinforced concrete, it may be necessary to increase its adhesion. Modern technology for pouring a monolith involves the use of collapsible formwork made of sheet steel or laminated panels. This makes it easier to install and dismantle the formwork, as well as obtain a more even surface.
But an overly flat concrete surface also has its disadvantages. The wall, smooth to a glossy shine, has a very low adhesion rate with any finishing compounds. As a result, coating with any solution will not be durable.
The building is a concrete monolith
To increase adhesion, the concrete wall is pre-treated with various abrasive or impact tools: a grinder, a mason's pick, a hatchet, a chisel, etc. As a result, the surface becomes covered with notches or acquires a rough structure.
Another option for increasing adhesion is plaster mesh. It is attached to the concrete using dowel nails and serves as a strong base for the plaster mortar.
Wooden surfaces have poor adhesion to plaster mortars. This is due to the physical characteristics of wood, as a result of which any mixtures will not stick to it.
The wooden wall must be additionally prepared for plastering. For this purpose, a plaster metal or fiberglass mesh is also used, or shingles - thin wooden slats - are criss-crossed onto the surface.
The mesh can vary in cell diameter: the thicker the layer of plaster, the larger the mesh must be used.
Preparing walls before painting
The surface intended for painting must meet certain requirements.
Plastered surfaces must be thoroughly dried - their humidity should not exceed 8%. Wetter surfaces can only be painted with lime compounds. Cracks, crevices and other defects are not allowed, especially around baseboards, platbands, window sills, and heating radiators. The humidity of wooden parts and structures should not exceed 12%. Metal parts should be firmly secured and free of rust. Before painting, dirt, dust, traces of corrosion, grease stains, drips of solution, vitriol primer, old paint and putty must be removed from surfaces.
Preparing walls before painting with water-based compounds.
Water-based compounds (lime, adhesive, casein) can be used to paint plastered, brick and dry-plaster surfaces. Aqueous compositions are dangerous for metal parts - metal corrosion occurs. You cannot paint surfaces with aqueous compositions on which old paint has been preserved, since in this case it may peel off from the plaster along with the new paint. Preparing the surface for painting should begin by cleaning it from dust, dirt, stains, soot, drips, stains, etc.
Newly plastered surfaces are usually cleaned with a flange or the end of the wood, eliminating roughness, streaks and other defects. To remove a thick layer of old adhesive paint, it should be moistened with hot water and, after 1 hour, cleaned off with a steel spatula (or scraper) without damaging the plaster. To remove old layers of casein paints, it is recommended to use a 2% solution of hydrochloric acid.
After washing with a 2% solution of hydrochloric acid, sooty areas should be rinsed with water and primed. Before priming, it is useful to wipe these areas with lime and fine sand. Unstable plaster that has fallen away from the base must be removed, the area must be cleaned of dust, washed with water, sealed with lime-gypsum mortar (1 part lime, 2 parts gypsum or alabaster, 2 parts sand) and rubbed.
Tarred and heavily contaminated areas of plaster should be removed and replaced with new one. When preparing and treating surfaces for painting with aqueous compositions, the main types of work are the following. Grouting of cracks in plaster is done after priming and drying for 5-8 hours. Grouting is done with putty. When using gypsum-chalk putty, the cracks do not need to be primed, but only moistened with water. The cracks are filled with putty using a spatula, first with transverse (relative to the crack) movements, and then the putty is leveled along the crack.
Sanding greased cracks with sandpaper (emery paper or glass) is intended to completely eliminate defects in the surface being prepared for painting. Priming contributes to a more even painting of the surface and strong adhesion of subsequent layers of paint to it. As is known, the porosity of different places on a plastered surface is not the same. The paint on such a surface will lie unevenly: where the porosity is greater, the paint will accumulate more. Such places (spots) stand out on the surface with greater color saturation. If there are highly porous areas, the surface must be primed twice.
For priming large surfaces, it is advisable to use hand brushes or brushes, for small surfaces - hand brushes. Before applying primer to the surface, press the brush against the wall of the dish (remove excess primer). It is recommended to apply the primer to the walls first in a horizontal, then in a vertical direction. When priming, the brush must be rotated periodically so that it works evenly on all sides.
Lime and casein primers can be applied to the surface with a hand spray gun or an electric spray gun. Primers are selected depending on what paints are used for painting surfaces.
Puttying of surfaces is carried out only after priming, and the primer should not contain chalk, otherwise brush marks may remain after painting, and the putty and paint layers may peel off. In addition, it is easier to apply putty in an even layer on a primed surface. Profiled parts (cement, gypsum, etc.) are not puttied. The putty should be applied in an even and thin layer to make sanding the putty surface easier.
When puttying by hand, putty of a thick consistency is usually applied. In this case, place 0.5 liters of putty in the middle of the spatula (grater) with a spatula. The spatula must be moved from bottom to top along the surface to be treated so that it fits tightly to the surface to be puttied and is at an angle in relation to it. Having applied a strip of putty to the surface, it should be leveled with a second movement of the spatula. Next to it, another strip of putty is applied in the same way, etc. Sometimes they use a wooden spatula, taking the putty straight from the box. Another layer can be applied to the dry and primed putty.
To apply putty to the surface, you can use a paint spray gun or a spatula with a mechanized supply of putty. In these cases, the putty should have a liquid consistency. It lays down in a thin layer and therefore has to be applied twice. Such puttying often requires additional smoothing and leveling of the putty with a hand spatula.
Sanding of putty is carried out one day after puttying. It is necessary to remove dust from the dried putty; it is recommended to do this with a hair brush, but not with a rag or rags, so as not to rub dust into the pores of the putty. The putty can be sanded with pumice or glass sandpaper.
Treatment of plastered surfaces for simple painting consists of priming and greasing cracks, sanding grease spots and priming the entire surface. In rare cases, if the surface is good, without defects, you can limit yourself to just priming it. It is useful to add chalk to the primer for adhesive painting (2-3 kg per 10 liters of primer). Processing plastered surfaces for improved painting consists of the same work as for simple painting, but priming is performed twice, which makes the surface smoother. The first time you need to add 2-3 kg of chalk to 10 liters of primer, the second time - 6-7 kg. A primer mixed with chalk better fills the pores in the plaster. Walls and partitions covered with sheets of dry gypsum or organic plaster are also subject to treatment (before painting). In this case, the following is necessary: sealing the butt joints with gypsum-chalk lining paste, painting the nail heads - you can use oil or nitro paint (dries faster), priming, and sometimes puttying the surfaces - this is done in the same way as with ordinary plaster. Before painting, reinforced concrete wall panels must first be moistened with water (you can use a spray gun) and then puttied. The following are applicable for this: lime dough - it is advisable to keep the lime for up to 20 days after slaking; putty 1-2 times;
building gypsum - hardens without shrinkage, so you can putty it once, tightly filling the pores with gypsum paste; We will replace building gypsum with a gypsum-chalk composition; a mixture of gypsum and clay; a mixture of lime paste with marble powder or fine sand (ratio 1:1); a mixture of lime paste with gypsum mixed in water (by weight, 3 parts of water and 4 parts of gypsum); After the putty has dried, the surfaces are sanded and primed with lime paste. This treatment allows you to eliminate defects from the surface of the panel and better prepare them for painting. Preparing walls before painting with oil compositions. Plastered surfaces covered with old adhesive paint are cleaned and prepared in the same way as when preparing for a new adhesive paint.
Old oil paint can be saved if it is durable, especially not damaged, and has a stronger base. In this case, it is enough to wash it with a 4% solution of soda ash - wash away dirty stains, soot, etc., or wipe with a clean, dry cloth, or rinse with hot water and dry for 2-3 days.
Old oil paint that is severely damaged, cracked, or weak should be removed. For this purpose, the surface is treated with caustic alkali, for example, a paste made up of sifted chalk and lime paste in equal quantities, diluted to medium thickness with a 20% solution of caustic soda. Using a wooden spatula, apply the paste in a layer of up to 2 mm to the surface. In 1.0-1.5 hours, the paste destroys the old paint, which can then be easily removed (scraped off) with a steel spatula. The paste can be reused if necessary. The surface, cleared of old oil paint, must be washed with water, a 2% solution of acetic acid (neutralizes alkali), again with water and wiped with a rag. After this, the surface must dry well, otherwise the drying oil will dry out slowly, the paint will peel off, and blisters and other defects will appear. Only after drying is it permissible to treat the plastered surface for oil painting, i.e. drying, smearing cracks and other defects, puttying, sanding.
Proofing is done with drying oil or emulsion using a hand brush or spray gun for large surfaces and a hand-held brush for small surfaces. Excess drying oil on the brush should be squeezed out. Apply drying oil to the surface in a thin, even layer, first with wave-like movements, then with transverse movements of the brush.
The emulsion is usually applied with a spray gun in even, parallel stripes. On the border of two different paints you need to work with a hand brush. The oiled surface must be thoroughly dried.
The lubrication of defects after the drying varnish needs to be especially thorough over the entire surface, including the junction of walls with platbands, baseboards, etc. Cracks are smeared with a wooden spatula, as a rule, twice. Putty can be used as a lubricant.
Puttying can be done with various putties. Lime and lime-gypsum are more effective. They usually putty once, then sand with pumice or sandpaper and clean with a brush. After this, an oil primer is applied: on large surfaces - with hand brushes, on small surfaces - with hand brushes. The primer can also be applied with a spray gun. New plastered surfaces are treated in the same way as surfaces cleaned of old paint. At the same time, they perform drying, greasing of defects, puttying, and grinding. Small cracks are sealed with putty or putty, large cracks - with plaster mortar. After drying, they are cleaned, primed, painted 1-2 times with a color close to the color of the wall, then the entire surface is painted with a new color.
Preparing wooden walls before painting. Before painting wooden walls, remove old paint in the same way as on plastered surfaces. On a new wooden surface, it is necessary to remove the upper parts of knots (to a depth of 3 mm), tarred areas, potholes, burrs and other defects. Then the surface needs to be sanded and all places where knots have been cut out and defects corrected must be sealed with putty. Major defects (large cracks, chips, depressions, loose connections, etc.) should be eliminated by replacing defective parts of the structure.
Preparing walls before painting with emulsion compositions. It is intended to use primers, putties and putties, which contain emulsions based on synthetic resins. But you can also use compositions used for oil painting, as well as polyvinyl acetate paints diluted with water (for priming). Vitriol, alum and alumina primers previously applied to the surface, as well as chalk whitewash, should be removed with sandpaper. Emulsion paints cannot be applied to such primers. In this case, after cleaning the old primer, the surface should be primed again with drying oil or oil paint.
Removing old coating
Before you start preparing the wall for painting, you need to get rid of the old finish, and this is not easy. Our tips will help you do this quickly and without unnecessary labor.
Wallpaper
At first glance, removing wallpaper is not difficult, but sometimes you have to work hard to get rid of all the remnants of the coating. The base must be cleaned completely, and only then can you proceed to the next stage.
Paper sheets are quite easy to remove. Pry them from below with a spatula and they will easily come away from the surface. If the material has firmly grown into the base, arm yourself with a spray bottle. Fill it with warm water and treat the old finish. Do not skimp on water - the more the wallpaper is soaked, the better. When the paper gets wet, it can be easily removed with a trowel.
Modern options are non-woven, vinyl ones cannot be removed so easily. Such wallpaper, especially the latter, is almost impossible to get wet through. Therefore, all that remains is to literally “punch” the way for the water using a toothed roller or knife. Moisture will penetrate through the damaged surface and soak the dried glue. If the toothed roller fails, a steamer will come to the rescue, of course, if you have one at hand.
Try replacing the steamer with a powerful hairdryer. Warm the moistened problem areas with it and remove the sheets with a knife.
If your household does not have such units, you will have to prepare yourself for the long and painstaking process of scraping off wallpaper and glue. If you need to clean the wall down to the concrete or brick base, you have every right to skip this unpleasant process and remove the wallpaper along with the old plaster.
Whitewash
Cleaning walls from whitewash is an incredibly difficult and tedious task. It is necessary to get rid of even the reminder that this material was present on the walls. Remains of lime or chalk will not allow the new finishing layer to be applied evenly and efficiently. A lot of pellets will form on the walls that will need to be cleaned off.
The following will help completely remove whitewash residues:
- warm water - spray the wall with a spray bottle and remove the composition with a spatula. Water is quickly absorbed, so you need to repeat wetting from time to time. Compositions that do not contain special hardeners and other additives can simply be washed off with plenty of water;
- tools that can be used to scrape off whitewash - a grinder, sandpaper, an iron brush and a spatula. During grinding, a large amount of construction dust is generated in the room. From time to time you should take breaks and leave the room until the suspension settles;
- a folk remedy consisting of soda, crushed laundry soap and water. A thoroughly mixed solution is applied to the surface, after which the finishing layer is removed using a spatula or sponge.
The main requirement is thorough cleaning of the base. If you do not pay due attention to this stage, you will have to say goodbye to the dream of beautiful walls.
Plasters and ceramic tiles
Old plaster can sometimes be left behind. If there are small defects, it is more profitable to simply repair them and thereby save a lot of money. Sometimes the putty comes off and voids form between it and the plaster. Then you can remove only this thin layer, after moistening it with water. If, after a thorough study of the formation, you find places of shedding, this is a sure sign of the presence of voids. It is better to get rid of a weak foundation. Often the problem is removing stubborn areas, but don't let that fool you. It is impossible to guarantee their reliability subsequently.
The tiles must be removed along with the tile adhesive. Cleaning the walls from ceramic cladding is done using a hammer drill equipped with a chisel-shaped attachment. First, the tile is knocked down, then the fixing material is removed. If there are defects in the exposed layer of plaster, you need to clean it down to the concrete base. There is no need to give up durable coating.
Old paint
The paint is removed using special solvents. The composition must be applied to the wall, then scraped off with a spatula. It is not recommended to cover old paint with new one, since it is impossible to guarantee a perfect result.
A hair dryer will be an excellent helper. When the painted area is heated with hot air, the paint swells with bubbles and is easily removed.
PREPARATION AND TREATMENT OF SURFACES FOR PAINTING
Room painting can be simple, enhanced or high quality. Surface preparation depends on the type of painting compositions, which can be aqueous (glue and lime paint) and non-aqueous (painting with oil, enamel and nitro paints).Preparation for aqueous compositions begins with cleaning the surfaces from dust, dirt, streaks, and buildup. Plastered surfaces are smoothed with flake (hard rock sand stone), wood end grain, sanding paper or sand-lime brick.
Old adhesive paint can be washed off with warm water. If the paint layer is thick, the surface should be moistened with hot water and cleaned after an hour using a steel spatula or scraper. A layer of old casein or silicate paint is removed with a 2-3% solution of hydrochloric acid. When painting previously painted surfaces with other compounds, old paint marks must be completely removed.
To remove rust, surfaces are washed with water and primed with a 10-15% solution of copper sulfate,
Sooty areas are washed with a 2-3% solution of hydrochloric acid and water or wiped with lime and fine sand,
When preparing surfaces for conventional adhesive painting, cut cracks are covered with gypsum-chalk putty (Table 16), then the surfaces are ground and coated with vitriol primer. Soap primer is used for the first priming for improved adhesive painting, as well as for the final priming for regular adhesive painting. Large surfaces are primed with hand brushes or brushes, small surfaces with hand brushes. The primer must be applied in an even layer in horizontal stripes, and then shaded in a vertical direction.
The primer is applied to the ceiling perpendicular to the light falling from the window, and shading is done along the direction of the light.
The preparation of surfaces for conventional adhesive painting ends with the first primer. For improved painting, the surface is primed twice, but the second layer is applied in vertical stripes, followed by shading in the horizontal direction.
With high-quality painting, after the second primer, the surface is putty. The putty mixture for adhesive painting is prepared using animal glue or vitriol primer. The first layer of putty is applied with a wooden spatula 100-150 mm wide. When moving from top to bottom, the spatula is pressed tightly against the surface at an angle to it (Fig. 136). The putty can be diluted to a creamy consistency and applied with a brush, then leveled with a wide rubber spatula. When the first layer of putty has dried, it is sanded with pumice. The second layer is applied with a metal spatula and sanded after drying with sandpaper. Then follow the second and third primers (the next one is applied after the previous one has dried).
Reinforced concrete wall panels are puttied before painting. Construction gypsum, a mixture of lime paste with gypsum, or plaster mortar (lime: fine-grained sand - 1:1) are used as putty. Before applying the putty, the surfaces of the panels are moistened with water. After drying, the putty is sanded and then primed with lime paste.
Surfaces for water-based polyvinyl acetate paints are prepared as for oil painting. It is better to prepare putty and primer using polyvinyl acetate paint. It can be used not only for putty, but also for lubricating damaged areas.
The putty for covering damaged areas should be prepared somewhat thicker. After the putty has dried, the surface is sanded and then primed. The primer is prepared from polyvinyl acetate paint by adding water (10-15% by weight of the paint). The primer can be applied with a brush, roller, or spray gun.
Before painting, wash off old plaster from the ceiling with warm water. To remove a thick layer of plaque, add a 3% solution of hydrochloric acid to warm water.
Before whitewashing the ceiling with a chalk composition, the following primer should be applied to it: laundry soap - 400 g, paste - 2 liters per 10 liters of water.
Preparation for non-aqueous compositions also begins with cleaning surfaces of old paint, repairing plaster and removing dirty stains and soot from old oil paint. If it has come loose, it must be removed with a scraper, burning with a blowtorch (only on plastered stone surfaces!) or using a chemical remover. Old oil paint can also be removed from any surface using a paste of the following composition: chalk - 1 kg, lime paste - 1 kg, caustic soda solution (20%) - to working thickness. The paste is applied with a wooden spatula 1-2 mm thick. After 1-2 hours, the softened old paint can be easily removed with a steel spatula or scraper. The surfaces are washed with water, then with a 2% solution of acetic acid and again with water. After drying, continue preparing surfaces for oil painting.
Large surfaces are sprayed with a hand brush, and small surfaces with a hand brush. After the drying oil has dried, cracks and joints with the plaster of the platbands and baseboards are covered with an oil putty or putty using a wooden spatula (Table 17).
Puttying of surfaces for oil painting is carried out in the same way as for adhesive painting. With improved coloring, the putty is applied once, with high-quality paint - 2 or 3 times. Each layer is sanded with pumice or sandpaper. After puttying, an oil primer is applied with a hand brush. For priming small surfaces, use a hand brush. Fresh primer is fluted with a dry brush (flute). In this case, the primer acquires a smooth surface. After drying, it is sanded with pumice or sandpaper, painted, fluted, allowed to dry again, sanded again and painted again.
When preparing wooden surfaces, old paint is removed in the same way. The tars and knots are cut out to a depth of 2-3 mm, the irregularities are oiled and puttied with a thick oil putty. The recipes for mixtures for preparing wooden surfaces for oil painting and the methods for applying it are the same as for preparing plastered surfaces. Drying is done with heated drying oil. The primer is applied with a brush and blended along the wood grain.
When preparing for improved painting, wooden surfaces after putty are sanded, dust is removed and primed with fluting and sanding. Then the first coat of paint is applied, fluted again and sanded. The putty is applied with a rubber or wooden spatula in a layer of 1.5-2 mm, and on carpentry of various configurations - with rubber plates.
For high-quality painting, the surfaces are puttyed a second time, followed by sanding. The putty is made thinner for reapplication. After it has dried, the surface is sanded, primed, fluted, allowed to dry and sanded again. Adhesive putties can be used for doors, windows and other wooden surfaces indoors (except floors).
After completing all the finishing work in the room, they begin preparing the floors for painting. The floor must be clean and dry. Knots and tars must be cut out, the recesses must be oiled and puttied. Then the entire surface of the floors is oiled, puttied and sanded. Paint is first added to the drying oil (2-3 tablespoons per 1 liter of drying oil).
When the floor is dry, all defects and cracks in it must be covered with oil-based putty with the addition of a small amount of ocher. They begin to putty the floor from the corner opposite the front door. Place 8-10 liters of the mixture on the oiled floor and use a spatula with a blade width of 200 mm to move the putty towards the front door, filling all the unevenness. After drying, the surface is sanded with sandpaper, the dust is swept away and a second layer of putty is applied. When the floor is dry, it is sanded and covered with drying oil. After drying, the floor can be painted.
When preparing metal surfaces (radiators, gas and water pipes, balcony grilles, etc.), it is necessary to clean them of rust and dirt. For this you can use a metal brush, a file, or sandpaper. The cleaned surfaces are oiled and, after drying, the defects are covered with an oil primer and then sanded. The first paint acts as a second primer. The paint is shaded along the product.
| Next > |
Elimination of serious defects
The solid base does not need to be removed. Sometimes, to save the situation, it is enough to carry out a series of simple manipulations, after which you can be confident in the reliability of the intermediate layer. Most often, the integrity of the coating is compromised by cracks. How to get rid of them?
- We “expand” the crack – we increase its dimensions – width and depth. You will need a chisel, hammer and spatula.
- We clean the resulting depression from dust and pieces of plaster using a brush.
- We prime the improvised “gorge” using compounds with maximum penetration ability.
- Fill the hole with putty using a spatula.
- We glue the reinforcing material - press it into the putty layer, coat it and leave it until completely dry.
- We sand the restored area.
It makes sense to carry out spot restorations only if the amount of damage does not exceed 25% of the wall area.
Removing ceramic tiles when preparing walls for painting
The method for removing ceramic tiles directly depends on whether you need to keep the old tiles intact or whether they are not intended to be reused. If the tile is of high quality and has a decent appearance, it can be reused for cladding a balcony or rooms in a country house. This is a great way to save on materials.
If the coating will not be reused for cladding, a simpler method of removing tiles by breaking them is used. In this case, the base under the tile remains as undamaged as possible.
The method for removing old tiles is selected taking into account:
- adhesive solution on which the tile was installed;
- the possibility of reusing old coating.
If cement was used when laying the tiles and the seams were rubbed with it, then during dismantling it will most likely not be possible to leave the entire tile intact.
It is important to use gloves to protect yourself from injuries and cuts from broken tiles.
First of all, you need to remove the grout from the joints between the tiles. This is done if there is a need to preserve the integrity of the old coating in order to reuse it in the future.
- To begin with, the seams are moistened with water, then they begin to remove the grout using a spatula or knife. If necessary, the seams are wetted several times until there is no material left in the gaps. But this method is suitable for removing only soft grout.
- Next, remove the remaining solution with a metal spatula.
- Next, select one of the top tiles and break it with a hammer and chisel.
- The next step will be to carefully clean all the seams between the tile elements, without damaging the tile.
- To avoid chipping at the corners, you need to make sure that the cut between the tiles goes deeper than the height of the tile itself. It should be repeated once again that if cement mortar is used during installation, there is almost no chance of keeping the tile intact when dismantling it.
- Next, all the tiles are removed from the surface one by one using a metal spatula or a thin chisel.
- The spatula is inserted under the edge of the tile and gently but firmly hit with a hammer.
- Next, move the spatula to the other edge and continue tapping. In this way, the tiles are removed from the surface from top to bottom. Having removed one vertical row, proceed to the next one.
- You can also use a special steel wire hook if the tiles are not firmly attached to the base. For this method, you need to carefully remove all the grout between the seams so that you can insert the hooks under the tiles.
- Using steel wire, the tile is removed in the following way: its bent end is inserted under the tile from different sides and pulled slowly. The tile should make a clicking sound when it is successfully removed from the wall.
- If the surface is plasterboard, then the tile can be removed only if one or more parts are replaced.
Remains of the adhesive solution from the tile itself should be removed with caution, because in this case, if handled carelessly, the danger of splitting the tile increases.
Using a hammer drill to remove tiles is advisable in rooms where noise and large amounts of dust will not disturb anyone. The device is connected, the attachment (chisel) is inserted into the spaces between the tiles. The tiles can be easily removed, but all the tiles will be broken. But with this method you can quickly obtain a high-quality surface.
You can also use a chisel and hammer to remove old tiles:
- A chisel is placed under the edge of the tile, and the chisel is hit hard with a hammer.
- Use a chisel to separate a piece of tile from the base.
- With this method, the tiles crack, break off and are partially removed in pieces.
After all the tiles have been removed, a fan heater is used (50 mm is the optimal distance between the fan heater and the wall) to soften the remaining adhesive. After this, the solution is removed using a scraper.
Preparing a brick wall for painting
To achieve a high-quality result, the wall must be carefully prepared before starting painting work. Processing of brickwork includes several stages:
Cleaning the wall. This can be done using a metal scraper and detergent. Areas with old paint or whitewash are treated with a solvent. Dirt, soap, and coating particles are washed off with water.
Removing efflorescence . Any salt deposits on the wall are removed using a stiff brush. After this procedure you will have to wait a few days. If salt crystals appear again, the surface will have to be treated with a special product containing acid or ammonia.
Sealing cracks. Small cracks can easily be covered with latex or alkyd paint. Large cracks will have to be sealed with cement mortar. To do this, they must first be thoroughly cleaned of dust and crumbs of old cement. After applying the solution, the wall is leveled with a brush. Then the wall must dry for at least 10 days. Excess dried mortar can be removed with a spatula.
Preparation for painting textured plaster and wallpaper
To ensure that the paint lays evenly and to reduce its consumption, decorative plaster, fiberglass and non-woven wallpaper are primed before painting. This is not to say that these are mandatory manipulations, but if you want high-quality repairs, do not neglect them.
Requirements for the wall surface vary depending on the future decor. If you plan to use textured paint, they do not have to be completely smooth. The relief of the coating will hide minor defects. But if you want to apply a monochromatic shade, draw a design using a stencil, or decorate the walls yourself using a sponge or fabric, the surface must be flawless. Otherwise, all the flaws will be noticeable. Take this nuance into account when treating walls before painting.
Technology for leveling walls before painting
After complete cleaning of the surface, they begin to level it.
Leveling is additional work when preparing a wall for painting. It is only necessary when the unevenness is deeper than 0.2 cm and there are significant defects in the form of chips and cracks in the plaster. In other situations, you only need to sand the old plaster coating with sandpaper or a sander. More visible defects can be eliminated in the following ways:
- Applying plaster. First, the wall is cleaned of old plaster. A brush removes all dirt and dust generated during the work. After the dust settles, the surface is impregnated with a primer and wait until it dries completely. And only then do they begin to apply new plaster and level the surface using beacons.
- Finishing with plasterboard sheets. Using drywall you can quickly achieve a flat surface, but this method slightly reduces the area of the room.
After the leveling work has been completed, you can begin puttying.
Processing and leveling walls
When painting walls in a simple way, you need to pay special attention to eliminating various defects: unevenness, cracks, gaps. There are several ways to eliminate surface unevenness:
- plaster;
- polish;
- level with plasterboard.
You can resort to sanding the walls only if the concrete wall or the plaster already applied to it is not damaged and has sufficient strength. In this case, you can remove the thin top layer of coating with a sanding block or sandpaper.
Scheme for plastering joints.
Consider the need to treat the old surface with an antiseptic and apply a primer to it. If fungus or dampness has damaged the coating in some places, then these areas must be thoroughly cleaned and sealed with a solution identical in composition to that used during the previous plastering. As a result, the surface should not be smooth, and the difference in level between two opposite sides should not exceed 2 mm.
After this, you can move on to the next stage - puttying the walls.
If there is significant damage to the wall covering or if there are significant differences in level, there are two options for preparing the walls: re-plaster them or finish them with plasterboard. You can determine the method that is more suitable for you, taking into account your financial capabilities and aesthetic preferences.
When implementing any of these methods, you will need to completely remove the old coating from the walls. How to prepare walls for decorative painting? You should not leave the plaster in some places where it still seems strong to you.
After this, the walls are covered with plasterboard or re-plastered.
When you get a smooth surface, it must be treated with a primer and left to dry for 5-6 hours. Only after the walls have completely dried can you move on to the next stage of preparation.
Preparing the surface for painting.
Preparing the surface for painting is very important. This preparation is part of the paint application system. The basis of such preparation will be cleaning the surface of all excess, degreasing and polishing it; only after performing all these procedures will the surface have good adhesiveness. Adhesiveness determines how long the surface coating will remain in good condition. Next, we will consider the stages of preparing the surface for painting.
To calculate paint consumption, you can use a paint consumption calculator.
Initially, you need to remove loose material, such as dirt, scale, grease deposits, oxide film, etc. This will help the paint adhere better to the surface.
Attention: If there is dirt on the surface to be painted, uniform application of the paint layer on the surface will be difficult, because the contaminant will prevent the uniform and dense application of paint.
After cleaning the surface from dirt, it is necessary to increase the surface area of the base; for this purpose, its roughness and metal standard are increased. To determine the operations for preparing surfaces for painting, you can use the table below.
Table for preparing surfaces for painting.
If there are no special conditions for painting certain surfaces, then abrasive sandblasting Sa 2.5 SIS 05 5900 can be used.
Preparation of old plastered surfaces
When painting repeatedly, a thick layer of paint is formed on the surface - plaque, which must be removed. A small weak plaque is washed off with water using a matting brush or a hand brush. Strong adhesive patches are moistened with hot water 1-2 hours before starting work, and then removed with a metal spatula or scraper. Strong casein, silicate, and sometimes adhesive deposits are moistened with a 2-3% solution of hydrochloric acid and cleaned off after softening. After removing the stain, the entire surface is washed with water and thoroughly rubbed with a wooden grater. The remaining operations during surface preparation depend on the degree of damage to the plaster and the category of painting. Preparation for painting wooden and stone surfaces
Wooden surfaces for lime painting are cleaned, moistened with water and primed.
Brick and concrete surfaces when painted with lime and silicate compositions are pre-cleaned and primed with the appropriate composition: for lime paint - lime primer, for silicate paint - silicate. Additional operations performed when preparing surfaces for water-based painting
In the process of preparing old and sometimes new surfaces, it is necessary to perform additional work to eliminate various defects. The surface to be painted may be dirty, with greasy or rusty stains, soot stains, etc. If stains are not removed, they will appear through the layer of paint film. Grease stains of non-drying mineral oils and soot stains are washed with a 5% soda ash solution. To prepare such a solution, 400-500 g of soda are dissolved in a bucket of water. Soot stains can also be removed with a 2-3% solution of hydrochloric acid. Rusty stains formed as a result of water leakage on the surface due to malfunctions of the water supply system, sewerage system, as well as a damaged roof, are washed with a 2-3% solution of hydrochloric acid. After drying, the surface is primed with grass - a 10-15% solution of copper sulfate. If the stains are large and stand out sharply (protrude) on the surface, they are covered with rosin varnish or quick-drying white enamel paint.
Based on materials from the reference book “Interior decoration.
Materials and technologies" Publishing house "Stroyinform" Back to section
Paint selection
The final stage is choosing paint. Almost any type of paint composition is suitable for painting interior walls. The main thing is that it best suits the taste of the apartment owner. After all, the main purpose of painting walls is to give the room aesthetics and create a cozy atmosphere.
Water-based paint
Water-based. The most popular type of coloring compositions today, the main advantage of which is the creation of a film permeable to air. Thus, they do not interfere with the free exchange of gases through the walls of the building.
Latex. Their peculiarity is a flat and smooth surface that protects the walls from the penetration of dampness. This coating is recommended for use in rooms with high humidity levels.
Acrylic. It is created on the basis of acrylic resins. It is resistant to abrasion and ultraviolet radiation, and is vapor permeable. Suitable for painting any surfaces: plaster, concrete, wood, metal, as well as for outdoor work.
Oil and nitro enamels. The classic version, used many decades ago, which is distinguished by its strength and durability. Among the disadvantages are the high consumption of material and a persistent chemical smell.
By observing technology and the requirements of building regulations, it is quite possible to make high-quality preparation of walls for painting with your own hands. The main aspect that influences the technology is the characteristics of the surface being processed.
The video shows the process of preparing walls for painting.
What you need to know about paint
Selecting the right lineup is already half the battle. There is a huge assortment on the construction market, and to make it easier for you to choose from this ocean of offers, we have taken the liberty of giving a few tips.
Composition requirements
- The first and main rule for facades is that the surface must breathe . Therefore, the composition must be vapor-permeable, otherwise you will block moisture inside the walls and end up with a damp room.
- But on the other hand, this same coating should not allow moisture to pass inside . In other words, the composition should act as a kind of vapor barrier, protect against water from the outside and not prevent the escape of internal vapors.
- Also, the coating must withstand sudden changes in temperature, pressure and humidity . The level of resistance to ultraviolet radiation plays an important role; the paint should not fade.
- Last but not least is the durability of the composition . The price of high-quality paints can fluctuate significantly, but it is better to pay for a coating that will last for many years than to repaint the facade every 2 to 3 years.
Wall paint.
Important: when choosing a composition, pay attention to alkali resistance. The fact is that alkaline-based solutions used for masonry can easily burn through most of the compositions.
- You should not chase paints with low consumption per 1 m² ; this may be more economically profitable, but compositions with deep penetration and slightly higher consumption are more durable.
- Quick-drying compounds accumulate less dust during the drying process, but without proper experience applying them with your own hands is much more difficult, plus most of them are harmful to health.
- You should pay attention to the adhesion or texotropic properties of the composition, that is, how well it adheres to the surface . This is especially important if you decide to paint a brick wall on a balcony or indoors, where, as a rule, primer is rarely used.
Painting the balcony.
Which paint is better
- If we talk about facade finishing work, then acrylic and latex compositions, as well as derivatives based on these 2 types, have proven themselves best. They are a water-based emulsion, so they dry quickly enough, have virtually no odor and have good vapor permeability.
- While the paint has not dried, it can be easily washed off with plain water, but after it has gained strength, a thin plastic film is formed that reliably protects from moisture and at the same time allows steam to pass through from the inside.
- These 2 types have unique resistance to alkalis, so they can be applied to new masonry after 2 - 3 months. While other types are recommended to be applied at least after 1 year.
Advice: if it is not possible to let the masonry stand, then the wall should be coated with a special alkaline primer several times.
- If the wall is covered with salt stains “efflorescence”, then the best solution would be to use latex paints. They form a stronger and more elastic film through which salt does not bleed through.
- If you need to paint a brick wall on a balcony or are painting brick walls from the inside, then such strict requirements are not imposed. For interior work, you can generally use almost any paint.
The video in this article gives tips on choosing paint.
Preparing metal surfaces for painting.
Often non-ferrous metals need painting, for example, zinc, bronze, aluminum, copper, etc. They are used in construction and industry, they are painted for protective or aesthetic purposes.
Thus, aluminum is often used in aviation, shipping companies and construction, so it is important to prepare the surface for painting well to ensure good adhesion of the paint layer. To do this, it is necessary to remove dirt, oil and grease, after which the surface is sanded using power tools or sandblasting. The next step is to apply the primer with a specially formulated coating. This principle is used when cleaning bronze and brass.
Contamination on metal, its effect on paint adhesion.
It is more difficult to prepare galvanized steel. Sometimes paint systems do not work when used on this type of coating. This occurs due to insufficient surface preparation or lack of necessary soil. If you do not clean the surface, then the following scenarios are possible: when the copper-acid solution reacts with the surface, the color may turn black; if fat or oil remains on the surface, the color will be bright metallic.
Galvanized steel must be degreased from the very beginning, after which the surface must be thoroughly washed to remove soluble salts. After removing dirt and degreasing, it is necessary to clean the surface; for this you can use a light abrasive treatment along with sandpaper. All this will have a positive effect on the quality of paint adhesion to the surface.
Why do you need wall preparation?
Without preparing the walls, the result will not look very nice, the paint will not adhere well. This procedure also has a number of other advantages:
- Eliminates unevenness. There are few rooms where the walls are perfectly even and smooth, without the slightest defect. When applying a coat of paint, imperfections will be noticeable if the walls are not primed.
- Helps fight fungus. Mold often grows in corners. If you simply paint such walls, the fungus will not go away, it will appear again. Especially when using water-soluble compounds. Treatment with special means eliminates mold.
- Protects from destruction. If you do not repair minimal cracks on the surface, then over time they will only increase and the plaster will begin to crumble. In addition, this is a way to eliminate holes that were formed from old fasteners (screws, nails). Fungus happily settles in any holes.
- Removes traces of grease and rust. Any stains, especially from rust, easily show through the paint layer. To eliminate them, processing is required.
- Allows you to save paint. If you need to repaint from a dark color to light or paint over bright patterns, then applying paint in one layer is not enough; you will have to repaint it several times. After puttying, only one layer will be enough.
- Prevents peeling. Over time, the old coating begins to peel, crack, and peel off. If you do not clean the surface, the new layer of paint will begin to peel off along with the old one. Surfaces will quickly lose their attractive appearance.
All irregularities and cracks must be filled with putty.
In addition, the preparation ensures better adhesion of the composition to the surface. The paint will lay down in an even layer, without drips.
Please note: Methods for removing paint from ceilings
Preparing concrete surfaces for painting.
If you are working with masonry, concrete or plaster, then there are some peculiarities. New concrete must cure for at least 4 weeks before painting. The surface is thoroughly dried and cleaned, and laitance that may be on the concrete is removed using mechanical means, sandblasting or acid. It is necessary to understand that hardening components and oils will reduce the adhesion of the coating to the base, so you need to get rid of them. Sandblasting using a non-metallic unit is the best means of obtaining a good quality surface.
For acid etching, a solution of hydrochloric acid (10-15% concentration) is required. However, on reinforced concrete you need to use organic acid, it reacts with the calcium components in the cement, this can be seen when bubbles appear. After this, the reaction product, calcium chloride, is washed with fresh water.
To remove old coating from concrete you need a rotating chisel or mechanical flails. This method is suitable for areas to be repaired in which lime mortar was used to reshape the surface.
