Recent Entries
The primer is used to remove dust and prepare the walls for the next stage of work. In the future, it will be much easier to apply paint or glue to the surface. In addition, the primer helps the material applied on top of it to adhere more firmly to the wall and stabilizes the porosity of the coating. If you prime the walls before the putty, then the putty, in turn, will be applied evenly and easily.
The primer is applied to the walls before:
- painting,
- putty,
- wallpapering,
- laying tiles.
The main positive feature of the primer is that any subsequent coating will adhere better. The situation does not change depending on the basis. Wood, concrete, metal and drywall base surfaces are also included in this list.
Types of compositions
You need to decide what compounds are used for different surfaces before priming the walls before painting.
Universal compositions include acrylic primers. Their additional advantage is that they dry quickly enough, within 24 hours, and do not have a characteristic odor. These are the most commonly used mixtures.
If you are at a loss as to which primer to choose for your walls, you can safely choose acrylic. It is suitable for painting concrete, plaster, and plasterboard walls.
There are alkyd mixtures for metal and wood surfaces. Soils are placed after preliminary preparation of the walls.
Aluminum primers are recommended for wooden walls. But polyvinyl acetate is used for certain types of paints, as well as for wooden, concrete, and plastered surfaces.
Brick and certain types of textured plaster are treated with silicate compounds.
Epoxy compounds are used for exterior work and impregnation of concrete structures. These are two-component primers. They are mixed before use. This is a very durable type of soil.
Preparing for painting
In certain situations, a primer is used before and after applying putty. For example, this happens in the case of a plasterboard base. Only then do specialists begin painting the surface. In this case, it is better to give preference to tinted soil. In today's conditions, you can easily match the mixture to the color of the subsequent paint, which will improve the final effect.
The question of whether it is necessary to prime after finishing putty is not the easiest, because this action requires special professionalism on the part of specialists. The corresponding stage of repair or construction will clearly pursue specific goals.
Possible errors
If you leave a specific wall without a primer, then the likelihood that defective areas of the surface will appear will automatically increase. It is absolutely wrong to refuse this type of work in order to save money. This is absolutely not cost-effective, because the service life of even the most expensive coatings will be quite short. Very quickly the walls will again need expensive repairs. Using a primer pays for itself in the long run.
Do I need to prime the walls before wallpapering? Definitely yes! In this case, soil mixtures are also capable of performing a very important fixing function, and also significantly save the consumption of wallpaper glue. To achieve your goals, you need to choose the right mixture. Experts prohibit the use of polymer dispersions and water-based paints as primers.
Priming walls before plastering
Before plastering, priming the walls is also recommended. However, it is still necessary to strictly follow the technology. To achieve this goal, you need to purchase a special roller. Alternatively, you can apply the mixture to the wall using a simple brush or sprayer.
After the mixture is applied, you need to wait an average of 30-40 minutes, which will give it the opportunity to dry. Many factors in this case depend on the degree of absorption of the surface. If this indicator is at a high enough level, then most likely you will have to apply a second layer of the mixture.
Surface preparation
Before preparation, the room should be vacated to ensure free access to all surfaces to be treated. The optimal conditions for priming are considered to be a temperature of 10-30 degrees and good ventilation of the room. Next we proceed to surface preparation:
- if there is mold on the walls, it is removed with a stiff brush, and problem areas are treated with an antiseptic. All noticeable damage to the walls is covered with putty;
- The main stage is cleaning from dirt and dust to improve adhesion. It is better to do this work immediately before starting priming, so as not to allow time for the dust to settle again;
- A prerequisite is dry walls. If ventilation is not able to get rid of high humidity, it is recommended to use a heat gun.
Main tasks
It is not difficult to determine whether it is necessary to prime the walls before laying tiles, because these mixtures significantly improve the quality of adhesion of various materials to the surface. Even tiles in this case are no exception. Thanks to the primer, the base itself becomes stronger, which will allow the wall to withstand the load much more easily.
Even if some parts of the base do not adhere to each other very well, then this circumstance can be changed with the help of a primer. Do not forget about the protective capabilities of soil mixtures. As a result of their use, the walls will be reliably protected from the occurrence of fungi, mold and other pathogenic bacteria. You can achieve the best result only if you choose the right primer for a specific finishing material.
It is easy to understand whether the walls need to be primed before plastering or applying other finishing materials. Soil mixtures have a lot of positive properties, which is why experts do not advise saving on this action.
If you find an error, please select a piece of text and press Ctrl+Enter.
Primer is a preparatory coating before painting walls. After priming, the paint adheres to the surface better, resulting in a perfectly even coating. However, some do not use primer, but immediately start painting. Let's find out how necessary it really is to prime the walls before painting, whether it can be abandoned, and how to prime the surface according to all the rules.
Which primer is better for puttying and painting?
The choice of type of impregnation for walls depends on the material being applied, the type and structure of the surface.
- Prime the walls before painting with water-based or acrylic paint. Before applying water-based or acrylic compositions to concrete, plastered, puttied or previously painted surfaces with similar compositions, it is recommended to use liquid acrylic primers for painting.
- The same impregnating liquids can be used for putty, but the bases must be dense and have good adhesion to them. In the presence of paint and varnish coatings, it is advisable to use concrete contact.
- Pigmented compounds are used to even out the overall color background - to lighten a dark base. Suitable for paints and decorative coatings - wallpaper, plasters, putties.
- The antiseptic composition must be used, regardless of the coating used, in the presence of temperature changes and high humidity.
We do the repairs correctly: grouting tile joints with your own hands.
We learn how to make a decorative panel from decorative plaster here.
Artificial decorative stone for interior wall decoration in an apartment: https://tv-peredelka.ru/decor/elements/iskusstvennyi-dekorativnyi-kamen.html
Pros of priming walls before painting
Do I need to prime the walls before painting and is it possible to do without it? The whole point is that, in general, it is possible to get by, but it is extremely undesirable. Getting to know the properties of primer and the effect it can achieve will help you understand why you need to prime your walls before applying paint.
- The soil strengthens the surface, penetrating deep into its structure.
- Levels the base, fills small cracks and pores that exist on the surface, thereby reducing paint consumption during the painting process.
- By priming a wall, you seem to cover it with a thin film, onto which the paint adheres well, without leaving stains or streaks. If the primer lays down in a thin, even layer, then the paint will also lay down well.
- Primer compositions are available in various colors; you can choose a primer to match the color of the paint to make it brighter.
- For a damp room, such as a bathroom, you can purchase an antiseptic primer. It protects walls from the formation of mold and mildew. After priming, the painted surface will be reliably protected from these troubles.
- Without pre-coating, the paint may crack, and if you want to repaint it, it will pull away from the putty in the process.
Properties and purposes of using primers
Whether it is necessary to prime the wall after puttying can be understood if you carefully study the properties and purposes of using the material. The primer material is made in different compositions. Depending on the specific composition, each product has its own distinct properties. But almost all basic functions are performed by any primer. These include:
- Increased adhesion between materials. Any primer increases adhesion between materials. The higher this indicator, the better the products will fit on top of each other. This product is used not only for beauty, but for the quality of finishing.
- Fills cracks and pores of the surface. Thanks to this, moisture does not penetrate the surface. Also, deeply penetrating primers significantly strengthen the surface after drying.
- After the layer dries, the product forms a thin film on the surface. This film does not allow subsequent materials to be deeply absorbed into the plane. Because of this, the consumption of paints and varnishes when painting, as well as glue when gluing wallpaper, is significantly reduced. This also helps the paint to be absorbed and applied evenly to the raw material.
Important! It is always worth priming the plane, regardless of its material. Such building components are designed for a wide range of surface materials and help to effectively protect it from negative influences.
Types of primer
There are several types of primer that are designed for different types of surfaces:
- Alkyd – for wood and metal. First of all, it is used for metal structures, as it has anti-corrosion properties. On wood and chipboard, this primer creates a protective layer that prevents the destruction of the material.
- Acrylic – universal, suitable for all surfaces. It penetrates into the pores of any material: wood, plaster, putty, concrete, metal. Strengthens the base and protects it from moisture.
- Epoxy – for concrete walls. Its base is epoxy resin, which increases the strength of the coating. Used as a base for painting, covering with linoleum, gluing ceramic tiles. It is durable and will not develop cracks over time.
- Aluminum – for wood and metal surfaces. Contains aluminum powder, which ensures reliable adhesion of the paint and varnish material to the base.
- Silicate - for brick or decorative plaster. Most often it is used for processing facades. Resistant to temperature changes, durable, moisture resistant. Places for its possible use in the apartment are the bathroom and balcony or loggia.
- Polyvinyl acetate - used for special types of paint. It is applied to the surface, which is then painted with polyvinyl acetate paint. It has good adhesion to different surfaces and dries very quickly.
The primer must be selected based on the type of surface, area and manufacturer. If you need to cover a small area, you can buy an aerosol can, it is more convenient to use.
You should buy repair products at a hardware store after consulting with a qualified salesperson. A well-known manufacturer is an additional advantage; it can guarantee good results. Before purchasing, check the expiration date and appearance of the packaging.
Dependence of the primer on the finishing material and base
Primer, although it is a separate material, the use of one type or another depends on the finishing coating and the material of the walls.
For weak, crumbling bases, a universal deep penetration primer is used. It will help strengthen the surface, penetrating deep into the base, and a water-repellent and vapor-permeable film will form on top.
For walls in damp rooms, compositions with fungicidal (antifungal) additives are used.
Priming weak surfaces Source finitex.ru
See also: Catalog of house projects for which painting is used for decoration
In addition to special properties (waterproofness, anti-corrosion, disinfection), surface priming gives the materials additional adhesion (mutual bonding). And this is perhaps one of the main features of the soil.
The primer for walls to be painted should have the same composition as the paint. Acrylic primer will help acrylic-based water-based paint to adhere securely and evenly to the surface. The primer composition will not allow the water part of the paint to be excessively absorbed into the surface, which means that the wall will be painted evenly, without stains or smudges.
Primer for walls under plaster is applied to a brick or concrete wall. Such a composition, in addition to adhesive properties, must have antiseptic and vapor-permeable properties. In addition, priming the walls will get rid of excess dust on the surface. Under plaster mortars it is necessary to use a deeply penetrating primer for mineral surfaces.
Primer base
Most often, walls are leveled with putty. Some people think that it doesn’t need to be primed, because the putty surface is already a good preparatory layer for paint. But it has disadvantages: it can crumble, and it also absorbs too much coloring composition. The primer will strengthen the base and save paint.
Paintable wallpaper does not require priming, as it is designed for application of a coloring agent.
Before wallpapering, the walls must be primed. The soil will ensure a reliable connection of this layer with the walls.
Drywall should be primed in two steps. First, you need to coat the sheets immediately after installation. Secondly, the final finishing with putty is also covered with primer.
Many people wonder whether it is necessary to prime each layer of paint. If you are painting a wall over an old layer, then primer should be used with different paint colors. It creates a barrier between two layers of paint so that the top layer does not show through.
How to prime a wall?
Primer technology differs for different types of soil. If you decide to apply it to walls or ceilings, read the coating instructions for the type of primer you have chosen.
Remember that before applying water-based paint, you will have to prime the walls.
- Protective mask and gloves.
- Roller or brush.
- Pallet.
- Degreaser.
- Wear safety glasses and gloves.
- Provide fresh air access to the room. In this case, the temperature should be within 5–25 degrees above zero.
- Sand the putty with sandpaper.
- Remove dust with a brush or cloth. Fungus and mold must be removed with a metal brush.
- Degrease the surface with white spirit or acetone.
- Pour a small amount of primer into the tray.
- Apply one coat to the wall with a roller or brush.
- Roll the primer layer well over the wall so that there are no puddles or smudges.
- Wait for it to dry completely, this can take from 4 hours to 1 day.
- Apply water emulsion in two layers.
Workflow Description
All necessary activities are divided into 3 stages:
- Collection of necessary materials and tools;
- Surface preparation;
- Application of the composition.
Let's look at each of them in detail.
Stage 1 – purchasing the necessary materials and tools
First, let's figure out how to prime the surface. Most preferred:
- Deep penetration compositions based on acrylic have a strengthening and penetrating effect . They are suitable for the preparation of plastered and puttied surfaces, as well as for plasterboard structures. The price per liter ranges from 30 to 100 rubles and mainly depends on the size of the package and the manufacturer;
There are many options and most of them are of good quality
- Latex primer for painting is distinguished by the fact that it creates a water-repellent, moisture-proof coating on the surface. It can be used both indoors and outdoors; I recommend using this option on highly absorbent surfaces. The cost is similar to the group of products described above;
Latex compositions can also be considered universal
- If you are working in a bathroom, toilet or kitchen, then an excellent option would be to use a solution with the addition of antifungal additives. In terms of its functions, it does not differ from the usual version, but the fungicidal additive allows you to effectively resist the occurrence of fungus and mold;
The presence of anti-mold additives is always indicated on the packaging
- Primer paint for walls is different in that it contains a color pigment and after application the surface becomes white. This solution is often used as a base for decorative coatings, but I also recommend it where you need to change the color of the wall. At the same time as strengthening, you will create the ideal base for any color, and the cost of a 10 liter bucket is about 1,200 rubles;
Primer paint makes it easy to repaint the wall in any color
- If you need to paint concrete or apply the composition to surfaces previously painted with oil or alkyd paint, then you will need an adhesion primer . It creates a good base, and water-based paint or any other paint will apply perfectly. But you should not buy the option with quartz filler, but a special composition, for example, Tikkurila Otex, it costs about 750 rubles per 900 grams.
This option is even suitable for preparing glass and tiles for painting.
All of the above options can be purchased both in finished form and in the form of a concentrate. The composition is diluted with clean warm water in the proportions recommended by the manufacturer. The ratio of components may vary depending on the type of base.
The concentrate is convenient because it can be diluted as much as needed right before work.
We need a simple set of tools that can be bought at any hardware store.
A roller with a tray is the best option for priming walls
| Tool | Recommendations for selection |
| Roller or brush | This is the main tool for application, the roller should be at least 18 cm wide with medium-length synthetic bristles, and a brush from 10 cm. The first option is faster and more convenient to work with, the second better fills all the unevenness with soil |
| Painting bath | This is a special container with a recess under the ground and a squeezing grid. The grid allows you to squeeze out the roller coat to remove excess composition and distribute it more evenly over the entire area of the roller |
| Narrow brush | Needed for processing corners, places near switches and structures of complex configuration. Optimal width 2-3 inches |
| Brush or broom | Necessary for removing dust, cobwebs and other contaminants from surfaces |
| Means of protection | Although the primer itself does not pose a danger, it is better to protect your hands with gloves and your eyes with goggles |
Safety glasses help prevent splashes from getting into your eyes
If you have pockets of mold on the walls, then you will additionally need to purchase a concentrated antiseptic composition, which is used to pre-treat all problem areas.
Stage 2 - preparatory activities
Before priming surfaces, you need to prepare for work:
- The room should be cleared of anything that will interfere. As a last resort, move the furniture to the middle to provide easy access to all surfaces to be treated;
- The temperature should not be lower than 10 and higher than 30 degrees, these are optimal conditions for high-quality work;
- If there are damages on the surface, they are sealed with putty. The fewer flaws there are, the better the final result will be. Pockets of mold, if present, are removed with a stiff brush, and all problem areas are additionally treated with an antiseptic;
After the putty has dried, it is advisable to rub the repair areas with a block.
- The surface is cleaned with a brush, broom or vacuum cleaner. It is important to remove dust from the walls to improve the adhesion of the composition. It is advisable to carry out this work an hour or two before the main stage, since dust tends to settle constantly, and if you clean the surfaces a few days before priming, they will become dirty again;
Using a vacuum cleaner can get the job done much faster and better.
- The walls must be dry; if there is high humidity in the room, it must be eliminated by ventilation. A more radical option is to use a heat gun, with its help you will definitely dry the walls.
A heat gun will quickly dry the room
Stage 3 - applying primer
Now let's figure out how to properly prime the walls. Instructions for doing the work yourself look like this:
As you can see, the diagram is very simple and clear
- First of all, it is worth preparing the composition; the primer should be at room temperature. If you have a ready-made solution, then you simply need to mix it thoroughly before use. If it is a concentrate, then mix the required amount with water in the proportion indicated on the package;
Adhesive compounds are mixed especially carefully, since filler always settles in them
- Then the composition is poured into the paint bath so that it fills the recess. The roller is carefully dipped on one side, turned, dipped again, after which you need to wring it out on the grill. Press the tool with moderate force and move back and forth several times, the composition will be distributed over the entire surface, the excess will flow into the recess;
The composition is distributed evenly over the roller
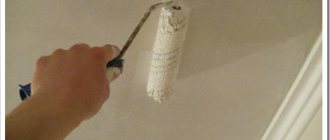
- The walls are primed for painting in any order. Start from a place that is comfortable for you, but it is better to go from top to bottom to remove smudges as they form. Press the roller so that the wall is abundantly moistened, but excess mortar does not flow along it;
The primer is applied with progressive movements in the direction from ceiling to floor
- Corners and other difficult areas are primed with a brush; this can be done at the beginning, or at the end, as is more convenient for you;
The walls are usually high and a stepladder or table is required when working. But you can get out of the situation easier: buy a special extension for the roller handle, with its help you can process the entire surface while standing on the floor.
The handle extension greatly simplifies the work process
- After applying the layer, you need to leave the walls to dry. How long the surface dries depends on the ambient temperature and the type of composition. I usually wait 2-3 hours. It is very easy to determine how dry the walls are by looking at the wet spots that should disappear;
You should not speed up the process with a heat gun; drying should be done under natural conditions; this is the only way to ensure maximum penetration of the soil into the base.
- The second layer is applied in a similar way, it is important not to miss pieces of the wall so that the base is evenly processed . If there are flaws, the absorption of individual areas will differ and the paint will lie unevenly.
Finally, let's figure out whether it is necessary to prime the walls before painting if they are painted with the same color? Everything is simple here: if the condition of the surface is good, there are no damages or stains on it, then you can immediately apply paint, bypassing the preparation stage.
And the last nuance, is a primer necessary if colored fragments are applied to a base of white paint? In this case, you can also do without primer, because it was applied under the main coating.
When applying colored paint to a white wall, there is no need to prime the wall.
Primer: types, how to choose
There are a huge number of different types of primer mixtures that differ in their characteristics. Depending on the purpose, the primer for painting walls is:
Three important tips for priming walls and ceilings for painting.
Three important tips for priming walls and ceilings for painting. What principles must be followed when priming.
- alkyd (for wooden and metal walls);
- acrylic (universal product, suitable for all substrates);
- aluminum (for wooden surfaces);
- polyvinyl acetate (used only before applying paints and other coatings that have a special composition);
- silicate (for processing sand-lime brick or decorative plaster);
- epoxy (for deep impregnation of concrete bases).
Types of primer for walls
Before priming the walls for painting, you need to choose the right material for this work. When purchasing a primer, pay attention to the manufacturer, cost and related technical characteristics. The higher the level of absorption into the base, the better this product will be for achieving any goals.
The most common and most used type is acrylic primer. Because it is a universal product that can be used both for preparing walls for painting with water-based paint, and for performing all types of external and internal work. If you don't know which primer to choose, choose a universal one.
The most famous primer manufacturers
Among Russian manufacturers, the company Birss stands out. The composition “Betonkontakt” (universal) is in demand. It has proven itself well as a preparatory layer for painting both for interior finishing work and for exterior use.
Ceresit is a German concern. Under his license, soils are produced in many countries, including Russia. The most popular brand is ST-17. This is a universal primer, including for painting.
Another popular German brand is Knauf. The line of the most famous compositions includes: KNAUF-Kvartsgrund (universal primer mixture), KNAUF-Izogrund (deep penetration), KNAUF-Tiefengrund (for interior finishing work).
To summarize, we can conclude that the use of a primer significantly improves the quality characteristics of finishing work. It protects the surface from temperature changes, humidity, mold and mildew. Its use guarantees that the paint will stay on the wall surface reliably and for a long time, so experienced builders always recommend choosing a primer before painting.
The instructions for use indicate for which surfaces it is used and in what proportions. Additional advice on which primer to choose can be obtained from specialists at construction supermarkets and on manufacturers’ websites.
Rules for priming surfaces (2 videos)
Products from different manufacturers (33 photos)
Why prime the walls?
When the surface is completely prepared, doubts arise: is it necessary to prime the walls before painting? Of course, this stage of construction work should never be skipped.
Priming allows you to create a reliable and durable base for subsequent painting of the surface. It strengthens the surface, penetrating deep into the base, and also creates a thin film on it. Due to this film, the water absorption of the base becomes uniform, which will result in ideal painting of the walls without stains or other defects.
The need to prime the walls
Antiseptic primers can be purchased at hardware stores. What primer should I use to prime the walls before painting? They are necessary to prevent fungi from forming on the surface due to constant moisture and dampness.
It should be noted that fungus often appears on puttyed substrates, since the putty does not allow the walls to “breathe” and remove moisture outside. Therefore, when fungus forms on the wall, you must first treat it with an antifungal primer, then let it dry and paint it.
Why do you need to prime walls before painting and puttying?
Coating walls with a primer is one of the types of preparatory operations before the subsequent application of a putty or paint layer. The treated surface acquires a number of useful properties:
- The strength of the surface layers increases, the particles of the “chalking” wall structure are held together.
- The absorbency decreases, which helps reduce the consumption of liquid covering material.
- Adhesion to most finishing products increases: metal, wood, concrete, brick, etc.
- Prevents the penetration of moisture into the surface being treated, which, in turn, prevents the occurrence of dampness.
- The walls acquire antiseptic characteristics - mold does not form on them, fungus does not grow, and rot does not appear.
What will be the consequences if you don’t prime the walls?
You don't know: do you need to prime the walls before painting? Of course, you may not immediately notice the difference between a painted wall without a primer and a painted surface that was primed before painting. The first thing that immediately shows the difference is the paint consumption after the first painting, which increases by 20% on an unprimed surface.
If you painted the walls without priming, then you will have difficulty repainting the surface to update the interior. Paint you apply to an unprimed wall will not adhere well. When you apply fresh paint on top of it and start rolling it with a roller, in some places it will lag behind the finishing putty and you will have to putty these areas, wait for them to dry, and so on.
Therefore, the primer must be taken as an axiom, and you should not even discuss whether it is necessary to prime the walls before painting. You need to know for sure that before painting with water-based paint, the surface must be primed.
Why do you need to prime?
The primer solution is a liquid, usually colorless or white.
Transparent material is applied to surfaces prepared for wallpaper. Opaque is used to treat ceilings (in most cases).
When puttying without preliminary priming, then after some time the walls or ceiling will certainly crumble.
In fact, everything will have to be redone. Plus, this will entail both a number of labor costs and financial expenses. To avoid such unpleasant moments, it is better to initially treat the surfaces and prepare them for finishing work.
The putty laid on top of the primer will adhere firmly to the walls or ceilings for many years.
To bond together all the materials that will later cover the surfaces, a primer is used. It acts as a connecting block between the base of the treated surface and the subsequent applied layers.
READ Replacing glass on a double-glazed plastic window
The quality characteristics of the primer are as follows:
- protects against the formation of mold and fungi on the walls;
- penetrates deeply into cracks and fills them, creates a smooth and solid wall surface before puttying;
- levels surfaces made of any material (plasterboard, concrete and others);
- neutralizes the color of stains;
- The treated surfaces can be brick, wood, concrete and plasterboard.
Preparing walls for painting. To prime or not?!
How to prime walls for painting with water-based paint
In order to properly prime the surface, it is better to seek professional help, since priming walls for painting with water-based paint is a rather labor-intensive and complex process. But, if you decide to do this work on your own, then to ensure acceptable conditions for further finishing work you need:
- Using a brush, remove the dust that remains after sanding the layer of finishing putty;
- degrease the base, for example, with white spirit or acetone to improve the adhesion of the soil to the base;
- apply primer to the surface in one layer using a roller or brush;
- It is good to roll the soil over the base without making “puddles”. Do I need to putty the fiberglass before painting? If the surface is heavily wetted, the finishing layer of putty can be damaged, so it is better to apply the primer in one motion over one area;
- After complete drying (4–6 hours), apply water-based paint in two layers.
Do I need to prime before painting?
The primer can be carried out with various compositions: paint, a ready-made primer preparation or a concentrate, which is diluted according to the instructions. Solutions are also marked relative to the surface to which they will be applied (wood, metal, plaster).
Water-based
Water-based emulsion is not the cheapest finishing material, so pre-priming the walls will significantly save on paint consumption.
The primer applied under water-based paint reduces the hygroscopicity of the base, which leads to a more uniform distribution of paint on the surface, increased strength of the coating, and increased wear life.
The water-based primer is applied with a brush, preferably in one layer, which should ideally cover all the unevenness of the wall, but not form uneven accumulations of soil. After the primer composition has completely dried, which takes 5-7 hours, water-based paint is applied in two layers.
Silicate
Silicate paints are sold dry; to paint, the mixture must be diluted with water and used as soon as possible, before the paint loses its properties. Therefore, a silicate-based preliminary primer is of great importance for the speed and quality of painting.
Special primer compositions can reduce the toxicity of alkali contained in silicate paints and strengthen mineral surfaces to extend the life of the paint to 10-15 years.
Acrylic
Priming before acrylic painting has an important feature: the composition must be applied to highly abrasive surfaces; from smooth surfaces it will gradually slide off even along with the paint.
Therefore, before applying primer, the surface of the wall must be treated with a stiff brush or coarse sandpaper to artificially create grooves and roughness.
In turn, the primer solution perfectly fixes the coating particles, leveling the adhesion and absorbency of the wall, which allows the acrylic paint to lay down in an even and durable layer.
Oily
Oil paint is one of the most highly adhesive, even without applying a preliminary primer layer. Priming increases the strength of the oil coating, making it smoother and less porous. However, often oil paint, applied without a primer, itself acts as an unsurpassed material for finishing work, as it adheres well to the surface.
When applying oil paint for the first time, the use of a primer solution is not necessary. For secondary paint, you should opt for a special “on top of the paint” composition, which will save the time required to remove the old layer.