Preparing the car for priming
In order to prime a car, it is necessary to place it in a clean room with the proper level of ventilation. If you plan to apply the primer locally, then all nearby parts of the body to which the composition will not be applied must be covered with paper and secured with masking tape.
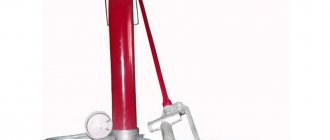
Then prepare a spray gun (spray gun) for the primer composition. It is advisable not to save on this instrument, although it will not be cheap - from about 10,000 rubles.
Depending on the volume of work, you need to choose one of two types of spray guns:
- For full priming, it is better to use a gun with a nozzle diameter of 1.8-2.0 mm. It is more versatile, and if there is no budget or other possibilities, it is better to purchase such a device.
For partial and spot priming, a spray gun with a nozzle diameter of 1.3-1.4 mm is more suitable.
How to use acrylic primer
The two-component product requires dilution with an acrylic solvent and the addition of a hardener. The proportions of each component can be found in the instructions - they may differ for different brands.
The prepared product must be used for a period of time from 30 to 60 minutes - then it begins to lose its usefulness.
For complete drying to occur at 200C, it will take from 3 to 8 hours - then you can start sanding. This process is performed in steps with a gradual decrease in the abrasive grain - from coarser to finer. Can be sanded by hand with sandpaper or a sander with abrasive attachments. When dry grinding, the grain size should be coarser than when fine grinding.
Types of primers for cars: primer, filler
To carry out body repair work, the same types of primers are used as in industrial enterprises during the production of a car. In general, there are 2 main types of mixtures:
- Primary or primer is used to protect the metal from the corrosion process and at the same time ensure reliable adhesion to the paint.
Primary primer - primer
- A secondary type of primer or filler is used to level out minor unevenness in the surface that will subsequently be painted. This allows you to create a uniform, smooth substrate. Fillers, in turn, are divided into sandable (most often used for body elements with defects that need to be hidden) and non-sandable (suitable for new and non-defective elements).
Secondary primer - filler
Today's range of formulations allows you to purchase a primer that has the properties of both a primer and a filler. For example, REOFLEX PRIMER FILLER (450-600 rubles).
Types of soils for cars
There are the following types of primers that are used to prepare a car for painting:
- Acrylic. A universal option that is used most often. Suitable for bodies that do not have significant defects, such as large chips or deep scratches. Bonds paint to metal well.
- Epoxy. Made from natural materials and provides the best protection for your car. Creates a durable film on its surface that prevents mechanical damage.
- Acidic. Refers to rough types of coating, protects the body from corrosion, paint cannot be applied to it.
Which primer to choose for the job depends on the condition of the car body and the presence of deep, noticeable damage on its surface.
Applying acrylic primer to a car
Acrylic primer is applied to:
- fill pores;
- create a protective layer;
- slightly level the surface, giving it greater smoothness;
- create a base for the paint.
The thickness of acrylic primer application can range from 50 to more than 100 microns.
Depending on the number of elements, the primer can be one-component or two-component .
The first is applied in a thin layer and is mainly used for applying to new parts before painting. This ensures improved adhesion and rust protection.
A two-component primer is more versatile and suitable for any work on the body.
It is necessary to strictly observe the proportions when diluting the primer
In addition, only thinner is added to a one-component primer (approximately 1 part thinner to 5 parts primer). No hardener is added. In a two-component mixture, you need to first add a hardener and then a thinner (usually 1 part hardener and 1 thinner to 4 parts primer).
How to dilute automotive acrylic primer
These mixtures contain many elements. And it is from the final composition of a particular primer from a particular manufacturer that you need to select a substance that can subsequently be used to dilute the primer. There are only two best options:
- Water - but only if it is one of the components of the acrylic primer itself. The packaging should then bear the inscription “water-acrylic”. If the old primer has hardened to a solid mass, then the water needs to be heated almost to boiling water.
- Special acrylic thinners are an excellent option for thinning. It is recommended to select them of the same brand as the soil itself.
Most often it is recommended to maintain the following proportion - 4:1 with the addition of a thinner. For more detailed information, please refer to the instructions on the product label.
For example, the label of Novol Protect 300 4+1 MS primer says that for 4 parts primer you need to take 1 part hardener and 25%-35% thinner.
It is important to understand that acrylic fillers remain in an unchanged state for 30-60 minutes, which is how long after mixing they will be ready for use. This time must be taken into account when stirring the primer and applying it.
The resulting composition is applied using a spray gun. But before you fill the mixture into the device, it must be filtered (for example, through nylon or a double layer of gauze). This is done in order to cut off all large fractions that could clog the pneumatic sprayer.
How to apply filler - tips and tricks
The following sequence of actions must be followed:
- If small smudges or other minor defects have formed, then after drying they can be easily leveled by sanding.
- The primer must be applied in a thin, even layer.
- In order to get the desired effect, apply 2 or 3 layers of acrylic primer. Between each application you need to wait about 20-40 minutes. At this time, evaporation of particles occurs. But you should be very careful, since the required evaporation period depends to a large extent on the ambient temperature, as well as on the thickness of the applied layer, the composition of the primer and its proportions, the type of surface being treated, and many other factors.
- To achieve a uniform, smooth effect with a minimum amount of smudges formed, it is necessary to cover the surface using cross movements.
- It is the pneumatic sprayer that allows you to achieve a more even and uniform surface, compared to using a brush.
- After the last acrylic layer of primer has been applied, it is necessary to wait for 20-40 minutes first, and then increase the temperature in the room where the car is parked. This will speed up the drying time of the soil and its hardening.
- At the final stage, after complete drying, the surface is sanded. Sanding can be done mechanically or manually, and can also be done dry or wet.
How to apply primer - tips and tricks
Primers are mainly needed to enhance adhesion between the substrate and the paint. The principle of working with it is somewhat simpler:
- Before opening the primer, you need to shake it well.
- You should try to make the applied layer as thin as possible, applying a minimum amount of composition. For work, you can use a brush or swab.
- After applying the layer and before painting, you need to wait 5-10 minutes (check the packaging for the exact time) until the primer dries completely.
- Before applying paint, you need to make sure that the primer layer is smooth, even and free of any contamination.
- If the surface has pores or minimal roughness, a second coat of primer can be applied in the same way as the first.
Adding Plasticizer to Primer
It is possible (and even recommended) to add a plasticizer to the acrylic filler primer that will be applied to plastic and other synthetic surfaces of the body - this is a special additive that will make the material more elastic and help avoid cracking of the paint even when the painted element is deformed. In addition, it neutralizes the impact of high and low temperatures on the material - the paintwork will shrink and expand as the temperature changes along with the element itself.
Plasticizer additive Novol Plus 770
The amount of plasticizer added to the primer can usually be deducted from the product label. Usually this is 10-30% of the finished primer mixture, then a hardener and thinner are added. The stiffer the plastic, the less plasticizer needs to be added.
After adding the plasticizer, the primer does not need to be infused or other manipulations carried out with it, but it is worth noting that the drying time of the applied layers will be increased by approximately 2 times.
Tintable primers
Fillers (secondary primer) can also be tinted. This is done by introducing acrylic paints into the composition - approximately 10-15% of the volume. The result is a tone that is as close as possible to the factory or re-applied enamel. This is done in order to:
- When a chip formed, this place was not visible, that is, the primer in the resulting chip will not differ from the tone of the top layer of paint.
- In this case, painting and repairs could be postponed until a time convenient for the owner, rather than being done urgently.
How to dilute acrylic paint, choose a solvent
Solvent for car painting is one of the most important and essential components in painting work. There are a large variety of them and only certain ones are needed to properly dilute the paint. So, in order not to be mistaken about how to dilute paint, acrylic or any other, we will consider the main types of solvents and their use.
In principle, a diluent and a solvent are one substance. Both serve to bring the material to the required viscosity (varnish, paint, primer, liquid putty, base enamel, etc.) The manufacturer always indicates which solvent is best to use for painting a car. Each paint system has its own required hardener and thinner. Be sure to read the instructions on the back of the container before use. It will indicate what type of thinner to use, at what temperature and for what material.
It’s worth mentioning right away which solvents should not be used to thin acrylic paint - these are organic 646, 647, 650, etc. When diluting paint or varnish with them, defects and difficulties in painting may occur. Use them only to clean the spray gun or other equipment. The price for them is not great for cleaning.
Types of solvents and thinners, which one to choose?
If you have a question, how to dilute acrylic paint?
There is only one answer: use any branded acrylic solvent. Even if it is from a different brand than the paint, varnish, primer, etc. being mixed. Just don't use the ones mentioned above! Branded acrylic solvent is an order of magnitude more expensive than conventional thinners, but for high-quality repairs it is recommended to use them. If the branded acrylic has run out or you want to save money, then you can use the domestic manufacturer of material thinner, universal solvent P12. It has been successfully tried on almost all acrylic materials (varnishes, acrylic paint, primers, epoxy substances). There were no problems or defects. It can safely be considered a universal solvent. P12 is “normal.
And so, the main criterion for choosing a thinner for diluting paint is the ambient temperature. It is necessary to determine the ambient temperature before painting and, as a result, select the right one. Temperature affects the drying time of the material. In hot weather, the solvent evaporates faster and the paint does not have time to spread. Defects, large shagreen, and dust appear. In cold weather, evaporation will be too slow, causing leaks and more debris.
There are three groups of acrylic thinners:
- Slow
- Normal
- Fast
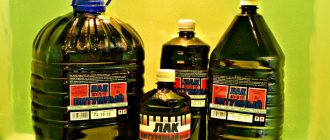
Therefore, for high-quality work, always choose a material at a certain air temperature. If it is cold, then use a “fast” thinner at a temperature of 5 to 15 degrees. At normal temperatures from 15 to 25, “normal” is used. And in hot weather from 25 degrees, a slow one is necessary. All figures are approximate; for exact determination, see the manufacturer's instructions. The photo below shows a series of thinners from Body 740 741 742.
It should be noted that there is no special thinner for varnish or for primer, acrylic. To dilute them, use a universal acrylic thinner. But for base enamel there is a base solvent. Although many people use the usual universal one.
Transition solvents
In addition to universal ones, there is also a solvent for transition. They are not intended for thinning varnishes and enamels. Their purpose is to create an invisible transition between old and new paint or varnish. To do this, apply the transition solvent from a paint sprayer or aerosol can onto the dry “spray” in the transition zone of the varnish or acrylic paint.
It is extremely important to note that the solvent for transferring over varnish or acrylic paint and for transferring over the base, also called “Binder,” are completely different products. A paint binder is something like a transparent base. It is used so that the metallic grain does not stick out like a “hedgehog” in the transition zone, but “settles down” correctly, which will ensure a high-quality invisible transition.
How to mix paints correctly.
For high-quality painting, the paint and varnish material must be of a certain viscosity, and in order to mix it correctly, there is a special tool:
- Beaker
- Measuring ruler.
Each has its own advantages and what to use is purely everyone’s choice. The measuring ruler is reusable and will last a very long time, unlike a measuring cup. Measuring rulers are double-sided (each side has different mixing proportions). Basically like this: 2:1 and 4:1 and another option is 3:1 and 5:1. How to use the measuring ruler and glass in the photo below, there is nothing complicated about it.
Before mixing paints, be sure to read the instructions on the packaging in what ratio to dilute the material. Below I will tell you in what proportions to mix different paints.
Mixing acrylic paint "acrylic":
For Vika paint this is a 4:1 ratio with hardener and 20%-30% thinner. And for Mobihel 2:1 with hardener and 10% -20% thinner.
Mixing the Base: Base paint is generally mixed 2:1. That is, the base itself and half of it is the solvent. It can also be mixed 1:1.
Mixing varnishes: The story with varnishes is almost the same as with acrylics. The varnish is diluted 2:1 with hardener and thinner from 0% to 20%. Depending on what viscosity you need it. All the above mentioned figures are approximate and may vary depending on specific needs, type of work, and application technique. In general, read the instructions before use and there will be no problems.
To accurately determine the viscosity of paint, there is a special tool called a viscometer. The operation of the viscometer: the viscometer is immersed in paint, taken out and timed for how long it takes to empty. As soon as the stream begins to drip, the stopwatch is stopped.
And finally, a couple of comments and tips:
- What to do if the paint has dried or thickened? Fill it with solvent, stir, close and leave for a while.
- Do not forget about Health, solvent vapors are very volatile and poisonous, prolonged exhalation can harm your health. Use a special respirator
- How to dilute alkyd paint? Recently, alkyd paints are practically not used in car painting. You can dilute alkyd enamel with white spirit.
Thank you for your attention. Good luck.
www.myavto.net
In what proportion to dilute the primer - example
If we consider a specific example, we can provide the following clarifying data. When it is necessary to dilute acrylic primer to cover a car body, take:
- 4 parts acrylic primer, for example, this is a 1 liter jar.
- One part of the hardener is added to it - this is 0.25 liters.
- Another 1 part of the diluent is poured in - this is also 0.25 liters. The diluent, as was already clarified above, can be water or special acrylic mixtures. It all depends on the acrylic primer itself.
Why prime the wall surface?
Why do you need to prime:
- The wall becomes even and smooth, defects are hidden, crumbling is prevented, and the percentage of porosity is reduced.
- The surface stops absorbing moisture, saving material consumption.
- Protection against mold, mildew, and microorganisms due to the high antiseptic properties of the material.
- Resistance to corrosion.
- The primer prevents color from bleeding through.
- The wall is strengthened and accepts further finishing well. The finishing material is applied quickly, efficiently, and easily.
- Durability of repair.
Manufacturers produce ready-made mixtures, substances in the form of dry soil and concentrates. The former should be thoroughly stirred before use, the latter will need to be diluted. You need to do this correctly so as not to spoil the primer or weaken its properties. Each type of substance has its own dilution instructions.
Basic Concepts
Acrylic primer is a special mixture that contains acrylic and a certain amount of hardener. Depending on the number of elements, the soil can be one- or two-component.
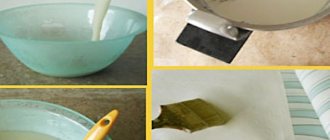
A similar material is used to fill pores, and also as a protective layer when covering wood.
In some cases, it acts as a substrate for the main paint. The thickness of application of these solutions depends on the material being coated (50-100 microns or more). The amount of filler allows you to change the characteristics of the soil, which can be either adhesive or filling.
One of the most popular products on the market is Reoflex, which is used as a leveler. It can be applied to both wet and dry, pre-cleaned surfaces.
Benefits of car body priming
Treatment with a primer is carried out before applying the final paint coating. Acid soils are used to protect metal body elements from moisture, salt and other adverse external factors, as well as corrosion.
Acrylic and epoxy primers for cars increase the adhesion of metal surfaces of the car body with the final paint coating. They allow you to get an even, durable layer of paint. Depending on the purpose of priming, other types of primer compositions are used:
- Passivating. Increases the resistance of metal to moisture.
- Soils with inert particles. They create a durable film for mechanical protection of the car body from liquid penetration.
- Rust modifiers. Used for application to metal elements and parts without preliminary cleaning of rust.
- Protective . The composition contains metal dust, which acts as a “protector”.
The features and procedure for applying primer depend on its type and composition, so before purchasing consumables, you should carefully read the instructions provided.
Dilute the mixture
Acrylic primers are component compositions. The technology of their dilution depends on this. For such purposes, experts recommend using several substances:
- The optimal thinner will be a special acrylic mixture that is compatible with a particular brand. Often, such solutions are recommended by the manufacturers of these products.
- Water. This mixture can only be used in cases where the soil contains a similar component. Water-acrylic mixtures are often diluted.
Some users recommend using a special thinner 647. But this issue is controversial, since the use of this product depends on the properties of the selected primer.
The amount of thinner often does not exceed 25% of the total volume of the mixture. Please note that it is important here to also consider the amount of hardener that is added to the solution when mixing.
You can find out the exact proportions and recommended solvent on the packaging. It is important to follow all basic recommendations to obtain high-quality and durable protection.
This post will remain in the same style. I will present my theoretical research based on information found on your INTERNET, using a specific example, and add/correct based on competent opinion in the comments...
Today I propose to consider the most common type of primer - Acrylic. As an example, we will look at Novol primer Protect 300 4+1 MS
Acrylic primer 4+1 is a two-component primer. The first component is a dispersion of pigments and filler in acrylic resin (because as I understand it, ACRYLIC). The second component is a hardener - a substance that causes it to harden (polymerize). 4+1 Means - 4 volumes of primer per 1 volume of hardener or by weight 5.6 masses of primer per 1 weight of hardener
4*1*1 this means that to dilute 4 parts of primer filler you need to add 1 part hardener and 1 part thinner.
This applies to volume i.e. 1l. +0.25l.+0.25l. If you dilute it by weight, the numbers will be different. To do this you need to know the specific gravities of the products. For soils, the specific gravity ranges from 1.3 to 1.8 kg per 1 liter. Hardeners are about 0.93-0.96 kg per 1 liter. Thinners from 0.78 to 0.86 kg per 1 liter. Good adhesion of the primer allows it to be used on different types of surfaces, such as:
old varnish coatings, polyester putties, polyester laminates, (Polyester laminate is a product made from fiberglass. Polyester is because the resin is polyester, and laminate is laid fiberglass impregnated with resin.)
plastics, reactive primers such as washprimer i.e. Reactive acid primers, galvanized steel, stainless steel, aluminum.
The primer is applied using a special paint gun onto a degreased, sanded surface. For tinting, you can use acrylic paints - 15% of the volume.
First you need to mix 4 parts of primer with 1 part of hardener (by volume) and 25% thinner. Mix thoroughly until smooth. 4*1*1 means that to dilute 4 parts primer filler you need to add 1 part hardener and 1 part thinner. This applies to volume i.e. 1l. +0.25l.+0.25l. If you dilute it by weight, the numbers will be different. To do this you need to know the specific gravities of the products. For soils, the specific gravity ranges from 1.3 to 1.8 kg per 1 liter. Hardeners are about 0.93-0.96 kg per 1 liter. Thinners from 0.78 to 0.86 kg per 1 liter.
The shelf life after mixing is approximately 60 minutes (at a temperature of 20° C).
How to dilute the primer with your own hands?
Most primer mixtures are sold ready-to-use. Just stir well and you can apply. The concentrate primer may need to be diluted. A number of products are presented in the form of dry soil, which will need to be diluted before work. How and with what?
To answer this question, you need to know the composition of the substances in the mixture, as well as which solvent (diluent) should be used. For example, a water-dispersion mixture is usually diluted with water. In other cases, a specific organic solvent is used. The choice of thinner may also depend on the type of substrate. By the way, to work on highly porous surfaces, the concentrate is almost never diluted.
It is important to know: what primer should be diluted with what?
Why do you need to prime the surface?
- Subsequent finishing materials are placed on a primed surface with better quality.
- The primer extends the service life of the coating.
- A deeply penetrating primer mass can regulate the porosity of the base and strengthen it.
- After penetration, the primer prevents wear of the material and protects against corrosion.
- Masking of minor defects.
- Primer mixtures for painting, puttying, and varnishing significantly reduce the consumption of finishing materials.
What to use as a thinner
Primers vary in composition, properties, and application. Moreover, they are all divided into two types - strengthening and increasing adhesion.
- Acrylic is also called dispersion or emulsion. We can say that it is universal, since it is used for almost all types of surfaces of walls, floors, ceilings, but is not used on metal, since it does not have anti-corrosion properties. Acrylic concentrate can be diluted with water. The substance is non-toxic and odorless. Acrylic can be either an adhesive primer or a deep penetration primer.
- Alkyd is used more for preparing wooden walls, floors and other substrates for further painting. Due to deep penetration and loosening of the top layer of wood, the primer mixture will ensure better adhesion of the base and paint. Used under enamel and for metal work. But it is not recommended for use on walls made of stone, concrete and other minerals. This also includes anti-corrosion alkyd mixtures with a rust modifier. The concentrate can be reduced with the same organic solvent as in the mixture, or use white spirit, xylene, solvent, or mixtures thereof.
Alkyd primer is more suitable for metal than stone, concrete, etc.
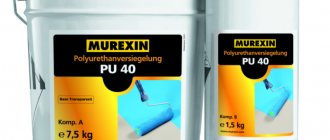
- Epoxy and polyurethane are used to treat concrete bases of walls, floors, ceilings, and under enamel. Also, certain mixtures are designed for working on metal (anti-rust) with subsequent enamel coating. To simplify application and lengthen the start time of polymerization, xylene (5-10% by volume) or other universal liquid is suitable as a solvent.
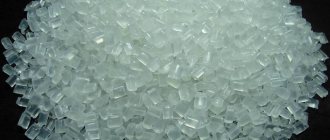
- Polystyrene is used for walls - on plaster and wood. The substance is toxic. Requires compliance with personal protective measures, as well as good ventilation of the premises during work and during the drying period. It is safest to use in the intermediate finishing of external walls of a building.
- Primers for metal work are generally classified as a separate group. The composition may contain various substances responsible for the special properties of the material: insulation, protection, transformation. The concentrate is diluted with various solvents up to 10% of the total volume, but not with water. The types of “native” organic solvents or universal ones are mainly used. Priming of metal structures in several layers is mandatory for enamel, painting and in conditions of constant humidity. insulating, protecting against moisture penetration and rust formation - glypthal, phenol-formaldehyde compounds. Form a durable, waterproof film;
How to replace primer for walls?
Sometimes, for some reason, there is not enough primer, and if a small area of the surface remains to be treated, then visiting the store is not advisable, and in this case, various methods of replacing the primer composition .
The main purpose of the primer is to hold the surface together so that it does not “crumble,” which means that the replacement product should have similar properties. It is necessary to keep in mind that no substitute will be better or cheaper than primer, so it is better to still find an opportunity to purchase this material.
As a substitute, you can use diluted PVA glue or water-dispersion paint, and the only factory substitute can be considered putty, which is laid on the plaster without a primer.
But such a solution will naturally cost more, although if you need to save time, then this is the best option.
You might also be interested in a video about how to properly prime walls
Source