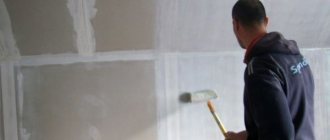
Without plastering, it is impossible to obtain perfectly smooth walls - this is an integral stage in finishing the premises. Plaster not only allows you to level the surface, but also significantly improves its strength characteristics.
With its help, various defects are removed from the walls, and when applying a thick layer, their heat and sound insulation improves. But it is worth noting that if you start finishing before the composition dries, numerous cracks will appear, which will lead to premature destruction of the finishing layer. So how long does it take for plaster to dry?
How long does it take for plaster to dry, depending on the type?
Some materials release moisture faster, while others release moisture more slowly. This means that to speed up the work you need to select the appropriate mixture. It is also important to control the layer; plaster that is too thick requires additional drying time.
Plaster
Each manufacturer indicates on the packaging how long it will take for the gypsum plaster to dry on the walls. It is necessary to maintain a stable temperature in the room. Because sudden changes lead to cracks. Dried plaster becomes noticeably lighter. Therefore, you can often see light and dark spots on the wall.
How long it takes for Rotband gypsum plaster to dry on walls depends on the conditions in the room. According to the instructions for the material, suitable drying conditions are as follows:
- humidity – maximum 60%;
- temperature – 20 degrees;
- applied layer – 15-20 mm.
Gypsum plaster under such conditions will dry completely in 5 days. When using this mixture, individual conditions are created at each construction site, so the time for complete removal of moisture from the coating will vary.
also states that its products will be ready for further processing in 7 days. The material sets in 40 minutes, so any imperfections must be corrected immediately. The maximum layer thickness for this mixture is 6 cm. It can be applied 1 or several times.
Gypsum plaster has a light and uniform structure
Cement
Let’s figure out how long it takes for cement plaster to dry on walls. This is the most popular material due to its affordable price, good performance properties and ease of application. High density and good moisture permeability increases the time for complete drying of the solution to 30 days, depending on the thickness of the layer. It is recommended to wait a week before laying the tiles to ensure there is no moisture. Clay-cement mixtures will take the same amount of time to dry.
The humidity level in the rooms should not be more than 70%. Suitable temperature is 18-20 degrees. It is not recommended to carry out repair work if the temperature outside is above 30 degrees. A solution applied to a wall in such weather will quickly lose moisture and crack.
On a note! It is also impossible to work at temperatures below +7 degrees, since the mixture will take too long to dry.
Limestone
This plaster will completely harden within 1 week. When lime is added to the cement mortar, the drying time is noticeably reduced. One small layer will harden within an hour.
The material has been used since ancient times to this day. Drying time depends on thickness, humidity level in the rooms and air temperature.
Acrylic
This plaster is considered quick-drying. However, time also depends on thickness, temperature and humidity. After applying the 1st layer, complete drying will occur within an hour. At high humidity levels this time increases to 3 hours.
Decorative
Let's figure out how long it will take for decorative plaster to dry. Acrylic paint can be used only a few weeks after application, and silicate paint can be applied after 3 days.
Bark beetle plaster is considered one of the most popular decorative coatings. Plus temperature no more than 30 degrees. Allows the mixture to dry for a maximum of 5 days. In this case, you need to protect the walls from direct sunlight and splashes. To do this, the surface is covered with polyethylene.
The Venetian style finish is smooth. The mixture is applied several times, but the thickness of each layer should not exceed 1 cm. To apply a new layer, you need to wait until the previous one has dried. Moisture is removed from the Venetian mixture in 6-12 hours. Only after 7 days will it completely harden.
Structural mixtures will be ready in 1 day, but complete drying takes about 9 days.
Textured relief finishing can be applied in a layer of up to 5 cm, so moisture comes out of it several times longer.
Important! Any mixture for decorative finishing is applied only to a primed base. After drying, the primer is reapplied.
The more textured the application, the longer it takes to dry.
Complete drying period
We have already said that gypsum plasters dry much faster than any other. In this category , Rotband plaster is very popular, which has very high quality characteristics . How long does it take for Rotband plaster to dry?
Plaster Rotband
You will be surprised, but complete drying of all layers of this material occurs within four days after application, so this is the most suitable option for those who want to carry out repairs more quickly.
At the same time, such plaster can only be used for interior work, because its performance characteristics are not enough for application outside the room, where cement plaster is most suitable.
If you want to know how long it takes cement plaster to dry on walls after applying the last layer, then the answer will be something like this - about four weeks. This period is counted precisely from the moment the last layer is applied, not taking into account the drying time between previous layers.
For more information about how long it takes for cement putty to dry, watch the video:
As for lime mortars, the average drying time after applying the last layer is about eight days .
Lime plaster
How long does it take for a façade to dry before applying putty?
Recently, facade plaster used for exterior finishing work has been very popular. Naturally, it all depends on the composition of the solution itself, because it can be either cement or lime.
In this case, answering the question of how long it takes for façade plaster to dry, we can say that it will be approximately the same as when finishing the interior.
Factors affecting drying speed
Various factors influence how long the plaster can dry before applying putty. The mixtures are applied manually and mechanically. Puttying begins only after the plaster solution has completely dried.
Let's figure out what affects the drying time:
- Components of the solution and its purpose. Mixtures with different compositions differ not only in consistency, but also in drying time. Gypsum hardens in the shortest possible time, the lime mixture takes longer to dry, and the cement-sand composition requires the longest period of time.
- The material with which the walls are covered. The concrete base does not absorb moisture from fresh plaster, so the mixture takes longer to harden. Brick, drywall or wood absorbs liquid. Therefore, the solution dries faster on them.
- A thick layer hardens longer, and a thin layer hardens faster.
- With a large volume of work in the rooms, the humidity level increases. Therefore, the walls take longer to dry.
- To hide large irregularities and create a single wide plane, the solution is applied and hardens several times.
- The temperature in the rooms affects the evaporation of liquid. To speed up the process, you need to open windows and doors and make sure the room is dry.
- The best conditions for external wall decoration are a temperature of at least +10 degrees and a humidity of 75%.
Note! The amount of water in the solution affects the speed of its hardening and the quality of the future finish.
Every 1 mm of layer adds 1 day of drying
Type of solution
An important factor influencing how long a plastered surface will take to dry is the type of mortar. The most common ones include the following:
Mortar
Lime mortars are characterized by high plasticity. The next layer can be applied after 6-7 hours, and the finished surface is strong and durable. Using a lime composition is an old but proven method. Its popularity in our time can be explained by its low price and ease of operation.
Gypsum plaster
Recently, gypsum plaster has become widespread, allowing you to save on heating costs by creating a good thermal insulation layer. A special feature of the gypsum mixture is the minimum time between application of layers, which ranges from 30 minutes to 2 hours. Gypsum plaster is completely dry five days after all layers have been applied.
Cement plaster
This type of wall plastering is the most popular due to its high performance and ease of application. Due to its density and moisture resistance, cement plaster will take longer to dry, approximately 2-4 days (depending on the base and layer thickness).
Clay-cement mixtures
Such solutions are especially often used for finishing fireplaces and stoves, because they are able to withstand relatively high temperatures. Drying rates and times are similar to those for cement plaster.
USEFUL INFORMATION: Choosing pipes: polypropylene or metal-plastic?
Influence of plaster layer thickness on drying time
The material of which the surface is made and the composition of the plaster mixture determines the maximum layer that can be applied at one time. The recommended thickness of the plaster is 2-3 cm. If you have to apply a larger layer, a reinforcing mesh is installed.
You can carry out subsequent work without waiting for the plaster to dry completely. It only needs to harden a little so that putty can be applied.
If you need to paint the walls without puttying, it is better to wait until it dries completely.
In order for a thick layer to dry faster, it is necessary to apply the plaster several times to the wall. This will allow moisture to leave the solution closer to the base faster.
In some places the layer thickness can reach 10 cm or more. The time for complete drying of plaster on any base is 1 mm in 1 day.
Manufacturers add special additives to the mixtures that promote accelerated moisture removal without surface deformation. It is not recommended to stay in the room all the time while the plaster solution is drying on the wall.
Types of base
How long does it take for plaster to dry on walls
Masters do not have a clear opinion about the drying period for plaster on different surfaces. Following generally accepted recommendations and observations, a 1 mm layer of solution hardens in one day. If the requirements for processing and applying the mixture are met, this period can be significantly reduced. Thus, a plastered wooden surface at an air temperature of up to 25 C and moderate humidity will dry in about 12 hours. The mortar layer for this example is 20 mm. How long does it take for plaster to dry on plasterboard walls? The dry and smooth surface of this material is an ideal base for plastering. The mixture, 2 mm thick, hardens after 8 hours.
The base is made of aerated concrete - a capricious material. With different humidity levels in the room, the drying time of the plaster lasts from 5 to 35 days.
| The basis | Layer of plaster (cm) | Complete hardening time |
| Tree | 0,9-2,00 | up to 4 days |
| Concrete | 0,5-1,00 | 2-6 days |
| Brick | 1,5-2,5 | up to 12 days |
| Expanded polystyrene | up to 4 | 1-3 days |
| Foam block | 1-1,5 | from 3 to 20 days |
| Gas block | 1,5-5 | up to 35 days |
Drying Features
There is a difference between the influence of the external environment on plaster outdoors and indoors. Situations often arise when streams of rain spoil the damp coating, and you have to redo it, spending additional time.
In room
The plaster in the apartment dries faster even in winter. It is enough to maintain the required temperature and humidity in the rooms. The gypsum will dry completely after 4 days, the solution with the addition of lime hardens in a week, the cement-sand mixture will take 30 days. It must be remembered that cement mortar shrinks.
On the street
Plastering work is recommended to be carried out in summer, at low humidity and a temperature of at least 15 degrees. If you do not pay attention to this rule, the drying speed will noticeably decrease and the strength of the finish will deteriorate.
The main stages of drying plaster
Construction professionals conventionally divide the drying process of plaster into 4 stages, each of which is checked in a certain way:
- The state of dust on the surface. If the dust on the plastered wall is easily removed (it can be blown off or wiped off without damage), then the first stage of drying has been successfully completed;
- Stickiness of plaster. The next way to check the degree of drying is the “manual” method. Lightly touch the surface of the material with your palm; if it does not stick to the plaster, then the second stage of drying is complete;
- Complete drying. This phase is determined by pressing the finishing layer with a fingernail. By the clarity of the imprint, you can judge how dry the plaster has already been;
- Polymerization. The final stage of polymerization is determined by the degree of hardening of the coating over the entire thickness of the layer. If your actions do not leave any mechanical damage, then the plaster has completely dried.
How to speed up drying of a wall
It is not advisable to use equipment to dry the walls, as this will increase the chance of cracks forming. But sometimes situations arise when drying needs to be accelerated.
To do this, follow the following rules:
- plastering work is organized in the warm season;
- it is necessary to ensure access of dry heat to the rooms;
- turn on the electric gun or heater, but so that cracks do not appear on the fresh plaster;
- good air exchange is ensured;
- gypsum-based plaster dries faster, so it is better to use it;
- You can turn on hair dryers, bright lamps or use hardeners.
When adding components that accelerate setting to the solution, you must follow the instructions so that the surface does not deform. If you follow all the tips, you can reduce the time for complete drying to 1-2 days. Gypsum plaster makes it possible to get the desired result faster.
Forced intensive ventilation in winter is unacceptable
Builders use the following drying methods:
- Natural. Does not require the use of technology. For natural drying, it is enough to provide good ventilation. However, in the summer, high temperatures increase the chance of premature drying and cracking of the finish. In rainy weather or winter, a draft will only do harm. Therefore, for this drying method you need to choose optimal weather conditions.
- Heat guns. They run on electricity or gasoline. Installed when the temperature is less than 10 degrees. For normal drying of the solution, it is enough to maintain the temperature within 20 degrees. during the day. The air flow should not be directed towards the wall. This will speed up the removal of moisture and cause cracking.
- Fan heater or blower heater. Differs from a heat gun with less power. However, it can maintain the room temperature at the desired level.
- Air Dryer. The best solution for quickly removing moisture from walls. The device collects moisture in a special container and does not dry out the air. You can configure it to the desired operating mode, taking into account the area of the room. This technique speeds up drying of walls by 50%. At the same time, the plaster does not deteriorate, the surface remains perfectly smooth.
Fact! A 1 cm layer of plaster using a dryer will be ready for further finishing in 12 hours.
Is it possible to speed up the drying process?
Many experts say that accelerating the drying time of plaster artificially is extremely undesirable, because this can lead to the formation of cracks. But there are several recommendations that will allow the plaster to dry faster, without negative consequences for it:
- plastering of walls is best done in the warm season , when above-zero temperatures prevail;
- You can install an electric heater inside the room, but you should not turn it on “full”;
- It is necessary to ensure good ventilation in the room. But here it is important to avoid drafts. In addition, if the weather is rainy outside, then you shouldn’t open the windows at all;
- we have already said that gypsum plaster dries faster , so if you want quick results, you should use formulations containing this material.
Complete drying of a plastered wall can be determined by eye. If it has a uniform grayish color, without moisture spots, then this will be a signal that you can proceed to further work.
If you want the plaster to stick to the wall normally, then you must follow the following recommendations:
- in the room must be completely eliminated
- the plaster should dry naturally, without the use of additional equipment. The only exception is heaters, but these should be used very carefully;
- it is necessary to protect the treated surface from exposure to sunlight;
- at the end of the work, when the plaster is almost dry, you should open the window so that the remaining moisture disappears faster.
In principle, there should not be any special problems with plastering walls; it is only important to follow a few simple recommendations. Perhaps the most important rule for interior finishing with plaster is that you need to wait until the surface is completely dry, after which you can start gluing it with wallpaper, tiles or other materials.
Drying time depending on the type of substrate
Any plaster transfers some of the moisture to the base. Since the walls of houses are made of different materials, their rate of absorption of liquid differs. This directly affects the drying time of finishing materials. The quality of adhesion also affects liquid absorption. Therefore, when plastering walls made of different materials, you need to know the rules for preparing the base.
Brick wall preparation:
- all dirt and dust are removed from the surface, outdated plaster is removed if necessary;
- the seams between the bricks are deepened in advance so that adhesion with the finishing material improves;
- if the thickness of the plaster is 1 cm or more, a reinforcing mesh is used to hold the materials on the wall and prevent cracking;
- A primer is applied to improve adhesion to the surface.
However, the primer can protect the brick from moisture. This material prevents mold. Therefore, such a coating increases the drying time of the plaster mixture. The solution will only release liquid into the environment; the brick will not be able to absorb moisture.
Monolithic concrete walls require careful preparation. Fresh mortar does not adhere well to such a base; cement-sand plaster always falls off before it has time to harden.
Particular attention should be paid to the correct implementation of preparatory activities
Preparing concrete for plastering:
- notches are cut on the surface so that they can later be filled with solution;
- A special composition with antibacterial properties is used as a primer.
Only after this is the plaster applied.
Preparation of cellular concrete:
- the wall is sanded until roughness appears;
- then all dust is removed from the surface;
- To strengthen the finish, a reinforcing mesh is attached to the wall.
Before finishing, the wall is moistened with water. This extra moisture increases drying speed but improves adhesion.
Chipboard or wood absorbs moisture and becomes deformed, so such a base must be primed.
It is better to apply only decorative plaster to drywall. An ordinary cement-sand mixture has a bad effect on the surface structure.
Preparing plasterboard walls:
- Serpyanka is applied to the joints, then they are covered with a special mixture for reinforcement;
- then the treated seams are rubbed down so that no sagging or other irregularities remain on them;
- First, a deep penetration primer is applied to prevent liquid from being absorbed into the material.
Then the surface is lightly plastered with a spatula; serious defects are eliminated by applying several layers of 3 to 5 mm.
Monolithic
A smooth concrete monolithic wall does not absorb moisture. The liquid can only evaporate from the plaster, so drying takes a very long time. Plaster with a thickness of 0.5 to 1 cm dries at 20 degrees. and air humidity 65-75% for at least 2-6 days. If the temperature drops to 10 degrees, you cannot use guns or other heaters. It is recommended to dry the walls twice as long.
Wooden
Natural material allows air to pass through well and retains heat in the house. Plaster mortar applied in a 20 mm layer will harden within 14 hours under suitable conditions:
- temperature within 15-25 degrees;
- humidity no more than 75%.
Note! If you apply a thicker layer, the drying time will only increase by 50%.
Wooden walls allow more air to pass through and dry faster
Brick walls
They have good moisture transfer properties. Therefore, the brick is pre-primed. At the same time, the drying time of the plaster mixture increases. A 20-25 cm layer of solution will completely harden in 10 days at +20 degrees.
If the walls are crooked, the mortar is applied several times. First, a layer of 1.5-2.5 cm is made, then a single plane is created. However, you will have to wait 10 days to apply the next layer.
Plasterboard walls
This material is rarely plastered, but to lay the tiles you will have to create a strong base. The required layer thickness is 1 cm; a reinforcing mesh must be attached to the drywall. After plastering, you will have to wait until the solution dries completely. Drying will take 1-2 days at +20 degrees.
Expanded clay blocks
This building material is porous and has a non-uniform surface. Such properties contribute to rapid drying. However, it is necessary to take into account the initial moisture content of the expanded clay blocks, which can affect the drying time of the plaster. You can apply from 1.5 to 5 cm to the blocks. This coating will dry from 3 to 7 days at 20 degrees and 70% humidity. To prevent cracks from occurring due to high humidity levels, you need to spray the plaster with water.
Aerated concrete blocks
Moisture leaves the solution faster due to the porous surface of the base. A layer of up to 5 cm can be applied to aerated concrete. The minimum layer will be ready for subsequent finishing in 24 hours. But preparing the base for laying tiles extends the waiting time by another 2 days. A layer of 5 cm dries in about 5 days at 20 degrees.
Factors influencing drying
Main factors:
- Microclimate in premises or weather conditions during outdoor work.
- The material to which the coating is applied.
- Layer thickness.
Influence of base materials on drying time:
- With a concrete base, the primary layer dries within 24 hours. In this case, the concrete surface must be dry and clean and the humidity level should not exceed 70%. When applying plaster to a smooth surface, it is necessary to use special solutions that help increase the adhesion strength of the plaster layer to concrete (for example, “Beton-kontakt” or its analogues). Read also: How long does it take concrete to dry?
- With a wooden base, the coating dries in no more than 12 hours (wood has good moisture permeability). Wooden walls or other wood-based materials must first be cleaned of fungus, mold and areas of rot (if any). Then coat the surface with an antiseptic and hydrophobic compound. The plaster cement mixture does not adhere well to smooth wood bases, so it is necessary to use shingles for upholstery.
- On a brick base, the coating dries in 24 hours, subject to the conditions of humidity and cleanliness of the base surface.
- On dry aerated concrete blocks, the first layer hardens in 6 hours, and on a wet base it takes much longer.
When plastering, it should be taken into account that too dry surfaces cause cracking and peeling of the coating. The most important criterion that influences the hardening time is the thickness of the coating layer. Usually, unevenness and defects in walls can be corrected with a layer thickness of at least 10 mm.
IMPORTANT! You need to use a level and beacons when working. Beacons should be mounted on plaster mortar. It is applied along the pre-designated vertical line in small lumps. The lighthouse is pressed in using a rule and a level. The level is used to control the vertical position. Using a level and beacons will significantly reduce the labor intensity of the work and create a perfectly level base for finishing.
Plaster drying in a short period of time is not a sign of its high quality. At a humidity level of no more than 75%, optimal drying of a layer with a thickness of 20-40 mm is 10-14 days, and a layer with a thickness of 50-80 mm is 14-20 days.
Ceiling and walls - is there a difference in drying?
Moisture comes out of the ceiling faster because air circulation works better in this place. Heat always rises, is saturated with moisture and sinks below. Moist air is constantly replaced by warmer and drier air.
However, in practice, walls and ceilings absorb moisture differently because their base material is different. Therefore, plaster on ceilings takes longer to dry than on a brick wall.
Ceilings are plastered less and less these days. They are being replaced by tension or suspended structures.
Under equal conditions, the ceiling will dry faster
Manufacturing jobs
If you did the previous steps and everything worked out well and without errors, great. You have reached the culmination of all actions, and it is very pleasant. There is just one nuance here. The gypsum mixture solution hardens in 7–10 minutes. That is, after this time it starts to get up, and you won’t be able to work with it anymore, you’ll have to throw it away.
If the layer of applied plaster is +/- 2 cm, then in such a period of time just a bucket of mortar is perfectly produced. Do you know what I mean? If you prepare, for example, a 20-liter bucket of mixture yourself, and then start throwing it around and pulling it, you will waste half of that bucket.
If you dilute 10 liters at a time, then yes, everything is fine, but the mixture is not prepared so quickly. That is, you will have to spend time cooking, spreading and stretching. It takes a very, very long time to do this alone. So you need an assistant.
While he prepares the solution, you spread the bucket and pull it out. As soon as you finished, he had already prepared a new bucket and gave it to you. With this “conveyor” you will get all the work done quite quickly. The only condition is the need to have a good hammer drill, because the work will be almost continuous.
Now let's look at how these simple actions are done, which will mark the end of all work.
- As usual, it all starts with the primer. Of course, you will say that we have already primed, why do it again? That’s right, if you previously carried out wet cleaning and eliminated dust from the room, then you only need to prime the “pyramids” with beacons. That's all for the primer.
- Let's move on to mixing the solution. There is no point in doing it according to the instructions; you won’t be able to keep the proportions anyway. Therefore, we pour about 5–7 cm of water into the bucket and begin to pour the mixture. We pour it so that the water barely comes through it, along the edges, but does not completely disappear. Let's start stirring. Adjust the consistency as you go by adding a little water or mixture. As a result, you should end up with a thick mass, the trowel of which, thrown over the wall, does not slide, but holds stably and firmly.
- Is the mixture ready? Great. We take a trowel, spatula or construction scoop, scoop it up and throw it onto the wall with a sharp movement, so that a characteristic sound of cotton appears, a “slap”, so to speak. In this way we cover the entire space between the two beacons. And remember, only between two.
- We take the rule of the appropriate size, apply it from below and begin to pull the entire mixture upward. We remove what remains on it with a spatula and throw it into the remaining cavities.
- Those that still remain are covered with a new solution, and we repeat the entire procedure with stretching.
- If you see that there are areas that seem impossible to stretch out, that is, they are constantly heaving, then this means air. You should pierce it with a cross and move this hole a little, release the air and repeat the stretching.
- We continue to produce the solution until the work is completed.
- After a few hours, we tear out the beacons from the walls using pliers.
- We wait for it to dry, sand and putty.
Well, friends, as you can see, plastering work is not that difficult. The most important thing is the proper placement of beacons. And the only thing I can advise you to make this unpleasant task easier is to purchase a laser level or borrow one from someone.
Finally, it would be useful to remind you that our story is not an instruction manual or educational literature. This is just an introductory article aimed at expanding knowledge on the topic. Therefore, look, if you are not confident in your abilities, then entrust the work to professionals. After all, only you are responsible for your actions. And in conclusion, I recommend that you watch a video on the topic. Good luck!
How to check if plaster is dry
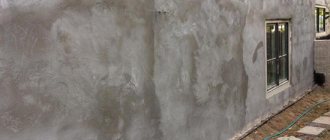
Plasterers recommend taking a closer look at the shade of the surface and its uniformity. Plastered walls become lighter as they dry. However, foundations with serious unevenness have damp spots at the very bottom. If the surface does not dry in a timely manner, it means that the application conditions were not followed correctly. Often the evaporation of moisture is difficult due to the layer being too thick.
A special device helps determine how long it will take the plaster to dry on the wall. If it shows 8-9%, then you can do putty or other type of finishing.
Dry plaster does not leave marks on the palm if you run your hand over it. If the wall is still damp, moisture can be felt after such manipulation.
If you drill a hole in the wall, the wet solution will stick to the drill. Dry plaster always crumbles well.
The plaster applied before finishing must always be dry. If you do not wait until it dries completely, the facing material will not adhere to the surface. The paint will crack to release moisture, the ceramic tiles will change position or begin to fall off. If deadlines are pressing and you need to complete the repair as quickly as possible, you need to consider which material dries faster and what will affect the acceleration of moisture evaporation from the plaster.
Was this information useful to you? Share in the comments!
Plastering walls with cement-sand mortar
Plastering using cement creates a smooth and reliable coating with increased strength and wear resistance. The coating is resistant to temperature changes and moisture resistant. Read also: what is the difference between plaster and putty.
Mixtures with cement and sand for plastering walls are deservedly popular. The leadership among solutions with their use is associated with high quality and ease of use. Solutions with a universal composition are characterized by high strength, moisture resistance and a long service life. They can be used for work of any complexity.
Cement is made from gypsum, which is the base, and clinker. Clinker is produced by firing a mixture of limestone and special clay. Various additives during production can increase elasticity, adhesion to various materials, and withstand heavy loads.
Many people prepare their own mixtures for plaster mortar, but it is more advisable to use a purchased dry mixture. All proportions of components will be strictly observed, and special additives will increase the performance characteristics of the coating. The cost of the finished mixture is somewhat more expensive, but the quality of the work performed will be much higher.
How long it takes for plaster to dry on walls indoors using cement is of interest to many. The drying time is affected by the thickness of the applied layer and the surface of the base. The material is highly dense and impermeable to moisture and usually takes 28 days to dry.
How to plaster external walls - technology for finishing work
When preparing to plaster the facade, carefully study the technology requirements. It provides for the following stages of work:
- Choice of finishing material.
- Preparation of the external surface of the walls.
- Installation of guide elements.
- Applying the plaster mixture.
- Clean finishing.
Each stage has its own characteristics. Let's look at them in more detail.
Choosing material for plastering external walls
- performance properties;
- shelf life of the plaster composition;
- manufacturer rating;
- reviews from professional builders;
- adhesion of the finishing mixture.
Also analyze the adhesive properties of the material and the need for additional preparation for application.
Preparing walls for applying finishing mortar
You should take responsibility for preparing the surface of façade walls. Their condition affects the quality of plastering activities.
Prepare the surface of the walls according to the following algorithm:
- Remove old plaster with a chisel and hammer or use a hammer drill.
- Clean the surface from finishing residues, sweep away dust, and remove grease and oil stains.
- Cut the brick joints by widening and deepening the joint areas.
- Remove the bumps, seal existing cracks and level out elevation differences with putty.
- Apply a deep penetration primer to the wall surface and wait until it dries.
- Attach a plaster mesh with square cells with a side of 20-25 mm to the outer surface.
Fixation of special beacons
Beacons are made of metal profiles and are securely fixed to the walls at certain intervals. Guides allow you to smooth out the plaster mixture using a rule, ensuring a flat finish.
To install beacons, you must perform a number of operations:
- Check the verticality of the walls by level or plumb.
- Cut the beacons to the height of the walls.
- Step back 20-30 cm from the edge and draw a vertical line.
- Apply a thick solution to the marking at intervals of 0.5-0.6 m.
- Place the guide along the markings and press into the solution.
- Adjust the verticality of the beacons according to the level.
- Remove any solution that has floated onto the surface of the guides.
- Fill the cavities under the beacon after the solution has set.
When determining the distance between guides, consider the length of the rule. The optimal interval between beacons is 1.5-1.8 m.
Applying external plaster to the facade of a house - finishing rules
Plastering technology involves sequential application of the material:
- First, a liquefied solution is poured. You should add polyvinyl acetate glue to it and add water until it reaches a creamy consistency.
- After drying, the main layer of plaster is applied. It is necessary to evenly distribute the finishing composition over the surface, ensuring a layer thickness of no more than 50 mm.
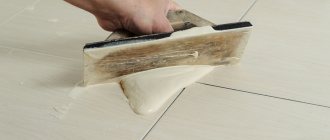
- Grouting completes the finishing activities. A wooden or foam trowel is used to smooth out uneven surfaces and seal cracks. Grouting should be done in a circular motion.
Start finishing after 5 days, when the plaster is completely dry.
How to properly plaster external surfaces - protecting problem areas
- thoroughness of sealing defects on the surface;
- uniform filling of cavities with plaster mortar;
- flatness of the finishing composition after grouting.
Grouting must be done correctly. First, make spiral-shaped leveling movements and, starting with a small diameter, gradually move to a larger circle.
Exterior wall finishing - finishing operations
At the final stage of work, finishing is carried out. Possible options:
- creating decorative spray;
- painting the surface in the required color;
- formation of a rough surface.