Often, car owners’ concern for their four-wheeled pet is expressed even more strongly than for themselves. And the construction of a well-equipped and high-quality insulated garage is one of the manifestations of such careful care. The issue of insulating the garage from the inside comes first here. And since the main source of leakage of such precious heat is the garage door leaf, the need arises to decide how to properly insulate garage doors.
It doesn’t matter what the garage space is used for: parking a car, storing things, a workshop, or anything else. The important thing is that it always remains warm. In this publication, we will tell you exactly how to keep the garage warm by insulating its doors. And let's start, perhaps, with a description of the main mistakes that many car enthusiasts make when they acquire a garage and equip it.
Common mistakes
- Ventilation. Having a good ventilation system is necessary in any room, and the garage is no exception. Alas, not everyone realizes this. Many people think like this: ventilation holes are an extra source of heat leaving the garage. In essence, this is true. However, their presence is necessary to avoid excess dampness in this room.
- Metal gate design. Many owners of a car home (which, in essence, is a garage), when setting up a garage, install gate leaves of a solid structure, without a gate. Meanwhile, the gate will allow you to achieve less heat loss during the cold season. Whether it’s the case, when we want to get into the garage in winter, we open a small gate for a few seconds, or we have to open a large gate to do this. The difference, as you can see, is obvious. True, these doors will also have to be insulated. Their insulation is carried out similarly to the insulation of the door leaf.
- Insulation. When deciding how to insulate a garage door, many owners, in an effort to save on insulation, use porous insulation. An example of such an insulating material is mineral wool. The reason why such materials should not be used is the following: most often garage doors are an iron frame with the same door leaf. Moreover, the thickness of the latter does not exceed a few millimeters. Because of this, during the cold season, condensation may form on the inner surface of the canvas due to temperature differences. Porous insulation absorbs this condensate quite well, as a result of which they lose their main qualities.
Exterior decoration of the garage
The garage has wintered well - it's time to take it seriously.
Read here how the foundation was made, as well as about the walls and roof.
I still have some of the materials from last year. These are tiles for the garage floor, paving slabs for the blind area and several rolls of hydroglass insulation so that moisture does not get into the garage. Before laying the tiles inside, you will have to weld it together (you need to buy a welding torch!). There were enough rolls (I counted) to cover the garage across and lengthwise. This made me happy! It was also necessary to plaster the walls of the garage outside and inside. The only difficulty was with the second floor (it, as I already wrote, was assembled from foam blocks) - poor adhesion. What is more profitable: buying a ready-made mixture or mixing it yourself? Cement has not risen in price since last year, ZIL sand cost 3,500 rubles. I decided that it would be more profitable to do it myself.
It was necessary to plaster about 200 m², and I couldn’t find a price less than 30 rubles/m². 10-mm beacons were also purchased for 25 rubles/piece,
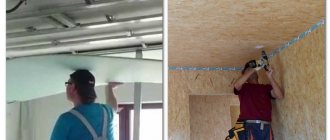
It was decided to start plastering work inside in the residential area. The bars were fixed horizontally at intervals of approximately 1 m (for subsequent lining with clapboard). A mesh was attached between the bars. The bars were used as guides during plastering work.
Beacons were used on the ground floor. The lighthouses were exhibited on Rotbant, which saved on a layer of plaster. From the outside, everything was displayed on lighthouses, naturally, taking into account foam concrete and sand concrete blocks. To ensure the passage of moisture from melted snow, I (remembering this advice once) bought “liquid glass”
It took 8 sheets. First, isospan (vapor barrier) 55 microns was stapled to the beams, then OSB was hemmed. This will allow you to subsequently lay insulation blocks between the beams.
Then a non-standard metal door was ordered for an opening of 800x1890 mm in such a design that the passage remained maximum.
The door cost me 25,000 rubles. with delivery and installation.
Not far from my dacha (Fryazino) there is a company that makes its own plastic windows from the REHAU profile that is so advertised. There I ordered a window (900x1050 mm) along with a low tide. It cost me only 12,500 rubles. (with delivery and installation). The outside of the window is covered with brown laminate (to match the roof and door), and the inside is covered with white plastic. There is also a brown mosquito net.
I also ordered manual lifting sectional doors nearby (saved approximately 12,000-15,000 rubles), so the gate cost me 52,000 rubles. with delivery and installation. Sandwich panels of sections have a thickness of 40 mm. The first and last panels have rubber seals. Seals are also laid along the vertical walls of the gate.
Materials
Now let's look at the question of how to insulate garage doors to ensure maximum thermal insulation. Actually, 4 materials are most often used for these purposes:
- Mineral wool;
- Extruded foam;
- Polyurethane foam;
- Styrofoam.
Each of these 4 materials has its own advantages and disadvantages. As for mineral wool, as we already wrote above, it is not particularly suitable for insulating garage doors. Polyurethane foam is quite expensive, and not everyone wants to spend a lot of money on a garage. Extruded foam, although it costs less than polyurethane foam, is still not affordable for everyone.
Based on this, we will consider insulating garage doors using polystyrene foam. Although he is quite afraid of fire, taking into account the ratio of the area of the garage door to the area of the rest of the surface of the garage, insulating the garage door with polystyrene foam is quite acceptable.
Garage finishing
All types of finishing can be divided according to the cost and labor intensity of the process. The main options include:
- painting;
- plastering;
- siding;
- block house;
- finishing with corrugated board;
- stone finishing;
- finishing with facade bricks.
Each of these types of finishes deserves attention and separate consideration.
Painting
Painting as a type of exterior decoration for walls is one of the simplest and most affordable. It suits a large number of finishing requirements. In terms of costs, this option is ideal, since it will require the least amount of costs. The materials are available for sale at any hardware store, which is good news. You don't need any special tools for the job, so anyone can handle the task. The fastest option is to apply paint not with a brush or roller, but with a spray gun. With a careful approach, the layer will turn out uniform and without drips. For each type of material from which the walls are made, you can choose your own type of paint.
Preparing for insulation
To insulate a garage door with polystyrene foam, you must complete the following steps:
Before you insulate your garage door, its inside surface must be cleaned. This is done using an iron brush. Particularly large and deep areas of metal corrosion on garage doors can be cleaned using a brush attachment on a drill. After which you need to seal and, if necessary, weld all the cracks and holes on the surface of the gate.
To prevent further formation of corrosion foci, it is necessary to treat the cleaned surface of the gate with some kind of anti-corrosion agent or antiseptic. For these purposes, a completely suitable remedy is heated drying oil, or even better, bitumen mastic. It is applied with a regular wide paint brush in two layers, perpendicular to one another.
After the anti-corrosion coating has dried, it is necessary to create a paving sheathing. It will become the basis for laying and securing insulation from foam boards. This lathing is made from bars with a cross section of 40x40 or 50x50 millimeters. The cross-section of the sheathing bars depends on the width of the end corners of the gate.
It is desirable that the bars are solid. The dimensions of the sheathing cells should be selected in such a way that they best match the dimensions of the foam boards. The sheathing must be attached to the end corners of the gate. To do this, holes of 4 mm diameter are pre-drilled in the latter. The pitch between such holes should not exceed 200-250 millimeters. Next, the sheathing bars are fastened through the drilled holes with self-tapping screws.
If the design of the garage door is such that it does not imply the possibility of removing the gate from the hinges, a slight problem may arise with attaching the sheathing bar to the lower end corner due to the inability to reach there with a screwdriver or even an ordinary screwdriver. In this case, the block must be secured exclusively at the end. By the way, it is also better to treat the bars with some kind of antiseptic before fixing them. If the gate or wicket has locks, bolts or a ventilation hole, the sheathing must bypass these elements.
When the inner surface of the door is cleaned, treated with anti-corrosion and antiseptic agents, and the lathing is securely fastened, you can begin insulating the garage door with your own hands using polystyrene foam. What does it mean to insulate a garage door with foam? This means covering as much of the gate's surface area as possible with foam. If the dimensions of the sheathing cells do not correspond to the dimensions of the foam plastic slabs, then these same slabs must be adjusted to the size of the cells by cutting them with a penknife or an ordinary, but thoroughly sharpened knife along a ruler.
The slabs are cut into pieces based on the width of the cell plus 2-3 millimeters. The same goes for heights. This is done so that the foam boards fit into the cells of the sheathing as tightly as possible.
This installation system will help solve two problems:
- The foam insulation will be securely clamped between the sheathing bars, which will eliminate the possibility of it sagging and falling out. In this case, no additional seal for the garage door will be needed.
- Thanks to such a dense laying of the foam, the insulating effect increases significantly. In this case, no additional sealing is required either.
Requirements for external finishing
Before deciding on the material that will be used for finishing, it is necessary to consider the requirements that apply to it. Among them we can highlight;
- reliability;
- resistance to mechanical stress;
- resistance to precipitation;
- biological stability;
- pleasant appearance;
- practicality;
- ease of cleaning;
- moderate expenses.
A garage is definitely a structure that should enhance the yard if it is located in one. But in terms of requirements for wall decoration, reliability and practicality come first. Reliability means long service life. In this case, the color of the finish should not change under the influence of sunlight or other factors. Garage wall decoration should be practical. This means that it should not be too dirty, and if it has to get dirty, it should be no more difficult to clean than to get it dirty. The ideal solution would be to clean with soapy water and a washcloth. It is desirable that the finish be resistant to various mechanical influences. But this is not the main requirement, since the decoration for the garage is chosen in accordance with the way the house is decorated.
But if we are talking about a garage, which is located separately or somewhere in a cooperative, then resistance to mechanical stress comes first, since there is no way to constantly monitor who is handling the walls in the garage and how. The finish should not suffer from precipitation. This applies to both deformation and simply appearance. Water resistance, resistance to temperature changes and strong winds - that’s what this means. Wall decoration should be pleasing to the eye, because that is why it is installed. If we are talking about a garage, which does not need to be combined with a house, then the cost of finishing should be reasonable.
Comfort and convenience of the garage
Along with its direct purpose, the garage is used as a workshop. During the cold season, even a short stay in the garage will require a lot of willpower. It is convenient to do small repairs in the garage yourself, and good ventilation is essential here. Basement smell, mildew and mold on the walls are not all the troubles. Staying in such a room is life-threatening. Often, openings for supply ventilation are left in the gates. On the topic of how to insulate a garage door, there is a useful video at the end of our article.
Important! Ventilation openings must be left in the thickness of the insulation.
Purchasing a finished product
If you decide to install a factory-made structure in your garage, then the problems of how to insulate the gate will end there. New lift-and-turn and sectional devices already have a layer of polyurethane foam. Even roller shutter types of gates are sometimes insulated, but the possibility of using them for a garage is very doubtful. Narrow aluminum slats will not provide reliable protection against burglary, and their high thermal conductivity makes them unsuitable for our climate. When ordering a gate, a swing system with a wicket would be a good option. It will significantly reduce the percentage of heat loss.
How does the cladding affect the properties of the gate?
Swing gates, even at an enterprise, can perform not only direct tasks - regulating traffic, protecting the territory from unauthorized persons, but also being a very important part of the exterior. All this leads to the fact that there are an incredibly large number of gate variations.
Some organizations are satisfied with the cheapest options, as long as they perform primitive functions. This approach may be correct only if the budget is severely limited, or if there is no need to install more protection. After all, the cheapest materials are the most fragile, which means that it will not be able to cope with a car going to ram, and perhaps it will not even be able to hold back a crowd of people.
If we approach the gate as part of the design, then they play an important role due to their dimensions. When some part occupies a large percentage of the area of a building that wants to look advanced and fashionable to investors and clients, then the sections must be properly designed.
If it is important for the room behind the doors to maintain certain temperatures, then you need to use sandwich panels. This is exactly what they do in warehouses, workshops and heated boxes. And to achieve a better effect, additional thermal insulation means are installed.
Before ordering, you should always ask the manager what options are available in addition to those already selected, as it may turn out that there is a better solution to the issue.
We choose the insulation wisely
The assortment is quite wide. Among the things that can be used to insulate garage doors, the most in demand are:
- Various types of foam plastics;
- Fiber insulation (glass wool, stone wool, basalt wool).
To make a choice, you need to take into account all the pros and cons of the materials.
Styrofoam
Polystyrene foam is a very economical option. The class of foamed polymers is quite diverse. They have a gas-filled structure and vary in type of polymer. Let's consider the types of foam plastics:
- Polystyrene is the most used. They are designated PSB or PSB-S. Extruded polystyrene foam (EPS) - has low hygroscopicity and good fire resistance. Insulating your garage door yourself is one of the best options.
- Polyvinyl chloride or PVC panels. Similar in characteristics to EPSS. International PVC marking. High fire resistance.
- Urea-formaldehyde foam (UFP). Used for voids and cavities. The liquid composition of CFP does not increase in volume after complete drying. Can also be used as garage insulation.
- Polyurethane foam (PPU). It is produced in the form of elastic foam rubber and polyurethane foam. Hard polyurethane foam adheres well to any surface. Good hydro and heat insulator. Fire resistant. Such insulation will be light in weight and suitable for any finish. Polyurethane foam will do an excellent job of thermal insulation of garage doors. A sprayer is used to apply the foam.
Fibrous materials
Among fibrous insulation materials, we immediately exclude stone wool and slag wool. The first is extremely harmful to humans; slag wool will oxidize the metal surface. Glass wool is dangerous to work with, but of all, it has average hygroscopicity. It is this quality that makes the use of cotton wool unsuitable for garages. The accumulation of condensate in a layer of material will reduce its thermal insulation properties. With a vapor barrier film, you can use basalt insulation.
The process of insulating a garage from the inside
To insulate your garage door you will need the following tools:
- Electric drill;
- Drills for wood and metal;
- Hacksaw or jigsaw for wood;
- Metal brush or drill attachment (brush);
- Screwdriver.
Also don’t forget about a tape measure, a paint brush, a hammer, a corner and a ruler, a sharp knife, a core, sandpaper and clamps. A clamp is a means for clamping parts. They will be convenient for attracting slats to the gate frame.
The order of work will depend on the insulation and type of construction.
Preparing the sashes
Cleaning
Remove old paint, rust and all dirt. This can be done conveniently and quickly using a power tool with an attachment.
Padding
The applied primer will protect the metal from corrosion. To work, take a wide paint brush. Anti-corrosion primer is applied in two layers. One across and the other along the surface.
Eliminating gaps between the frame and the canvas
Use a rubber seal. It will not interfere with the operation of the mechanism and will close unnecessary holes. Next, we will look at how to insulate garage doors from the inside.
Insulating a garage from the inside with construction foam
Another method of insulating garage doors with your own hands is polyurethane foam. Of the ways you can insulate garage doors with your own hands, this is the easiest way.
- Polyurethane foam in cylinders (consumption of 5 cylinders per 7m2).
- Spray the foam in an even layer (cut off excess material after drying with a sharp knife)
- Decorative finishing (the covering can be chipboard, lining or any other material).
The advantages of insulating garage doors with your own hands using foam are that the material penetrates even into small cracks. This will also strengthen the entire gate structure.
The safety of your premises and vehicle in proper condition depends on the quality of garage door insulation. Safety also depends on choosing a reliable garage lock.
Are you thinking about how to cover a garage door or what material to choose to fill the frame of an outdoor sliding model? You have come to the right page. In this article we will talk about popular options for finishing structures to insulate and increase attractiveness.
How to cover the outside of a garage door
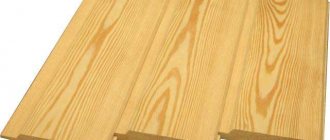
To sheathe the outside of the garage door, buy plywood, lining, siding or corrugated sheets. These materials are ideally suited for decorative and protective finishing.
Covering garage doors with plywood
Plywood is the most budget-friendly finishing material. The work will not take much time.
For sheathing you will need the following tools and materials:
- plywood sheets of selected thickness;
- drill with drills for metal and wood;
- nuts, washers and bolts;
- electric jigsaw or hacksaw;
- two wrenches of the required size.
Finishing takes place in 4 stages:
- Cut sheets of plywood to fit the dimensions of the sashes. When marking, keep in mind that you need to retreat 0.5 cm on each side. Allowances are necessary to ensure that the gate closes easily and tightly.
- Mark the sheets and sashes.
- Drill through holes in the required locations.
- Secure the sheets to the sashes using keys, bolts and nuts.
Note! For fixing, galvanized fasteners matched to the color of the plywood are best suited.
After completing the installation work, cover the sashes with protective compounds and/or paint. This will increase the moisture resistance of the coating.
Photo No. 1: garage doors lined with plywood
Covering garage doors with clapboard
Gates covered with clapboard look much more attractive, but such finishing involves more serious labor costs and will cost more.
Photo No. 2: garage doors covered with clapboard
During the work you will need:
- drill with drills for metal and wood;
- bolts, washers and nuts and keys;
- jigsaw;
- thin nails and a hammer.
The materials needed are lining and timber for the manufacture of guides.
To sheathe the outside of the gate, proceed according to the following scheme:
- Saw the timber into pieces of the required sizes (3-4 pieces for each sash).
- Mark the guides and sashes.
- Drill through holes in them. At the same time, do not forget that the bolt heads must be recessed.
- Attach the bars to the sashes.
- Cut the lining.
- Nail the strips to the guides with thin nails.
Important! With this option of decorative and protective finishing, you can additionally insulate the garage. To do this, before attaching the lining, place the material selected according to the thickness of the bars between the guides.
For finishing, colorless varnish is best, since paint will hide the natural texture of the wood.
Covering garage doors with siding
Siding is the most expensive finishing option. However, this material has a number of important advantages:
- Excellent technical characteristics. The panels are durable and resistant to precipitation and temperature changes. Gates covered with siding will retain a presentable appearance for decades.
- No finishing required. The material does not require painting or treatment with protective compounds.
- Easy to care for. The lining and plywood will have to be treated annually. The siding only needs to be washed periodically.
Photo No. 3: garage doors covered with siding
Garage door siding is covered using the same technology as in the case of lining. Additional insulation is possible.
Covering garage doors with corrugated sheets
This finishing option is also popular. Sheets of corrugated sheets are perfect for covering old metal gates.
Photo No. 4: garage doors covered with corrugated sheets
During the work you will need:
To sheathe the gate with corrugated sheets, proceed according to the following scheme:
- Take measurements.
- Cut out the sheets.
- Mark the material and sashes.
- Drill holes (the diameter should be less than the diameter of the screws).
- Screw the sheets to the sashes.
If you purchased painted corrugated board, no additional finishing is required.
Automation of swing gates.
Before installing gate automation , you should determine the necessary parameters, study the market, and only then proceed to purchase the device. With the right approach, you can get your hands on an automatic drive that will operate for several decades. But only the highest quality models can do this, which are used according to the instructions and specifications.
Automatic drives are divided into lever and worm drives . The first one is cheap and easy to install. The second is modern and expensive. During the installation of the worm drive, the gate loses about 30 cm of opening. Regardless of the type you choose, you need to pay attention only to manufacturers who have already proven themselves among buyers. Since the cost of repairing systems is high, it is better to spend once on a good product than to constantly repair a bad one.
To purchase the right drive, you need to choose a product with a power reserve of 30%, which is necessary for operation in strong winds. If the system does not operate at its maximum capacity, it will deteriorate more slowly. You also need to take into account the characteristics of the doors (weight, area) and weather conditions.
How to sheathe a gate from the inside
Do you want to sheathe the inside of your garage door to create the most favorable conditions for preserving and repairing your car? Polystyrene foam, extruded polystyrene foam and foil-foamed polyethylene are suitable for this.
It is worth noting that automatic sectional garage doors do not require sheathing, since the thermal conductivity of high-quality sandwich panels is comparable to the same characteristic of a 0.6 m thick brick wall. Below we will look at methods of insulating traditional metal swing structures.
Garage door interior lining with polystyrene foam
Polystyrene foam is most often used to insulate garage doors for three reasons:
- Low cost. This insulation is the cheapest.
- Light weight. The load on the hinges will practically not increase.
- Durability. The material does not deteriorate at high air humidity.
Laying foam plastic will not take much time and effort.
- Preparation. Thoroughly clean the internal surfaces of the metal doors to remove any old finish and rust. Paint the gate and apply a layer of bitumen mastic for waterproofing.
- Creating a sheathing. For this purpose, wooden blocks selected according to the thickness of the foam and cut to the width of the sashes are suitable. Secure the strips with nuts and bolts. Their caps should be located on the outside of the gate. The optimal step for fixing the guides is 30–50 cm.
Photo No. 5: covering the gate with foam plastic
- Installation of insulation. Cut the foam into panels of the desired size. For fixation, use polyurethane foam, which also has thermal insulation properties, or any suitable adhesive.
If you want to create an additional protective layer and give the gate a finished and attractive appearance, cover the gates with plastic panels or sheets of plywood.
Important! To do this, you will have to make sure that the bolts do not stick out from the guide bars.
Garage door interior lining with extruded polystyrene foam
Extruded polystyrene foam is more expensive than regular polystyrene foam, but compared to it it has three advantages.
- The material is better suited for maintaining a comfortable indoor temperature due to reduced thermal conductivity.
- If you buy extruded polystyrene foam foiled on one side, no additional waterproofing will be required.
- Due to its high strength and rigidity, the insulation can be attached directly to the sashes. There is no need to do the sheathing.
Photo No. 6: gates lined with extruded polystyrene foam on the inside
To attach the panels to the sashes, use high-quality imported mounting adhesive. German quick-hardening liquid nails are perfect. Don't forget to seal the joints with foam.
Note! Plywood, lining, plastic panels and even wallpaper are suitable for finishing. In the latter case, you will have to putty the surfaces.
Internal lining of garage doors using foil-foamed polyethylene foam
Photo No. 7: foil-foamed polyethylene foam
The thermal insulation properties of this coating are lower than those of the materials described above. Foiled polyethylene foam is used as the main insulation only in regions with mild climates. For fixation, high-quality quick-hardening liquid nails are usually used.
Photo No. 8: garage doors lined on the inside with foil-foamed polyethylene foam
The main advantage of this coating is its excellent waterproofing. The flexible material fits even into the most difficult to reach places without any problems. Thanks to these qualities, foil-foamed polyethylene is excellent for creating combined cladding.
The ideal option is 3 layers.
- Foiled polyethylene foam.
- Extruded polystyrene foam.
- Foiled polyethylene foam.
This way you will get maximum thermal and waterproofing properties of the cladding.
Why you shouldn't use mineral wool
Many garage owners use mineral wool for insulation, but this should not be done (even if you use foil).
Photo No. 9: foiled mineral wool
This “airy” material perfectly absorbs water, which makes it unsuitable for use in garages where humidity levels significantly exceed normal values. At first, mineral wool will provide the necessary thermal insulation, but over years of service it will lose its properties and become unusable. The sheathing will have to be redone.
Why sheathe garage doors?
Metal gates must be insulated.
The main task of the garage is to prevent freezing or freezing, and not to create an optimal thermal regime. According to SNiP, it is recommended to maintain the temperature in heated parking lots no more than +5 C, and in unheated ones - no lower than 0 C. To maintain this regime, in the northern regions the room will still have to be equipped with a heater. In the middle and southern regions you can get by with insulation.
Insulation performs the following functions:
- Thermal insulation – iron gates are the main cause of heat loss. Insulating gates and walls allows you to maintain temperatures above zero without heating.
- Overheating protection – too high an indoor temperature is also not good for the car. High-quality thermal insulation in the garage ensures acceptable temperature conditions.
- The absence of drafts is important for those cases when a workshop is set up in the garage.
- Protection from humidity - according to statistics, being in a damp, warm room is more destructive for a car than being outside in winter. Installation of insulation implies reliable waterproofing, which eliminates the accumulation of moisture and the appearance of condensation inside.
If the garage does not have windows or vents, insulation is combined with good ventilation, forced if necessary.
How to properly sheathe a garage door with your own hands
To properly sheathe your garage door with your own hands from the outside and inside, carefully study the following professional advice:
Important! If your garage has very thin walls, you can create a good microclimate only if you line the entire structure.
Methods of additional insulation
There are two good ways to provide additional insulation.
Curtains
Awning manufacturers market a wide range of single- and multi-layer tarpaulin and PVC canopies. Products equipped with eyelets are excellent for additional insulation of garages.
Photo No. 10: garage insulated with a tarpaulin canopy
To hang a curtain:
- weld the steel cornice;
- fix it above the doorway;
- tie a rigid metal wire on one side;
- thread the free end through the eyelets of the canopy;
- raise the curtain and complete the installation.
Sealers for cracks
To seal the side and top cracks, buy a roll of sealant at the construction market. Silicone self-adhesive tape is best. It is characterized by reduced thermal conductivity. Installation will take place as quickly as possible and will not require the use of adhesives.
Image #1: Self-adhesive silicone tape
To seal the bottom cracks, buy special wax-coated nylon brushes. Their installation will not complicate the operation of the gate.
Photo #11: Wax coated nylon brush
How to cover sliding gates
Do you want to cover your sliding gates yourself? There are two options:
- Buy the necessary tools, materials and components and do everything yourself (which is extremely difficult).
- Order the production and installation of sliding gates without filling the frame at a competitive price in Moscow.
Next, we will talk about how to cover the gates on the street and show interesting design solutions.
Note! Filling the frame yourself will not require significant time investment. Sheathing involves only fastening selected materials using screws or welding.
Covering sliding gates with corrugated sheets
Corrugated sheeting is the most popular material for cladding sliding gates. Galvanized steel sheets treated with high-quality paints combine:
- low cost;
- wide choice of color and design solutions;
- light weight;
- resistance to adverse weather conditions and temperature changes;
- long service life.
Photo No. 12: sliding gates covered with corrugated sheets
Covering sliding gates with European picket fences
Covering sliding gates with European picket fences will help maintain the area's airflow. The structure will not experience serious wind loads.
Photo No. 13: sliding gates lined with Euro picket fence
Covering sliding gates with wood
Wood is an excellent choice for those who want to combine modern technology and traditional natural materials. This option for filling the frame has one important drawback. Gates lined with wood will have to be regularly treated with protective compounds.
Photo No. 14: sliding gates covered with wood
Covering sliding gates with sandwich panels
Covering sliding gates with sandwich panels is popular when decorating street and sectional garage structures in the same style. To fill the frame you will need a welding machine. The result is a rigid structure. Sandwich panel fabric does not make loud sounds when moving.
Photo No. 15: sliding gates covered with sandwich panels
What should you pay attention to when lining gates and wickets?
Fencing is usually installed along the perimeter of suburban areas. On the street side it consists of a fence, a gate and a gate for vehicle entry.
If there are certain requirements for the type of fence placed along the border with neighbors, it can be made blank on the front side of the site (in accordance with SP 53.13330*2011). Accordingly, the owners’ possibilities for constructing this structure are significantly expanded.
Blank fence for a suburban area
An important part of the fence is a gate with a wicket. These movable fencing elements are mounted on a durable frame secured to support posts. The choice of options for cladding such structures is much narrower than for finishing the entire fence.
The main part of the fence can be made of concrete, brick, stone, wood, metal and other types of materials. Gates can have different designs depending on the opening method.
In suburban areas, three types are installed, each with their own advantages and disadvantages:
- Hinged doors, the doors of which open inward or outward . For operation, free space is required, which can be difficult to provide if the gate is wide.
Swing design
- Sliding, sliding sideways parallel to the fence.
Electric sliding gates
- Folding, the operation of which does not require a significant area for opening.
Accordion type gate design
The control method for the entrance structure can be manual or automated. Most often, the electric drive is installed on sliding models.
The gate can be mounted separately from the gate. To optimize the use of the surrounding area, many install it inside the entrance structure.
The disadvantage of such a device is the limitation in size, since the gate will be located inside the gate frame. Having a threshold sometimes causes inconvenience.
Wicket inside the gate
You can decorate the fence and gate only from the front (street) side, which is most often practiced, or from both.
The mobility of entrance and entry structures affects the choice of material for their finishing. It should allow you to operate the fencing elements without any problems.
What else is required from the facing material:
- Resistance to environmental influences and mechanical damage.
- Long service life, easy maintenance.
- Aesthetic appearance, since the fence is an important design element of the entire private property, compatibility with the installed fence.
- Decent protective characteristics: both from unauthorized entry into the territory and from excess dust from the road and prying eyes.
- Easy installation.


