The window sill is not subject to special loads during operation. Most often it contains flowerpots with indoor plants. However, the window sill board is located on the border of warm and cold zones, and condensation may form here. Dripping from the glass, drops of moisture not only destroy the old paint, but also penetrate deep into the wood, destroying it. The paint is cracking, and the owners are faced with the question of repairing the window sill.
A wooden window sill cannot be painted over an existing damaged layer of paint. The surface must be prepared. The process consists of several stages.
Painting wooden window sills and slopes
The process of painting wooden windows is not limited to the restoration of window frames; it is also necessary to put the window sills and slopes in proper order. You can bring them back to life on your own, after first understanding the painting technology. First you need to prepare the surface of the window sills.
Restoration of a wooden window sill
The process of preparatory work before painting a wooden window sill can be divided into several important stages:
1. Cleaning the surface of old paint using a blowtorch, a hair dryer or a regular iron for ironing clothes - you need to heat the old coating and carefully remove it with a spatula. You can also use special chemical removers, which are sold at any building materials store.
2. Having examined the window sill for cracks, holes and chips, it is necessary to get rid of all these defects using a special building compound for window sills and slopes. You can prepare it yourself by mixing dry finishing putty with a primer coating that penetrates deeply into wooden surfaces. The resulting mixture has high strength, which will ensure the durability of wooden window sills and slopes.
3. Leveling the surface of the window sill should be carried out using the resulting construction mixture, applying it in a layer several millimeters thick. The width of the spatula should be equal to the width of the window sill. After drying, the surface is thoroughly rubbed and sanded, and then you can proceed to direct painting.
Method of applying paint to a prepared surface
The peculiarity of painting a wooden window sill is that neither a brush nor a roller is needed here, since they can leave unsightly stains. Paint should be applied using the pouring method. First, spread a thick oilcloth under the window sill, since smudges cannot be avoided. Then the paint is poured evenly onto the windowsill directly from the can. You need to pour gradually, slowly.
Then the poured mass is leveled with a spatula and left until completely dry. All excess paint will flow onto the pre-spread cellophane. Cured drips and drops of paint that may form at the bottom of the window sill should be cleaned with sandpaper and then polished with felt material.
Painting slopes
In addition to the restoration of the window sill, the window slopes also require separate repairs. Once the preparatory putty work is completed, you can proceed to the actual painting process. For these purposes, the most suitable are acrylic or water-based paints, which are applied in two or three layers using a roller or soft brush. Each layer must dry thoroughly before applying the next.
Painting wooden window sills and slopes, at first glance, may seem like a simple matter. However, sometimes you want to turn a window into a real work of art. In this case, it is imperative to seek help from professionals. Not only exterior painting of cottages is available to you. Our company’s specialists will come up with a unique painting design that matches the interior of your room, and will carry out all the necessary work efficiently, ensuring not only the beautiful appearance of the wooden window, but also its long service life.
Stage one - remove the primary paint
This procedure can occur in several ways. Before painting, it is necessary to ensure good ventilation in the room, since these “paths” are harmful to the body.
- We use a special wash that slightly softens the first paintwork and makes it more plastic. Then you can easily remove it with a spatula. But keep in mind that this method is suitable for a wood concrete base!
- We use a hair dryer, which makes the initial coating soft, after which it can be easily removed. It is worth remembering that this method is suitable for wood surfaces.
- We clean the old paint with coarse sandpaper, then use medium-grain and then fine sanding paper. This way you can “kill two birds with one stone” - remove the original paintwork and level the base.
Paint for wooden windows: what is it and what is it needed for?
This is a paint and varnish material created specifically for application to wooden surfaces, including structural elements of window systems. The key features of any paint are:
- Creating a protective film on the surface of wood. After hardening, the coloring composition turns into a dense film that is resistant to environmental influences. Thus, painting helps protect the wood and extend the life of the windows.
- Painting the structure in the required shade. Very often, owners of wooden windows need to paint them one color or another. This may be required to give the window structure a certain style, for example, so that it can harmonize with the exterior of the building or the interior decor of the room. Modern paints allow you to paint windows in a wide variety of colors and shades.
Coating a plastic window sill with varnish:
In order to protect and preserve the quality of the paint layer on a plastic window sill for as long as possible, it must be varnished. The water-based varnish PaliPlast RP 022 Varnish gives an excellent effect of depth of coverage and high gloss. Its use creates an additional layer, which is decorative and makes the color of the surface more saturated.
A particularly beautiful surface is provided by acrylic varnishes mixed with metallized decorative pastes, which give a “metallic”, “mother of pearl” or “gold” effect to the varnish coating of the window sill.
Today, painting a plastic window sill will not be a problem even for a beginner. It is enough just to purchase paint, cleaner, impregnation and varnish on a common basis and from one manufacturer, as well as follow the correct sequence of work. After which the window sill will delight you for many years with its bright colors, beautiful appearance, fits seamlessly into the interior and saves money.
Inspection and surface treatment
After removing the paint, you will find uneven spots and imperfections. It is quite possible that the tree is infected with a fungus and the surface is susceptible to rotting. The affected areas must be removed and the layers of healthy wood must be reached. If necessary, treat the wooden canvas with an impregnation that prevents the development of fungus and mold. Dry.
Leveling the surface
After thermal or chemical removal of paint, the working surface has a lot of defects and irregularities. You need to get rid of them using a sanding machine. In those places where the machine does not reach, the surface is processed manually with sandpaper. After sanding is completed, all dust must be removed, the easiest way to do this is with a vacuum cleaner.
putty
If there are few defects and unevenness, they are each separately sealed with putty, then sanded. If there are many defects, it is easier to cover the entire surface with wood putty. Using a rubber spatula, rub the solution into the wood. To level large areas, you will need a large metal spatula. It is necessary to dry the window sill if the cracks were deep, this will take approximately two days. After drying, the window sill is sanded again.
Preparing an old wooden window for painting with your own hands
To simply and quickly restore an old wooden window and give it a beautiful appearance, you first need to prepare it.
Let's consider a wooden window in an apartment, where it is installed in a load-bearing opening made of concrete and → our slopes are concrete (read the link about the types of slopes and how to install them).
Concrete slopes painted with oil paint
Cleaning old paint
If you are painting a window in a living space, first protect the floors with film.
We clean off the old paint that is peeling off. Again, you can clean it in different ways; you can simply use a metal spatula or scraper (even a knife) to peel off those parts that are peeling off. A metal brush is also used. Or you can → remove all the old paint using various methods: chemical, thermal or electromechanical (read the link about methods for removing old paints) to the base and paint the wooden window again. First, let's consider the simplest option, when the old paint from a wooden window is not completely removed, but only flaking particles are removed, and then we will seal the differences with wood putty.
Using a metal spatula, scraper or even a knife, remove those parts of the paint that are easily removed. In those places where there is almost no paint, we will go over it with a metal brush.
In places where the paint on the window is loose, a metal brush will do.
Another point - old wooden windows consist of two sashes that need to be opened, the paint inside must be removed, and painted accordingly. The sashes can be attached in two ways:
- on latches
- and on screws.
- There may be others, but I don't know about them.
The photo below shows an option with a latch on the end of the window, which opens by simply lifting the latch lock upward.
Open the two doors by simply lifting the latch
The second option is with screws that can be unscrewed with a screwdriver. The main thing, when unscrewing the screws, is to align the two doors exactly relative to each other (because they can dangle a little), otherwise the screws will not come out.
Screws on old wooden windows that need to be unscrewed to open the two sashes
We opened our sashes and cleaned the window of the old paint, which came off easily. What's next? Next, the surface needs to be dust free. It’s easier to do this with a vacuum cleaner and then wiping with a still damp cloth, or even better with a solvent (white spirit, for example).
Removing old, peeling paint from a concrete window sill
We repair chips, cracks, and differences
Having dusted and degreased the surface (with a solvent), we begin restoring our old wooden window using wood putty. All chips, cracks and places of peeling paint must be repaired with putty. This also applies to concrete surfaces - window sills, slopes; wood putty is also perfect for them.
Wood putty
It’s better to use white putty, but light colors will also work; everything will be hidden during painting anyway. It is better to have two spatulas: one larger, the other smaller - 10-12 cm and 3-4 cm wide.
Two spatulas: one larger, one smaller
Using a small spatula, take a little putty (as much as is required for sealing, with a reserve) and apply it to the damaged area, smooth it flush with the surface, help with a larger spatula (if the surface is smooth). You can also use a “tool” such as a finger; it’s convenient to seal cracks in the corners with your finger.
It is possible and necessary to seal it with a small margin, because after drying the putty shrinks a little (just a little), and in general it won’t be possible to seal it perfectly flush with a spatula anyway, since the putty has its own grain and consistency, and it turns out that with a spatula you will get everything flush you also listen more than you need to. Apply the putty a little more, maybe half a millimeter. In addition, further, after drying, we will simply sand the putty areas “to the desired condition.”
The photo below shows where chips, cracks, etc. are repaired. We fix everything that can be fixed.
Next, you need to wait until the putty dries well and simply sand the putty with fine sandpaper (40-60 grit), leveling it with the surface. Next, we will dust the surface with a damp cloth, and if necessary, repeat the puttying procedure, if somewhere else it is needed and our window is almost ready for painting.
Why almost? Because next you need to use masking tape to protect the glass from paint. If this is not done, the glass will be smeared with paint during painting and will have to be removed from it later. This is also possible, but not recommended. If you do not protect the glass with masking tape, you will have to remove the paint from them using the same metal spatula (scrape off the paint), or chemically. solvents.
Paint selection
Before starting restoration, it is important to consider various paint options and understand how to paint a plastic window sill and surfaces made of natural materials.
For natural materials it is better to use the following types of paints:
- Alkyd enamel. It is characterized by durability, elasticity, water resistance, dries quickly, does not lose its color, does not turn yellow.
- Acrylic. The paint is odorless, easy to apply, dries quickly, is “breathable” (that is, allows air to pass through), strong, durable.
For a PVC window sill it is better to choose the following paint:
- Aerosol for car plastic. Applies evenly and can be used in several layers. It is characterized by durability, strength, and has a rich range of colors, so you can easily choose the right option.
- Polyurethane or alkyd-urethane. They are resistant to damage (do not wear out or scratch), tolerate temperature changes well, can withstand heavy loads, and come in a variety of colors.
Preparatory work
Before painting the window sill with water-based, acrylic or other paint, it needs to be prepared. To do this, carry out the following manipulations:
- remove indoor plants and other objects from the windowsill;
- wash the surface of the plastic with a cloth soaked in soapy water;
- remove static tension from the base;
- treat the window sill with an adhesive-based impregnation, which will improve adhesion to the paint layer;
- eliminate scratches or other defects using putty (before applying the composition, the damage is cleaned with sandpaper and treated with a degreaser).
Each applied layer of putty or primer must dry.
If there is no damage, it is enough to wipe the base from dust and treat it with sandpaper to improve adhesion. For degreasing, use a universal solvent or special compounds for plastic. The window is covered with polyethylene, which is secured with tape.
Water-based acrylic paints
This is a fairly popular paint for wooden windows. It has high technical characteristics, the price of the material makes it affordable for buyers. The main substance is acrylic resin diluted with plain water. The paint is odorless, well suited for wood products, and does not emit harmful substances.
Positive properties include the cost-effectiveness of paint, the ability to dry quickly, and the ability to form a plastic coating, due to which the paint layer is not damaged by temperature changes. If you use colors, you can get any desired shade. The paint does not fade in the sun and does not lose color saturation. The material is not afraid of low temperatures, moisture, and is suitable for use both outdoors and indoors.
acrylic water-dispersion enamel for windows
Paint for window frames may contain other additives that enhance its characteristics, for example, various antiseptics to combat fungi and mold. When certain components are added, the material can become a serious fire hazard.
If the window includes metal elements, you cannot use paint designed for wood. For them, you should choose a similar one, but designed specifically for metal structures. For example, high-quality fire-retardant paints include Polistil.
Colors for acrylic paint
No. 4 – Dulux Ultra Resist paint
This German product has gained great popularity thanks to its ultra-modern production technology, which creates the “lotus effect”. Dulux Ultra Resist paint contains waxes, which give the painted surface water- and dirt-repellent properties.
Dulux Ultra Resist paint is available in three main versions - for the living room, for the children's room and for the kitchen and bathroom. Practice shows that it is better to paint a window sill with paint marked “For kitchen and bathroom.” Its technical characteristics are as follows:
- consumption when painting wooden surfaces – 1 liter per 15 m2;
- drying speed – 4-6 hours;
- time to achieve wash resistance is 1 month.
According to the last parameter, this paint is somewhat inferior to the above. However, it has an important advantage: according to the technical documentation, it can be washed using abrasive agents. In addition, the “lotus effect” prevents painted surfaces from becoming dirty too quickly.
The active fungicidal additive included in Dulux Ultra Resist paint prevents mold from developing on the wood of the window sill. The product is available in seven basic shades, which can be additionally tinted.
Installation steps
All information on how to install a wooden window sill can be combined into several stages. Let's list them:
- At the preparation stage, it is necessary to make rectangular recesses in the wall on both sides, into which the side parts of the product will then be inserted. Their height and depth will be 50 mm. If there are uneven surfaces on which the window sill will be installed, or chips in the wall, then they need to be leveled. After cleaning the dust, the installation site itself and the recesses in the wall must be treated with a primer.
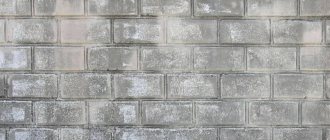
How to renew a concrete window sill?
There are 2 ways to repair a concrete window sill. First method:
- Remove old paint. If the product has not been painted, you should immediately proceed to the second step.
- Clean the surface.
- Prime the product.
- Putty.
- Prime the surface again.
- Apply paint.
Scheme of the second method of restoration of a concrete window sill:
- Remove old paint with an electric hair dryer, gas heating pad, etc. If the thickness of the old coating exceeds 3 mm, remove it with a construction hammer.
- Clean the surface.
- Prime.
- Place the formwork on the edge of the product and apply a mixture of equal parts of fine crushed stone and cement.
- After 48 hours, sand the surface.
- Paint or lay tiles.
The listed methods for restoring the covering of a window sill with your own hands are noticeably cheaper than replacing the latter. I suggest watching a video that presents the work experience of experienced people.
Opaque enamels
The classics of the genre are opaque enamels. They are more toxic than their competitors, they are fire hazardous, but they are cheap and easy to apply. The most important advantage of enamels, apart from the low price, is total moisture resistance. The enamel-coated frame will not change its shape under the influence of changes in humidity. It is best to use opaque enamels to paint frames on the outside, to best protect them from the harmful influences of the environment. But it must be remembered that enamels are applied only to a thoroughly dried surface in order to avoid the appearance of blisters and peeling.
Wood is a natural material. He knows of no worthy replacement in the design and construction industry. The color, smell, texture cannot be faked. Many customers choose just such window sills because of the rich and calm palette. The colors of oak, larch, and pine look good in decorating a room with any style.
Our raw materials undergo multi-stage processing:
- drying;
- polishing;
- coating with varnishes and paints if necessary.
The average thickness of the product is 40 cm. We list the main advantages:
- high thermal insulation of the window;
- decorativeness;
- more possibilities for room design;
- universal style;
- environmental friendliness and safety, including for people with allergies;
- compatibility with any other materials in the house - glass, plastic, stone, metal, leather, natural fabrics, such as cotton and linen;
- easy installation;
- affordable price.
Wood imitation – DANKE window sills
Danke or Danke window sills are made in Germany.
They are made of PVC and imitate in detail natural wood of any color and value, and even marble. Interestingly, the design has special stiffening ribs. They are not visible on the surface, but significantly increase service life, even if heavy loads are expected. The decors of these products embody modern trends and a tribute to traditions. In the collection you can choose from a range of colors everything for an office, study, cottage, apartment, bedroom, kitchen, etc.
German Danke wood window sills and their properties
Particular attention should be paid to Danke window sills because of their coating. It is not subject to mechanical abrasion and is scratch resistant. The glossy surface will be perfectly smooth. This effect is achieved using an acrylic laminate; it is applied to the PVC surface using hot glue. The result is a monolithic product, smooth as a mirror. Over time, it does not fade, does not lose color and brightness, and does not fade. The window will look like new throughout the entire period of use.
Working with plastic surfaces
Over time, even the highest quality window sill can lose its perfect white color. Under the influence of unfavorable factors, the base begins to turn yellow, spots and scratches of varying depths appear on it. During the restoration the following actions are performed:
- Cleaning the window sill from accumulated dirt and dust using a regular cleaning product and a sponge.
- Treat the surface with fine sandpaper, but do not press too hard, otherwise the plastic may be damaged.
- Application of primer for polyvinyl chloride. Deep scratches and chips can be filled with putty. The treated surface is sanded again and cleaned of dust.
- Protect the heating radiator using newspaper and masking tape.
Recommendations for caring for wooden window sills
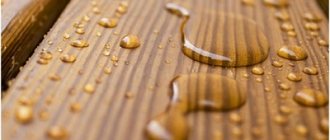
Wooden window sills cannot be cleaned with abrasive powders, which will damage not only the paint layer, but also the structure of the wood. It is best to use the same products that are used for furniture to care for these products. Dust from the surface of the window sills can be removed with barely a soft cloth. In this case, it is necessary to ensure that moisture does not accumulate on them. The appearance of abundant condensation flowing down may indicate problems with the window structure itself, so we recommend that you read the article that will help you learn how to deal with this phenomenon. If the issue of condensation is not resolved, it will constantly flow onto the windowsill and very quickly ruin it.
Ideal material for a window sill: 9 options
When it comes to interior window sills, the first materials that come to mind are wood and plastic. In fact, there are many more options, and each has its own advantages.
Tree
Version: solid and laminated wood.
Unlike solid wood, the latter can better withstand changes in temperature and humidity. There is no risk of it cracking or deforming.
Dimensions.
Length for pine trees is up to 3 m and up to 2.5 m for oak trees, thickness - from 2-3 to 6-8 cm.
Prices for wooden window sills.
Depends on the type of wood, size, additional processing. For example: 1000 rub. per sq. m - pine without impregnation and painting; 3500 rub. per sq. m - solid oak. For complex milling of edges - an additional payment of 200-400 rubles. per linear m.
Nuances: coverage is required.
Wooden window sills must be stained, laminated, varnished or waxed. This is especially important if you plan to store flower pots and other heavy items there.
Laminated boards
Execution: L-shaped.
The front part of such a window sill is usually bent down a few centimeters - a so-called drip edge is obtained.
Dimensions.
Width - 10-80 cm, thickness - 2.8-4.0 cm, length - up to 3 m.
Prices.
Depending on the drip line and the thickness of the slab - from 1800 rubles. per sq. m. (chipboard) and from 2200 rubles per sq. m. m (MDF). Edge finishing - from 145 rubles per lin. m. Sometimes cutting of slabs is additionally paid.
Nuances: protect from moisture.
To do this, the ends are covered with planks or covered with special tape. For wet rooms, slabs with increased moisture resistance are chosen.
Ceramic tile
Material: the same as on the walls.
Tiled window sills are usually made in the bathroom, so you need to choose tiles from the same collection as for the walls. You can use decor.
Quantity calculation.
Window sill area + 10-20% for trimming.
Price.
From 300 rub. per sq. m (Russian-made tiles).
Nuances: lay with a slope away from the window.
The joint with the frame is filled with silicone sealant. The window sill itself, if it protrudes from the wall, is made of concrete reinforced with mesh or steel rods.
A natural stone
Dimensions.
Thickness 2-3 cm, length up to 3 m.
Price.
A window sill 35 cm wide and 3 cm thick, depending on the type of stone, deposit, type of processing, and shape of the slab, will cost 2,700–7,700 rubles. per linear m. Plus end processing, hole drilling, drip milling, delivery, installation, sawing and other services - they are paid separately.
Nuances: impregnation for stone.
Without it, dark spots may appear on marble due to moisture, and it will not harm granite.
Fake diamond
Version: with polishing and drip.
This is exactly what most artificial stone window sills look like. They are usually made to order according to specified sizes.
Dimensions.
Width - up to 120 cm, thickness - 1.2 cm, length - any.
Price.
For Corian brand window sills - from 13,500 to 15,500 rubles. per sq. m depending on the amount of pigment and type of filler.
Nuances: seamless joints.
The window sill can be connected to a kitchen countertop made of the same material so that the connection appears seamless. If scratches appear, they can be easily sanded out.
Agglomeramor
Material: imitation marble.
Composition: 80-90% - ground marble, polyester resin, pigments. Another name is cast marble, since products from it are cast in molds. It is not afraid of impacts and chemicals, and is easily processed to give the desired shape.
Execution: glossy and matte.
Glossy ones scratch faster; matte ones may show water stains. Typically, such window sills are covered with an additional layer of resin on top.
Dimensions.
Each manufacturer has its own line of ready-made window sills, which are then customized to fit individual ones. Typically the width varies from 12 to 80 cm, thickness from 10 to 30 mm. Maximum length - 3.5 m.
Price.
With a thickness of 15 cm, the window sill will cost 9–11 thousand rubles. per sq. m depending on the type of marble flour, pigments, drip treatment.
Nuances: cost of adjustment.
It will cost either 10–50% of the cost of the workpiece, or you will have to pay for the entire workpiece, without deducting the cut parts.
Quartz stone
Material: imitation natural stone.
Composition: 95% - quartz chips, polyester resin. It can be painted or natural, imitating marble, onyx, limestone, etc. Does not absorb moisture, is not afraid of scratches and dirt. Durable and durable.
Execution: matte and glossy.
Typically, window sills from this material are made without drip edges, with rounded ends.
Dimensions.
Width - 12.5-60 cm, thickness - 1.2-3 cm, length - up to 3.5 m.
Price.
Depending on the size, color and manufacturer - 7,000-14,000 rubles. per sq. m. Plus installation work and delivery.
Nuances: the price is affected by the composition.
The price of a slab of artificial quartz from the same manufacturer will depend on the size of the stone chips and the pigments used.
Plastic
Material: hard PVC.
It is covered with a decorative film on top, which can imitate wood or stone. Such window sills are light in weight and moisture resistant.
Execution: lattice structure.
It is not visible from the outside. But due to it, the window sill does not sag and becomes stiffer.
Dimensions.
Width - 10-80 cm, thickness - 2 cm, length - up to 6 m.
Price.
From 450-500 rub. per sq. m.