How long does putty take to dry?
The modern construction market contains a wide range of different mixtures that differ in their binding components. Actually, the drying time of the finishing putty depends on this. Some compositions require more time, while others require very little.
Plaster
Let's consider how long it takes to dry gypsum putty for walls. During one working session, you can apply several layers of putty. Based on the thickness of the coating, the exact drying time varies between 3 and 6 hours. For this reason, the mixture is prepared in small portions so that it can be used within 5-6 minutes.
Mixtures based on gypsum, which acts as the main binder, are used to treat exclusively internal surfaces. Due to its hygroscopicity, the material is unsuitable for use in conditions with high humidity levels - the putty layer will begin to peel off.
This disadvantage is compensated by a number of significant advantages:
- high drying speed;
- excellent adhesion;
- affordable price.
On the one hand, the ability of the mixture to rapidly lose moisture allows you to reduce the duration of work. But on the other hand, this results in increased costs.
Gypsum-based wall putty is the most popular
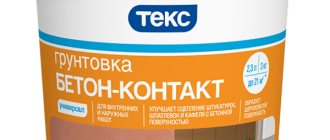
Cement-lime
Adding lime to the cement composition allows you to obtain high-quality and reliable building material at an affordable price. This coating is not afraid of high levels of humidity. The surface also withstands temperature fluctuations. This is a good solution if it is necessary to cover the surface with heavy materials - tiles, porcelain stoneware, stone.
The drying time for lime-cement putty is 24 hours, subject to the manufacturer's conditions (temperature, humidity). The prepared mixture does not harden in the container for a long time. This allows you to cook large portions and does not require prompt action.
Cement compositions have a number of advantages
Based on polymer components
Polymer mixtures are a universal composition. This type of putty can be used both indoors and for treating external surfaces. The finished coating is resistant to moisture and elastic. Polymer putty does not shrink, and the appearance of cracks is also excluded.
But due to the high cost, owners buy such mixtures for treating critical premises, where it is important to obtain a smooth and even surface. High plasticity allows you to apply thin layers - up to 1 mm, which is reflected in the drying time. Depending on the specific layer thickness, the coating dries within 3-4 hours. The remaining mixture will retain its properties for up to two weeks in a tightly closed container.
Acrylic
Acrylic putty is also versatile in terms of application - ideal for walls made of concrete or plasterboard. The characteristics of the coating are maintained in hot or cold weather and even under the influence of rain and snow. It is also a quick-drying building material, but the drying time largely depends on three main factors:
- coating thickness;
- temperature conditions;
- humidity level.
If the putty is applied in one layer, the room temperature is kept between 20-22 °C, and the humidity is from 4% to 65% - in such conditions, the acrylic putty dries within an hour. But in rainy weather, against the backdrop of an increase in humidity to 40-65%, the drying time of each layer increases to 3 hours.
An acrylic-based leveling solution is easy to work with and is universal in the area of application.
Latex
The latex composition is used for finishing vertical and horizontal surfaces indoors. The elasticity of the material allows you to apply a thin layer, the thickness of which does not exceed 1 mm. In addition, latex putty has no odor. The material dries within 24 hours.
A characteristic feature of this type of putty is the absence of odor
Alkyd
Alkyd compositions differ from many other analogues in a certain degree of toxicity. For this reason, the room must have good ventilation. This putty is applied before painting metal or wooden products.
Alkyd mixtures can be stored for a long time after use. When the container is tightly closed, the solution will retain its beneficial qualities for a month. Complete drying of the surface takes from 10 to 16 hours.
Alkyd putties are designed for long-term storage after use.
For plastic parts
Plastic products are used in many areas of human activity. There is a special type of putty for such surfaces. Often, mixtures are used by car painters to prepare plastic elements of vehicles for further painting. The drying time is not very long - from 20 to 30 minutes, which in itself is a worthy advantage.
A distinctive feature is the fast drying process, which lasts 20–30 minutes
For metal
For processing metal products, the putty contains special sawdust, sulfur, ammonium chloride and a number of other components. The mixtures have a high drying rate. In this case, the amount of thickener used to prepare the composition is taken into account.
It can take a whole day for the putty to dry completely. However, if it is necessary to process the parts with sandpaper or a grinding machine, the surface will be ready for work after a short period of time - from 30 minutes to 2 hours.
The drying speed of metal putty is the highest
On wood
There are several types of building mixtures suitable for treating wooden surfaces. But regardless of the type of putty, the drying time is always the same - 4 hours. During this time, the required level of strength is gained, after which the wood is ready for further procedures.
Note!
The instructions for wood putties state that the composition dries within 24 hours after application. Despite this, you can start working with the treated surface earlier.
There are different types of wood putties
Other types
Other putty options are also entering the construction market:
- Terracotta - this mixture is used to treat the walls of the bathroom, kitchen and other rooms.
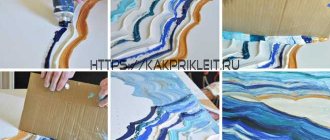
- Asphalt - the composition covers metal, glass, stone, and wooden surfaces. The putty is based on asphalt, plasticizers, and various fillers.
- Mixtures for masonry - are used for gluing slabs, facing natural stone, filling gaps, and also for repairing damage to the coating.
- Waterproof oil composition - the mixture is obtained by mixing slaked lime with fine-grained clay powder, linseed oil and other substances. The surface after such treatment resists precipitation.
- Putties for joining various types of materials include lead oxide and glycerin among the main components, which helps improve the quality of the composition.
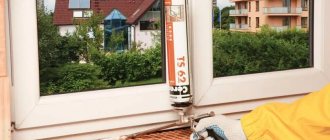
Putty is also used for glazing window frames. The material contains linen varnish, chalk and other components. The mixture is easily smoothed out, and during drying it does not crack or crumble.
Modern manufacturers have in their arsenal a wide range of starting components for putties
Is it worth artificially accelerating drying?
The vast majority of experts do not recommend doing this. When using various heating devices (hair dryers, heat guns, etc.), the surfaces of the walls dry unevenly; more precisely, only the surface layer dries out. Therefore, to speed up work, for example, with finishing putty, the method of accelerating drying is quite acceptable. When working with starting mixtures applied in a thick layer, forced drying can cause cracking, peeling of the top layer, crumbling or destruction of the entire restoration site.
Conditions that will help naturally speed up the drying process:
- optimal air temperature,
- high-quality ventilation in the room,
- normal humidity.
To speed up the repair at least a little, modern quick-drying putty is often used. There are options for such mixtures for surfaces made of concrete, metal, wood, as well as universal compositions, which, as a rule, are inferior in quality to both starting and finishing mixtures, while being significantly more expensive than both the former and the latter.
Excellent results in terms of drying time for latex putties. They are quite expensive, but the price/quality ratio is optimal. Such compositions are elastic, adhere well to the walls, one layer dries for about an hour at +20-25° C. Another advantage of this material is its readiness. Latex putty is produced immediately ready for use and does not harden for a long time.
Factors affecting the drying time of putty
The functionality of a building mixture is based on changes in its state and consistency. The dry composition is diluted with water to the desired condition, and then applied to the surface. The moisture gradually evaporates, and the applied composition acquires strength and hardness. How long the putty dries on the ceiling or walls depends on various factors.
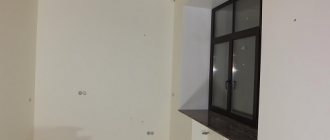
Putty is the final stage of wall finishing before wallpapering or painting.
Environment
The drying time of the putty mixture is directly influenced by external conditions. For the material to harden, a temperature range between +18 °C and +20 °C is required. The humidity level should not exceed 65%. In addition, drafts should not be allowed in the room.
If these conditions are not met, not only the drying time of the putty changes, but also the quality of the coating, and not for the better. Due to the lower temperature, the entire technological process is disrupted. The quality of the putty also decreases.
Indoor humidity
Moisture directly affects the quality of leveling. Ideally, air humidity for a favorable hardening process of putty should be no more than 50%. If you increase the limit to 75–80%, the treated surface will dry much longer.
Air permeability
Good ventilation in the room helps to increase the speed of work without any negative consequences. The main thing is to avoid drafts. The specific drying time of the putty is influenced by the thickness of the layer, the characteristics of the base and the characteristics of the composition.
The room should be ventilated, but drafts should be avoided
Putty layer thickness
A competent technological process involves applying the mixture to the surface in several thin layers. Each new coating is applied only after the previous one has completely dried. The thicker and larger the layers, the longer the drying process will be.
Surface
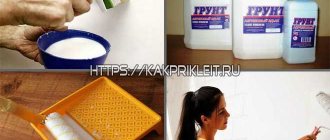
Before work begins, the walls must be prepared for further processing. The surface must be smooth, dry and durable, no dust, grease stains, or old paint. If there are porous areas and other defects, a sealing primer is applied (before plaster and putty). Finally, brush the surface with a hard-bristled brush to remove any protruding particles.
The porosity of the wall promotes increased moisture absorption, which causes the putty to harden and crack faster. Pre-treatment with a primer avoids this problem.
Attention!
It is not recommended to lay putty on a fresh plaster layer. With a thickness of 1.5-2 mm, the coating will be ready in a day at optimal temperature and good ventilation.
A standard coat will dry within a week, based on its thickness. However, the longer you let the plaster dry, the stronger the surface will be - it’s better not to rush here. The coating will gain maximum strength after 26–28 days.
Before work, the base must be carefully prepared
What determines the drying speed?
The drying speed of any material is directly dependent on temperature and air humidity.
The peculiarity of obtaining mixtures for leveling surfaces is the need to dilute the dry ingredients with water. When strength is gained, the water evaporates, and the treated surface acquires the necessary characteristics. High temperature and dry air speed up this process, while low temperature and high humidity slow it down.
In construction, there are standards under which the process of strength gain occurs in an optimal mode:
- the temperature must be positive, from 5 to 25oC;
- air humidity from 50 to 75%;
- coating thickness;
- features of the base material.
Let's talk about the last two points in more detail.
At negative temperatures, the process of strength gain practically stops and special additives must be used to restore it. Too high a temperature leads to premature and uneven drying of the solution, which reduces the strength of the coating.
A layer 3-4 mm thick will take longer to dry than a layer 2-3 mm thick, and therefore it is customary to apply several thin layers, ultimately forming a durable and smooth surface.
On a porous surface, the process of putty gaining strength is faster than on a denser base, but rapid absorption of moisture can also lead to uneven hardening. In this case, it is important to properly treat the surface with a primer before starting work.
Acceleration of drying of starting and finishing putty
Professional finishers, as well as manufacturers of building mixtures, do not recommend using anything to reduce the polymerization reaction time. Hardening of the coating should occur naturally according to the characteristics of the technological process.
The surest way is to provide suitable conditions for work:
- Firstly, maintain optimal temperature conditions - from 5 to 26 degrees above zero.
- Secondly, avoid sudden temperature fluctuations.
- Thirdly, you need good ventilation, but avoid drafts.
- Fourthly, only dry, sunny weather is suitable for work.
The type of building mixture also plays a major role. For example, it is optimal to choose latex-based putty. Aqueous solutions harden faster - up to 72 hours. Materials with linseed oil take a long time to dry. However, it takes several weeks for the thin layer to gain strength. Window putty dries in approximately 14 days.
Some finishers use hair dryers (at low speed) to speed up drying of the coating. However, experts recommend refraining from this technique, since under the influence of a hair dryer the surface dries unevenly and often only the top layer. As a result, cracks appear on the walls, and sometimes the putty crumbles.
Manufacturers do not recommend accelerating the polymerization reaction
Required working conditions
If you do not take the application and drying of the putty seriously, then all your work will go to waste.
Poorly dried pieces of the mixture may fall off the wall along with the wallpaper. Irregularities may appear that will spoil the appearance of the wall or ceiling, and the applied paint will clearly not be pleasing to the eye. When working with ceramic tiles in the bathroom, careful filling of irregularities and bumps is necessary, otherwise the finish will quickly deteriorate. In order for the putty drying process to proceed as quickly as possible, but at the same time efficiently, special conditions in the room are required. Therefore, it is recommended to do repairs in the warm season. Thus, the applied layers of the mixture will dry and harden evenly, will not deform, and will adhere well to the wall surface. Among the optimal conditions are:
- Good temperature conditions . Ideally, puttying should be done indoors at a temperature from plus 5 to plus 25 degrees Celsius. If the room is too hot, the mixtures will dry too quickly, which will affect the quality of the work. In the cold, the hardening of the putty not only slows down, but the process itself is disrupted. The applied composition may simply fall off.
- No drafts, but good ventilation. Walls and ceilings will gradually release moisture, which should quickly leave the room.
- Protection from direct sunlight. Unfortunately, the sun can ruin the quality of the work. Therefore, after applying the putty, it is recommended to cover the wall surface with a protective film.
- Humidity in the room. The best option is a 50 percent moisture concentration in the air. If it is larger, then the putty will dry more slowly.
- Thickness of the applied layer . Everything is simple here: the thicker the layer, the slower it dries. Some builders recommend applying the composition to the wall in several layers. They will harden faster, but the work will take a long time.
- Quality of plaster. If it is old, then you can immediately apply the mixture to its surface. In other cases, you should wait until it dries. If there are too large cracks or depressions on the wall, then it is better to plaster the wall first and only then apply the composition.
- Type of putty . As a rule, the packaging already contains the necessary information that you need to familiarize yourself with.
How to tell if putty is dry
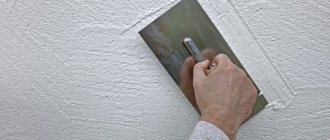
Before proceeding to covering the surface with finishing materials, you should check whether the putty has dried or not. First of all, you should refer to the instructions of the manufacturers of building mixtures. In addition, you can rely on external signs. It is enough to touch the treated surface with your fingers to determine the stickiness of the material. The complete drying of the putty is indicated by the absence of marks or damage to the finish.
Note!
If the wall or ceiling has the same shade, the putty has dried evenly. The presence of dark spots indicates that some areas have not yet dried and therefore you need to wait.
When and why it is used
But first, let's do a little technical education. Many owners, even having started repairs, have very little idea of why putty is needed at all, in which cases its use is justified, and in which it is not.
.
You may have a reasonable question: what then is plaster? This is where the main catch lies: both putty and plaster, in fact, perform the same function - they help to achieve a perfectly flat surface before applying decorative finishing material to it.
- plaster corrects rough unevenness on the wall and other obvious flaws; putty is used after plastering and successfully completes what was started, correcting smaller defects that are often not visible even at a quick glance.
Quick-drying all-purpose putties
A classic technique that allows you to speed up repairs is to use quick-drying compounds. In this case, there is no aggressive effect - the putty dries by itself. This is due to the characteristics of the material. Often, owners give preference to these mixtures before gluing wallpaper.
This option is appropriate when it is important to meet deadlines and there is no way to wait for the putty to dry. Therefore, special quick-drying mixtures for leveling surfaces are widespread in the construction market. However, it is worth considering that in this case you have to sacrifice the quality of the coating. However, the mixture adheres perfectly to any base and fills all the unevenness and defects.
Quick-drying all-purpose putties are a good solution for rooms where there is a constant high level of humidity (bathroom, kitchen, shower). The drying time of the composition is indicated on the packaging and depends on the thickness of the layer. The thin coating will be ready for further procedure after 10 minutes. If it is necessary to lay a thicker layer, you will have to wait at least 2 hours.
Another advantage of solutions lies in adjusting the degree of viscosity. To obtain the desired consistency, add water in the required amount.
The classic way to speed up repairs is to use quick-drying mixtures
Preparation of putty
The puttying process begins with the preparation of putty. In order for the composition to have all the necessary qualities, it is necessary to adhere to the manufacturer’s recommendations regarding the proportions of the dry mixture and water. Each manufacturer's cooking methods and proportions may vary, so you need to carefully look at the instructions, which are located on the back of the package.
In addition to the dry mixture itself, you will need a number of tools to carry out the process:
- container for mixing the solution. The optimal capacity of the container is 20 liters, and you should make sure that the bottom is even and the edges are round.
- spatulas of different widths and lengths necessary for sealing seams and puttying a flat surface;
- corner spatula, for leveling internal corners;
- special mesh (serpyanka) for seams. Using it minimizes the risk of cracking.
- construction mixer or drill with a screw attachment.
To prepare the mixture, a set volume of water is poured into the container, after which, with the mixer turned on, a certain amount of dry material is added to achieve the desired consistency. After complete stirring, it is advisable to leave the mixture for several minutes to bind the components. However, do not forget that gypsum compositions harden very quickly, so mixing such a solution must be done in small quantities, since it cannot be mixed again.
When can further work be carried out?
Subsequent operations using finishing materials should begin only after the putty has completely dried. Otherwise, the owners risk encountering undesirable nuances and may have to redo everything all over again.
Painting
To understand when to start painting work, you need to know how long the finishing putty should dry on the walls before painting. If the coating thickness is no more than 3 mm, you will have to wait a day after applying the composition. But only if you adhere to optimal conditions. Deviations in temperature and humidity increase the waiting period to 2 days.
This is exactly the amount of time it will take to paint a plaster surface or plasterboard sheets (GKL). The same applies to tiling the walls of the bathroom and toilet with tiles.
When the putty on the walls or ceiling has already completely dried, it is recommended to coat the surfaces with a primer. It is undesirable to neglect the rule, since this has a positive effect on the adhesion of the paint to the treated surface. And when the primer coating is dry, you can begin painting work.
To determine the start date for painting, you should know how long the finishing putty takes to dry.
Second layer of putty
If it is necessary to apply a second putty layer, you need to wait until the hydration process in the starting coating is complete. The first layer always shrinks and for this reason, applying the next one inevitably leads to a loss of the appearance of the surface. Cracks and chips will appear.
In some cases, manufacturers recommend treating the first layer with a primer and waiting until it dries completely. Typically this takes 4 hours. Only then apply the second layer.
Wallpapering
Before gluing the wallpaper, you must wait until the surface has gained strength after applying the putty. Based on temperature and humidity indicators, this may take a period of 12 to 48 hours.
Taking this into account, it is better to start gluing wallpaper 2 days after the putty was applied. It is also advisable to cover the walls with a primer mixture in order to increase adhesion.
Wallpapering is possible only after the putty layer has fully gained strength.
A perfectly smooth wall surface has good adhesion during subsequent paint application. However, only if the putty is completely dry. This gap varies within a certain range among different manufacturers.
Did you learn something new? Share in the comments!
How is puttying done?
Putty can be rough (starting) and finishing:
- The task of the starting option is to level the surface. Apply a layer of up to 6 mm;
- finishing putty prepares the wall for subsequent painting or gluing. Apply with a minimum layer of 1 mm. It is recommended to use polymer compounds. They withstand contact with water well and do not emit harmful substances.
Rough or starting putty is applied only to a completely dried and sanded wall after plastering. For plaster, the time required for drying is calculated using the formula: 1 mm x 1 day.
Which will dry faster: walls or ceiling?
The question can be considered rhetorical, because the speed of drying is influenced by many factors. It is quite natural that the ceiling will dry out faster due to its physical characteristics: the air above will be much warmer. But you should also take into account the thickness of the applied layer and the type of putty mixture used.
Final drying time
The composition of the putty will also be different, because some mixtures include gypsum as the main binding component. This material is famous for its literally instant hardening, so you should not immediately prepare large portions of the mixture to avoid unnecessary costs. Special additives will help to slightly increase the drying time of gypsum plaster, but the real result will still be much faster than a regular cement mixture. And in order to select a putty containing gypsum, you should know how long the gypsum dries.
Factors influencing the drying time of the putty layer:
- Air temperature.
- Humidity.
- Thickness of the applied layer.
- Surface location.
- Chemical composition of the mixture.
What is the price of putty for wallpaper is indicated in this article.
Considering how many uncertain variables there are in this construction problem, the drying time of the applied layer can only be approximately determined.
How to putty drywall with your own hands
After the primer layer has dried, you can begin the process. Initially, it is worth gluing the serpyanka on all corners and connecting seams. When gluing, it is necessary to observe jewelry precision, because the joint or seams must be exactly in the center of the tape.
Sealing joints
To properly seal the seams, you need to apply a reinforcing layer evenly so that no unevenness or roughness is formed as a result. To do this, use two spatulas - medium (12-15 cm) and wide (30-35 cm). Using a medium spatula, scoop up a small amount of solution and apply it to the middle of a wide tool. Then, using a wide spatula, the mixture is pulled along the entire length of the seam. Putty for seams belongs to the group of leveling materials, which contain not only gypsum, but also cement, for greater viscosity and adhesion.
Putty screws
To do this, use a narrow spatula, with which the mixture is applied to the screw head in a cross shape. Initially, a movement is made along and then across. Thanks to this technology, it is possible to completely fill the grooves on the head, as well as hide the screw itself.
Putty corners
This process is the most complex, and therefore it is performed in several stages:
- Initially, one side is puttied as standard;
- after the mixture has partially dried, the second side is puttied.
Due to a short wait, it is possible to achieve perfect evenness and make a neat seam.
Applying finishing putty
After all the starting work has dried, you can begin applying the finishing solution to the surface. To do this, you need to rub out all the unevenness with sandpaper, then dilute the dry mixture with water until a consistency is formed that resembles sour cream in appearance.
The finish is applied using a wide spatula using smooth movements. The main thing in this work is to apply as thin a layer as possible and make sure that there are no defects.
Technology of applying the finishing composition
The whole process consists of several stages. Each of them is important and cannot do without each other. The sequence does not change. Since this is a finishing coating, we skip the thorough preparation of the walls, which includes removing the old coating, eliminating cracks and irregularities. Let's look at each stage in more detail.
Preparing the walls
In fact, the walls are already ready for further application of putty, because the base layer was initially applied. The only thing you need to do is wipe down the starting layer. A coarse grater is used for this. The next step is to clean the surface from dust. This will allow the material to adhere well to the surface.
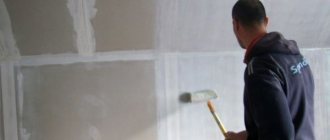
Preliminary priming of the walls will help improve adhesion to the surface and reduce putty consumption. The surface is processed without gaps using a roller. Hard-to-reach places are treated with a brush. Only after drying can you start using the finishing putty.
Application technique
When working with polymer mixtures, you just need to open the jar and start applying the contents. As for gypsum putties, they are first mixed. How to properly dilute finishing putty? Instructions are indicated on the packaging. But the technology is simple: first, the specified amount of water is poured into the bucket, and then the putty is poured. The sequence cannot be changed. The composition is mixed to the desired consistency, reminiscent of thick sour cream. All that remains is to let the mixture stand for 10 minutes, mix again and begin puttying.
Next you will need a spatula for finishing putty, even two. One is wide, the other is narrow. Use a narrow spatula to spread the putty onto a wide one from a bucket. Now all that remains is to apply a thin layer of the mixture, spreading it over the surface. Work starts from the corner. The spatula is held at an angle of 20°, movements from bottom to top
It is important not to leave marks from the tool. The process is controlled by a flashlight and a rule
All shortcomings are immediately eliminated. To create even corners, use a corner spatula.
How long does finishing putty take to dry?
Once the room has been treated, all you have to do is wait for it to dry. No further work can be carried out. Typically, the drying time is indicated on the packaging from the manufacturer. In addition, this indicator is affected by room humidity and temperature. Some mixtures can take two days, 24 hours or even 4 hours to dry.
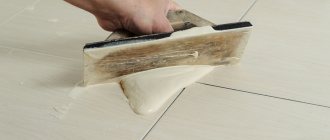
Surface grinding
After the finishing putty has dried, you need to give it a finished look. A grater is used for this. The surface is polished. Fine-grained sandpaper. This will help remove tool marks and smooth the entire wall, preparing it for further manipulation. Sanding is done in a circular motion. You should not get carried away so as not to erase the applied material.