A person constantly comes up with various objects, processes, and new products to improve his life. So it was once noticed that if you dig a hole and put food there, it will last longer. Over time, technology improved and people began to make cellars and basements equipped with various shelves and stands so that food could be stored without touching each other at a certain height.
It should be remembered that lime can destroy pathogenic microbes and fungi, as well as destroy harmful insects.
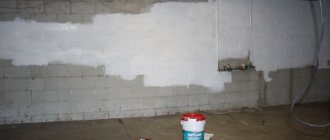
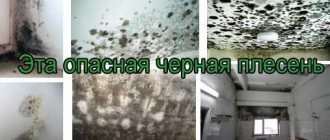
If you have a cellar, then you are probably familiar with the problem of annual ventilation and disinfection. One of the most popular and simplest methods is whitewashing. An affordable means for whitewashing and disinfection at the same time is now lime.
Whitewashing the cellar means not only disinfection, but with this you also improve the appearance of your room.
Whitewashing is a fairly popular method due to its availability, simplicity and low cost.
Lime is a unique substance that can destroy pathogenic microbes and fungi, as well as destroy harmful insects that come with vegetables and settle in the basement.
Preparation and stages of whitewashing
Scheme for removing old whitewash.
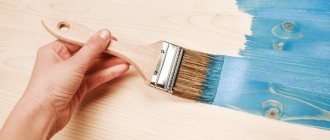
In order for the solution to lay evenly on the walls and ceiling, it is necessary to soak the brushes in water before whitewashing, since the distribution of paint depends on the condition of the brushes. If you plan to whitewash a large volume of walls, then you can use a special sprayer. It must be kept at a distance of about 30 cm from the wall, then the layer will lie flat. Before starting work, it is recommended to remove racks, shelves and everything else that is stored in your basement. It is important that the cellar is free, since the vapors of wet lime can negatively affect health and impregnate the basement equipment with harmful substances. The surface intended for whitewashing must be cleaned of grease stains, traces of fuel oil, glue and similar substances. The surface intended for whitewashing with lime must be dry and clean. Existing cracks or rust must be primed.
So, the whitewashing process should begin from top to bottom, applying a solution of lime to the walls of the cellar, leaving no dry space. After the walls are whitewashed, it is necessary to ventilate the cellar for two days. It is important to wait until the whitewashed walls are completely dry, then, when the walls are dry and the harmful fumes from the cellar have evaporated, you can safely install racks, shelves, partitions and other equipment. It is best to dilute the whitewash solution in a wooden, enamel or metal container. In this case, the lime will not react with the vessel. For strength, various impurities are added to the solution, and to change color, tints and other dyes are added.
Whitewashing the cellar must be done carefully, given that contact with lime on the skin can cause burns, irritation or allergies. Therefore, for whitewashing it is necessary to use special protective clothing and a mask that will protect the respiratory tract.
In addition, you can not use lime in its pure form, but use, for example, paints that contain lime. Such paints are quite suitable for cellars; they also use lime as a binding element between the components of the solution. The big advantage of such paints is that they can be safely applied to a damp surface and in a cold room, which is important if the cellar is poorly ventilated or has a very low temperature.
Recommendations for improving the color and quality of whitewash
If you use lime milk to whitewash the cellar, then you can use linen blue to give it a bluish or snow-white color. A little trick used by specialists for whitewashing a cellar is to add table salt, no more than 100 g per 10 liters, then the solution will be strong, and the lime will not stain your hands and clothes while you are in the basement. Before adding salt, it must be dissolved in water and then gradually poured into the lime mortar. In addition, you can add a few grams of drying oil, the same effect will be achieved. To preserve the color and composition on the walls of the cellar for a longer time, you can add skim milk to the whitewash solution in a one-to-one ratio with water. That is, 5 liters of water and skim milk and the required amount of lime. And to ensure that the plastered surface of the cellar does not fall off after whitewashing, you can add wallpaper glue or latex paint to the solution.
How is a cellar whitewashed with lime?
A person constantly comes up with various objects, processes, and new products to improve his life. So it was once noticed that if you dig a hole and put food there, it will last longer. Over time, technology improved and people began to make cellars and basements equipped with various shelves and stands so that food could be stored without touching each other at a certain height.
It should be remembered that lime can destroy pathogenic microbes and fungi, as well as destroy harmful insects.
If you have a cellar, then you are probably familiar with the problem of annual ventilation and disinfection. One of the most popular and simplest methods is whitewashing. An affordable means for whitewashing and disinfection at the same time is now lime.
Preparation of lime solution
Composition of lime mortar.
Whitewashing a cellar is done by applying lime mortar to the walls in the basement. For this you will need lump lime. It is necessary to lower the lumps into a tank or large bucket, divide them into small lumps, add water and stir thoroughly until all lumps are removed. The ratio of lime and water is one to three. Be careful when diluting the whitewash solution, as lime releases heat when slaked with water, and there may also be splashes. After filling the clods with water, it is best to move away to a safe distance for a while. When the lumps are wet and saturated with water, it will be easier to stir them and the whitewash will be safe. As a result of stirring, lime milk should be obtained.
Whitewashing the cellar will require you to prepare the following tools and materials:
- bucket;
- brush;
- protective clothing;
- gloves;
- protective glasses;
- water;
- lump lime.
We determine the cause of dampness and eliminate it
Moisture in the basement can come from outside moisture or from condensation inside the basement.
Influx of dampness from outside
To rule out this cause, conduct a survey of the basement or cellar.
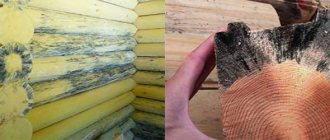
Moisture can seep into the outside of the basement through cracks or defects in the walls. Along poorly installed communications. Pay attention to the condition of the blind area. If large trees grow near the foundation, then water can also enter the basement through their roots. High groundwater is one of the reasons for dampness in the basement.
Eliminating the causes
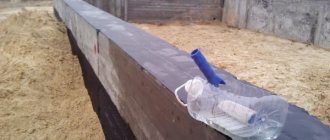
After inspecting and identifying large and small cracks, clear them and carefully seal them with cement mortar. Dry well. Treat with a concrete cleaner; it effectively destroys mosses, lichens, and fungi. After drying, coat with bitumen mastic.
The entry points of communications where leaks are possible should be sealed with alabaster mortar.
If moisture enters through cracks in the floor, then all cracks must be sealed with cement mortar.
After drying, pour about a 5-7 centimeter layer of sand or fine expanded clay.
Lay roofing material three millimeters thick on top of the sand or expanded clay. In this case, it is necessary to overlap the sheets on each other and on the walls by at least 10-15 cm. You can cover the sand with a special waterproofing film for floors.
The joints of roofing felt sheets are coated with bitumen mastic. Lay the reinforcing mesh and make a new screed.
You can lay logs and lay a wooden floor after the concrete has dried.
If the cellar has a clay floor, then waterproofing it is not at all difficult. To do this, you need to remove about 5-7 centimeters of clay. Level well and compact the base thoroughly. Spread two layers of thick plastic film, overlapping at least 10 cm on the floor and 12-15 cm on the walls.
Prepare a mixture of clay and sawdust, adding about 10% of the latter. Mix well, moisten a little. Place on top of the film in a layer of 12-15 cm, compact well.
During the drying process, small cracks will form on the floor. They are covered with the same composition.
After drying, apply a second similar layer, but with a rise of 25-30 cm on the walls.
When the floors dry well, the humidity in the basement will be much lower.
Increased humidity from an internal source
The appearance of condensation on the internal surfaces of a cellar or basement is an internal source of dampness. If condensation appears on the walls and ceiling in a cellar or basement, the culprit is poor ventilation or its absence.
The simplest ventilation device is shown in the figure.
For small basements and cellars, up to approximately 45-50 cubic meters. meters, two pipes installed at different ends of the basement are enough. Firstly, the supply air, which from below does not reach the floor by 10-15 cm, and from above rises above the ceiling by 30-35 cm. Secondly, the exhaust, which from below is located almost under the ceiling, and from above should be higher than the supply air at least than 60-70 cm. Be sure to install “fungi” on top of both pipes to protect them from rainwater. In addition, it is advisable to install a metal rodent mesh on the supply pipe, since it is located low above the ceiling.
Preparing the room for subsequent whitewashing
The cellar should be whitewashed after putting the surfaces in order; the recommended course of action includes the following steps:
- Freeing up basement space: removing food supplies, shelves, containers and, if possible, the shelves themselves. All collapsible structures are lifted upstairs, inspected for damage, washed with hot salt or soapy water and dried.
- Cleaning the cellar walls from old lime coating or peeling paint by wetting and treating with a steel spatula, and if necessary, degreasing.
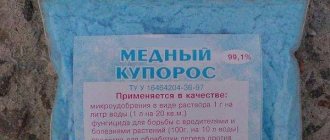
- Removing crumbling plaster or masonry mixture, filling cracks with liquid glass, covering the walls with water with the addition of 10% vitriol or 5% aluminum-potassium sulfates, ventilation and drying.
- Painting of all remaining metal elements with anti-corrosion compounds.
- Closing stationary racks and bins with polyethylene.
After this, tanks, tools and PPE are prepared. It should be remembered that lime, even in its unslaked form, poses a danger to the mucous membranes and respiratory tract; rubber gloves, protective clothing and a mask are used at all stages of work. A large metal container is best for preparation; separate bowls or buckets will be needed for soaking brushes and pouring small portions. In addition to brushes, you can whiten the walls of the cellar using a manual, electric or pneumatic spray gun, a special apparatus or a regular large-volume spray gun. When laying mechanically, the mixture is filtered through gauze.
Nuances of preparing and applying lime mortar
Popular recipes are shown in the table:
How to remove dampness from a basement, folk experience
Gardeners and gardeners have been using basements and cellars for storing crops for many years. And methods for removing dampness have been tested by more than one generation of villagers.
Removing dampness from the cellar with quicklime
Today, quicklime can be bought at any hardware or garden store. And in ancient times, limestone was burned on a fire and quicklime was obtained. If you fill it with water, a quick reaction will occur and we will get a lime solution that can be used for whitewashing or preparing Bordeaux mixture.
But if you scatter lime into small, 1.5-3 liter containers and place it in a damp basement, it will begin to absorb moisture from the air. The same reaction will occur as when pouring water, but the moisture will come from the air. As a result, the air in the cellar, and therefore the cellar itself, dries out.
By the way, the gases released during the lime slaking process have aseptic properties. They are destructive to fungi and microorganisms.
Drying the air using clay bricks
If there is little dampness in the cellar, and mold and fungi have not yet begun to develop, then you can use baked clay bricks. Heat the bricks and place them around the cellar. As they cool, they will heat the air, which will begin to rise and exit through the exhaust hole, carrying moisture with it. And clay bricks, when cooling, will absorb moisture themselves.
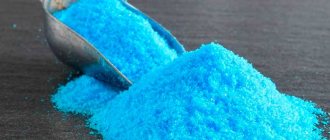
Dampness in the cellar will absorb calcium chloride
Calcium chloride absorbs moisture well. Sprinkle calcium chloride into small containers and place them in several places. The adsorbent will perfectly dry the basement. For a small basement, a kilogram of powder is enough.
Drying the cellar using a roasting pan
If the humidity in the cellar is high, moisture has covered the walls and structural elements, more effective measures will need to be taken to dry the cellar.
Before drying using a brazier, you should open the hatch or hole in the cellar and see if the ventilation pipes are blocked by anything.
To dry, you can use a portable roasting pan, or you can use a regular old metal basin with holes near the bottom. Light a fire in a barbecue or on a sheet of metal; when the wood is burning well, throw it into a metal bucket, lower it into the cellar and pour it into a brazier or basin. You can add small firewood. Hot air from the fire will rush upward into the exhaust openings, hatch, manhole, carrying moisture along with it.
Instead of a brazier or basin, you can use an old metal bucket with holes in the bottom and sides. A bucket of burning coals can be lowered on a cable into the basement. If necessary, repeat the procedure after a day or two.
Dampness in the cellar? A candle will help
An ordinary candle can help dry out the cellar. If you light it and install it directly under the exhaust pipe. Although the flame is small, it will heat the air. Which will begin to rise through the exhaust pipe along with the moisture contained in the air. In its place, dry air from outside will begin to flow more actively through the supply pipe. This will increase air exchange and the cellar will begin to dry out. As a rule, drying a small cellar using this method will take several days and use several candles.