Poor-quality cellar finishing can ruin even a spacious underground room and turn it into a cold and damp place with an unpleasant odor. Vegetables in such cellars are poorly stored due to high humidity; in winter, the crop can freeze and in spring suffer from groundwater rising on the floor. However, this situation can be corrected if the issue of finishing the cellar inside is approached with due attention. To do this, you need to be patient and have some free time. If you wish, you can even make a special design for the room.
Preparatory work
Like the rest of the house, the cellar requires care and attention from the owners. The first thing you need to take care of is protecting the room from moisture. To do this you will have to resort to waterproofing. This way you will get rid of excess water inside the cellar and forget about mold forever.
A quick guide to waterproofing:
- Before starting construction work, carefully inspect the room for leaks and other problem areas. After they are “neutralized”, proceed to the first stage of work.
- The first stage is the external drainage of the underground floor. If your soil is predominantly swampy, then perform internal drainage of the cellar. This will prevent moisture from penetrating inside.
- At the second stage, arrange a waterproof blind area. To do this, concrete a circular plot of land that “encircles” the house. Now your cellar is not afraid of rain and melt water.
- The next stage is the use of adhesive or penetrating waterproofing. It is best to combine these methods of protection against water with each other.
At the final stage, finishing is carried out (which we will talk about later) or, if necessary, insulation.
When finishing the cellar, use moisture-resistant materials. This will provide additional protection and a comfortable indoor microclimate.
Possible errors and their consequences
What can go wrong:
- Lack of waterproofing between the brickwork and the base. If water seeps into the basement through the floor, the concrete base can become saturated with it and transfer it through the capillaries of the materials into the wall. The brick is destroyed by moisture, cracks appear on the wall, and the masonry is deformed.
- Failure to comply with masonry geometry. A cellar with uneven corners and walls will not be able to withstand the pressure of the building. As a result, part of the wall will crack and gradually collapse, allowing moisture and cold into the room. The cellar will have to be liquidated.
- Failure to comply with the order. The displacement of bricks in adjacent rows is necessary so that the weight of the structure is distributed evenly. The consequences are the destruction of walls, disruption of the functionality of the basement.
- Wrong choice of material for construction. The brick must meet the requirements, otherwise the walls will not withstand the pressure or will allow moisture to pass through.
Reinforcement of the structure is mandatory, since the basement walls will have to withstand considerable load.
We take care of thermal insulation
Having ensured high-quality waterproofing of the cellar, we move on to thermal insulation. What is it for? Thermal insulation allows you to maintain the desired temperature in the cellar, regardless of the weather conditions outside. This is important when storing and preserving vegetables, since high temperatures will promote crop germination, and too low temperatures will promote freezing.
To insulate the floor, you can use expanded clay or foam chips.
So, a plastic film is laid on the floor, and wooden or metal logs are installed. Thermal insulation material is tightly placed into the resulting cells.
Insulation of the cellar floor using expanded clay.
When laying thermal insulation material, it is unacceptable to leave voids. The entire space should be evenly filled with material. Then the surface is leveled and filled with concrete mixture. To increase the reliability of the floor, additional reinforcement is carried out. To do this, use a metal or fiberglass mesh.
After the concrete mixture has hardened, we begin finishing the floor. For this you can use various coatings and materials. It is not only the insulation of the floor that needs to be taken care of. The walls of the room also require attention.
For walls, heat insulators in the form of slabs or mineral wool are used. Installing insulating material is easy. The same insulation technology is applied to any material. The slabs are laid on the prepared walls and secured with special fasteners.
Don't forget, insulation is important (especially for food cellars).
Living spaces
Here are some ideas for converting your basement into a cozy and useful living space:
- For connoisseurs of good wine, in the basement of a private house you can set up a special wine cellar with a large number of shelving and wooden tubs.
- A good ventilation system will allow you to organize a gym in the lower part of the house. If the area allows, the space can be divided into zones using partitions. Next to the gym you can place a small swimming pool or a children's playroom.
- Avid party-goers can put a bar counter in the basement, cover the walls with soundproofing material, install a high-quality audio system and invite guests every day. And light music and a disco ball will turn this room into a real mini-club.
- Movie buffs and gamers will be delighted by the media center located in the basement. You can hang a large screen on the wall, place a game console next to it, and hang three-way speakers around the perimeter of the room. The free space can be filled with comfortable armchairs, sofas and low tables, and the floor can be covered with a warm and fluffy carpet. This room will turn into your favorite place in the house.
Home cinema in the basement.
Speaking about residential premises, we should also say a few words about technical ones. Before placing engineering equipment under the house, you should consult with specialists. For example, placing a boiler room in a basement completely buried in the ground is prohibited. Only rooms with windows facing the street are suitable for this.
Start of finishing the cellar
The cellar should not only be regularly ventilated, but it also needs periodic cleaning and tidying. Cleaning involves getting rid of unnecessary or missing products, removing cobwebs, etc. In addition, the cellar, like any other room, requires cosmetic care.
Before starting finishing work, it is necessary to thoroughly clean all surfaces.
The decoration of a cellar differs significantly from the decoration of a living space. Materials that are great for rooms are not suitable for work in the cellar (and vice versa).
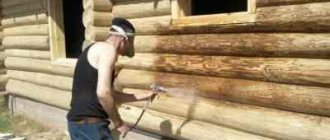
To finish the cellar, paint “for the underground room” is often used. It has the necessary properties, is moisture resistant and does not emit toxic substances. Painting the walls in the cellar is not a complicated, but painstaking process. You must have patience and accuracy, then the result will exceed your expectations.
Before work, prepare the necessary tools:
- Paint the desired color.
- Roller.
- A container where you will pour the paint.
- Clothes that you are not afraid to get dirty.
- Gloves.
- Respirator or protective mask.
Selection of coloring composition
For finishing work, various types of solutions are used, which are selected based on the material of the walls and floor. Also, before purchasing, take into account financial capabilities and the expected duration of operation of the premises. Before making a choice, it is recommended to study the characteristics of each colorant.
Interior view of the cellar Source remkasam.ru
Lime whitewash
Lime composition is a traditional, time-tested means for decorating any premises. This substance is especially suitable for wooden walls, since it has the ability to protect against moisture and prevent the development of fungi and mold. In construction stores you can find ready-made lime, which does not have to be slaked before use. This option significantly speeds up the finishing process and also helps prevent inhalation of toxic fumes that accompany the extinguishing procedure.
Paint or lime?
The choice of paint depends on the wall and floor covering. If you used concrete, apply a moisture-resistant base before painting. Without it, the paint will not last long, as moisture will cause it to peel off. In addition, there are materials with a water-resistant structure, for example, various emulsions. They have a wide range of colors and are quite durable. After applying the emulsion, you can choose the paint of the required color, depending on the design of the cellar, and treat the walls again.
Painting concrete with water-based paint.
When choosing paint, pay attention to its expiration date. Regular paint will last no more than one year. Due to the special microclimate in the cellar, enamel paint can “slide” off concrete surfaces after a couple of weeks. This is due to increased humidity in the room. Paints with a service life of more than five years are suitable for wet concrete; such paints belong to the group of silicate paints. They do not emit toxic substances and do not absorb moisture (water simply drains from them).
Whitewashing the ceiling with slaked lime.
Slaked lime is often used to finish the cellar. It is suitable for whitewashing in rooms with low humidity and good ventilation. Lime has antifungal properties, so if you're concerned about mold, it's a great solution for giving your cellar a makeover. Lime has long been known as an excellent means of combating pathogens. Another advantage of lime whitewash is its low cost. The same cannot be said about expensive paints, which are capable of releasing moisture from concrete, but do not allow it to penetrate into it. Such paints are made on the basis of liquid glass.
Paints based on liquid glass are mainly used in industrial enterprises and have a long service life. This coating is not afraid of strong moisture and temperature changes, so if you can afford such paint, you will forget about finishing the cellar for more than 15 years.
Also, an excellent competitor to lime whitewash is acrylic paint. It can be used to treat any surface. This type of finishing is also not cheap. However, the effectiveness of this method justifies the expense. With this paint you can update the design of the cellar and give it a more noble look. A wide range of colors will allow you to turn the most unusual ideas into reality.
Storage protection features
Creating the right conditions for storing food is the only goal of “cellar work”. The main enemy of vegetables is low temperature, at which the “roots and tops” freeze, losing their taste and almost all useful substances. It is optimal to store food at temperatures from +1 to +5°.
The second threat to vegetables, fruits and canned food is high humidity. And in this case, it is important not only to make high-quality waterproofing, but also to equip the most efficient ventilation system. However, it is done during the construction stage of the building.
In large basements, where other rooms are located in addition to the cellar, it is best to use its forced variety. If the room is used only for storing food, then natural supply and exhaust ventilation will be sufficient for normal air exchange and maintaining the required level of humidity (85-90%).
To resolve all issues, several factors must be taken into account. These include:
If we talk about a cellar built under a garage, then in this case an additional factor must be taken into account - the fire hazard of the upper room. Therefore, when choosing a potential insulation material, it is necessary to find out in advance about the degree of its flammability.
Painting Tips
It is recommended to finish the underground space, taking into account the following points:
- When choosing a paint color for your cellar, opt for darker tones.
- If you are repainting, clean the walls and get rid of the old coating. To do this, go over the walls thoroughly with a metal brush.
- When choosing paint or other material for wall decoration, consider the safety of this material. It should not emit toxic substances.
- Before painting the basement, protect yourself with a respirator or a special mask. The work will be carried out in a room with poor ventilation, so without special protection there is a danger of poisoning from toxic fumes.
- After treating the walls with whitewash or paint, leave the room to ventilate for 72 hours. During this time, harmful fumes will disappear and the cellar will become suitable for use.
- If you have a wooden floor in your cellar, use oil-based paint to finish it. You will be pleased with its wear resistance and long service life. It is better to treat concrete floors with the same coating as concrete walls.
What is required for masonry?
What materials are used in construction:
- the brick itself;
- connection solution;
- cement, crushed stone, sand, clay - to strengthen the base and side walls of the pit;
- water;
- fittings
Construction Tools :
- trowel;
- Master OK;
- shovels, shovels and bayonets;
- square, tape measure, plumb line, building level;
- beacons and thread;
- double-sided hammer;
- concrete mixer or solution container.
Whitewashing tricks
Before you start whitewashing the walls, read the advice of experienced painters:
- In order to make the coating stronger, add 100 grams of salt to a 10-liter lime solution. This is especially recommended for owners of narrow cellars. Thanks to the salt, the coating will not be imprinted on clothes. Salt must be dissolved in water and added to the solution (you can use drying oil instead of salt).
- In order to make the walls dazzling white, add a few grams of blue to the solution. First dilute it in boiling water. It prevents the whitewash from yellowing for a long time, which means that the design of your cellar will last much longer.
- Another secret that prevents whitewash from quickly turning yellow is skim milk. It is diluted with water in a 1:1 ratio and added to the solution.
- Recently, another way to increase the wear resistance of whitewash has appeared - add wallpaper glue or latex paint to the solution. This will make the coating more elastic and resistant to deformation.
- If you want to have the walls in the cellar of a certain shade, you can add coloring pigments to the solution. This way you can create your own cellar design. Please note that such a pigment must interact well with alkali, otherwise your coating will simply delaminate.
Arrangement of an arched cellar
Fans of unusual solutions can make an arched dome as a ceiling in a cellar or basement. Its base is a very strong reinforced concrete arched structure, forming a vault height of 40-60 cm. To make such a structure, standard formwork is built and filled with concrete. The ventilation hole is mounted near the top of the arch.
The interior decoration of the building can be done at the request of consumers, in accordance with the functional features of the structure, as well as based on the overall design of the summer cottage. It is possible to plaster the walls, which will create additional warmth and waterproofing. Or whitewash the walls with lime whitewash, which has good disinfecting properties. For summer residents, who often do not have professional building skills, building a brick cellar with their own hands is quite affordable. Brickwork frees you from constructing formwork and laying reinforcement, which is impossible to do without during the construction of concrete analogues. When building a cellar, it is necessary to follow construction technology and purchase materials of the highest quality possible. In this case, the brick cellar will serve the owners for several decades without major repairs.
0 0 vote
Article rating
Plastering walls
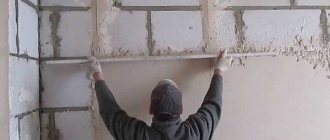
In a cellar with brick, stone or concrete walls, plaster is used for finishing. A wall plastered with skillful hands provides additional fire protection and does not allow moisture to pass through. This is a method of finishing a cellar that is accessible to many and does not require complex skills or time.
Plastering the walls plays the role of additional waterproofing.
Plastering walls begins with cleaning them. Clean the walls from dust and spray liquid cement mortar. This will improve the adhesion of the plaster to the walls. You don’t have to do this for brick walls, since they already have good adhesion to the material.
For foundation blocks, you will have to additionally use a metal mesh, which is secured with parachute dowels. Due to the increased humidity in the room, the plaster will not hold up without additional strengthening.
Plaster on metal mesh.
After the first layer of plaster has been applied, let it dry and proceed to the second stage of work.
It is not recommended to dry the plaster using heating devices (this will lead to cracking). At the second stage of work, apply another layer of plaster and leave to dry.
Gypsum, cement or lime mortars can be used to plaster walls.
DIY basement finishing
The height of wall panels is usually about 2 meters. This will be enough to place 3 shelves vertically for supplies.
The thickness of concrete walls is 5 cm, a brick wall cm depends on the masonry, and a rubble wall thickness is 25 cm. As already mentioned, the mass of the panels is large, so during construction the walls should be mounted on solid ground so that they do not move.
Post navigation
When preparing a hole for a cellar, you need to dig until there is strong, stable soil, if this is possible in the soil conditions. The outer side of the cellar walls is constructed in the following sequence: Before starting construction work, you need to check the walls for leaks.
All cracks must be sealed. Thermal insulation is laid on the internal walls if the external side is not insulated.
Insulation of the internal walls of a brick cellar with polystyrene foam should be done in the following sequence: This thermal insulation option is worse. As a result, the wall will still freeze and collapse faster. A metal mesh should be glued on top of the thermal insulation.
What else can you turn your basement into?
If the size allows, the underground room can be used not only as a storage of vegetables or equipment, but as a place for relaxation or entertainment.
- Swimming pool in the basement. The ceramic floor and mosaic at the bottom of the pool will create an atmosphere of relaxation. The design of the pool can be very diverse. Many bright “eyes” compensate for the lack of windows. Take care of waterproofing and good ventilation.
- A sauna under the house is convenient and unusual. Such a room is finished with clapboard and decorative or natural stone, depending on the design of the sauna.
- The gym on the ground floor will appeal to active and athletic people. Now you don’t need to visit a paid gym, just go down to the basement and you’re there!
- Billiard room. The special design of the basement, complemented by a billiard table, will surprise your guests. The design of such a room is usually done in a classic style, with a predominance of wooden panels. Good lighting will make not only the game enjoyable, but also the stay itself.
- Wine Vault. For lovers of good wine, collectors or producers, there is the opportunity to turn the basement into a wine cellar. With convenient racks and the right temperature.
As you can see, decorating and designing a cellar is a very multifaceted and creative task.
Materials and tools for building a cellar
To build a brick cellar, you need a simple construction tool: a bayonet shovel, a trowel with a hammer, a square with a plumb line, pliers, self-tapping screws and screws, nails, a tape measure, a rope, and wooden pegs. From electrical equipment you need to prepare a welding machine, drill and screwdriver. It is very convenient if you have a concrete mixer at hand. It will help make work easier and speed up the construction process.
There shouldn't be any problems with the materials. All of them are publicly available, and you can purchase them at any construction market or in a specialized store. To build a cellar, metal corners, pipes, fittings, sand, clay, small crushed stone and red brick are used.
The amount of building bricks is calculated in advance, with a reserve for defects or damage.
What insulation is suitable for basement walls?
Basement walls must be insulated from the inside and outside. The correct choice of insulation is half the success when finishing the walls of such a room.
When purchasing material, it is necessary that it meets certain requirements:
- It was resistant to moisture penetration and retained its excellent properties under adverse environmental influences.
- Had the ability to withstand compression and pressure arising from the thickness of the soil masses.
- It was quite strong and durable.
These requirements are met:
- Extruded polystyrene foam or special foam . Its peculiarity is hermetically sealed pores, which creates high strength, high thermal conductivity, and increases hydrophobicity. Today this is the most popular material, which:
- has low weight;
- does not rot;
- not subject to crumbling;
- environmentally friendly;
- with excellent thermal insulation characteristics;
- has a long service life if waterproofing is carried out correctly;
- easy to trim, which allows you to give it the desired shape and required dimensions.
Disadvantage: it burns easily, and when heated, it emits an unpleasant odor.
- Foamed polystyrene foam or regular polystyrene foam (see Insulating the basement with foam plastic: features and nuances of the work). Its characteristics are similar to extruded foam, but due to moisture absorption, it requires additional waterproofing. The strength of the material is almost three times lower; rodents love it, which requires deratization of the premises. Its low price allows it to be widely used for finishing basements.
- Penofol . This is foamed polyethylene with the inclusion of aluminum foil. Sometimes it is used as an additional layer for wall insulation, which is placed on foam plastic.
- Polyurethane foam . It is applied in several layers using the fine spray method, which is very convenient for finishing walls, ceilings and floors. It hardens in 20 seconds and creates a fairly even, durable coating with no voids, seams or joints. The solution penetrates into the most difficult to reach places. When installing such insulation, there is no need to carry out moisture-proofing measures.
Basement and design
What will be the finishing of the basement inside the house - only you decide
We have already mentioned above that the interior decoration of the basement floor and its insulation - everything here depends on the purposes for which this room will serve. Before finishing the basement, you should carefully consider the design of its ceiling.
Ceilings in the basement
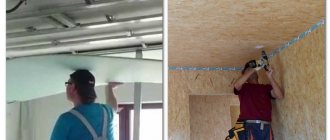
Since high-quality lighting of basements requires numerous lamps, which should be correctly “scattered” over the ceiling surface, the best option for arranging the ceiling here can be called a suspended ceiling (creating a suspended structure).
How to do it?
- In order to provide lighting in the basement, there really is nothing better. Moreover, there are a lot of options with a suspended structure, especially those that you can implement on your own. However, the design of the ceiling surface and the materials from which the ceiling is made must fully correspond to the functionality of the room;
- Experts recommend strictly following this rule at all times, no matter where exactly the room being finished is located. This can be not only a basement, but also an attic, a guest room or a children's room. When choosing ceiling structures, the height of the floor is always taken into account;
- If the height in your basement is suitable, you can always make a suspended multi-level ceiling here. Suppose you decide to arrange a guest room here - so this choice will be very successful.
Inside any basement room, the design of the ceiling plays a huge role, because there is a shortage of light
However, for rooms without natural light, the best solution is a glass ceiling, which is also equipped with internal lighting.
- This option guarantees truly high-quality lighting. Particular attention is also paid to lighting when a study or office is set up in the basement. Not only glass ceilings can be used here - there is another design trick that can play a good role if there are no windows;
- It's simple: you can easily make imitation windows on the walls of such a basement. That is, they install a frame, under it - photo wallpaper (maybe a city panorama), some people even put blinds on these windows. When employees stay in this office all day, they certainly will not feel psychological discomfort, and the overall interior of the basement will only benefit from this approach. The room will look attractive and as natural as possible;
- Glass ceilings look good in a variety of rooms, including those where the ceiling height is insufficient. To optically enlarge the space and improve the quality of lighting, mirrored ceilings are often chosen.
There is no need to buy strictly glass ceilings. They often purchase options made from plastic panels, aluminum or even covered with a special mirror film. There is also no need to install mirror elements throughout the entire ceiling area - they are easily combined with other types of coatings.
The need to line the walls of the cellar
An important point is the process of covering the walls of the room. In most cases, concrete or brick is used. In this case, the solution is usually poured between the formwork and foundation pit.
Each of the methods can be done independently, provided that all the details are thought out in advance. For bricklaying you will need mortar and brick, and for a monolithic wall you will need to prepare material for spacers and formwork.
Why do the walls in the basement and basement become damp?
Causes of this problem:
Alexey NikolaevSpecialist at LafargeHolcim
The basement floor is an occupied room under a cottage, the floor level of which is located below the planning level of the ground around the house to a height of no more than half the height of this room. If the floor level is lower, then the room is usually called a basement. Walls in rooms buried in the ground become damp due to the entry of moisture from the ground or its loss in the form of condensation due to the lower temperature of the wall surface.
The main reason for this problem is the developer’s refusal to carry out engineering and geological studies of the soil and erroneously adopted engineering and technical solutions when building a house.
If there is no or poor ventilation in the basement or ground floor, then condensation accumulates abundantly on the walls and ceilings of the premises.
What should the floors be like in the cellar?
Even if you choose a bulk cellar with your own hands rather than a classic cellar, in any case you will have to take care of the floors in the storage room.
Preferably, concrete floors are chosen because they are highly resistant to groundwater, as well as various pests, of which there are always large numbers in a country house.

