Drywall is one of the most popular building materials nowadays. You can use it to assemble a complex structure for a multi-level ceiling, make a partition or screen, level the walls, etc. However, this raises questions regarding the finishing of gypsum plasterboard elements. The fact is that the material is quite demanding in terms of compliance with the work technology, and painting drywall without putty raises the most questions.
Is it possible to paint walls without putty?
Drywall can be called a universal material. However, for all its versatility, it is very demanding. It is necessary to observe all the subtleties of technology, otherwise it will lose most of its wonderful qualities, quickly become unusable, crack and acquire an untidy appearance. Therefore, when carrying out any work, it is necessary to comply with the manufacturer’s requirements so that the walls and partitions made of gypsum plasterboard serve for many years.
Painting gypsum plasterboard walls is considered one of the simplest and most economical finishing methods: the materials for the work are inexpensive, and, importantly, almost everything can be done yourself. But some craftsmen want to further reduce costs and time and suggest skipping the stage of puttying plasterboard walls. They explain this by saying that the walls are smooth and covered with a protective film, so there is no need to apply a building mixture. But not everyone knows for sure whether it is possible to paint drywall without additional treatment.
In fact, puttying is needed not so much for leveling, but to protect the sheets themselves from aggressive external influences. Manufacturers always insist on additional processing of the material.
Note! If there is no putty on the walls, you will need to apply more layers of paint to achieve an even color.
Savings at this stage of work look doubtful. You can skip it only as a last resort, when there is simply no other option for painting walls or partitions.
DIY drywall painting
First, the drywall must be properly prepared and processed. It is necessary to check the sheets for strength, tightness and reliability of fastenings. When working, be sure to follow safety precautions and not allow paint to get on exposed skin. The room must be well ventilated and no open fire should be left near the workplace.
Preparatory activities begin with a thorough check for defects and surface treatment for application of products. The sheets must be tightly fitted to each other, the joints processed and sealed. The fastener caps should be sealed with a special tape and coated with a primer.
Can this be done without applying putty?
To understand whether it is possible to paint drywall with water-based paint without putty, you need to take a closer look at the positive aspects of the puttying process:
- Strengthening the coating. The top layer of gypsum board consists of cardboard, which absorbs moisture very well. If you do not additionally putty the sheet, the strength of the drywall can be significantly reduced.
- Increased coating adhesion, improved adhesion of paint to sheet.
- Reducing paint consumption by creating a water-repellent surface.
- Aligning paint color. Without additional coverage, the product will absorb and dry unevenly, leaving stains and gaps.
To understand whether it is necessary to additionally putty the drywall before painting, you need to decide on the purpose of the structure. Painting without preliminary putty is suitable for warehouses, production and utility rooms, where quality and beauty are not as important as in residential premises.
Work technology
If for some reason it turns out to be impossible to putty the wall before painting, then you must strictly follow the technology. This will extend the life of the walls, make the work easier and make it possible to avoid fatal mistakes. All work is carried out in stages.
USEFUL INFORMATION: Secrets of preparing walls for wallpapering
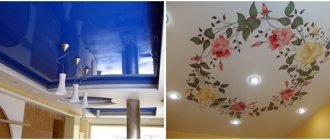
Features of painting for wallpaper
Painting drywall with water-based paint to match the wallpaper is an original solution for decorating rooms. The process is reminiscent of painting work.
Before applying paint to the wallpaper, it is correct to do a test painting on a small area. Wallpaper for painting is mainly white with a smooth or textured surface. It is permissible to work with paint only after the wallpaper has completely dried after gluing. This may take forty-eight hours or more. The technology for producing wallpaper for painting involves applying waterproof impregnation to it. This allows them to withstand several painting sessions during new renovation work. The most suitable dye is considered to be a water-based dye.
Before applying paint to the wallpaper, it is correct to do a test painting on a small area.
Preparatory work
First of all, you need to prepare the gypsum boards themselves for the upcoming painting procedure:
- Before work, the walls or ceiling must be thoroughly cleaned of all kinds of contaminants: dust, dirt, drops of fallen mortar, etc.
- It is advisable to additionally go over the drywall with a vacuum cleaner - the device will remove the smallest dust particles. However, despite their invisibility, they greatly reduce the ability of materials to adhere. It is not recommended to use wet rags to clean gypsum boards.
Cleaning is carried out no earlier than 1–2 days before the start of work. Otherwise, dust will again accumulate on the walls, and they will have to be cleaned again. It is better to carry out cleaning work a few hours before painting.
- It is necessary to check, using a spatula, the heads of all self-tapping screws screwed into the gypsum board sheets. To do this, run a spatula along the seam. If it touches the head of the screw or gets stuck on it, it means that it is not screwed deep enough. It needs to be tightened, otherwise noticeable and unsightly bumps may form on the wall or ceiling.
Puttying plasterboard surfaces
All that is needed for the most important step is a putty solution and a tool with which it is applied to the primed surfaces. For beginners, it is better to purchase a ready-made solution and “stretch” it using a spatula 25-35 cm wide.
For those who have already more or less got their hands on such work, you can prepare the solution yourself from powder putty. As skill increases, it becomes more convenient to putty walls with a metal float (width 25-35 cm).
It is very important before starting work to check that the putty is homogeneous, that is, that it does not contain solid particles that leave grooves on the surfaces. If you use powder putty, do not make a solution at once from the entire available amount. The mixture begins to thicken after 40-50 minutes, so you need to prepare it in small portions.
The procedure is as follows:
- A small amount of the finished solution is scooped up with a narrow spatula and transferred to a wide one - the one that is prepared for work. The putty is evenly distributed over the entire width of the tool blade.
- The process of puttying the ceiling begins from the junction with the wall, the wall - from the upper corner (any). The spatula is positioned at an angle of 20-30 degrees to the surface. The solution is applied in a layer of 1-2 mm with sweeping movements, it is very important not to change the pressure force.
- The corners are processed last.
The final stage of preparation for painting
When the putty surfaces are completely dry, they should be sanded. For this, a special grater is used. Smoothness is checked with a flashlight.
If you find a depression in some area, fill it with putty solution and sand it after drying.
Next, professionals recommend applying another primer before painting. And finally, the drywall finish is completely ready for painting.
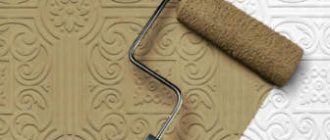
Primer of plasterboard walls
Drywall has a porous surface, so it absorbs a lot of paint. To reduce its consumption and improve adhesion, it is imperative to treat the wall with a special deep penetration primer. Also, thanks to the primer, the material will become more durable.
You need to apply the product so as not to miss a single millimeter of the surface. Otherwise, there will be differences in color in the future. There are three ways to apply primer:
- It is recommended to use a roller (preferably with a long pile, but medium pile is also possible) and apply the stripes from top to bottom.
- You can use a wide brush.
- Many people like to work with a spray bottle, but in this case there is a high risk that dry spots will remain or the application will be uneven.
How to paint drywall without putty
Drywall does not need to be puttied before painting if repairs are carried out in storage rooms, technical rooms and other rooms in which the quality of painting is not of significant importance.
If the quality component of the finish is not so important, you can get by with partial puttying of plasterboard sheets
When starting repairs, you should remember that you won’t be able to do without putty completely, since the seams between the gypsum board sheets and the screw heads will definitely need to be filled with putty mixture. Putty is applied to the drywall joints, onto which a reinforcing sickle mesh is pressed. The mesh in this case serves as additional reinforcement and reduces the risk of cracks forming in the future. After reinforcement, it is necessary to apply an additional layer of putty solution to the joints and, after drying, carefully sand it until a smooth plane is formed. Sanding, as a rule, is carried out 12 hours after applying the putty, using a construction float, fine sandpaper or an abrasive mesh.
On a note! When performing partial puttying, it is almost impossible to achieve a perfectly flat surface. But to improve the result, professionals recommend using a light bulb, which helps control the plane when grinding and make problem areas less noticeable.
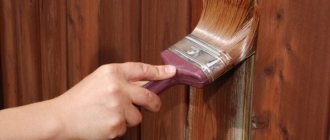
Surface preparation before painting
Before painting, the walls must be thoroughly cleaned, vacuumed and coated with a deep penetration primer mixture; for this you can use a brush or roller with long or medium bristles. Dust and other particles on the surface that are invisible to the eye significantly worsen the quality of the finish, so the room should be cleaned the day before the start of repair work, or better yet, immediately before it, in which case the dust will not have time to accumulate.
The primer significantly reduces the absorbent properties of drywall and reduces the risk of uneven staining on the finish coat. After the primer has dried, it is necessary to apply 3-4 layers of paint, with each subsequent layer applied after the previous one has completely dried. The edges and corners can be painted with a thin brush, and the rest of the area with a regular paint roller. The final number of paint layers is determined by the fact - if spots and noticeable color changes are observed on the surface, you need to apply another layer. Drywall surfaces are most often painted with water-based or water-dispersion paint.
Before painting, drywall must be primed, especially if the sheets have not been completely puttied
Seam alignment
It is impossible to completely avoid putty work before painting: at the joints of the sheets there are always small gaps that need to be sealed. You also need to disguise the heads of the screws, so you still have to make friends with the spatula.
USEFUL INFORMATION: Soundproofing plasterboard "Knauf": soundproofing or acoustic plasterboard
- Before caulking the seams on the walls, they are glued with sickle mesh. It will strengthen the seam and will not allow the sheet joints to separate in this place and crack later. The width of the mesh can be from 5 to 10 cm depending on the condition of the walls.
- Then the putty is diluted, following the instructions, and the seams are coated. If necessary, the work is repeated. Do the same with all screw heads.
- The mixture is allowed to dry, as a rule, this takes at least 10–12 hours, but it is better to check the instructions.
The raw solution has a darker shade, but the dried solution becomes light in appearance and hardens.
- When all the seams on the wall are dry, they are carefully sanded. This work is best done using a hand grater, onto which a piece of fine-grained sandpaper is attached, since it is necessary to control the pressing force and the thickness of the layer being removed. When using a sander, you can easily damage the protective paper layer on the plasterboard.
Grind until the putty on the seams becomes even and smooth, and also trim the mortar on the screw heads. Of course, it won’t be possible to perfectly align them with the wall, but you need to get as close as possible to this.
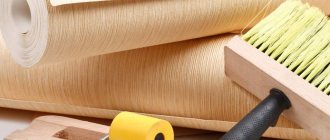
Painting tools
The proper tools for applying paint to drywall are a paint roller and a brush. A roller should be chosen with a medium-length pile, as the paint is absorbed into it optimally, allowing it to be easily distributed. Long pile takes up too much material, the tool becomes heavier and it becomes difficult to work. A roller with short bristles can leave poorly painted areas. The quality of the hair also matters. They should not be susceptible to chemical solvents that may be constituents in dyes.
The minimum length of the roller handle (clasp) is twenty-five centimeters. The kit may include a telescopic pipe. This is very convenient, since you do not need to install a ladder (stepladder) in the premises to work.
The brush is used to coat individual areas - corners, protrusions, surfaces of different levels. It is better to use a narrow brush (up to ten centimeters) of a flat shape.
The proper tools for applying paint to drywall are a paint roller and a brush.
The process of painting gypsum board walls
When the base is ready and the primer has dried, you can begin to actually paint the drywall. The process itself is not much different from the usual painting of walls and ceilings. Both acrylic and water-based paint can also be applied to drywall. However, there are a few things to consider when working:
- It will not be possible to paint a gypsum board wall in one layer: in any case, there will be differences in color, it will be visible that there is putty in the area of the seams, but there is none in the rest of the space. Therefore, you need to immediately prepare yourself for the fact that you will need at least 2-3 layers. And in some cases - even more. You need to prepare for this before the repair.
- It is better to use a roller for painting. In this case, the paint goes on more evenly, while streaks and streaks remain behind the brushes.
USEFUL INFORMATION: Design of a two-level plasterboard ceiling for the kitchen: 12 photos
- In order for the paint to lay evenly, it needs to be rolled out in a tray.
- A thick layer of paint will not help hide flaws on the wall. Due to the abundant coating layer, drips will form, which will lead to the opposite result.
- A new layer can be applied only after the previous one has completely dried. Otherwise they will be smeared.
- The next layer is applied perpendicular to the previous one: this is the only way to achieve uniform coloring and avoid gaps and differences in color.
- It will not be possible to properly process the corners with a roller; here you will have to use a brush. The same applies to the perimeter of the wall or ceiling near the baseboard. It is better to start painting by treating these treacherous areas.
It is difficult to say exactly the required number of layers. This is determined as work progresses: the drywall is painted until the color evens out. The absence of differences and stains indicates that the work was done with high quality.
- To apply the design, you can use a figured roller.
That's all for the work of painting walls, partitions and ceilings made of gypsum plasterboard. The technology itself is not much different from working with any other type of surface. However, the base for painting must be carefully treated.
Why putty drywall?
At first glance, such a smooth material does not require additional leveling before painting. However, the functions of putty are not limited to just leveling. Putty:
- increases the strength of the surface material,
- increases the adhesive properties of the base (paint adheres better),
- reduces the absorbency of the surface,
- evens out the color of the applied coating.
Drywall at its core is gypsum boards covered with thick cardboard. Despite its density, cardboard is still paper, and therefore absorbs moisture very well.
The paints produced by modern industry are mostly water-based, which means they will certainly be absorbed into the material. Because of this, paint consumption increases significantly.
Another characteristic of drywall is its tendency to dry unevenly. As a result, the painted surface becomes spotted.
If painting the walls is meant to be done in a warehouse or utility room, the end result may not be of great importance. But in living rooms it is better to do everything according to the rules.
You don’t have to putty the entire area of the plasterboard boards before painting, but the joints and fastening points must be puttied. However, in this case, the secondary primer should be applied not in one layer, but in two.
Trimming corners and reinforcing seams
Corner reinforcement is work that is associated with the processing of walls, the purpose of which is to align the corners. This process is one of the most important in processing, since the proportions and beauty of the work performed will depend on it. Since the GCM itself already assumes smooth surfaces, reinforcement is only necessary to provide reinforcement and prepare areas for further processing.
Various materials can be used for reinforcement. It can be like regular paper that is attached to the corner of the wall. For stronger reinforcement, metal inserts made at an angle of 90 degrees are used. The essence of the technology is not very different between the two types, since working with roll tape involves the same actions.
There is also special equipment that is designed for reinforcement. It allows you to get work done quickly and efficiently.
How is it shown:
- applying the solution at the required width and height;
- there are installations for applying the solution;
- angles that allow them to be used for alignment.
In home construction, it is not necessary to use special equipment and adjust the correct angles. You can do this yourself, from improvised or purchased materials. In addition, you can use basic tools that everyone has at home.
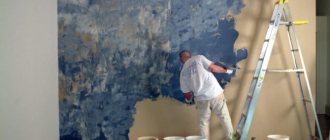
Preparation
The first stage of preparing concrete structures for painting is the use of sealant.
A special composition intended for concrete is applied in one layer and dries within 24 hours. The sealant allows you to create a barrier against the penetration of mold microbes. The next stage of the work process is priming. Concrete primers have a slight tint, which is necessary to later check that the entire surface is evenly coated. If not, the primer is reapplied, drying each layer for 24 hours.
There are special impregnations for concrete that perform a dust-removing function (protecting against abrasion and crumbling), which are usually used on concrete floors.
If there are cracks
It is better to repair any surface imperfections in the form of cracks, chips, drop-shaped recesses with a special repair solution (cement, putty) using a trowel or spatula.
This will allow subsequent layers of primer and paint to lay down evenly and will extend the durability of the coating.
After using the mixture to seal cracks, it is necessary to go over the surface with sandpaper to remove excess roughness.
Without finishing
Before applying paint, the concrete surface should be washed to remove dirt and dust, which shorten the service life of any paint coating. You can clean the concrete with a soapy solution using a rag or a rough brush in case of severe contamination.
On concrete, if there is no protective coating, rust will form over time, which should also be removed before painting.
Copper sulfate solution copes well with rusty deposits.
If the affected area is too large, it is necessary to treat it with rosin varnish.
With finishing
There are three main ways to remove old finishes from a concrete surface:
- sandblasting is a hardware method that requires skill and time for subsequent drying;
- alkali solution - necessary to remove old paint;
- using a spatula is a mechanical method of scraping a layer, time-consuming, but giving an easily controlled result.
Features of working with plasterboard sheets
One of the most budget-friendly options that does not require a lot of money is painting gypsum boards. This method is much simpler than gluing large pieces of special paper that requires precise measurements. In addition, the simplicity is noticeable, since there is no need to adjust the design. The ease of finishing and painting makes plasterboard a practical and convenient material that is useful for finishing home construction. When painting the material, you can use any designs, making the wall exclusive and not similar to the other.
Do-it-yourself painting of gypsum boards without putty:
- Increasing the strength of the material;
- Increased adhesive properties, so the paint lasts longer;
- There is a decrease in absorbed liquid;
- The color of the paint is evened out, which gives a beautiful appearance.
However, there are also negative features. If you do not use putty, stains may form due to uneven drying. Puttying drywall for painting is a necessary process that is carried out to perfectly level the surface.
Important. If you don't want to use putty, you can avoid using it, but you should use it on seams and paint joints. This will allow the coating to be distributed evenly over the entire surface.
Proper sealing of joints of gypsum board sheets is the key to high-quality painting
Joints of gypsum board sheets are a problem that many people encounter when painting. Nothing seems to be a sign of trouble, but literally after half a year, or even less, cracks will form on the already painted wall. These cracks form at the joints of sheets.
Let's find out why this happens and how to avoid it. The fact is that many craftsmen seal the joints of gypsum board sheets with a “serpyanka” mesh, which does not sufficiently reinforce the seam and the seams crack. To seal gypsum board seams, it is better to use paper tape, or even better, combine both serpyanka and tape, and also putty the entire drywall in two layers! But this is already a bit expensive, so we are considering an option without putty.
Tape for joints of drywall sheets
You can also stick sickle tape onto the joints under the wallpaper; you still can’t see under the wallpaper that cracks have appeared, and this won’t cause the wallpaper to tear, but you need to use tape when painting drywall.
It is better to seal the joints with a special putty, especially for gypsum board joints, it is stronger and more reliable. Self-tapping screws screwed into the gypsum board must be recessed into the sheet and these places must also be puttied.
The joints are glued with paper tape and puttied, the holes from the screws are also
Paint selection
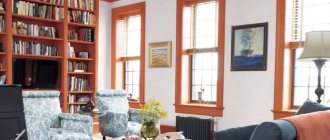
Paint color
When choosing a color, you need to keep in mind that light colors visually increase the space, while dark colors reduce it. Accordingly, light colors are better for small rooms, and dark ones for large ones. Colors are divided into cold and warm.
The former include blue and green, the latter – yellow, red, and violet.
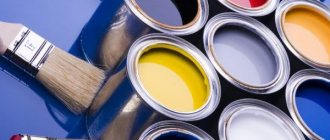
Type of paint
Alkyd and oil paints are not suitable for concrete coatings. It will be necessary to apply several layers of such paints, but even in this case it will not be possible to achieve high-quality coloring for the long term. Very soon you will have to repaint the surface again.
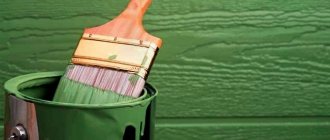
Suitable for painting concrete walls:
- Epoxy paints. They are highly resistant to moisture and wear. However, such coatings require good ventilation of the room.
- Latex and acrylic based paints. Resistant to temperature changes and low toxicity.
- Glossy paints. Advantage: attractive appearance. Disadvantage: poor resistance to mechanical damage. Do I need to prime the walls after the starting putty before the finishing putty? In terms of quality and environmental compliance, the best choice is products made in the USA.
Epoxy, latex or acrylic based paints are suitable for painting concrete walls.
Note! High-quality compositions are ready for use without any additional manipulations (dilution), and they can be used to paint walls even in cold rooms.
When choosing paint, you need to pay attention to the presence of an antibacterial component in its composition. If present, the surface will be protected from mold and mildew.
Impregnation for concrete
To create a protective layer that protects the surface from moisture, dust and aggressive environments, you can use concrete impregnation. Penetrating deep into the material, impregnation strengthens its structure.
Impregnations are made on the basis of acrylic, polyurethane, epoxy resin and other materials. The surface dries out a few hours after it has been treated with impregnation. Impregnations can be either colorless or colored.
Cleaning and priming drywall
There is a lot of debate about whether a primer is needed before further processing of drywall. The debate concerns which part of the surface needs to be primed. Some believe that only the caps and seams of the joints need to be modified, while others believe that the entire surface needs to be treated. Still others believe that there is no need to use a primer for drywall, and it is not needed at all.
Practice shows that it is best to use a primer over the entire surface of the drywall.
Reasons for using around the perimeter:
- The primer improves the adhesion of materials, so it will reduce the costs of materials such as glue, and others;
- when removing old wallpaper, the primer will allow this to be done without harming the material itself. If you stick the wallpaper on bare gypsum board, the wallpaper can no longer be replaced, since the material has deteriorated;
- Paint absorption occurs noticeably less when priming with GCM. This will allow the paintwork to be applied evenly to the surface, which will prevent the formation of stains.
Important. The use of primer on GCM is a controversial issue, but experts believe that it is best to apply primer over the entire surface of the coating. This will improve adhesion, coloring properties and make it possible to throw away old wallpaper.
KM recommendations for drywall from manufacturers
GLA and joints treated with putty are coated with any water-based dye.
- for living rooms: brand Tex Ceiling paint TEX Pro white 9 l, price 1099, rubles;
- in rooms with high humidity: brand Accent Rezel+ Universal rubber paint, 6 kg for 435.00 rubles;
- for rooms where dry wear is important (hallway): brand Accent, Paint “Acrylor Extra” Accent 1.5 kg, price 132.00 rubles.