There are many ways to decorate an arched opening - finishing the arch with a corner, covering it with plastic, painting and others. All these methods allow you to harmoniously fit it into a room where a certain design already exists. Manufacturers offer a wide selection of materials; there will be no difficulties in combining them.
In addition to decorative functions, the corner protects the arch from wear and paint abrasion - we will discuss this further.
Important function of arched corners
Arched decorative corners
Finishing corners have been used for many years to simplify renovation work. It allows you to form corners and also protect the doorway. The main advantage of arched corners is the possibility of extending the service life of the finish, since with them the wallpaper will not break off at the corners and the paint will not be erased.
And if during the installation of an interior arch you need to plaster a corner made of chipboard or plasterboard, then an aluminum corner will allow you to display 90 degrees. Any home corner is subject to external influence, especially for arched openings - rearranging furniture or regular Saturday cleaning can damage it. There is a solution - glue a decorative corner.
Important! A perforated corner provides a smooth edge for a curved design. At the same time, the consumption of putties is reduced.
Thanks to perforation, the corner can not only be framed with clear lines, it can be bent and drawn into various shapes. The soft curved element makes it possible to design not only square or rounded arches in a classic style, but also to create semi-arches, as well as openings with non-standard bends. Arch corners have the following advantages:
- Affordable price.
- Practical - can be used in most interior solutions.
- Finish – produced in a wide range of colors.
- Installing decorative elements is not difficult.
Why do we need corners for an arch: types, functions, methods of fastening
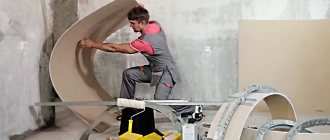
It is better to trust the construction of an arch in a house to professionals - this is an indisputable truth, proven more than once by the facts of the collapse of home-made structures, their curvature, and fragility.
It is naive to rely on your own talent and try to make an arch with your own hands using instructions on the Internet. In the worst case, people may get hurt. You first need to calculate the arch in the apartment, which requires knowledge of basic formulas and rules. Yes, and the standard appearance is unlikely to be achieved. The beauty of an arch depends on many factors. One of them is the quality of corner alignment. To prevent even the slightest deviation from the norm when making the central element of the interior, special corners are used. This is the name for an auxiliary working tool and consumable that will allow you to make the corners very even and without spending a lot of effort on it.
Among self-taught craftsmen, there is an opinion that to form an even arch it is permissible to use any decorative elements. This is not entirely correct; when decorating arches, special devices with certain dimensions are used, which are intended only for finishing structures with indirect lines.
Necessary tool
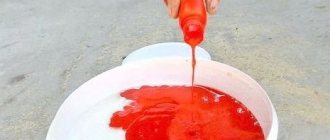
Liquid Nails
The plastic corner for the interior arch must be properly secured. For this purpose, a list of such tools is prepared in advance:
- Plastic element to match the style of the room.
- Assembly adhesive.
- Liquid nails will help attach the element.
- Rubber mallet.
Important! Gluing decor using liquid nails is simple, but risky. Firstly, the plastic can be damaged, and secondly, a large amount of material used leaves greasy marks on the finish.
It is best to attach a bent corner using assembly glue or liquid nails, since installation with metal nails or screws looks awkward and also increases the chances of cracks and chips.
Drywall is one of the most common materials for creating interior portals. It is lightweight, attached to the frame and makes it possible to draw internal and external radius corners. Since the material requires subsequent cladding, corners are used for ease of design. Glue for installation - putty.
Finishing an arch with a plastic corner (video)
Tools for work
Prepare the following tools and additional materials:
- square;
- stationery knife;
- water level;
- masking tape;
- wooden planks;
- rags to remove excess glue;
- metal scissors or hacksaw.
If there is no square, but only a school ruler, then remember your geometry lessons from high school. Draw a right triangle on anything with sides of 3 and 4 centimeters and a diagonal of 5 centimeters. Or take a school arithmetic notebook and draw a right angle in it, and then transfer all the measurements to the surface. If the amount of work is small, then several cuts can even be made with a hacksaw blade, holding it in your hand.
To ensure an even cut, apply a metal square to the surface. Its side will be a guide and will not allow the hacksaw blade to go to the side. The cut must be strictly perpendicular to the longitudinal axis, otherwise the seam will be visible.
Although arch corners are not a mandatory element of room design, they are recommended to be used in order to give the interior a finished look.
Installation of decorative corners
Any apartment will look much more impressive if the edging of existing arches is decorated with plastic corners. Therefore, let's look at how to glue a plastic corner to an interior arch and make the frame durable and reliable.
There are two needs to use a PVC part: to glue and remove a right angle, or to paste over an arc. Condition for creating right angles:
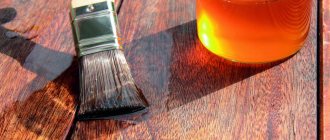
- Surface treatment with a penetrating primer solution.
- Use a square to mark, mark and cut to the required size with a grinder.
- Apply the adhesive mixture to two inner planes of the element.
- Apply the strip, gently pressing it along its entire length.
First you need to level the surface of the opening
The flexible corner for the arcuate arch is fixed in a slightly different way. Photos and videos will help beginners understand the differences and features of installation. Installing such an element yourself will be no more difficult than the previous option, but pay attention to the following nuances:
- The width of the sides of the corner when finishing the arc varies. The wide side is laid on the end corner of the arch, and the narrow side is pressed against the wall.
- Silicone sealant or adhesive solution is applied to the element, as in the first case.
- You need to fasten it with several nails - a necessary measure, since the hot solution must completely set.
- Instead of nails, it is allowed to use masking tape - it secures the edge of the plastic corner.
Gluing a decorative corner
Important! It is prohibited to use a home or construction hair dryer to speed up drying, especially if photo wallpaper or paint is used for the walls.
Corners for interior arches are easy to glue onto wallpaper. The finishing material quickly sets with glue and allows you to test your strength the very next day. But if you want to cover an arch with an MDF corner, then use these tips:
- This type does not require additional fixation, but after applying glue to the corner and pressing it to the surface, wait a couple of seconds and then peel off the element again.
- After waiting for the glue to thicken, you can safely return it to its place. Usually 1-2 minutes is enough.
It is better to use a wooden corner for arched openings made of the same material. It is difficult to bend, so you can glue it on straight planes. Ideal use is rectangular portals where there is no round element.
Glue the plastic corner to the arch
Interesting! Among the abundance of finishing elements, you can choose cork, rubberized, rubber corners. A rolled and flexible rubber corner is simply necessary in places where water hitting the surface makes it slippery. These can be glued to tiles and concrete if necessary.
It is also possible to cover the arch using ordinary plastic corners, but in this case the elastic threshold will be much smaller. In order to bend the product to the desired size without damaging the product, you should heat the material with a hair dryer.
For the decorative design of arches and walls, polyurethane and polyurethane foam are used - in this case, all surfaces must be smooth. If there are small differences, then you need to glue the elements together by gently pressing and increasing the amount of glue in these places.
Perforated corners
Unusual looking corners. With their help, it is possible to easily and quickly eliminate irregularities on the edges and at the same time protect them in the future from chips, shedding, and destruction. They go on sale in white and have perforations along the entire length. One edge of the corner is smooth, the opposite is made in the shape of petals. This design was not chosen to save material - it allows you to bend the corners in the right places without fear of accidental creasing or cracking.
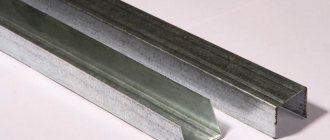
Arched corners, despite their simplicity, are multifunctional and are used for other purposes. They are suitable for finishing suspended ceilings and interior plasterboard partitions. It doesn’t matter on what front of the repair work you use them - they perform a load-bearing function, because they are installed on the base of the arch, and after installation they require the application of plaster and a finishing layer. Corners are made from PVC or metal, each length no more than 3 m.
The third type of arched corners on the market are cork elements. They are used exclusively for decorative purposes. They are not as durable as their metal and plastic counterparts, so they are not in demand.
Photo gallery of finished works
Well, gentlemen, novice finishers or home craftsmen, you still don’t know how to bend or fix bent components for building plastic * (PVC facing plastic)? Then you will definitely like this material! After all, only here will they teach you how to lay a plastic corner, L-shaped profile or F-shaped profile on an arch and tile, and indeed on any surface. BUT! Initially, the material was conceived to help those people who are still carrying out finishing work using plastic or carrying out partial dismantling of it, during which waves bend or appear on the corner, F-shaped profile, and especially at the start, or as it is also called the L-shaped profile.
So that everyone understands what we are talking about, I am attaching this photo.
I’ll tell you a little further about how to bend a plastic corner, and also along an arch, but now I would like to talk about how to align this corner, an L or F shaped plastic profile that has undergone some kind of deformation, not particularly critical!
I'll start with a small example.
In a toilet lined with plastic, it was necessary to get a long PVC panel clamped on both sides with a start (L-shaped profile). The plastic was on the front side, the toilet was standing flush against each other, and there was no other way to pull it out without additionally dismantling the entire right wall. Which is what I didn’t want to do. In general, using a heroic force, the plastic jumped out of the starting panel, bending it and making nicks and waves in it. It looked very ugly and it didn’t occur to me how to fix it without replacing the panel. Well, maybe cut out the place of deformation, at a loss of aesthetics! umnyestroiteli.ru
This is still a decent picture, since out of fright they leveled most of it with their hands; before that it was simply disgusting. So. What we did.
As it happens with a Russian person: - Laziness gives rise to ingenuity. I didn’t want to go to the store, and I didn’t want to spend money on starting either! Yes, and going through the entire right side of the node is not a “vein”. Taking an ordinary home hair dryer and turning it on to the third maximum speed, I brought it to the bent starting plastic.
And then a miracle happened. The waves formed on the L-shaped profile at the time of dismantling simply leveled out and the launch itself even seemed to hug the plastic panel a little. Yes, here’s the actual result, the still hot result in the photo below.
As you can see, all the deformation on the component has practically disappeared and everything doesn’t look so sad anymore. After further manipulations everything became even better!
As for the internal and external plastic corners, F-shaped profile, their deformation is corrected in the same way, using a hair dryer.
And now, actually, how to bend a plastic corner onto an arch, and for any decoration in principle.
How to bend a plastic corner: along an arch, tile, or any surface!
We are already savvy and know for sure that we will need a hairdryer for this. On many construction sites I advise you to bend plastic corners using a hair dryer. But in the previous example, we were perfectly convinced that an ordinary household hair dryer with three speeds would be suitable. This is due to the fact that the plastic corner itself is made of thin PVC * and begins to bend, taking into account the fact that it is not fixed and nothing presses on it, even from direct rays of the sun. You should have seen this in hardware stores with large windows that let in the light. They sell corners there that are so wavy that the parrots can rest. And this is a direct violation of the storage of plastic products! So.
Bend a plastic corner along an arch is as easy as shelling pears. You will need to run it along the arch and at the moment of greatest tension, simply heat it slightly in the place we need, until the stress on the bend is completely removed, so that the corner can move further along the arch without any problems. As a rule, these are three places in which the plastic corner will need to be bent. This takes into account the fact that at home you have an ordinary, not a figured arch.
Well, let's look at these places in the picture below.
As you can see, in a regular arch there are three potential zones where you will have to bend the plastic corner. But that is not all. You may encounter such a problem that you will have to use a hair dryer around the entire perimeter of the arch. Don't worry, this is normal. Heat the corner with a hairdryer not too much, the main thing is to lay it around the entire perimeter without white kinks. And then once you glue it, only then will you go through it one more time to eliminate minor or major defects. The corner will definitely fit around the perimeter as it should.
Bending a plastic corner on a semi-arch is also very simple, even easier than on a regular arch. Since she only has TWO places where she needs to bend it!
More complex arches, in my opinion, are not framed with a plastic corner, since there are special panels and slats for this. Well, finally, something interesting.
The material “How to bend a plastic corner” was sent by our regular reader and expanded by the administration of the site Construction from A to Z. Enakievo-Donetsk *.
https://www.umnyestroiteli.ru
Master's answer:
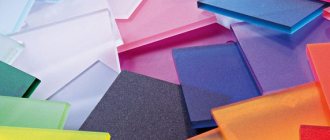
Real materials intended for finishing are reliable and durable. But the most valuable qualities are combined in plastic corners. They are made from solid polyvinyl chloride, and they are sheets of plastic with a given specific width. In accordance with the technology, plastic corners are obtained after bending plastic sheets exactly at an angle of 90 degrees. Thanks to a number of additives to the original plastic, the corner is extremely durable and flexible at the same time.
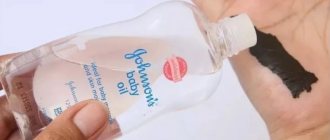
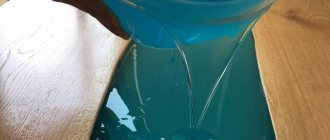
In order to give the plastic corner the required shape, you will need the corner itself, a powerful hair dryer that produces very hot air. Also stock up on a sharp knife and sealant (liquid nails).
It happens that you need to change the shape of a corner, for example, edging an arch. In order to change the shape of a plastic corner, you need to heat it to a certain temperature, without resorting to open fire. It is best to use a construction hair dryer, and if you don’t have one, heat the plastic with a regular hair dryer or hot water.
When the corner has warmed up thoroughly, then, without hesitating for a second, apply it to the joint of adjacent surfaces, previously coated with liquid nails or sealant. As soon as you “plant” the corner, hold it for a while so that it exactly takes the shape you require. During the cooling process, the material will exactly repeat the bends and convexities of the surface.
It is to create beautiful arched structures in the interior of an apartment that manufacturers produce special corner arched elements. The design of these elements is designed in such a way that there are many notches on it, allowing you to bend the plastic corner, adjusting it to an arch with any diameter. The corner arched elements are fixed in the same way as plastic corners - using liquid nails and sealants.
In order to create complex geometric shapes, you need to cut the ribs on a plastic corner with an interval of 0.5 cm opposite each other and so that there is a mandatory offset of the cuts in relation to each other. It is very easy to bend this shape, but there is one caveat - the structure itself is fragile, and if you cut it longer than it should, the corner will break. In addition to all this, the decoration of the corner will suffer, so such actions can be carried out in the place of the corner where it will be primed or puttied.
Installation of plastic corners is very simple. The corners can be fixed with liquid nails, sealant, or ordinary metal nails. Plastic corners are very easy to clean, even using household chemicals. They are waterproof, nonflammable, durable and resistant to any mechanical damage.
Plastic corners are used in different areas. They protect joints and external corners from cracks and damage, and increase their strength. They also contain a decorative element, which is used in the manufacture of furniture. But the most important thing is that PVC corners are absolutely environmentally friendly and do not harm human health.
The arch in the interior serves both as decoration and determines the quality of the apartment’s renovation. Its shape and finish highlight the style. The location in a high traffic area requires protection of the protruding elements of the opening. Decorative corners for wallpaper will help to beautifully emphasize the shape and strengthen the arch; decorative corners for wallpaper will help create a holistic image. They can also be used on painted surfaces.
Corners for arches for wallpaper
Clear lines and protection from destruction are obtained thanks to the edging
Wallpapered and painted outer corners are the first to begin to deteriorate. As people pass by, they cling with their shoulders and legs, and hit the protruding elements with various objects. I advised my friend, who was finishing his renovation, to stick up a corner for wallpaper. In his house, figured arches separate the kitchen and dining room, zone the large living room, and separate the hallway from the corridor.
Finishing the arch with corners
The pasted edges of the arch without additional finishing are visually blurred and merge with the background. The easiest way to make a line clear and turn it into interior decoration is with the help of a decorative profile. It is flexible, made from:
- plastic;
- metal;
- laminated cork.
Decorative plastic profiles are used more often than others. It is painted during manufacture. Has a uniform cut tonality. It bends easily and hides surface defects and irregularities.
Metal corners are used for edging arches in modern techno, hi-tech, art deco, and avant-garde styles. They are made of aluminum strip 0.3 - 0.8 mm thick with a decorative coating:
- spraying;
- chrome plating;
- lamination.
The surface can have any color. The most popular ones are steel, black metal and mirror ones.
Cork wallpaper corners are rarely used. It is mounted on arches with a large arch radius. They are used in interiors with wallpaper and panels made of similar material. A profile made from natural bark is more expensive than plastic and metal materials.
Arched profiles are divided according to purpose:
- perforated plaster;
- decorative.
For corners whose rotation is greater or less than 900, special flexible corners are produced from laminated cardboard and plastic.
Perforated profile for arches
Arch and corners for it under wallpaper
The corner of the arch can be finished if it is smooth, without changes and does not go to the side. To do this, special perforated corners are installed during putty:
- plastic;
- metal;
- cardboard.
One side of the profile consists of segments. When bent, they easily fan out or compress, taking the desired shape, and adhere to the surface of the arch and figured multi-level ceiling. When putting putty they serve as beacons. Attach them:
- construction stapler;
- nails;
- adhesive composition.
When renovating indoors, plastic corners are mainly used. Outside the house it is more practical to use metal ones. Cardboard is rarely found on sharp and obtuse corners under wallpaper in the interior.
The use of a plaster profile makes the lines of the arches correct and the transitions of the planes clear. The trellises and paint lie flat. At the same time, perforated profiles strengthen the corners and protect the finishing material from destruction and chipping.
How to install corners
The corners are attached to the surface using glue, self-tapping screws or special nails without heads. The most common method is adhesive: it is much easier to secure the corners to the surface using so-called liquid nails or a special sealant. Before choosing a mounting method, make sure that the adhesive option is acceptable in your case. You will have to replace adhesive compounds with mechanical fastening methods if the adhesive contains a chemically active reagent that has a detrimental effect on plastic or metal. Some compounds are so aggressive that they can cause deformation of the corner. As a result, instead of a perfectly smooth edge, you will get an unpleasant result.
If out of all the options you still choose adhesive, try to purchase a “Decor” class product. It goes on sale in a wide range and does not harm plastic elements.
Before starting work, take the trouble to prepare the surface: in order to achieve reliable adhesion of the corners to the base, you need the surfaces to be clean, free of dirt and dust. If you are not sure that there are no particles of fat on the corners, go over the inside with a solvent.
The time has come for priming and impregnation - they are used to treat the surface of the arch and leave to dry for about half an hour. Start gluing the corners. An important point - do not under any circumstances try to install decorative elements on top of the wallpaper if you do not want to spoil both. Even if you initially manage to secure the corners, they will not last long, so remove all excess materials, only then proceed to finishing.
Variety of decorative corners
Corners for wallpaper for arches
You can choose corners for wallpaper that match or contrast. It all depends on the style and desire to emphasize the arch line. Plastic corners created for arches have different sides:
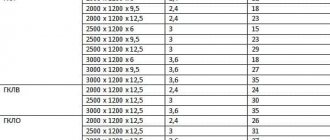
- 9 x 16 mm;
- 10 x 20 mm;
- 13 x 16 mm;
- 15 x 30 mm.
There is no specific standard regulating the size of the sides. Each manufacturer produces a wallpaper corner in a width ratio that it considers convenient. In addition, the profile length ranges from 2700 mm to 3000 mm. Equilateral corners are also used to decorate the arch. They start from a side size of 10 mm and end with 50 mm. Their thickness is 1 – 1.4 mm. Wider trims are custom made for a specific arch.
The thickness of the plastic profile for finishing arches is usually one millimeter. This is enough so that the wallpaper corner can hide unevenness and remain flexible. In addition to plain colored ones, they can be painted to match various types of wood, metal, and stone.
Attention! When purchasing, pay attention to the bending radius. Its minimum size by which a decorative corner can be bent without destroying it and creating extreme stress.
What size and color to choose for a certain style
Arch in the interior of the apartment
You can make the corners neat without highlighting the arches in the interior using a narrow profile matched to the background color of the wallpaper. A contrasting dark edging will emphasize the shape of the opening and concentrate attention on it. For folk and natural styles, decorative plastic wood-look corners are used.
The smaller the room and the arch, the narrower and more inconspicuous the corner should be. Contrasting bright finishes make the interior expressive and visually reduce the space.
The tone profile should match one of the three colors most often used in wallpaper designs.
Installation of decorative arched corners
Corners for the arch to the room
The decorative arched corner is installed last during renovation, when the wallpaper is glued and dry. It can be attached in various ways:
- self-tapping screws into holes with a cone for the heads;
- carnations with cut off heads;
- adhesive composition for plastic;
- liquid Nails.
I use self-tapping screws when decorating interiors in loft and industrial styles. In this case, they are elements of thematic design.
I never use nails. If they become clogged, the plastic may crack. Even if the caps are cut off, traces of the fasteners are visible. It is difficult to match the mastic exactly to the tone of the finish and to disguise the nails.
Attention! Remove strips of wallpaper half the width of the profile and glue the corners directly to the putty.
Arch and corners for wallpaper
I install the corners for the arch with glue mainly on painted surfaces and thick washable wallpaper.
- I cut the wallpaper on both sides of the corner with a sharp knife.
- I cut and check the fit of the dry profile. I mark the middle of the corner and arch.
- I adjust the joints. I'm rechecking their alignment.
- I apply a small amount of glue to the middle of the profile.
- I start gluing from the middle. I press the corner and secure it with tape to the wall.
- After the glue dries, I remove the tape.
Advice! If the length of the profile is not enough to completely cover the arch, add it symmetrically on both sides. This will look more aesthetically pleasing than the usual “sharpening” in one place.
I use liquid nails most often when finishing glued arches. Preparation is similar to gluing. I only apply liquid nails pointwise, press for a few seconds and move further - from the middle to the right, then to the left and down. The quick hardening of the composition does not require fixation with tape and long pressing with hands.
Preparing the surface for installing arched corners
- Before gluing decorative corners, it is necessary to clean the surface from dirt, old wallpaper, putty and loose materials.
- If the base is greasy, it should be treated with a solvent or degreaser.
- The profile is glued only to the prepared wall, i.e. preliminary puttying and priming of the surface will be required. After the building mixtures (putty and primer) have dried, you can begin the main work - gluing the arched corners.