Description of technology
You can often hear from hunters that supposedly real bluing of a gun can only be carried out in a factory setting. However, such words carry only half the truth. Yes, during the industrial process, steel undergoes much better chemical treatment, since the reagents contain a huge amount of iron oxide. But this doesn’t mean that you won’t be able to achieve the same result at home. The most important thing is to know the optimal technology and also have the necessary equipment. So, to carry out bluing at home, one of three methods is usually used:
- Oxidizing agent treatment. The procedure involves coating the trunks with a special reagent (for example, saltpeter), which reacts with the metal and gives it a black color. However, the peculiarity of this technology is that the chemical will have to be heated to the melting point, which is not always possible to do at home.
- Hot bluing. The most common method, which is as similar as possible to what is used in weapons factories. Another definite advantage is the absence of harmful fumes during operation. The technique is to first heat the part to a high temperature, and then dip it in linseed or machine oil.
- Cold bluing. The method is usually used if the steel has low strength and may lose its qualities when exposed to heat. The whole process consists of step-by-step processing of the metal with various oxidizing agents. The most important thing is to follow the instructions exactly, and also monitor the time the barrel is immersed in the chemical.
In addition, many hunters practice the method of processing metal with “rusty varnish” (we will talk more about this procedure in one of the following sections). So there really are quite a lot of methods for processing a barrel. Which option to choose depends only on your preferences. Our task is to tell the reader about the main advantages and disadvantages of each method, as well as to provide detailed instructions that will allow the method to be carried out as accurately as possible.
How to restore bluing? Do-it-yourself gun barrel bluing
They say that metal bluing is nothing more than the artificial application of oxide films to barrels that increase the protective properties of the metal. One of the many methods is acid oxidation, or “rusty varnish” - a composition that causes increased oxidation of the steel surface with the formation of magnetic iron oxide.
To prepare “rusty varnish” you will need: 50 ml of technical hydrochloric acid, 54 ml of concentrated nitric acid, 30 g of cast iron or carbon steel shavings, 20-30 g of metal scale, 1 liter of distilled water.
“Rusty varnish” should be prepared exclusively in the open air, and on the leeward side, otherwise you risk being poisoned by the gases released during cooking. Pour 50 ml of hydrochloric acid into a glass container, add one third of cast iron shavings and scale, then carefully add one third of nitric acid.
| Catalog of spare parts for Ctr https://ctr.parterra.ru/ Car spare parts from warehouse https://febest.parterra.ru/ |
After some time, the mixture will turn a little green and begin to bubble, strongly releasing heat and brown gas. When the seething calms down a little, add the same amount of chips with scale and another third of nitric acid. The reaction will resume and then subside again, after which the remaining chips and acid can be added.
As a result of this sacred rite, you should get a red-colored mass, which must be allowed to brew for at least 24 hours in a sealed container. After a day, add one liter of distilled water to the resulting mass. The varnish is ready. It does not require special storage conditions and can serve for many years. In addition, in its finished form it is completely safe.
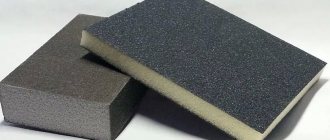
Now we need to prepare the surface of the metal, that is, carefully grind and polish it. We start sanding with relatively coarse sandpaper to zero, then move on to processing with fine abrasives.
Next, degrease the metal surface. To improve this process, taking into account the different nature of fats and oils that need to be removed, we add emulsifiers to the solution. One of these substances is “liquid glass”, or ordinary office glue.
So, degreasing solutions per liter of water:
Option 1.
Caustic soda, or caustic soda – 10-15 g. Trisodium phosphate – 50-70 g. Soda ash – 30-40 g. Liquid glass – 3-5 g.
Option 2.
If the trunks are soldered with tin solder, then it would be better to use the following composition: Soda ash - 100-150 g. Liquid glass - 20-30 g.
Option 3
. Blueing of metal: 1. Immerse the barrel of the weapon, or its metal part, in a concentrated solution of caustic alkali containing sodium nitrate. Heat until almost boiling. The thickness of the black film will be up to 1.5 microns. when repeated twice. After this, rinse and dry, and plunge into oil for 5-7 minutes at a temperature of 105 - 120 degrees. 2. Heat the metal until it turns crimson and rub it well with the onion head.
Read also: Copper tips for a soldering station
Option 4
. The easiest way to bury metal is as follows: it can be done at home. To do this, you need to degrease the metal that you are going to burnish, wash it with detergent for a more even burnishing, then heat it on a gas stove until a brown tint appears. And immediately rub this hot preparation with a cloth dipped in oil (machine or vegetable oil will do). Then heat the metal again to burn off the remaining oil. We get a radical black color.
Whichever of the three options you choose, the temperature of the solution should be at least 90-100 degrees, and the exposure time of the parts in the solution should be 15-30 minutes. In order to check whether the process is completed or not, it is enough to take the trunks out and see if the liquid covers them evenly. If it does not form drops, then the process is complete.
Now all parts should be thoroughly rinsed with running water, wiped, dried with a hairdryer or blown with compressed air and immediately begin applying the “rusty varnish” directly before a natural oxide film forms on the metal due to its contact with air.
The trunks should be coated twice, namely: apply varnish to the surface of the trunk using a brush, remove all excess with a brush, then dry at a temperature of 40-60 degrees, repeat everything again. To avoid poor-quality bluing, try not to touch the barrels with bare hands. After drying, the surface should acquire a dark orange color.
Then comes boiling down. To do this, prepare a solution from clean (not tap) water with the addition of nitric acid at the rate of 1-1.5 ml per liter of water, boil the water in a container for several minutes, then immerse the trunks in a boiling bath and boil them in a boiling solution 15 minutes. The trunks should acquire a velvety black color. If you don’t get a perfect black color the first time, don’t be upset - with further digestion this defect will be eliminated.
The next stage will be brushing, i.e. Using a round metal brush attached to a grinding machine or drill, it is necessary to remove loose deposits from the metal surface until a shiny black film is obtained. Be sure to wear safety glasses when brushing.
The total number of barrel coatings with “rusty varnish” should be at least eight (sometimes ten, until a rich black color appears), therefore, there should be four boilings and four brushings.
After the fourth brushing operation, the final stage begins - oiling. The barrels, now of a uniform graphite color, are immersed for five minutes in a bowl with neutral (machine) oil, which is heated to 105-110 degrees, or natural drying oil.
The process, of course, is not fast and labor-intensive, but weapons that have undergone this procedure provide excellent resistance to corrosion for quite a long time, even under the most unfavorable conditions for it.
Keeping hunting weapons in order is the responsibility and concern of every owner. Maintenance requires some effort, but for true lovers it is not a waste of time. The ability to extend the service life and eliminate the appearance of traces of corrosion, shells or other defects on gun barrels is of great importance for successful hunting and the owner’s own safety. The traditional way to protect weapon metal from rust is bluing, which has to be done from time to time. Coating application is a technically simple procedure, but requires considerable experience and skills. Many owners blue their weapons at home, which saves time and provides the highest possible quality of protection. Sometimes this option is the only available method of coating, so it is useful for every owner of a hunting rifle to have an idea about it. Let's consider what this procedure is and how accessible it is for independent implementation.
Preparation for the procedure
Before you start bluing the barrel in one way or another, it is first recommended to carry out a number of preparatory procedures that will allow you to achieve a better result. To do this, simply follow the algorithm described below:
- We clean leaded deposits using a copper or plastic brush.
- We treat the inner surface of the barrel with a rag soaked in kerosene.
- We thoroughly wash the barrel channel with a soapy solution (water + detergent).
- Place the barrel in a warm room and wait for it to dry completely.
- We grind the upper surface of the barrel in any convenient way until it is perfect.
- We disinfect the surface using a solution of citric acid or alcohol.
The weapon must be cleaned before bluing.
After completing all these activities, you can choose the bluing method and begin processing. However, first, we recommend that you familiarize yourself with the safety rules to avoid an undesirable outcome.
Safety precautions
Even a beginner understands that bluing the barrel of a hunting rifle is a rather dangerous activity that is associated with a huge amount of risk, especially when it comes to the use of chemical reagents. In order to reduce the likelihood of an accident to a minimum, it is strongly recommended that you follow certain safety rules:
- Reagents may only be stored in clean containers, out of reach of unauthorized persons.
- During the bluing process, it is important to use protective clothing, gloves, goggles and a mask.
- It is best to work with hazardous chemicals outdoors or in a ventilated room.
- It is extremely important to comply with the proportions and time frames indicated in our article.
- If you suspect poisoning with a chemical substance, you should immediately consult a doctor.
The equipment that will be used for bluing also deserves some attention. For example, if a gas stove is used to heat oil or a reagent, then it must be in good condition, like the gas cylinder itself. The same goes for other tools, such as a sander.
Types of bluing
There are the following types of metal bluing:
- alkaline . The steel surface heated to 135-150° is covered with a thin layer of alkaline solutions, causing an oxidation reaction and the creation of a protective film;
- acidic _ Produced by electrochemical or chemical methods using acid solutions;
- thermal _ Refers to traditional methods of bluing, although there are more modern technologies with the formation of protective films in vapors of ammonia-alcohol compounds or in molten salts.
Read also: Electrical wiring diagram for angle grinder 90112
There are a huge variety of methods for applying protection, from complex multi-step processes to simpler and faster procedures. All of them are characterized by a limited period of validity and do not provide absolute protection from moisture. The barrels of hunting rifles must be blued from time to time, and the condition of the weapon must be constantly monitored. Coating cannot be considered as a final solution to the problem; it is only a way to somewhat reduce the consequences of contact with water and slow down the rate of rust formation.
Cold bluing
Now that you are completely ready to start bluing, you can get to work. The cold method should be chosen if the weapon barrel does not tolerate thermal effects well (the steel has not undergone the cold hardening procedure). This method is usually used by owners of air rifles or small-caliber shotguns. The essence of the method is the step-by-step processing of a steel part with various chemicals. You can purchase entire sets in specialized stores. The most popular among hunters is the mixture of “Voron-3” (domestic product) and “Parisian oxide” (foreign production).
Using a solution and a brush
Detailed instructions for working with a particular chemical can be found in the document that will necessarily come with the reagents. At the same time, the advantages of such a technique are visible to the naked eye - the simplicity of the method, as well as the absence of the need to create the liquid with your own hands. In addition, commercially available reagents are generally non-toxic, so safety requirements are minimal (something like “avoid eye contact with the chemical”). So the technique is ideally suited for those who are doing bluing for the first time.
However, this method also has a significant drawback, based on the fact that the barrel is treated with chemicals using a special brush. Such a tool is not best suited for penetrating hard-to-reach areas of the trunk. After bluing, you will definitely have to resort to additional polishing, since the layers of the reagent are not applied evenly. The worst part is that cheap chemicals can leave an uneven mark on the metal, resulting in the need to repeat the procedure. Well, not everyone can afford an expensive composition.
Immersion method
In rare cases, cold bluing also involves immersing the part in a special liquid, which is diluted according to the instructions from the reagent manufacturer. The undoubted advantage of this technique is that the chemical penetrates into “all the cracks” of the weapon, resulting in better processing. In addition, the liquid does not splash, as when using a brush, so the technique is considered even safer. However, it also has a drawback - the huge cost of the concentrate, which will have to be diluted. In this regard, we decided to do a little digging on the Internet and find methods for making our own liquid for cold bluing. We managed to find a couple of proven methods.
For the first recipe we will need the following reagents:
- nitric acid (HNO3) - 20 grams;
- ferric chloride (FeCl3) - 75 grams;
- medical alcohol (C2H5OH) - 30 grams.
The reagents for the second recipe are as follows:
- ferric chloride (FeCl3) - 170 grams;
- nitric acid (HNO3) - 13.5 grams;
- hydrochloric acid (HCl) - 4 grams;
- copper sulfate (CuSO4) - 4 grams.
This method is not suitable for bluing knives, since this coating is not resistant to mechanical damage. The immersion method is best used by those who do not use weapons very often, for example, collectors. The hunter runs the risk of damaging the protective film on his first trip to the forest, by getting the trunk caught on branches.
Hot bluing in oil
The most popular method of bluing weapons at home is the method using oil. Most experienced hunters will say that this is the only correct procedure, since it is as close as possible to that used in weapons factories. And it’s quite difficult to argue with such a statement, because the protective film turns out to be really very durable, so the bluing effect will last much longer.
In addition, during the work you will not have to use various chemicals, so there is no chance of poisoning. The technology itself is also not complicated:
- First you need to heat the barrel to a high temperature. Moreover, the hotter the metal, the better. To do this, you can use either a regular wood-burning stove or a simple metal barrel, building a fire in it. The most important thing is to be careful when removing a hot metal part. So don't forget to wear rubber gloves and get some tongs in advance.
- We immerse the heated barrel in a container with linseed or machine oil. For convenience, it is best to place the liquid in a small but fairly deep metal tray. It is necessary to keep the hot barrel in the oil for a maximum of ten seconds. A clear sign that the metal is ready for further processing are dark spots that will begin to appear across the entire surface.
- We process the barrel with a blowtorch. After removing the barrel from the oil, hang it by the front sight on a metal wire, then do not hesitate and begin the additional heat treatment procedure. The “baking” procedure should be carried out evenly and until the metal changes its color from brown to black. As soon as the entire surface of the part changes color, turn off the soldering iron.
The barrel should cool naturally for several hours. Then all that remains is to get rid of any remaining oil by wiping the metal with a dry cloth. After such bluing, the likelihood of corrosion on the metal will be minimal. In this case, the protective film will be resistant to mechanical damage.
“Hot” bluing
Advantages
- This coating lasts much longer.
- Absence of harmful fumes that accompany the process of “cold” bluing.
Technology
The workpiece to be processed is first slightly warmed up so that the substance “fits” better onto the base. You can use gun oil, linseed oil, lignite oil, olive oil, or something similar. The choice of a specific product depends on the type of metal.
How to apply oil is up to everyone to decide for themselves. It would probably be more advisable to dip the part into it. After this, it is subjected to heat treatment.
The most common method is firing with a blowtorch.
Feature of the technique
- After immersion in the bath, you need to let the oil drain. Excess of it will lead to stains on the surface of the part.
- During the firing process, it is necessary to control the color change of the workpiece. Once it changes from brown to black, treatment should be stopped.
Burnishing with oxidizer
Various chemical compounds such as nitrites or nitrates are used. All of them are characterized by their melting point, so you need to focus primarily on your own capabilities, since not every owner has, for example, a muffle furnace. Temperature sources can be different, so there is no need to complicate your life and be guided by the first recipe you come across - the choice of oxidizing agents is quite large.
Oxidation
Another way to blue a weapon is to treat the metal with an oxidizing agent, such as saltpeter. A significant disadvantage of this method is that the reagent will have to be heated to the melting point, which is not always possible at home. However, if you create an oxidizing agent yourself using one of the following recipes, then the need to heat the solution will disappear.
Composition of the solution
The first of the recipes is based on the use of disodium hydrogen phosphate as the main reagent. To create a solution for 1 liter of water, you will have to mix the following components:
- disodium hydrogen phosphate (Na2HPO4) - 100 grams;
- sodium nitrate (NaNO3) - 50 grams;
- caustic soda (NaOH) - 2.8 grams.
Before and after: bluing with saltpeter.
The second solution recipe is designed for 0.63 liters of water and includes a large amount of caustic soda. To make it, mix the following ingredients in the required quantity:
- caustic soda (NaOH) - 400 grams;
- potassium nitrate (KNO3) - 10 grams;
- sodium nitrate (NaNO3) - 10 grams.
Which recipe to use is up to you to decide, since they are equally effective, and the difficulty usually lies in obtaining certain reagents in the required quantities.
Methodology of the procedure
As soon as the solution is ready, it is necessary to dilute it in the required amount of water and immerse the previously prepared barrel in the liquid. It is necessary to soak the metal in the chemical for about 30 minutes. Moreover, this technique is suitable not only for bluing a barrel, but even a knife, since the protective film will have good strength. However, the method is not suitable for a beginner, since a certain skill and ability to work with chemicals is required from the person.
Methods for bluing metals at home and requirements for their implementation
Common home methods for protecting and decorating metal surfaces include:
- boiling parts in special chemical compositions that you can prepare yourself;
- oil coating followed by heat treatment;
- applying the finished product to the surface using a brush.
Carrying out work during chemical bluing involves chemical etching and cleaning operations, as well as mechanical grinding and wiping of the surface.
In order to use bluing at home using chemical reagents, you need to create certain conditions:
- provide the work area with ventilation or exhaust;
- prepare a container from a neutral material that is not destroyed by chemicals. A vessel made of heat-resistant glass, earthenware or porcelain is best suited. If long-term boiling of the solution is required, you can use a stainless steel container;
- the container must have sufficient volume so that the part is completely covered with the composition;
- stock up on protective equipment: gloves, protective mask or goggles, aprons.
Features of chemical bluing and recipes for some compositions
Before performing work, the surface of the metal product is subjected to treatment: removing the old oxide layer by sanding and degreasing with a solvent.
The durable blued finish is primarily produced by boiling solution throughout the entire paint cycle. To obtain a durable film, the process should last from 30 minutes to an hour and a half, so the boiling solution is periodically topped up to ensure complete coverage of the part.
After the process is completed, the part is thoroughly washed using detergents and then lubricated with oil.
For household work, the alkaline oxidation method is mainly used. Let's consider some options for the chemical oxidation of metals in an alkaline environment.
Method number 1:
- Water is poured into a container (porcelain) of the appropriate size and sodium nitrate (sodium nitrate) and caustic soda (sodium hydroxide) are dissolved in it in the ratio: per 100 ml 30 g of sodium and 100 g of soda.
- The mixture is heated to 140 - 160 ° C, and the workpiece is placed in it, which remains there for at least 30 minutes.
If the process is carried out correctly, the result will be a deep black coating, sometimes with a bluish tint.
Method number 2:
A bluish tint to the film can be obtained using a boiling saturated alkaline solution in which potassium or sodium hydroxide is dissolved in high concentration. At least 700 grams of a chemical substance dissolves in 1 liter of water.
These recipes are provided as an example. There are many other chemical formulations using nitrites and nitrates.
Oxidation in an acidic environment is carried out at lower temperatures. For example, when using an acid solution consisting of:
- calcium nitrate – 30 hours,
- orthophosphoric acid – 1 hour,
- manganese dioxide – 1 tsp.
Oxidation is carried out by keeping the workpiece in the solution for at least 30-45 minutes at 100°C.
Means for bluing metals
Simple coating methods that can be used at home include technologies for surface application of oil, saltpeter and ready-made Clover.
These bluing products are easy to use and allow you to carry out work at home without special preparation.
Let's look at ways to create film using each of them.
Oil coating
The technology of creating a protective film using oil is the most common for home use.
It is done like this:
- the sanded and degreased product is coated with machine or sunflower oil;
- then it is placed in the oven and heated to 350 - 400 ° C;
- after cooling, the surface of the part becomes brown or black;
- Remaining oil from the part must be removed with a rag;
- To obtain a more saturated color, the process should be repeated several times.
You can use different oils, for example, gun, linseed or olive. It can be applied with a brush or by dipping the part into an oil composition.
If you need to blacken any part of the part, then it is better to use a blowtorch to do this. During this firing process, the color change in the surface of the workpiece is clearly visible. When a rich brown-black color is achieved, the heat treatment can be stopped.
Use of saltpeter
A good result of chemical bluing is obtained by a classic solution using saltpeter in addition to those given earlier. As a result of boiling the part in a solution of sodium nitrate at a temperature of 130 - 150 ° C, a durable oxide coating of a shiny black-blue hue is obtained.
Recipe for composition with saltpeter:
- Distilled water – 1 liter;
- Sodium nitrate (NaNO3) – 500 g;
- Caustic soda (NaOH) – 500 g.
Ready-made kits with saltpeter for oxidation are available for sale.
You can watch the process of bluing in saltpeter in the video:
The surface with this treatment looks smooth and does not require additional polishing.
Surface treatment with Clover
You can treat metal surfaces with the ready-made “Clover” product. It has a gel-like consistency and is sold in small 50 ml containers.
It is used for minor corrosion damage to metal. To obtain maximum coloring of the product, you need to treat it with Clover two to three times. Before applying it, the part must be sanded and degreased.
Apply the product with a brush and leave for 2 minutes. If a whitish-yellow coating appears, it should be washed off with warm water and the surface wiped dry with a cloth.
The advantage of this product is its ease of use, which is why it is often used to coat weapons. It has no effect on steel containing more than 3% Cr.
Cold bluing at home
The use of the “Clover” product does not require additional heating of the workpiece, therefore this method of processing is classified as cold. In addition to this, other means are used for cold bluing at home, which are also applied to the treated surface with a brush.
Read also: Face mills for metal GOST
For example, they use the domestic drug “Voron-3M”.
When applied to a metal surface, a dense black film is formed. Therefore, this coating is called metal blackening.
The imported product “Paris oxide”, which contains selenium, is also popular.
The drug includes three bottles. One composition is intended for pre-treatment of the surface, the second is the active composition, and the third provides protection for the formed coating.
The solution is also applied to the product using a brush; after obtaining the color, the residue is washed off the surface with warm water.
Cold processing is used for small parts. This method is especially good for bluing a gun, since the method of hot boiling in chemical solutions cannot be used on it.
Burnishing steel at home
The question of how to blue steel at home interests many.
Most of the parts that are blued are steel products. Therefore, the methods described above for treating the metal surface by oxidation and coating with an oil film are mainly used for steel alloys.
Many brands of steel are susceptible to rust. The coating for steel products primarily serves as protection against corrosion and at the same time gives them an attractive appearance. The degree of protection and color of the oxide film depends on the thickness of the layer and the reagents used. The thickness can vary from 1 to 10 microns.
When bluing steel products using a chemical method, the choice of solution components when using heating to high temperatures should be approached with caution. For example, there is a ban on such processing of hardened parts, as well as steels that cannot be heated to high temperatures. This can lead to a deterioration in their technological properties.
It is for this reason that when high heat treatment is necessary, it is recommended to use alkaline solutions. They are more gentle.
Oxidation in acidic compounds is carried out at lower temperatures. For example, when using an acid composition consisting of:
- calcium nitrate – 30 hours,
- orthophosphoric acid – 1 hour,
- manganese dioxide – 1 hour,
- oxidation is carried out at a temperature of 100°C, keeping the part in the solution for at least 30-45 minutes.
Metal blackening
When heating steel blanks in an acidic or alkaline environment, a film of different shades may form on the surface. Bluing includes all colors inherent in tarnish. They change as the film thickness increases from yellow, brown, violet, then to gray, blue and black.
Therefore, bluing is not the same as blackening. You can obtain the desired surface shade by using different heat treatment modes for steel blanks and using different chemical components of the solution.
For example, you can achieve the desired shade by using copper nitrate, which is a salt, in an amount of 70 g and 30 g of alcoholic denatured alcohol. The salt is heated until melted and denatured alcohol is added. The mixture is applied to the steel part and heated with a burner. Stop the heating process after reaching the desired shade.
Blackening of steel blanks can be done using oil. It is enough to coat the product with oil, wax or animal fat and heat it thoroughly over the fire. As a result, a permanent black coating will appear on the surface.
Blueing of weapons is nothing more than the artificial application of oxide films to barrels, which increase the protective properties of the metal. One of the many methods is acid oxidation, or “rusty varnish” - a composition that causes increased oxidation of the steel surface with the formation of magnetic iron oxide.
Burnishing with “rusty varnish”
Using “rusty varnish” is another method of bluing a weapon that can be used at home. And although such a coating wears off quite quickly and is not resistant to mechanical stress, it would be wrong not to consider the method at all, since it is the simplest and least expensive. Its essence is extremely simple - to treat the metal surface with a corrosive medium - “rusty varnish”.
To prepare the reagent at home, you will first have to mix two components: hydrochloric acid (12 grams) and nitric acid (20 grams). In this case, it is recommended to measure the required amount using pharmacy scales rather than beakers, since the density of the two reagents is different. A reaction disorder can occur even with 1 extra gram of the substance. Once the two acids are mixed, add 30 grams of iron oxide and 5 grams of iron filings to the container.
Once all the components are mixed, it is important to wait some time for the chemical reaction to take place completely. After this, the solution must be mixed with 50 grams of alcohol and 50 grams of distilled water. The barrel should be immersed in liquid for 12 hours. After this period of time, the part is removed and washed with cold water. All red marks must be brushed off. The result of all procedures will be a beautiful black trunk.
Considering that prolonged exposure to cold varnish negatively affects the quality of the metal, it is strongly not recommended to use the method for blackening edged weapons. However, if you still decide to take the risk, then carefully monitor the time it may take to blue the barrel. But you shouldn’t count on a good result, since the coating will still wear off quite quickly with frequent use of edged weapons.
Other bluing methods
Below are a few more ways to blue a weapon:
- We heat the barrel to high heat and rub it intensively with bloodstone. As soon as the metal cools down, we continue heating. As a result, the metal will acquire a bluish tint.
- Rub the polished barrel with olive oil. Next, sprinkle the metal with sifted ash from hardwood. We place the trunk in the charcoal mine. As soon as the metal begins to turn white, take it out and let it cool. Next, wipe the material twice: first dry, second time with olive oil. The color of the metal will eventually turn grey.
- The following method will give the trunk a brown color. To do this, you will need a solution of the following components: copper sulfate - 120 grams, nitric acid - 240 grams, 90% alcohol - 250 grams, water - 1 liter. Moreover, water and alcohol must be added after the vitriol dissolves. We apply the prepared solution to the metal, and when it dries, we wipe the barrel the first time with a brush with thin wire, and the second time with a brush with stiff bristles. We repeat the procedure 2-3 times within 3 days and after this period we obtain brown material. The last thing to do is to rinse the barrel in boiling water, and then wipe it with cloth and grease it with olive oil.
- A beautiful surface can be obtained using the following composition: zinc chloride - 20 grams, copper sulfate - 20 grams, water - 1 liter. Sometimes the solution comes out opaque, then you need to add a few drops of hydrochloric acid to the liquid. Next, generously lubricate the surface with the solution and repeat this operation 2-3 more times after the metal has dried. After lubrication, wipe the surface with a soft-bristled brush. We repeat the lubrication procedure for 4 days. To speed up the process, you can slightly heat the barrel.
- A pronounced dark tone can be obtained using the following components of the solution: crystalline iron sesquichloride - 500 grams, neutral antimony trichloride - 500 grams, gallic acid - 250 grams, water - 1 liter. We treat the surface with the resulting composition several times, each time allowing it to dry first. After obvious darkening of the metal, wash the product in water, dry it and rub it with linseed oil.
- Processing "Clover". In this case we are talking about a means of factory production - “Clover”. Before applying it, we clean the metal from grease and dirt. Then we treat the surface with “Clover”, which will soon acquire a yellow-white color. We wash off the substance with water and dry the surface.
Which bluing method is preferable?
So, what is the best method to use to blacken a shotgun or rifle barrel? Personally, we recommend paying attention to the “hot” method, since it gives the optimal result and is not particularly complicated. Of course, if you have the funds to buy reagents, you can resort to cold bluing, but even professionals say that it does not give as good a result. As for oxidation, the method is quite good, but only for those who are used to working with reagents. Well, it’s worth using “rusty varnish” only if the quality of the blackening is not as important as its cost.
Blueing a weapon is an extremely important maintenance procedure. Over time, even the factory protective coating wears off, causing rust to form on the barrel. However, you can put your gun or carbine in order at home. The most important thing is to acquire all the necessary tools and reagents, follow the instructions exactly and do not forget about safety rules.
