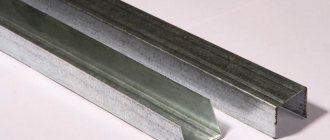
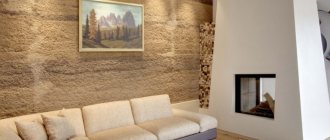
Drywall composition
The outside of the material is made of thick cardboard, and inside it is filled with a pressed mixture of gypsum. The lateral oblong sides generally have an edge with rounded or trapezoidal corners, protected with cardboard. There is no edge at the end edges.
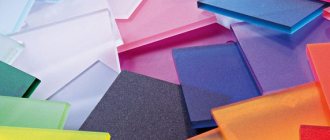
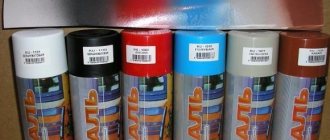
Several types of plasterboard are produced:
- Regular (gypsum plasterboard), having a gray tint.
- Moisture resistant (GKLV). The outside is green.
- Fire resistant (GKLO). Available in pink or light purple.
- Moisture resistant (GKLVO). It has a dark green color.
- Soundproof. Manufactured in blue.
Typically, standard sheets have dimensions of 250x120 cm, with an area of 3 square meters. m. More rarely, you can find other variations: 200x120 cm (2.4 sq. m) and 300x120 cm (3.6 sq. m). The thickness of the material can reach 12.5 mm, used for wall decoration. When constructing ceiling structures, mainly sheets of 9.5 or 6 mm are used.
The image below lists the main standard dimensions of drywall, indicating the approximate weight of 1 sheet. Knowing the mass allows you to determine the approximate heaviness and bulkiness of the material, having previously assessed its possibilities of use. Work with sheets should be done with the utmost care, since if handled insufficiently carefully, they may not withstand the load and break.
Regardless of the type chosen for finishing, all drywall is cut the same way.
Drill with a hole saw (circular saw) into the drywall.
The fastest and most convenient way. Drywall crowns are sold in almost all hardware stores and construction markets. The price of the set, depending on the number of blades, diameter and manufacturer, ranges from $2 to $30. The most popular sets with 7 blades with a diameter of 26, 32, 38, 45, 50, 63 mm with one holder, cutting depth up to 18 mm. The price of this set is $2-5:
For holes of larger diameter (for example, for installing lamps), you can buy a set with blades with a diameter of 60, 67, 74, 81, 95 mm with a cutting depth of 32 mm. This set costs $5-8.
To drill a hole of the required diameter (or close to it), you must first remove all the blades, turning each one slightly clockwise and pulling it towards you, select the blade of the required diameter and insert it into place. Drilling takes from 3 to 10 seconds; it takes longer to select the blade. Marking and drilling are done from the front side of the drywall. Holes can be drilled both on plasterboard sheets screwed to the frame and on sheets that are not secured in the designed position.
It’s very convenient, but it happens that the sets don’t have blades of the required diameter. For example, to install a socket box, the hole must be as precise as possible so that the socket box does not dangle later. In this case, you can use a combined method: first drill a hole with a crown, and then adjust the hole to the desired size with a knife. How this can be done is shown in the video:
If you are only interested in drilling, then you do not need to watch the entire video.
However, you may not have a crown at hand, it doesn’t matter, there are other ways to make a hole in the gypsum board:
Key Tools for Cutting Drywall Sheets
Cutting drywall to specific sizes requires the presence and use of certain tools, which include:
- Electric jigsaw. Using it, it is comfortable to make cuts of considerable length. Its use allows cutting out elements with complex curved shapes.
- A utility knife or one designed for cutting drywall.
- An electric drill with large feather drills and crowns, allowing you to cut out huge round holes for sockets, switches and communications.
- A narrow shear saw with slightly toothed teeth, used for cutting wood or a hand saw for cutting plasterboard sheets.
- A planer for wood or drywall, which will be required for processing edges when cutting the material.
- A needle roller will become necessary when creating arches or other curved surfaces, for example, when forming a complex ceiling structure with many tiers.
- To take measurements and mark on sheets, you will need a pencil or marker, a construction tape measure, a square, a metal ruler or a flat metal profile 1 m long, which is used during the construction of the frame sheathing. To make long, even cuts you will also have to have a rule in place.
The nuances of cutting drywall depending on its type
Drywall sheets can be specialized, for example, waterproof. The paper on these is impregnated with polymers. They close the pores in the cardboard, making it resistant to moisture and reliable protection for the compressed gypsum powder inside.
However, the edges of even waterproof plasterboard are not protected. Accordingly, the workplace should not be wet. Once in the gypsum, water will cause it to swell and change the geometry of the building sheet.
Arched drywall
Arched plasterboard stands separately. It is as thin as possible, only 6.5 millimeters in thickness. It would seem that such a sheet would be easier to cut than a centimeter sheet. However, fiberglass is laid inside the arched panel.
It reinforces drywall and gives the flexibility necessary to deform the sheet intended for curved doorways and ceilings.
Because of the fiberglass inside, the arched material is more difficult to cut than simple drywall. It's better to use a power tool. A mounting knife or a hand saw “goes” hard.
Knives for cutting plasterboard sheets
Due to the fact that the key tool when cutting drywall is a knife, you should familiarize yourself with its inherent parameters in more detail. Knives used for cutting sheets can be divided into 3 categories:
- Standard. The main advantage of these models is their affordable price. They have a simple design consisting of 4 components, which include a body-handle, a cover-lock, a blade adjuster and a replaceable cutting element. These knives are not highly reliable, especially when cutting plasterboard sheets. They are more suitable for performing other tasks, for example, cutting wallpaper. When cutting drywall, their cutting elements become dull rather quickly.
- Reinforced. These knives, unlike standard models, have a higher cost. Their distinctive feature is the presence of a metal guide, which is located in the body of the tool, allowing the blade to be more securely fixed, as well as ensuring rigidity during cutting.
- Professional. These models are used by specialists who often work with drywall. There are a huge number of professional knives on the market, and their distinctive features are the ergonomics of the body, the way the latch works and a slightly modified design of the tool. Their price is several times higher than the cost of standard and reinforced models and in some cases reaches up to 1000 rubles.
To cut drywall, you can use a tool of any category, but in order to finally focus on one of the options, you should consider each of them in more detail.
Note! Knives with a 9 mm blade are not intended for cutting plasterboard sheets, since they do not have sufficient endurance and can break during the cut, so their use should be avoided. Their use will not only significantly reduce productivity, but can also cause serious damage to the hand.
Basically, knives with a cutting element 18 or 25 mm wide are used for cutting drywall.
Stationery knife
It is the simplest and most affordable solution, which is in high demand among non-professionals. This tool is easy to use and is suitable not only for cutting plasterboard sheets, but also for a number of other tasks. The thickness of the blade in this type of knives reaches from 0.3 to 0.6 mm and the higher this figure, the better. Externally, the models may look different, but their operational parameters are practically no different.
Knife with trapezoidal blade
This type of knife has a trapezoidal blade and is designed specifically for cutting drywall. The advantages of the models include the presence of a comfortable handle, which makes using the tool as comfortable as possible, since the force of the hand is well distributed over the material being processed. The cutting element of such a knife is characterized by high rigidity, which prevents its bending and high-quality cutting of drywall sheets. Tools of this type are available in different price segments, and their cost often depends on the manufacturer’s brand, but even the most budget ones are able to fully demonstrate themselves during use.
Knife with folding design
Most of the characteristics of this tool are similar to the previous version, however, it not only has a trapezoidal blade, but also has a folding design that allows you to conveniently and safely carry the knife with you when folded, eliminating the possibility of injury.
Disc blade knife
These models of knives are mainly preferred by specialists when cutting plasterboard sheets, since with their help even curved cuts are obtained as smooth as possible. The disk blade is fixed near a metal ruler installed along the cutting line, along which the master moves the tool pressed to the material. After this, an even cut with the same depth appears at the point where the cutting element passes. If necessary, quite significant force can be applied to the disc blade, since due to its high level of rigidity it can easily withstand significant loads.
Some models of folding knives are also equipped with disc-shaped cutting elements that move out of the body when the moving part of the handle is acted upon.
Reismus
This special cutter for cutting drywall has a unique design and appearance that is unlike other tools. The thicknesser has two cutting elements, which are located in a horizontal position parallel to each other at a specific distance. It is fixed on a plasterboard sheet and moves along it, cutting two layers of cardboard. Its cutting elements are round in shape and, if necessary, can be easily replaced with new ones. The thicknesser allows you to produce perfectly even cuts, cutting the sheet into strips up to 12 cm wide, often used in the construction of ceilings consisting of many tiers and other structures, the creation of which requires the presence of narrow strips of the same size. Its handle is also a guide from which the required cutting width is set. Subsequently, the thicknesser is placed on the end of the plasterboard sheet, cutting along its entire length.
Blade Runner
The Blade Runner cutting tool is in great demand among professionals, allowing the work speed to be doubled. This cutter is useful for anyone who cuts drywall on an ongoing basis. It consists of 2 detachable parts, held together during use by means of magnetic latches. The blades are in small blocks and, if necessary, they can be replaced with new ones. Using this tool, you can easily cut drywall with your own hands, since its two components are fixed on both sides of the sheets on strips pre-drawn on them. Next, the cutter moves along the marked line, cutting the cardboard layer simultaneously from both sides. Thanks to it, it is also possible to make curved cuts of complex shapes as smoothly as possible; it is only important that the markings are clearly and accurately applied to the surface of the material.
Having familiarized yourself with the various designs of knives, you can easily choose the most suitable option for yourself, taking into account the characteristics and optimal cost, which will allow you to cut the material into workpieces of the required sizes and shapes with extreme accuracy and evenness.
Methods for cutting plasterboard profiles
There are 4 ways to cut a profile. Let's consider the use of different tools.
Hacksaw for metal
If there are no other suitable tools at home and there is no opportunity to buy them, this option remains. It is the most labor-intensive and ineffective. You can cut it, but one cut will take 10-15 minutes.
Bulgarian
There are no problems when cutting, but the work must be carried out taking into account the danger posed by sparks. If they come into contact with flammable surfaces, a fire may occur and other surfaces may be damaged. Before cutting a profile for drywall indoors, take care to protect anything that can deteriorate or catch fire (wallpaper, flooring, etc.).
Metal scissors
Scissors are convenient for cutting any profiles: guides, vertical, ceiling. Advantages: no noise, smooth cuts, safety. Pre-apply markings to the profile on top or on 3 sides.
Jigsaw
With a metal file, the cut is beautiful, smooth, without defects. Disadvantages: cutting creates noise and leaves debris in the form of metal shavings.
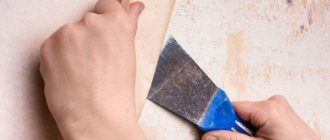
Cutting technology and further processing of plasterboard blanks
The process of cutting plasterboard sheets is not particularly difficult, but to increase the comfort of work and obtain correct markings, as well as further cutting, excellent lighting and free space in the room in which the cutting will be carried out are required.
To cut drywall at home correctly, you should perform the following steps:
- Due to its large dimensions, the material requires quite a lot of free space. To mark and cut, it must be laid horizontally on a strong and stable base. You don't need to own a workbench for this task, as drywall can be laid on a table, stools, or even the floor to carry out the cutting. If stools are used, they should be placed at a short distance from each other, which does not exceed 30 cm. If this is not observed during the procedures, pressing on the sheet can cause it to break.
- After laying the material on a solid base, markings are carried out according to the required dimensions. Marking is done using a pencil with a ruler or tape measure, and the cutting strips between them are made using a long rule or metal ruler. To draw perpendicular lines, you will additionally need a square.
- At this stage, the knife blade is tightly attached to the ruler, which is located on the drawn line. After this, the cutting element is carried out along with it along the entire length of the marked strips. Using a rule instead of a ruler is more convenient if you need to cut a sheet to its full length or width. During the first pass of the knife blade, light pressure should be applied so that only the cardboard layer is cut from the outside.
- If one of the above-described models of tools is used for cutting, then the accuracy of the procedure largely depends on the skill of the person. It should also be taken into account that the drywall does not have to be cut to its full thickness in one pass, because in this case the cut site will most likely not only be uneven, but the cutting element itself will quickly become dull and will need to be replaced.
- Next, you need to move the plasterboard sheet closer to the edge of the surface on which it is located and carefully tap the cut site on the opposite side. This procedure will reduce the integrity of the gypsum layer along the cut strip. After this, you need to grab the cut piece and bend it down with a sharp movement, which will cause the sheet to break exactly along the line.
- Finally, you need to use a knife, bending the plasterboard blank along the cut strip and finally dividing it into 2 parts. This is quite easy to do, since both pieces of sheet will be supported by only one layer of cardboard.
- Upon completion of cutting the sheet, in order to eliminate the remaining uneven nicks, which can cause inconvenience when joining different pieces of drywall together on the wall, you should clean the edges of the cuts using a plane. Processing must be carried out without pressing the tool tightly against the material, since it can begin to break. During the procedure, there is no need to achieve perfect evenness of the sides, removing only excessively protruding irregularities in the cardboard layer if they appeared during cutting. To ensure high-quality reinforcement of the joints between the sheets on the wall, the beveled edges can be cut after completing their installation, since otherwise during the work it is easy to damage the unprotected and insufficiently strong sides consisting of cardboard.
It is much more difficult to cut a shaped hole, for example, a semicircle, since you have to watch the curved strip all the time. This procedure can be carried out using a narrow hacksaw or an electric jigsaw, with which you can make a more even cut, but for this you need to have experience in using it.
Note! Cutting the material should be done extremely carefully, avoiding breaking the edge, especially if the sheet does not have a cardboard edge.
Next, the excess drywall is slowly cut using a hacksaw in accordance with the previously marked line.
Through openings of any required shape are also made using one of the above tools. First of all, its location is marked on the plasterboard sheet, after which the edges are determined by lines. In the center of each side, closer to the inner part being cut out, a hole is drilled, the diameter of which should be equal to the width of the nail file inserted into the electric jigsaw. Typically this figure varies in the range of 8-10 mm.
Next, a file installed in a jigsaw is inserted into the hole in the off state, through which the strip is cut to one of the corners. After this, the tool should be turned off and upon completion of rotation of the cutting element, it must be removed from the device. Next, you need to turn the jigsaw in the opposite direction and, re-installing the file, insert it into the same hole, cutting to the other corner. The other sides should be cut in a similar manner, easily removing the cut fragment upon completion.
How to cut gypsum board in a straight line
It is better to make an even cut with a construction knife. Place the sheet on the table or cut it in a stack so that the bottom sheets serve as the base. Take measurements and mark.
Use a simple pencil, because marks left by a marker or fountain pen will not be covered with putty. Apply markings on both sides. Then connect the lines using a string or rule.
Interesting fact. With skill, cuts of any shape can be made using a drywall hacksaw. It allows you to cut out elements of absolutely any shape, be it squares, circles, Arabic script or Chinese characters.
Adjust the length of the knife so that the blade is shorter than the thickness of the sheet. After applying the rule to the drywall, run the knife several times to make an even cut. Likewise on the reverse side.
Tap the cut line several times - the sheet will break and will stick only to the paper. Now cut the cardboard completely.
Cutting a round socket for a socket or switch
The socket or switch connector, which has a round shape, is cut out using a drill with a special crown attachment of the required diameter, or using a jigsaw or a narrow hacksaw. The first option allows you to carry out the task most easily, requiring only a few seconds of time. Cutting out any openings is often done locally, after the plasterboard sheet has been secured to the sheathing, since otherwise the strength of the material may be compromised and often even a slight distortion during transportation or installation can cause a break.
Note! To mark a round opening, you only need to determine the center of the circle without performing any additional actions.
In the case of cutting holes using a hacksaw or jigsaw, determining the middle is done using a compass, which allows you to draw a cutting line.
Next, 2 openings are drilled on the strip with a drill as close to each other as possible. After this, the hole should be carefully connected using a file, continuing to cut along the contour line.
Cutting drywall with an electric jigsaw
A jigsaw is a tool with a reciprocating saw motion. Simply put, we are talking about a miniature version of an electric saw. When working with drywall, it allows you to:
-make curved cuts
- holes inside the sheet
-maximum precise edges without jagged edges or contour changes
Cutting drywall with a jigsaw
Using a jigsaw, we cut the drywall along the pre-designed contour. Since plaster dust will be knocked out from under the blade, we make outlines with a black marker. It can also be seen under the whitish sediments.
Mark the sheets on the back side. However, drywall is only the basis of structures, which is then covered with tiles, wallpaper, and plaster. Therefore, the marking side is not important. Let's get started:
- Place the gypsum sheet on stools or bricks, leaving the space below the cutting line free. Also, there should be no tension on the cutting line. Its tearing forces will degrade the quality of the cut. Drywall is supported on a base due to the flexibility of the material. Without support, the sheet may break under pressure in unexpected places.
- We install the jigsaw at the start of the cutting line or bring the drywall to the tool’s stand, because it can be not only autonomous, but also stationary. Also, a number of jigsaws have a laser sight. It helps you “follow” exactly the markings. If you work in semi-darkness, backlighting will help out. Not all jigsaws have it either.
- All that remains is to turn on the jigsaw and smoothly move along the markings.
- Finally, we process the edges with sandpaper or a plane and a file.
It’s worth figuring out how to cut drywall with a jigsaw only if you have the tool.
The simplest models cost from 1,100 rubles. If the expenses are unjustified or you don’t have an already purchased jigsaw at hand, figure cuts are made...
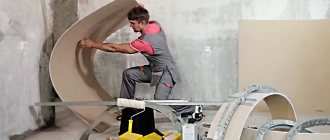
Sheathing curved surfaces with plasterboard
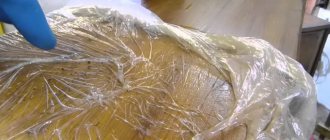
To cover surfaces of uneven shape, the material may be bent, before which preparatory work must be done in advance. For example, if you are planning to make a slight bend to build an arch with a huge radius, 2 methods may be suitable to give the drywall the required shape.
In the first case, punctures can be made on the workpieces using a needle roller, after which they should be moistened with a spray bottle. These procedures will help wet the material, making it more susceptible to bending. Installation of the resulting curved workpiece should be done extremely carefully on the arched frame, without waiting for it to dry. Some specialists, when bending a pierced and moistened sheet, use a pre-made template, made in accordance with the dimensions of the arch opening. To do this, the prepared drywall must be laid on top of the sample, lightly pressing it on the sides with a weight. In this state, the workpiece dries, after which it is installed on the arch frame.
The second solution is to cut the drywall along its entire length required for sheathing. The cut lines must be perfectly even. If a column is to be made from it or an arch opening with a small bending radius is to be sheathed, then the cuts should be made in the same way along the entire length of the drywall, but in 2 opposing passes, maintaining an angle of 100-110 degrees. During the procedure, a small part of the material is removed from the cuts made, and the resulting grooves must have a cross-sectional shape resembling a triangle, since otherwise it will not be possible to bend the workpiece.
Special drill attachment
You can make a round hole in drywall using a special drill attachment on a drill. This option can be considered the simplest and most convenient for independent implementation. To do this, you need to purchase crowns (round drill bits) from a specialized store that will correspond to the required dimensions. The element is clamped in the drill chuck, and the required holes are drilled using pre-applied markings. Such drills are most often sold in sets, so there should be no problems with selecting the right size.
One of the most convenient ways to make a hole in drywall is with a hole saw.
Helpful Tips for Successfully Cutting Drywall Sheets
In order to avoid irreparable mistakes when cutting material, it is necessary to take into account some nuances and adhere to a number of the following recommendations:
- When cutting drywall, it is better not to use a grinder, since using it will not only be noisy, but will also generate a huge amount of gypsum dust that will need to be removed.
- If you need to use a hammer when cutting sheets, it should be exclusively rubber, since a metal tool can cause severe damage to the material being processed. When wielding it, you should also calculate the force of the blows without putting in a lot of effort.
- To reduce the number of notches along the cutting strip on the sides of the sheets, it is necessary to hold the knife or hacksaw at a right angle, since the lower the slope of the cutting element, the larger the nicks on the cardboard will be.
- All key cuts should be made before attaching the drywall to the sheathing, since if this fails, the sheet will need to be replaced with a new one. The damaged workpiece can be used when making inserts. The exception is cutting out openings and sockets for sockets and switches, which are best done after installing drywall on the frame.
- It is not recommended to make complex designs in material with thin partitions, for example, openwork mesh, since in this case it is highly fragile.
- When cutting a sheet completely, this procedure is often performed on the floor. After making a cut along its strip, you should place a beam under the drywall, and then you need to press on 2 parts of the canvas, easily breaking the material along the line previously passed by the cutting tool.
From all that has been written above, we can conclude that there is nothing difficult in carrying out work with drywall. Even a person who does not have the relevant experience can cope with this task, and if there are any doubts, everyone can first practice on a small-sized workpiece, making sure that cutting is easy. Having become familiar with how and what to cut drywall at home and adhering to the given technology, the use of high-quality tools will allow you to complete all the work quickly and at a high level, avoiding various mistakes and possible damage to the sheets.
Video on how and with what to cut drywall at home with your own hands:
Rules for working with a hand saw
If you need to cut a piece of drywall of a special shape, then it is rational to use a hacksaw, because such an effect cannot be achieved with a knife. It is necessary for creating arcs, waves and other shaped edges on a sheet of drywall. These forms are especially relevant when creating multi-level ceilings and interior partitions.
Again, the whole process begins with markings being made on the plasterboard. The order of marking depends on the specific task. It’s one thing to make a circle for a hole for a socket and a completely different thing to make a “daisy” marking on the ceiling.
It is especially convenient to cut arcs with a hacksaw
When creating a design, pattern or lines to be cut, you need to consider the entry point for the hacksaw. Somehow it has to get through the drywall to cut it. After the hacksaw is inserted into the plasterboard, you just need to cut along the intended lines. It is advisable that they do not have strong bends, because such a turn is extremely difficult to repeat.
This diagram is understandable if you need to cut from edge to edge. But how to cut drywall if the shape does not touch the edges of the sheet? In this case, you need to punch a hole somewhere in the middle on the marked line with a knife. The hacksaw will be inserted into this hole.
Height of the circle.
Usually the difference between the marks of the 1st and 2nd levels of a suspended ceiling is 10-15 cm, sometimes 20 cm. The main limiter here is not so much aesthetic requirements or technical capabilities, but the height of the original ceiling. Not all people live in apartments with a ceiling height of 3 or even 4 meters, more often in apartments with a ceiling height of 2.5 meters, and sometimes less, and therefore it is not advisable to lower the ceiling in such apartments. But even if you make a circle 10-12 mm high, i.e. according to the thickness of the sheet being hemmed, then the suspended ceiling will already become embossed. And if 3-4 sheets are sewn at the transition point between the first and second levels, then in addition to the height difference of 30-50 mm between the ceiling levels, a rather complex shape of the wave end will be achieved, partially similar to that shown in Figure 1:
Figure 6 . General plan and section of the ceiling with a circle in 3 levels, formed only by the thickness of the plasterboard sheets.
The advantage of this version of the ceiling is that the side surface of the circle does not have to be sewn up and, accordingly, there is no need to make a rather complex frame for sewing up the side surface of the circle, and there is no need to bend plasterboard sheets. Nevertheless, it will not be easy to properly putty such a ceiling. In all other cases, you will have to make an additional frame to cover the side surface of the circle.