The time has come to learn in more detail how to dilute plaster so that the resulting solution is of high quality, and the coating is reliable and lasts a long time, without causing trouble to the owner. To do this, you need to do everything correctly: choose the composition, mix the plaster mixture, apply it and provide conditions for hardening. Since plaster materials differ in their base, scope, and purpose, there are also nuances in the preparation of plaster dough. Let's look at what you need to pay special attention to using examples of various mixtures.
Necessary tools for mixing plaster
Like other building mixtures, plaster has a specific purpose, which is indicated by the manufacturer to the buyer on the packaging.
The main purpose of the plaster composition:
- protection of walls (as well as other building structures and their joints) from adverse factors during operation;
- monolithic surface of the facade or interior of the building;
- improvement of appearance (leveling surface geometry);
- decoration;
- providing additional functions (thermal insulation, X-ray protection, waterproofing, etc.).
Depending on the purpose and components of the composition, the plaster mixture is produced in two states:
- in the form of a dry powder (dry mixes, or SS);
- in ready-made, paste form (most often these are decorative plasters such as bark beetle, fur coat, etc.).
Dry mixtures are packaged by the manufacturer in craft bags/bags weighing 5, 10, 25 or 30 kg. Ready-made ones are sold in plastic bucket containers (packaging by weight may vary). There is no need to dilute this plaster, just stir it before applying it to the base to restore the homogeneity of the mixture in which heavy inclusions have settled down.
Semi-finished products or dry mixtures must be diluted without deviating from the manufacturer’s recommendations printed on the packaging.
To do this, you will need not only water and a container for the solution, but also a tool.
This:
- electric drill (plasterers use a drill mixer, for example, Rubi);
- removable mixer attachment;
- scales (usually a steelyard) for weighing dry substances;
- measuring container for measuring water;
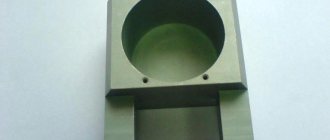
- container for washing the mixer (bucket);
- Master OK;
- stationery knife for opening packaging.
tool for mixing plaster
Since you will need to prepare plaster dough more than once, make it a rule to immediately wash the mixing attachment after use, and the containers after the working mass has been used. When plastering work we are dealing with solutions that crystallize during hardening. Lumps of the previous batch that have fallen into the solution and have been exposed to air become centers of crystallization. In this case, the plaster behaves unpredictably for “newbies”: suddenly the whole thing turns into a frozen mass.
The strength of the cement coating decreases, albeit slightly. In addition, lumps that get on the wall when spreading the plaster mixture form potholes and scratches, which spoil the surface of the finish. Only clay compositions are not “afraid” of such inclusions, since the lumps that have absorbed moisture from the already diluted mixture soften.
Tools, containers – we try to keep everything clean.
How to thin plaster
To decide how to dilute purchased CC correctly, read the instructions and look at the composition. If the composition contains sand of medium and coarse fractions, granules or fibers, then the entire mixture contained in the package should be mixed at one time. This is due to the fact that during transportation and storage, heavy components are collected at the bottom, light components - closer to the top.
By dividing the contents of the package into two batches, we get two different compositions. Only gypsum compositions (without coarse sand) can be safely dosed to prepare the required volume of dough.
An important condition for quality is water temperature. For gypsum SS, the liquid is taken cold, or at least at room temperature. Warm water accelerates the crystallization of gypsum, reducing the mobility of the solution, which is already short. In other cases, for example, when plastering with cement material at low temperatures, dilution with warm water is allowed (temperature limits specified by the company).
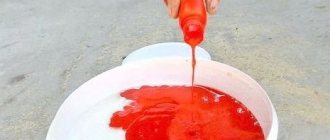
pour water into a container
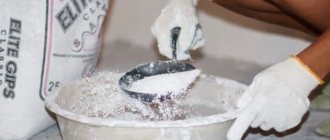
add the required amount of dry mixture
mix the plaster thoroughly
check the quality of the mixture
Water is taken either from settled rainwater or tap water. The final strength of the plaster coating depends on the purity of this liquid, since water in mineral mixtures participates in chemical reactions. It is advisable to filter rainwater.
Video about how to thin gypsum plaster.
Let's consider the process of mixing gypsum-based SS, when only part of the powder is taken, in detail:
- We prepare the necessary materials (materials, tools, containers) and weigh the bucket.
- Using a knife, open the package.
- Pour part of the mixture (2-4 kg) into a bucket. To accurately determine the required volume of water, weigh the bucket with the mixture and subtract the weight of the bucket. Let's say it turns out to be 3 kg.
- We calculate the required amount of water according to the instructions. For example, to dilute 10 kg of Rotband composition, 6-7 liters of water are needed, or, on average, 6.5 liters. Based on the proportion 6.5: 10 = 0.65 l will be required per kg of dry powder. For 3 kg you need 0.65 x 3 = 1.95 l. This is approximately 2 liters.
- We measure this amount of water with a measuring stick and pour it into a container where we will prepare the plaster composition.
- The drill is equipped with an attachment.
- Pour the measured SS into the water.
- Using a mixer (speed 400-800 rpm), mix the powder and liquid. The process is similar to the kitchen operations of kneading dough and is not difficult. We start stirring from the center to the outskirts, trying to work through the entire volume evenly until a mass is formed with a consistency similar to sour cream.
- Let the mixture stand for 3-5 minutes and finally mix.
- We use the prepared solution (you can now plaster the wall), wash the mixer in a separate container (just put the nozzle in the water, turn it on and chat).
Cement mixtures are mixed in reverse order. First, pour in the powder, mix (by hand) the components for uniform distribution, then pour in water. The water is not poured in all at once, but gradually, so as not to get an excessively liquid dough. If you pour cement powder into water, lumps will form that are not easy to break. As a result, the solution will be unmixed.
Preparation of CSP.
Why and when should you choose gypsum putty?
Modern construction stores are replete with an abundance of offers for putties - the choice is simply huge, there are a lot of options for putty mixtures. Gypsum putty has been a known material for quite some time, and of course, today there are a lot of other, more modern analogues for it. What makes experts still prefer the good old gypsum putty? Here's why:
- Gypsum is an environmentally friendly natural material, it is completely safe for human health and does not pollute the environment. In general, the entire composition of gypsum putties is safe.
- The gypsum mixture is well suited for filling cracks, recesses and irregularities - it can, provided that the additive fraction is large, tightly fill the gaps and not crack.
- Gypsum allows surfaces to “breathe” as it conducts air and moisture well. Such putties have excellent vapor permeability, which allows you to create the right microclimate indoors.
- Gypsum putties have a plastic structure, which makes them easy to apply. These materials will be ideal even for a beginner who is picking up a spatula for the first time, and will make it easier for real specialists to carry out work and significantly speed up the puttying process.
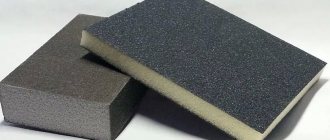
- Their subsequent processing is also convenient - after applying the finish, it can be easily sanded to a mirror shine. Once dry, gypsum is very easy to work with and sanding does not require much effort.
- Gypsum putty is quite unpretentious and can be successfully used on various surfaces: drywall, cement, brick. It has a high level of adhesion, and in principle, it does not matter what material will be the base.
- Since gypsum putty always contains plasticizers and modifiers, after it has completely dried, shrinkage will not occur, which means cracks will not form.
- The consumption of gypsum putty is much less than that of some other types, say, cement putty, which means it is more profitable to use them.
- The cost of gypsum putties is very affordable; these finishing materials are available to everyone. Since their main component, gypsum itself, is not expensive, putties also have a budget price.
As you can see, gypsum putties have many advantages and all of them are significant, so despite the constant emergence of newer materials, gypsum putties continue to occupy a leading position in overall sales volumes for finishing materials. Among their shortcomings, there is only one that really deserves attention:
- Gypsum putties are not moisture resistant, which means they cannot be used in rooms with high humidity, such as a bathroom or kitchen. Typically, gypsum putties are used for the initial and final finishing of residential premises.
How to mix plaster without a mixer
If you need to prepare a little solution, you can do without a mixer. The preparation sequence is the same, only the mixture is mixed manually using a spatula or trowel. The dough proportions are calculated as described above.
preparing small portions of solution
Cement, clay, lime compounds are mixed in a trough. Hoes or shovels are used for kneading. Stir by hand until done. For large volumes, mixing of the solution is carried out in mortar mixers. The mixed solution is also left alone to acidify, then mixed again.
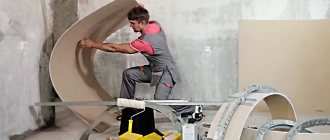
mixing large portions of the solution with a shovel
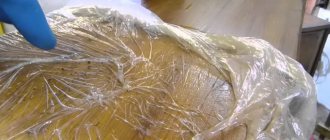
A special mixing procedure is used for “warm” plasters, which contain perlite sand. This filler is ultra-light and volatile. Therefore, the sand is moistened directly in the bags before use.
There are mixtures that are prepared exclusively by hand. For example, liquid wallpaper, also called silk plaster. Their preparation is impossible mechanically, since the decorative elements and fibers that make up the finishing feature are destroyed. The mixture (all that is in the package) is poured into warm water and mixed gently. Leave for 8-12 hours in a sealed container, then mix completely.
What solution is needed
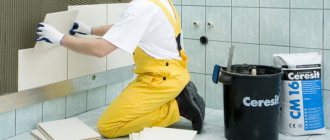
Plastering walls is done with various solutions. The main leveling plaster “pastes” used for leveling facades are cement-sand materials. When transformed, such compositions turn into a durable, dense coating that resists the impact of hailstones, rain flows, the heat of the sun, and winter cold. Cement-based materials are also used for finishing walls in damp or unheated rooms, garages, terraces, and unglazed loggias.
cement and gypsum plaster
For interiors, gypsum plasters are more often used, which are easy to form, quickly set, and gain strength. These are breathable, “comfortable” materials (both for walls and for residents). Disadvantages: fear of hydrophobia, less strength. For facades, gypsum is used in finishing rarely and with caution.
In addition to cement or gypsum plasters, other mineral plastering materials are used:
- limestone;
- clay;
- cement-lime;
- cement-polymer;
- lime-gypsum.
Their preparation is described in separate articles.
Important nuances
Gypsum plaster is suitable for many surfaces. It can be applied to cement and lime plaster, drywall, wood and paint. It is also allowed to use gypsum mixtures on gas silicate blocks, logs, chipboard and expanded clay concrete. Such surfaces always need to be primed. For most of these materials, a regular universal primer of two or three coats will do, but for concrete floor slabs and paint it would be better to apply concrete contact.
Before you begin applying gypsum plaster, you need to carefully prepare the surface. All old decorative coatings are completely removed, grease stains, glue and dust are removed. If the wall or ceiling was previously painted, it is recommended to remove the paint layer completely. To do this, you can use a scraper or grinder with a grinding attachment. Loose layers of old plaster also need to be removed.
It is necessary to remove all metal elements from the surface being treated, since the gypsum layer increases the impact of corrosion on them. Metal parts that cannot be removed are generously coated with an anti-corrosion compound.
Large cracks, chips and other significant defects must be covered with cement mortar.
The minimum layer for some plaster mixtures is 5 mm. But the optimal thickness for a layer of plaster is within 1-2 cm. In cases where there are large defects on the surface, it may be necessary to increase the thickness of the coating to 8 cm. Under these circumstances, it will be necessary to reinforce the surface with galvanized or plastic mesh. Also, reinforcement of walls must be done in new buildings to prevent deformation during shrinkage of the building.
To install the reinforcing mesh on the entire surface of the wall, you need to apply markings every 35-45 cm with a marker. Holes are drilled along these marks using a hammer drill, and plastic rods from dowels are inserted into them. The mesh is cut into small rectangular pieces and overlapped with self-tapping screws. The distance from the wall to the reinforcing material should not be more than half the plaster layer
No deflections are allowed on the reinforcing frame , and vibration should not occur when touching it. To correct such defects, to strengthen the structure, a wire in the shape of the letter Z is threaded between the cells of the mesh. A plaster mixture of a thinner consistency is placed on the inside of the mesh. This layer is left for 10-20 minutes to dry and only after that a thicker outer layer is applied.
You may also need to install guide beacons. As such, you can use an aluminum profile for drywall, which must be removed after the plaster layer has dried. You can make your own beacons from a gypsum mixture. To do this, construct a vertical strip from the solution and level it using a level. You can work on gypsum beacons in 3-4 hours.
After the plaster has completely dried, it is necessary to check the uniformity of color and evenness of the surface. You can only check the color in the correct bright lighting. The finished coating must not have cracks or chips, and it should not be perfectly smooth or very porous. Only small pores are required on the surface. If there are any shortcomings, then a second thin layer of plaster should be applied on top of the finished coating.
When working with gypsum materials, you need to take into account many nuances. For example, you can add cement to gypsum, mix it with alabaster or sawdust. Various additives impart new properties and textures to the solution. You need to work very quickly with any gypsum solution. If it hardens, then it will no longer be possible to soak the frozen mixture for further work with it.
Checking the quality of the solution
It is not difficult to dilute plaster yourself, but you definitely need to check the quality of the composition mixed at home. In addition to the thickness and uniformity of the batch, the working composition must have normal fat content (the ratio of the proportions of binders and fillers). This can be checked visually by the behavior of the pile of dough on the tip of the trowel. The high-quality composition does not spread or delaminate. When tilted, the tool does not slip, but moves slowly, leaving no sticky layer on the blade.
checking the quality of plaster
If the solution drains quickly from the trowel, it is either too empty (skinny) or too liquid. This composition does not form a coating of the required strength; it becomes “sandy” - when passed along the surface of the wall by hand, grains of sand fall off. The greasy solution sticks to the spatula. When hardening, such a mixture forms shrinkage cracks.
Specifications
The plasters of this company are produced in accordance with technical specifications 5745-003-48420415-2015. The quality of the products is confirmed by a certificate of conformity.
“Rotgypsum” is a universal plaster that is used for finishing walls and ceilings with different bases. The plastic consistency facilitates the application process. High adhesion improves finishing quality.
The plaster solution creates a smooth surface that is easily glossed. The surface treated with this composition does not require subsequent puttying. Working with this material is easy. It is easy to apply to the base. Processing it is not difficult.
Setting time averages 60 minutes. This is enough to complete the work, and, if necessary, to make adjustments. Due to the high adhesion ability of the material, the layer of applied plaster can reach 0.6-5 cm.
The company’s line of plastering compositions is represented by three types:
- Gypsum plaster "Rotgips". It is universal, plastic, with high adhesion and low consumption.
- “Rotgypsum standard” – does not shrink, is resistant to cracks. One layer can reach a thickness of 5 cm.
- "Rotgips-MSh" for machine application. It is characterized by high productivity, efficiency and long shelf life of the finished solution (up to 90-100 minutes).
How to save an incorrectly prepared mixture
If the solution is prepared independently, it is possible to obtain a mixture with unsatisfactory proportions - excessively fatty or lean. How to correct the prepared dough? This mixture is corrected by introducing the missing components into the composition:
- add additional amounts of binders into lean solutions, doing this in small portions, mixing thoroughly and checking the quality of the solution;
- sand is added to fatty solutions, adding liquid (also in small portions, stirring and quality control);
- Add water to thick gypsum solutions.
As you can see, knowing how to thin plaster will be useful for a beginner, since not everything can be outlined in brief instructions on the package. Taking into account the characteristics of the materials and the place of their use, following the recommendations set out by the manufacturer in the instructions, you will lay the foundation without which it is impossible to obtain a high-quality finish. We wish you success!
Gypsum putty: comparison with similar materials
If in the process of finishing work you rely only on your own strengths and skills, you must approach the choice of putty composition with due care. In this regard, we will consider the answer to the question: “Which putty is better?”, and also consider why it is still better to choose gypsum putty. To do this, let’s compare its characteristics with the characteristics of an equally common polymer putty.
- Both compositions are intended for finishing work indoors;
- Using polymer or gypsum putty compositions, you can effectively fill voids and cracks, as well as level even complex surfaces;
- Despite the fact that polymer putty, unlike gypsum putty, is characterized by resistance to high humidity, this is difficult to attribute to a number of its advantages, since this contributes to the disruption of microclimatic parameters and moisture retention in the room, while gypsum putty manages to maintain them at the proper level ;
- Gypsum putty is characterized by high vapor permeability, while this is not typical for polymer compositions;
- The next advantage of gypsum putty compared to its polymer analogue is especially important if you carry out repairs yourself. Due to the characteristics of its composition, it is characterized by plasticity, which facilitates the process of working with it;
- Gypsum putty is an environmentally friendly material, while polymer putties contain synthetic components;
- The price of gypsum putty is another advantage of it compared to rather expensive polymer compounds.