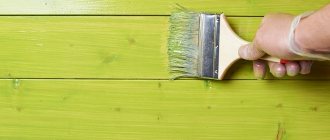
Paint selection
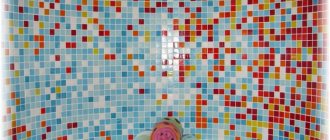
Paint color
When choosing a color, you need to keep in mind that light colors visually increase the space, while dark colors reduce it. Accordingly, light colors are better for small rooms, and dark ones for large ones. Colors are divided into cold and warm.
The former include blue and green, the latter – yellow, red, and violet.
Type of paint
Alkyd and oil paints are not suitable for concrete coatings. It will be necessary to apply several layers of such paints, but even in this case it will not be possible to achieve high-quality coloring for the long term. Very soon you will have to repaint the surface again.
Suitable for painting concrete walls:
- Epoxy paints. They are highly resistant to moisture and wear. However, such coatings require good ventilation of the room.
- Latex and acrylic based paints. Resistant to temperature changes and low toxicity.
- Glossy paints. Advantage: attractive appearance. Disadvantage: poor resistance to mechanical damage. Do I need to prime the walls after the starting putty before the finishing putty? In terms of quality and environmental compliance, the best choice is products made in the USA.
For painting concrete walls, epoxy-based, latex or acrylic paints are suitable.
Please note! High-quality compositions are ready for use without any additional manipulations (dilution), and they can be used to paint walls even in cold rooms.
When choosing paint, you need to pay attention to the presence of an antibacterial component in its composition. If present, the surface will be protected from mold and mildew.
Impregnation for concrete
To create a protective layer that protects the surface from moisture, dust and aggressive environments, you can use concrete impregnation. Penetrating deep into the material, impregnation strengthens its structure.
Impregnations are made on the basis of acrylic, polyurethane, epoxy resin and other materials. The surface dries out a few hours after it has been treated with impregnation. Impregnations can be either colorless or colored.
Choosing paint for a concrete surface
Choosing a paint color is also a serious matter, and often the start of renovations is delayed precisely because the owners cannot choose a paint. There are some features to take into account to help you make your choice. In particular, light colors provide visual expansion of the apartment, while dark colors create the impression that the room appears smaller than it actually is. You should also remember that the color can be either cold or warm, or neutral.
The category of cold colors includes green, blue, light blue. Warm colors are pink, orange, yellow, beige and their shades. In order for the coloring to be complete, you need to buy all the tools that you may need when performing such work. You may need a solvent, so make sure you have it on hand in advance. When choosing paint, consider that its service life is long, and it should not be too expensive.
Currently, acrylic paints are very popular. These paints contain a polymer acrylic emulsion, which acts as a link between the pigment and water. Acrylic paints are used for interior work and for exterior wall coverings. These paints dry quickly and last for 10 years. Therefore, we can consider that this option is one of the most relevant.
The preparation of concrete walls for painting has been completed, now we proceed directly to the painting process. The paint may need to be thinned if it is too thick. For large areas, you can use a wide roller. In areas where it does not have access to the wall surface, such as corners, paint with a brush. After applying one coat of paint, wait until it dries before applying a second one. How many layers to apply depends on the characteristics of the walls. In some cases it is enough to paint 2 times, but often 3 layers of paint are required.
After leveling the wall, it is treated with a primer
, which allows you to strengthen its surface. Acrylic primers or materials based on quartz sand are suitable for this.
For wall putty
Usually a gypsum mixture is used, and it is applied in two layers. The first layer is for leveling rough unevenness, and the second is for final leveling the surface.
After the first layer of putty has been applied, it should dry and then be sanded with coarse sandpaper. The surface is leveled with a second layer, and after it dries, sandpaper with a larger grain size is used.
Preparatory work
Before painting concrete walls, you need to carry out a number of activities aimed at preparing the surfaces.
Required tools and materials:
- primer;
- putty;
- electric drill equipped with a special attachment;
- dye;
- roller;
- masking tape;
- small and medium brushes;
- painting tray or mesh;
- ladder;
- coarse sandpaper (you can use a grinder);
- fine-grained sandpaper (for finishing work).
Surface preparation
- The first thing to do is check the moisture content of the coating to be treated. You cannot paint walls if less than a month has passed since the construction of the concrete structure. To check the humidity, you need to tape a sheet of plastic film (size meter by meter) to the concrete surface. If traces of condensation appear on the polyethylene during the day, the humidity is increased.
- If the wall has been previously painted, the old layer must be removed. To do this, you can use a spatula or chemicals (for example, alkali). Sandblasting is also effective.
Remove the top layer of paint using a drill
- The wall must be thoroughly washed from dust, soot and dirt. Dirt and dust are washed off with plain water. Soda ash solution will help remove soot. Rust can be removed using a 15% solution of copper sulfate. What paint can be used to paint penoplex without plaster? If the stains are large, it is recommended to treat them with rosin varnish.
- Small irregularities and roughness on the wall need to be leveled using a piece of pumice or emery.
- To strengthen the top layer of concrete, an acid-salt solution (fluate) should be used.
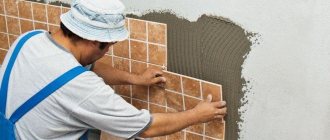
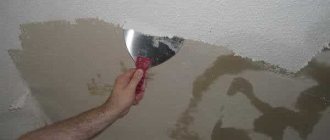
Puttying walls
Before painting the walls, they need to be puttied. The putty is applied in a couple of layers. The starting layer evens out the main unevenness, and the finishing layer evens out minor roughness.
The second layer should be especially smooth.
The selection of putty is carried out depending on the humidity of the room. Dry gypsum mixtures are suitable for dry rooms. If the room is damp, it is recommended to use dry cement mixtures.
Instructions for making putty:
- fill the container with water;
- pour the required amount of dry mixture into the container (we find out the exact proportion by reading the recommendations on the packaging);
- Stir the mixture with water well using an electric drill.
Please note: the putty must be done in exactly the order indicated - first water, then the dry mixture - otherwise a solution sediment will form at the bottom.
Tools for putty work
After applying the first layer of putty, you need to take a break and wait for it to dry completely. The waiting time can be found in the instructions, since different compositions dry differently.
Next, we sand the putty surface with sandpaper and apply the final layer of putty. We wait for the surface to dry and process the finishing layer with fine-grained sandpaper.
The next step is priming the surface. We use 2-3 layers of primer. Moreover, the composition for concrete walls should penetrate as deeply as possible into the structure of the material.
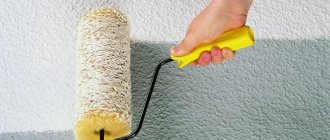
Apply the primer with a brush or roller.
Painting the walls
- We use masking tape. It isolates adjacent surfaces (floor, ceiling) from accidental paint.
- Before painting, remove any dust that has accumulated on the walls using a damp cloth.
- We use safety glasses to prevent paint from getting into our eyes.
- Pour the mixture into a clean container and stir until the paint becomes uniform.
- We dip the brushes so that the layer of paint on it is as uniform as possible. If we use a roller, then a special paint tray or mesh will come in handy. With their help, excess paint is removed from the roller. If we use a brush, then every time we expect excess paint to flow into the container.
- It is best to paint with a roller and use a brush where the main tool is missing.
- Before starting painting, the roller and brush must be slightly tousled and rinsed under running water. You also need to make sure that there are no loose bristles on the tool.
- Dip the roller in paint. Then spread the layer over the paint bath.
- Distribute the paint carefully and evenly over the surface. It is recommended to cover the failed layer with another one.
- You need to start painting from the top of the wall, working downwards. The trajectory of movement should follow the letter W. If the surface is rough, the starting layer is applied in the shape of the letter M, and the finishing layer - from top to bottom.
- Re-use of the roller is possible only after the tool has been in a container with clean water for 2 days.
- After removing the masking tape, use a thin brush to carefully align the edges of the painted surface.
Painting a concrete wall will not be very difficult. However, you will need care and diligence, as well as careful compliance with the instructions.
- Epoxy , they have high wear resistance and protect the wall surface from the negative effects of moisture. You can use these materials indoors if it is well ventilated.
- Acrylic-latex ones are suitable for use inside buildings, as they are non-toxic. When choosing these materials, take into account the fact that they are not afraid of temperature changes.
- Gloss paint can be used, but it gets damaged quickly. If you decide to use such materials, then you need to buy high quality paint.
The boundaries of the area to be painted should be marked with masking tape. Particular attention must be paid to door frames and window openings. An equally important area is the ceiling surface and adjacent walls. To protect your eyes from accidental paint contact, use glasses.
Treating concrete walls for painting
We give as an example the most common base for paint - concrete. Its processing includes all the main stages of finishing and gives a comprehensive idea of the volume of work ahead. Let's look at the process step by step.
Stage 1. Leveling the walls
In front of you is a base that has been cleared of old plaster. If you cannot remove it in some places, tap it with a hammer. If the sound is dull, like beating a drum, a cavity has formed under the material. Break up the area to re-treat, otherwise over time the surface will become deformed and cracks will appear.
Assess the evenness of the walls. A visual inspection is not enough for this. The fastest way is to use a laser level. If this is not possible, you have two options
:
- Walk along the wall with a rule or batten.
- Hang plumb lines on threads along the edges of the wall. Stretch a horizontal thread between them, securing it so that you can move it freely up and down.
Both methods allow you to identify recesses and protruding places on the wall. Immediately mark them with a pencil or stick them on top with masking tape. You will plaster the holes, and the mounds need to be cut off with a hammer drill.
Now you need to choose the alignment method
. You have three alternatives:
- Grinding
used for all types of concrete, including those with the addition of marble chips. This is a noisy and dusty process that requires a concrete grinder. The equipment is expensive. You can rent it, but it is better to hire a specialist to do the work in order to save effort and time, and be sure of the quality of the repair.
- With help plaster
you can eliminate cracks and holes, and also stretch the walls, making them even. For internal cladding, a gypsum mixture is used. We will not go into details of the work, because its volume depends on the curvature of the base. We list only the sequence of actions: priming, installing beacons, plastering (twice if necessary), re-priming.
- If the walls are very uneven, they can be covered
with plasterboard
. To do this, the base is treated with an antiseptic, then a frame is made from profiles and the sheets are fixed on them. The work is labor-intensive, but the surface will become perfectly smooth. All that remains is to putty it. When choosing this leveling method, keep in mind that the area of the room will decrease by 3-4 cm on each side.
Leveled walls are primed with a roller or spray. The primer enhances surface adhesion and prevents shedding and cracking of finishing materials. Before starting the next work, at least 5 hours must pass so that the base is completely dry.
Stage 2. Starting putty
Plaster and drywall are not suitable for painting. The first is too porous and grainy: the paint will not be distributed evenly. The second absorbs paint and varnish materials, which leads to a change in shade saturation and reduces the durability of the coating.
To ensure that the paint applies evenly, the base is puttied. They do this twice. In this section we will talk about starting putty. Its structure is finer than that of plaster, but larger than that of the finishing mixture. With its help, minor deviations of the wall from the level are leveled and cracks are sealed.
To work, you will need two spatulas: wide (from 40 cm) and narrow (up to 20 cm). Using small tools you apply the mixture broadly along the entire length. With a large one, distribute it along the wall. Do not try to make the starting coat perfectly smooth by reducing the edges of the layers. At this stage, these actions are inappropriate, you will waste your time. The main thing is to evenly putty the wall, leaving no gaps, and fill in any unevenness.
Cracks, external corners and places where walls meet door and window openings can be reinforced with reinforcing mesh (serpyanka). It enhances the strength of the coating, prevents shrinkage of materials due to temperature changes, and evens out corners and joints. To use it, apply a thin layer of putty and glue the serpyanka vertically. If several strips are needed, they are overlapped. Now move on to the main puttying.
Corner-forming tape will help give the inner corners a neat, regular shape. It is fixed in the same way as serpyanka, on a small layer of putty, then the transition between the tape and the wall is eliminated, then the walls are puttied in the usual way.
Wait for the finish to dry - at least 6 hours - and sand the surface. Use a 120 grit sanding sponge or mesh. This will remove imperfections and minor irregularities. But you can’t paint the wall yet: it has a coarse-grained texture, and the paint won’t apply well.
Stage 3. Finishing putty
To ensure that paint and varnish mixtures lay down in a uniform layer and do not change shade, use finishing putty. Its composition is devoid of large particles, so the coating is smooth. In addition, it prevents paint from seeping into the inner layers of the finish, which reduces material consumption and prevents color change.
The process is similar to the previous one, just try to distribute the mixture in a layer of no more than 2 mm, otherwise it will crack. At the end of the work, sand the wall with a mesh with a mesh size of 60-80. Do not overdo it so as not to remove the entire finish coat.
The quality of the final finish is checked using a lamp. Point it at an angle to the wall and inspect the surface. Even tiny irregularities provide shade. Sand them down.
Stage 4. Final primer
After the putty has completely dried, clean the walls from dust with a dry cloth or vacuum cleaner and apply a primer. The solution will protect the finish from moisture and reduce paint absorption. The coating will lie more evenly and last longer. If the area is humid, choose a mixture with anti-fungal additives to prevent mold from forming.
Preparation
The first step in preparing concrete structures for painting is the use of sealant. A special composition intended for concrete is applied in one layer and dries within 24 hours. The sealant allows you to create a barrier against the penetration of mold microbes. The next stage of the work process is priming. Concrete primers have a slight tint, which is necessary to later check that the entire surface is evenly coated. If not, the primer is reapplied, drying each layer for 24 hours.
To determine whether a concrete surface is ready for painting, it is necessary to conduct a moisture test: a piece of polyethylene measuring 1 m2 is tightly glued to the concrete with adhesive tape and left overnight. If condensation has settled on the film in the morning (light “perspiration” or drops), then the concrete has not yet dried out enough and it is better to postpone finishing work for a while.
There are special impregnations for concrete that perform a dust-removing function (protecting against abrasion and crumbling), which are usually used on concrete floors.
If there are cracks
It is better to repair any surface imperfections in the form of cracks, chips, drop-shaped recesses with a special repair solution (cement, putty) using a trowel or spatula. This will allow subsequent layers of primer and paint to lay down evenly and will extend the durability of the coating.
After using the mixture to seal cracks, it is necessary to go over the surface with sandpaper to remove excess roughness.
Without finishing
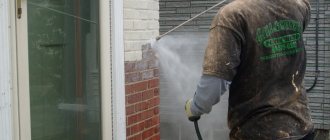
Before applying paint, the concrete surface should be washed to remove dirt and dust, which shorten the service life of any paint coating. You can clean the concrete with a soapy solution using a rag or a rough brush in case of severe contamination.
On concrete, if there is no protective coating, rust will form over time, which should also be removed before painting.
Copper sulfate solution copes well with rusty deposits.
If the affected area is too large, it is necessary to treat it with rosin varnish.
With finishing
There are three main ways to remove old finishes from a concrete surface:
- sandblasting is a hardware method that requires skill and time for subsequent drying;
- alkali solution - necessary to remove old paint;
- using a spatula is a mechanical method of scraping a layer, time-consuming, but giving an easily controlled result.
If the concrete wall is covered with dirt or soot, then the right solution would be to use a solution of soda ash to wash the contaminated surface.
Preparing concrete surfaces for painting
The preparation of surfaces for painting naturally varies depending on the type of base intended for finishing. In this article, we will present you with an algorithm for pre-treatment of concrete walls and ceilings.
Make sure the floor is completely dry.
If necessary, remove the previous layer of paint - scrape it off with a metal spatula and/or treat it with special chemicals (for example, caustic alkali)
Start by cleaning the base from dust and dirt, grease and rust stains.
- Fat and soot are removed using a 5% solution of soda ash (dilute 400-500 g of soda in a bucket of water)
- Washing with water followed by priming with a 10-15% solution of copper sulfate will help you destroy rust. Priming should begin after the surface has dried.
- Large-scale rust spots are covered with a layer of rosin varnish or white nitro enamel.
You can also use specialized products and solvents that are easy to purchase in city stores.
Treat the surface with sandpaper or pumice. Try to achieve a smooth base, because concrete initially has a rough structure. Paint does not have the property of leveling the surface, and therefore the coating applied to a rough wall will not look very aesthetically pleasing.
Carefully inspect the base and repair all, even the most minor, cracks.
Prime the surface - the priming composition will add adhesion (adhesion of the surface to the material) and provide good moisture-proofing properties. Apply a coat of primer with a brush, roller or spray.
Putty the wall or ceiling. The putty is applied in two stages:
- Rough putty destroys all significant potholes and irregularities
- The second (top) layer of putty finally creates a noble, smooth surface, ready for painting.
Choose putty depending on the type of base and purpose of the room. There are options for putties for plastered walls, special modifications for sealing plasterboard joints, and thick-layer putties for smoothing out serious wall defects. In this case, you should give preference to conventional putties for concrete surfaces.
Each layer of putty needs to be sanded after drying. It is made with sandpaper or a metal mesh attached to a wooden or plastic “iron”.
Sandpaper is classified according to the grain size criterion: the smaller the grain fraction of the sandpaper, the more “gentle” it affects the coating, and, accordingly, the greater the numerical value of its marking.
- To sand the first (coarse) layer of putty, choose sandpaper with a value of “60”.
- For the outer layer of putty, use 80 or 100 grit sandpaper.
After the final layer of putty has dried, treat the base again with a primer - the surface after puttying is quite dusty and priming will add to its ability to adhere to the paintwork. The primer is selected in accordance with the type of paint used for finishing work: oil paint requires drying oil, glue and lime paint require soap, etc.
When preparing walls for treatment with adhesive paints, add chalk to the priming liquid (2-3 kg per 10 liters of primer) to reduce the level of porosity of the base.
High quality painting requires 2-3 coats of primer. In this case, a little paint is added to the last layer, which will subsequently be used to finish the surface.
Having completed the preparatory work, begin painting the surface.
How to properly prepare a wall
You can’t just start painting the walls in your apartment. Some preparation is required. To complete everything without unnecessary errors, you must strictly follow these instructions:
- At the very beginning, the walls to be treated must be checked for moisture. There is a very simple but effective way to do this. It is necessary to paste the plastic film and secure it with adhesive tape. If after 24 hours no condensation appears on it, then the test has been passed.
- If the wall has already been painted, then it is necessary to remove all the paint using spatulas. If possible, it is advisable to sandblast the surface.
The quickest and easiest way to clean the surface of old paint is to use a drill with a metal bristles attachment.
- The next step is to clean it from possible contamination with water and a cloth.
- If there is rust, it will be easy to remove it with a fifteen percent solution of copper sulfate.
- The cleaning is done, now you need to make sure that the wall is perfectly flat. It is very important to eliminate even the smallest irregularities using pumice or sandpaper.
First stage of preparation
The preparation of concrete walls depends on whether there is an old coating on them, or whether the walls have never been decorated.
Preparation for old wall coverings
The very first stage in carrying out preparatory work for wallpapering is dismantling the old covering. If you do not dismantle the old wallpaper, further measures to prepare the surface will not make sense.
The old wallpaper needs to be softened. If the previous wallpaper was paper, it should be wetted with a soap solution and wallpaper glue added. On vinyl or non-woven wallpaper, you need to make cuts in order to get to the paper base, which should soften the soap solution. After the wallpaper has softened, it should be removed with a metal spatula. If they are difficult to remove, you should moisten them again with soapy water.
If the wall was painted with enamel or oil paint, it should be cleaned with coarse sandpaper. Water-based paint is removed in the same way as paper wallpaper using a spatula.
If the previous wall finishing was plaster, you need to ensure its integrity by tapping for the presence of voids. Empty spaces are removed and plastered; if there are many such spaces, it is better to remove the entire layer and plaster the surface again.
Preparing walls in a new building
Before preparing the walls for wallpapering in a new building, a rough finish should be carried out, which, in turn, consists of several stages:
- Spray with plaster in a layer of 3 to 9 mm. It should have a consistency that can easily fill all the cracks and small holes. Preparation for plastering begins with wetting the wall with water.
- Applying primer in several layers.
- Finish coating with plaster with a layer of 2-4 mm.
- Leveling the surface with sandpaper.
Elimination of uneven walls can be done using a plaster mesh. To achieve maximum adhesion of the plaster to the surface, notches are made on a smooth concrete wall with a hammer drill.
Interior and exterior work: differences
There are two differences between painting interior and exterior concrete.
Working hours.
If work inside is carried out according to the general repair schedule, then for painting external surfaces it is necessary to select a time of day when the appearance of morning or evening dew is reduced to zero. When applying paint to exterior concrete surfaces, the weather must be suitable - cloudy but not raining.
Puttying concrete
Painting concrete walls inside any room is easy to do with your own hands, using step-by-step instructions and photos. But cleaning the walls is not everything, and it’s too early to move on to painting.
The next important stage is puttying, which is most often done in a couple of layers. Starting putty will completely level the entire surface. And the finishing one will easily eliminate all minor irregularities.
Before applying putty, you need to choose the right mixtures. If the room has dry air, you can use the gypsum version. And if it’s wet, then cement mortar would be the best option.
Do-it-yourself painting of concrete walls indoors step by step photo
How to properly putty concrete walls:
- After applying the first layer, you need to leave it alone until it is completely dry. The drying time can be checked on the packaging. After all, each solution dries for a certain amount of time.
Painting walls inside: features
Concrete paint can be applied directly to the primer or to previously putty walls.
The choice of putty depends on the general humidity of the room: in a dry, heated place it is recommended to use gypsum solutions, in humid places - cement-based mixtures.
How to paint without putty
Painting concrete without applying a layer of plaster preserves the structure of the coating visible. In interiors, concrete surfaces are used to emphasize the coldness and masculinity of the overall style of the room, therefore, as a rule, paint in shades of gray and sand is chosen.
Is it possible to paint without plaster?
Painting without prior puttying is possible; it is important to choose the right compositions for impregnation and primer, because they will fix the layers of paint applied to the concrete wall.
Painting in an apartment without preparation
There are modern coloring compositions that do not require the application of a base. They are not so durable, but they allow you to easily change the situation. The peculiarity of using “all-in-one” paint is the need to refill it in the sprayer.
What type of finish should be used for painting on concrete walls?
Concrete allows you to create a finishing layer of plaster, which can imitate brickwork, 3D drawings, frescoes, and partial finishing required by the interior design. In such cases, the paint is applied after the wall texture has completely dried, usually with a thin brush, for the best resemblance to the original.
How to paint without leveling
When painting walls, a problem often arises - the unevenness of the wall violates the integrity of the coating, which subsequently leads to cracking of the paint. This misunderstanding can easily be corrected by the correct selection of building materials:
- paint roller - must be marked as a tool “for uneven walls”;
paint - you should choose a textured one that imitates waves, strokes, wood structure, etc.
How to prepare walls for painting with water-based paint yourself
Despite the large assortment of cladding, high-quality painting has not yet faded into the background. Painting walls is simple and allows you to quickly and cheaply change your interior at any time. However, you need to keep in mind that paint is not a reinforcing material and does not hide surface defects, so high-quality preparation of walls for painting is extremely necessary.
Surface painting
The fastest way to cover the wall surface is with a roller. If the paints for concrete walls are very thick, then it is better to dilute them a little with a solvent that is suitable for the specific type of mixture.
It is recommended to work using rollers and brushes. This way, a large area can be painted with a roller, and brushes can be used in corners and hard-to-reach places. The paint is applied in several layers, but before applying a new layer, you need to wait until the previous one has dried. As a rule, the material is applied to the walls in 2-3 layers.
To make it clearer how to paint a wall to look like concrete, you should study the instructions:
- Markings are made on the wall. The borders are covered with masking tape. You need to carefully cover door and window openings, as well as the ceiling area in the area adjacent to the wall.
- For further painting in the apartment, it is recommended to wear glasses, this will prevent paint from getting into your eyes.
Knowing how to paint the walls in an apartment and using the instructions provided, you can safely do the work on your own, significantly saving money.
Peculiarities
Sometimes it becomes necessary to paint a concrete wall without puttingty. In such cases, it is better to use acrylic or oil paints, and the latter will be more economical.
Please note that oil compositions are less resistant to damage and precipitation than acrylic ones , so they are not recommended for outdoor use.
The procedure for painting a concrete wall will be as follows:
- to avoid accidentally painting the ceiling, apply masking tape around the perimeter of the room;
- Use a damp cloth to remove dust from the wall;
- When performing the above work, you must use personal protective equipment: goggles, gloves, mask;
- the paint from the can is poured into a container and mixed well; for this, use a drill with an attachment;
- the work can be done with a brush or roller; after dipping it into the paint, you need to remove the excess back into the container;
- in open areas the paint is distributed evenly using a roller, and in hard-to-reach areas the work is done with a brush;
- work starts at the top and moves down;
- if you see that one layer of paint is not enough, you need to let it dry and apply a second layer;
- remove the protective tape; if there are flaws, they are corrected with a brush;
- If you plan to reuse the roller and brush, place them in a container of water or rinse well with solvent.
You can also use an electric spray gun for painting, but the material consumption will be greater.
Choosing paint indoors
The range of modern construction and finishing materials only increases with each season, so the best recommendations will be given by store consultants, taking into account the area of the room, the purpose and interior requests of the client. Paints selected for coating concrete must not only be appropriately labeled, but also contain detailed instructions for use.
Three types of paints are most commonly used.
- Epoxy. It is wear resistant. It has a rich color and protects walls from moisture. Painting work should be carried out in rooms with good ventilation. Over time, cracks may appear.
- Acrylic. It is economical in consumption; sometimes one layer is enough. Environmentally friendly. Dries quickly and is resistant to moisture. The only negative is the short service life.
- Glossy. An environmentally friendly product, but at the same time sensitive to mechanical damage.
If it is necessary to combat mold and mildew, any type of paint is suitable - the main thing is that the composition contains antibacterial components, as evidenced by special marks on the label.
Material selection
When deciding what paint to paint concrete walls, you need to consider a lot of factors. First of all, they consider the main varieties, their advantages and disadvantages, compliance with the functions of the room, and cost.
So, the most popular are: epoxy paint for wear resistance, rich color and protection from moisture; acrylic for economical consumption, safety and environmental friendliness, quick drying; glossy for beauty and non-toxicity.
When deciding how to paint a concrete wall outdoors, they give preference to synthetic and durable compounds that are not afraid of moisture, sudden temperature changes, and sunlight. But for an apartment, it is better to choose environmentally friendly paint based on natural oils or water - here external negative factors will not affect the surface, but it is very important to choose an option that is safe for health.
The purpose of the room where painting is carried out is also important. So, for the kitchen and bathroom, moisture-resistant compounds are chosen, but for the bedroom or living room, acrylic-based interior paint is also quite suitable. Moscow and the regions today offer a fairly large selection of materials on the market, so choosing the right one will not be difficult.
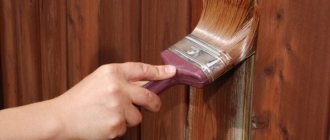
Oil paints
This type of composition is usually used when deciding what to paint a concrete wall on a balcony or on the street. This is the best option for outdoor work, since the paint is quite toxic and has an unpleasant odor, which then takes a long time to dissipate.
Main advantages of paint:
- Availability in terms of price
- High level of resistance to moisture, temperature, various external factors
- Excellent coating strength, durability
- Simple and easy care – the paint can be washed even with cleaning agents
Among the disadvantages of oil compositions, it is worth mentioning the long drying time (at least a day), low level of elasticity and the risk of cracks, color instability (due to drying oil turning yellow over time).
Pro Tips:
- Painting work must be carried out wearing safety glasses. When using strong-smelling paint, wear a respirator.
- Before applying paint, you need to prepare your tools: fluff the brushes and check if they are losing bristles; Soak the roller under a strong stream of water, then wring it out and smooth out the pile.
- To protect the floor and ceiling at the joints with the wall, use masking tape, which is peeled off after painting. If necessary, individual areas are then worked on with a thin brush.
- When applying paint, it is important to remember that each layer should be as thin as possible. A wall painted in three thin layers looks better than one too thick, which creates streaks.
- As a rule, concrete walls are puttied in two layers: the first is gypsum or cement plaster, then the finishing putty. This method allows you to achieve a perfectly even coating.
Painting concrete surfaces with paint is not difficult for either beginners or experienced finishers. When painting, it is important to wait patiently until each layer of coating dries, then the result will be uniform and durable.
What paint to choose for painting concrete
The concrete paint available on the construction market differs in composition and properties. The concrete paint available on the construction market differs in composition and properties. The choice of paint coating should be made after a thorough analysis of the situation, since when purchasing paint and varnish materials, the nuances of the surface, the purpose of using the paint and other features should be taken into account.
Necessary paint requirements
Regardless of whether concrete paint is used outdoors or indoors, it must have the following properties that will help it properly perform its functions:
- The high level of adhesion allows you to create a reliable coating with a fairly long shelf life.
- Moisture resistance will prevent moisture from entering the pores of the concrete and destroying it from the inside.
- Resistance to atmospheric phenomena and ultraviolet radiation will allow you to preserve the aesthetics of the coating for a long time.
- Resistance to high and low temperatures will prevent cracking and allow the concrete to maintain its attractiveness for a long period.
- Vapor permeability will allow the walls to “breathe” and prevent the formation of condensation.
- Fire-resistant properties are important for human safety.
- Ability to withstand mechanical stress.
Each concrete paint for exterior and interior use has the listed parameters to varying degrees. When choosing a paint and varnish material, you should study all the types of paints presented in order to decide on the most suitable paint and varnish material.
Painting concrete walls
The process of painting concrete is no different from painting any other surface. You can use a brush or roller, depending on your personal preference. Start from the far side of the room and move towards the exit.
After applying one coat of paint, leave it to dry for a day before applying the second. It is easier and faster to apply than the first and is an important step to ensure a sealed, water-repellent surface.
Epoxy paint can be applied in one coat, but latex paints should always be applied in two coats. You can start using the room a day after painting. Other coloring compounds are not suitable for concrete.
Epoxy paint can be applied in one coat, but latex paints should always be applied in two coats.
Is it possible to paint without plaster and putty?
Before you think about painting concrete outdoors or indoors, decide whether the concrete needs preparation for painting. Plaster and putty are designed to smooth out the porous surface of concrete. This, firstly, allows you to seal small voids and cracks; and secondly, smoothing allows you to reduce the area of the surface to be painted and, accordingly, paint consumption.
Concrete can be painted indoors without prior plastering and puttying. But for external surfaces this is important, because... Porous concrete strongly absorbs atmospheric moisture. In the cold it turns into ice, which, expanding, gradually destroys the concrete.
Concrete can be painted indoors without prior plastering and puttying.