Selection of materials and tools
If you decide to restore a chair with your own hands, do not rush. First you need to decide what paint to paint. It is also important what tools and related materials will be used for the work.
When choosing paint, you should pay attention to what materials the piece of furniture is made of. The legs of the chair can be made of metal, and the working (upper) part can be made of wood. It is now easy to purchase paints for different coatings. Aerosol paint and varnish products are best suited for metal surfaces, acrylic paint - for wood, alkyd - a universal option.
Important! You should not choose water-based paint, since in any case the chair will be subject to wet cleaning from time to time. The peculiarity of aqueous compositions is that they create a coating that wears off quickly.
If you want to preserve the texture of the old material, then there is a solution - choose transparent paint or varnish your favorite chair. The varnish will protect the surface from external negative factors and save the decorative coating from abrasion for some time.
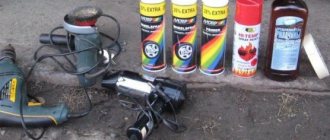
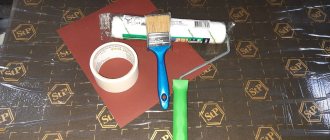
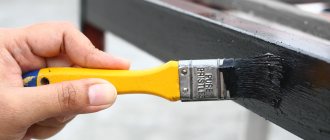
The choice of working tool depends on the painting method. You can stock up on round or fluted brushes, sponges, rollers of different textures, and a paint sprayer. The choice is yours.
What else you might need:
- putty and spatula (for sealing cracks, chips, deep damage);
- wood primer (it will ensure adhesion of the surface to the paint);
- fine or medium-grit sandpaper, depending on how much of the old paint layer will have to be removed;
- unnecessary newspapers or paper;
- soap and a regular rag;
- tape or construction tape;
- a screwdriver, a nail puller and a hammer will also help.
We must not forget basic safety requirements. You need to work in old or protective clothing, gloves, glasses and a hat. This will reduce the risk of skin contamination and foreign bodies getting into the eyes.
Surface preparation
Painting chairs is accompanied by preliminary preparation of the surface so that the paint does not peel off quickly. To do this you need to perform the following steps:
1. Using a soap solution and an old rag, rinse the product, degrease with white spirit and dry. Check for gaps, cracks and loose fasteners. It is best to mark each defective place with chalk so as not to miss any defects.
2. Cracks, potholes and chips must be repaired with a special wood putty. If there is a large crack, then it is better not to use this method, as the material will sooner or later fall out.
3. Remove the old upholstery (if any), unscrew the legs if they are screwed on. Carry out the work with a screwdriver and a nail puller.
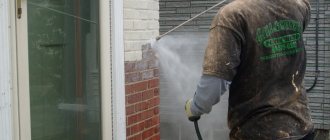
4. Painting a chair yourself requires first removing the old coating layer, especially if it is already peeling off. Cleaning can be done using sandpaper. You can also use a sander.
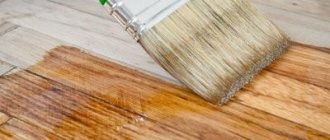
5. For uniform distribution of paint and its better adhesion, the surface of the chair must be primed.
6. Wipe the surface with a damp cloth to prevent dust from mixing with the paint.
Important! To paint a chair with high quality, you must first disassemble it and process every detail.
In the video: painting and restoring a chair - 5 steps.
Painting process
To make the old chair shine again and look like new, it should then be painted in the chosen color. To do this, do the following:
- To protect the floor surface, you can lay down old newspapers or paper.
- If the chairs have some decorations, it is recommended to seal them with construction tape or tape.
- It is best to mix the paint first so that the drying oil is not on top.
- Turn the wooden chair upside down if it cannot be disassembled.
- Prepare all the tools.
- Wear protective clothing, household gloves and goggles.
Painting technology:
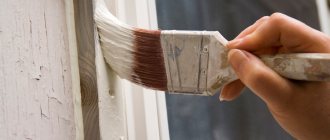
- First we paint all hard-to-reach places.
- Next, we cover with a thin layer all possible elements or what can be approached at the moment.
- Now you need to wait for it to dry completely.
- You should use fine sandpaper to remove any hard particles after painting.
- The treated chair should be wiped with a damp cloth and allowed to dry.
- Next, paint the entire product evenly with a second layer of paint.
- At the final stage, varnish should be applied.
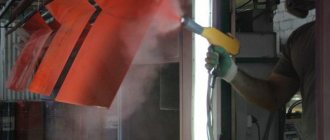
Advice! It is more convenient and faster to paint with aerosol paint. This way you can carefully paint over all the protrusions and small decor (if any).
Viennese
To repair Viennese chairs yourself, you first need to assess their general condition. The amount of damage may depend on operating conditions.
The most important damage that can be assessed at home is instability. This occurs due to weakening of the tenon joints. To bring the product back to normal condition, it is necessary to increase the size of the tenon, install seals on the drawers and replace the power bars. After this, the paintwork is replaced and the seat is restored.
To restore an outdated structure, you need to prepare basic materials and tools. To work, you need to get a hammer, a furniture stapler, a self-tapping screw, paints and varnishes, solvent, brushes, glue, scissors, cloth and sandpaper.
The renewal process begins with cleaning all surfaces of the product from dirt and dust. After this, the analysis of the chair begins. First, remove the seat and backrest, which are usually held on with screws. Then step by step the remaining parts are removed
It is important to check the strength of all connections. If any attachment point does not hold well, then it is not worth disassembling it
Disassembled elements must be replaced immediately to avoid errors during the assembly process. All parts are sanded with sandpaper to thoroughly remove old varnish. This is necessary so that the furniture can be repainted so that the new layer fits perfectly on the chair.
Next, be sure to inspect the places where the elements are glued. The top of the legs, which are attached to the grooves, must be wrapped in several layers of bandage, covering each layer with glue. If the leg wobbles very much, then a hole is made in the end, into which a small wedge is then driven. This will increase the width of the end, and the leg will hold firmly in the groove.
For drawstring structures with a weakened seam, you need to make a hole on the inside and use a syringe to inject an adhesive into it. You can also resort to matches coated in glue and insert them into the socket when assembling the chair. In this case, the ends must be adjusted with great precision so that no gaps form between them and the drawers.
Assembly of the structure begins with complete gluing of all tenon joints. Excess glue should be removed with a napkin. The product dries for about a day, and for maximum fixation you need to place some heavy object on the seat.
To update the seat, you need to get rid of the worn upholstery and eliminate any surface imperfections. If you need to change the foam rubber, then you need to draw markings on the new foam rubber sheet and cut out the part. The fabric with which the seat will be upholstered must be larger than the resulting seat. It is placed closely on the surface and secured with paper clips on the back side.
The chair itself can be decorated in Provence style. To do this, all wooden parts are painted and, after drying, processed with a sanding machine.
We paint the chairs. grinding, staining, priming, polishing
This article is intended for those who produce chairs, cribs and other so-called lattice furniture. For such products, solid wood is mainly used, as a rule, beech, birch, less often oak and other types of wood. Therefore, we will consider coloring using the example of beech as the most suitable material for such products.
The type of finishing is traditional - stained, painted with transparent varnish, the pores are closed. We offer you a technical process widely used in Italian chair factories.
So, before us is an assembled, unpainted chair.
The first thing you need to pay attention to is how it is polished. Very rough sanding will cause the stain to be unevenly absorbed (staining) and will require a large amount of primer to even out the surface. If the wood is sanded too well, you will get a great painting result for less money, but will experience poor adhesion. As a result, there is a high probability of peeling of the paintwork.
Optimal grinding with abrasive P150 - 180 or K60 - 80 based on aluminum oxide (usually red).
The choice of dye and method of application can be completely arbitrary. Many people use solvent-based dyes and apply them by spraying. But this does not always lead to uniform coloring and always leads to large losses of material.
Optimally, and this has long been tested and used, the use of water-based dyeing systems. This is a specially developed composition based on organic resins, which ensures uniform distribution and absorption of the dye. Painting is done either by dipping or using the shower principle, which, in general, leads to the same result - abundant and uniform wetting of the entire surface. In the Milesi range these products are: CFC 2 (filler) and CFT 1 – 9 (dyes). The proportion of the finished stain looks something like this: CFC 2 – 45%, dyes – 5%, water – 50%. As a result, you get a very high-quality, economical and environmentally friendly product, and the amount of losses in this case is almost zero.
The next step is priming
In most cases, a polyurethane product is used as a primer and finish. We will consider it. To finish this kind of product, it is important to be able to apply a larger amount of material so that it does not run off, that is, the material must be thixotropic.