Why is painting chipboard difficult?
The main thing that complicates painting furniture made of chipboard or MDF at home is the need to remove the old coating. The slabs are initially processed for protective and decorative purposes, and this decor “sits” very firmly on the material. If you paint directly over it, it will turn out unsightly, and it can be difficult to completely remove the coating.
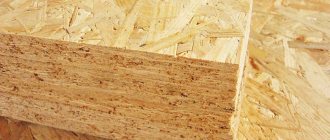
Any chipboard needs to be painted differently. There are 4 main types of particle boards, differing both in the technology of creation and in the complexity of repainting:
- Varnished. When creating this type of chipboard, it is first decorated and then varnished in 3 or more layers. When the varnish dries, a durable “film” is obtained. Removing it in order to repaint the product is very difficult.
- Laminated. The plate is covered with film and a heat press is used to secure it. The film serves as both protection and decoration. Lamination is easier to remove than varnish, but still quite difficult. And the answer to the question of what paint can be used to paint furniture made of laminated chipboard is very simple - any will do.
- Veneered. Veneer is glued to chipboard under high pressure. There are no problems with repainting such slabs. But there is a difficulty with what to cover veneered chipboard with. Regular paints are not suitable for it - only varnishes and stains.
- Laminated. This type of chipboard is decorated with paper - the least durable of all coatings. Accordingly, removing it is not difficult. You can paint with anything, but first you need to clean off all the dried glue.
There are other categories of chipboard, but they are practically not used in the furniture industry. Therefore, you should pay attention only to the 4 above.
Paint selection
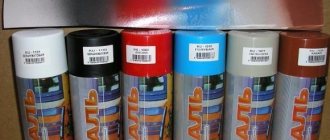
Furniture with a laminated facade is best painted with water-based acrylic paint. It is suitable for painting products white, and to add color to the base you can add a color of the desired shade. Also, if necessary, the paint can be diluted with water to achieve a lighter tone.
Acrylic paint can be used indoors: it does not have a pungent odor, does not emit harmful compounds, is durable and easy to clean. To paint large surfaces, you can use acrylic paint in cans.
Thixotropic paint is also suitable for painting furniture - it has a special consistency, thanks to which it applies smoothly, without running down or forming smudges. Painted surfaces will resemble plastic ones.
You can paint laminated surfaces with polyurethane and latex paints, but when choosing, it is important to pay attention to the label: it should indicate that the product can be used for indoor furniture. They are also available in a basic white color; color is used to obtain the desired shade.
What you need to paint chipboard
Painting old chipboard at home is not difficult if you follow the rules inherent to this type of material.
Before painting old chipboard furniture, you need to:
- inspect the product, assessing the quality of the coating (the better quality it looks, the more difficult it will be to get rid of it);
- check the “pliability” to painting on an inconspicuous area of the furniture - this will help not to spoil the entire product.
To paint furniture or a facade made of laminated chipboard at home, you will need the following tools:
- roller (best of all - with a fur “coat”, with medium-length pile);
- narrow brush (for painting hard-to-reach places and ends);
- masking tape - to seal areas that do not need to be touched;
- sandpaper and rags for processing slabs before painting.
Instead of a roller, a spray bottle is often used. But you need experience working with this device, because if you hold it too close to the surface to be painted, painting furniture yourself will not be of very high quality, and unsightly “smudges” will appear.
But you shouldn’t replace the brush with a foam sponge - using this item it is very difficult to evenly distribute the paint on the chipboard.
Required materials and tools
Before you start painting, you need to stock up on the necessary materials: construction tape; napkins or rags or sponges; sandpaper of various grains to remove the previous layer of paint; degreasing agent; primer; putty (car putty is quite suitable); solvent or white spirit - will remove remnants of the previous paint; glue; dye; varnish; gloves, for painting it is better to take rubber ones.
Materials and tools for work.
Tools you will need: stationery and carpenter's knives; a construction hair dryer to dry the painted surface; flat brush – it’s better not to skimp on brushes, buy high-quality ones so that no lint remains on the surface; roller; putty knife; screwdrivers; hammer; nails; drill.
You need to remove the fittings from the furniture, take out the shelves, remove the doors. Then get to work.
How to paint chipboard
To successfully repaint furniture from a dark color to a light color or choose any other shade, it is important to choose the right paint. What paint to choose for painting chipboard furniture most often depends only on personal preferences. The only recommendation is that veneered boards need to be varnished; other coloring agents are not suitable for them.
When choosing paint for home furniture made of chipboard, you need to consider:
- wear resistance of the drug;
- ease of coloring;
- color scheme and texture (chipboard lends itself well to texturing, so paint with filler is often chosen).
To achieve the best result, you need to buy paint that is designed for chipboard or just wood. It is better not to use universal compositions “for all surfaces”.
Primer
In addition to the coloring agent, you also need a primer for painting chipboard. This is a very important point, because the primer increases adhesion (adhesion of paint to the slab), extends the “life” of the new coating, and makes the appearance more attractive. In addition, with a primer it is much easier to change the color of a chipboard cabinet or other furniture - it completely covers the old shade.
It is best to choose a primer that is close in color to the paint. If this is not for sale, then white.
Chipboard should be primed for painting in 2 layers (or more if desired). Before applying the last layer, it is necessary to degrease the surface. White spirit or any other solvent is suitable for this. It is most convenient to use a spray bottle.
Oil
Oil paint allows you to quickly cover a large area. Therefore, it is often chosen to repaint large furniture. But there is also a noticeable drawback - it takes a long time to dry. To paint furniture made from chipboard with high quality, it is necessary to do several layers, and after each stage you have to wait until the oil dries - at least one or two days.
In addition, oil paint smells unpleasant while working and drying. Therefore, it is unlikely that you will be able to paint a cabinet or table in a room where there is no good ventilation.
Alkyd
Alkyd paint can be compared to oil paint - it also has a strong odor and takes a long time to dry (although not as long as oil paint - about 6 hours). Its main advantage is resistance to various microorganisms. Therefore, alkyd preparations are chosen for painting old chipboard furniture in the kitchen and bathroom.
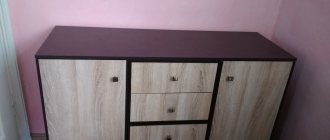
And in order to paint a chest of drawers with your own hands, it is better to use acrylic paint - this is the best option for a living room or bedroom, where the “stress resistance” of an alkyd analogue is not required.
Acrylic
Using acrylic paint, painting chipboard furniture yourself is the easiest way. It is easy to apply and is not as prone to smudges as oil. There is no unpleasant smell (cheap options do, but it’s weak). This product dries very quickly, so it is an excellent option for repainting an old chest of drawers or other particle board furniture.
The only drawback of acrylic paint is the drying speed. If a drop of the drug falls on the floor, it must be wiped off in a couple of minutes, otherwise the stain will have time to dry. So when working with this product you need to be careful and careful.
Ecopaint
Any colorful preparations are suitable for exterior decoration. But to repaint the inside of a wardrobe in a different color, it is better to use environmentally friendly paint. It will not “saturate” clothes with unpleasant odors and harmful components.
Also, thanks to its slightly “faded” color scheme, eco-paint is well suited for interior styles such as country and Provence. Painting a cabinet with this material often looks very attractive.
Eco-paint is also recommended for treating furniture in a children's room. Milk-based compositions are absolutely safe and have good wear resistance.
Varnish and impregnation
Veneered chipboard is advised not to be painted, but to be varnished. But varnishes are also suitable for other types of slabs. You can also use stain to change the color of furniture, and special impregnation to strengthen the slabs and extend their service life.
Often colorless varnish is used as a fixing layer - after painting. This increases costs, but makes the new coating more durable. If you paint an old chest of drawers with acrylic and then cover it with clear varnish, the furniture will last for many more years.
When does coloring make sense?
After you take a closer look at the price tags in furniture stores, you begin to think about alternative ways to update your interior. A good way to update would be to repaint existing furnishings. There are several reasons why people think about painting furniture and begin to study the issue in detail:
- I would like to update the furniture in my dacha. Most country house sets are made up of outdated furniture of different styles and colors. The update will help bring all items to a single style, making the interior harmonious and cozy.
- It's a shame to throw away your old headset. Many sets left over from Soviet times are durable and can last for decades. But their surface has long lost its attractiveness, and the objects themselves look obsolete; Restoration and painting (possibly with a color change) will help extend their life.
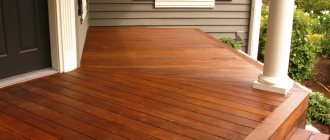
How to refresh an old itemSource aviarydecor.com
- The house has an inherited rare wardrobe or retro chest of drawers. Antique furniture is valuable for its original appearance, often more refined than modern models, but its appearance is far from perfect. Skillful restoration will transform an old item beyond recognition and make it a decoration for any living room or bedroom.
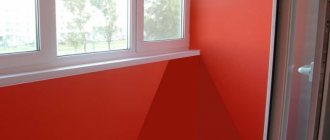
- You want to refresh the interior, but you are not mentally prepared for a full renovation. In this case, point changes are used. They often change the color of one wall, make it an accent wall, and purchase new textiles and lamps. An effective way would be to repaint furniture in a new, sometimes unexpected color: when a brown cabinet turns white or olive, the interior is transformed beyond recognition.
- I want to change my style. They resort to artificial aging of facades when they want to decorate the interior with vintage notes (for example, Provence or shabby chic). A chest of drawers or a wardrobe begins to resemble an antique thanks to a special painting technology. A decorative layer with noble cracks can be obtained in several ways.
Distressed nightstandSource luniqueblog.com
Procedure for painting chipboard
Before you paint chipboard furniture with your own hands, you need to:
- remove old coating;
- remove dust and dirt;
- prime and wait for the primer to dry;
- Cover with masking tape all areas that should not be painted.
You should also prepare all the tools and materials in advance and study the instructions for them. If possible, it is better to work outside or on the balcony. Then you can paint a table made of laminated or varnished chipboard with high quality, giving it an attractive look.
Padding
If the furniture does not need pre-treatment (removal of old coatings, cleaning of dust and debris, then you can safely begin the priming stage. This should be done like this:
- Sand the entire surface with fine-grit sandpaper. This is necessary for better adhesion - especially important for varnished boards. You can use a grinder, but be careful, otherwise there is a risk of damaging the material.
- Clean the furniture surface from dust. A handheld vacuum cleaner or dry brush is suitable for this purpose.
- Coat the chipboard with a primer - for now only the first layer. Wait until dry.
- Inspect the product carefully. If there are any unevenness, chips, cracks, they need to be puttied. It is better to use a soft rubber spatula to avoid damage.
- Sand the putty areas.
- Apply remaining coats of primer before painting. There can be 2 or 3 of them - no more are required.
After this, you can repaint the cabinet from any chipboard, choosing any paint you like.
Preparation of varnished or painted coatings
Repainting varnished chipboard (or previously painted) requires pre-treatment. It goes like this:
- Treat the old coating with hot air. If you don’t have a heat gun on your household, a simple hair dryer will do just fine. Heating softens the old paint or varnish, after which the coating can be easily removed with a metal spatula.
- If the furniture is large, then it is better to warm up a small area and clean it immediately - before it has time to cool down.
- If you cannot remove a layer of old paint, you can use “heavy artillery,” namely devices with higher temperatures than a hair dryer. A torch or blowtorch is the most affordable choice.
The above method is convenient for vertical surfaces. It is better to iron a horizontal surface (for example, a tabletop) with an iron through a sheet of foil.
An alternative method for removing paint or varnish is to use a solvent. It must be applied in an even layer (for example, use a brush) and left for a while. Then you can easily scrape off the softened paint with a spatula and choose how to paint a cabinet made of laminated or varnished chipboard.
Cleaning polymer veneers and laminated paper
Before you paint laminated chipboard at home, you need to clean it properly. The same applies to veneered and laminated boards. The paint on laminated chipboard furniture looks good without preliminary stripping, but it doesn’t stick very well.
Laminated and veneered boards should be processed as follows:
- Rub the coating with coarse sandpaper until the material becomes rough. This is necessary to increase adhesion. You must act carefully so as not to damage the base of the slab.
- When the coating becomes uniformly rough, use a large brush or low-power vacuum cleaner to remove dust and small residues.
- Continue sanding with finer sandpaper.
- Feel the cleaned surface for damage or unevenness. If they are found, they need to be puttied.
Then you need to vacuum the room before priming and repainting the furniture. Removing dust is very important, otherwise it will rise into the air and can settle on the surface of the product, making the painting uneven (where there is more dust, the paint will look more matte).
To make a cabinet repainted white look good, you need to choose both a putty and a white primer. This way they will not show through the paint, reduce its consumption and give the coating a uniform color.
Puttying
The surface can be puttied during priming or preliminary cleaning. If at any preliminary stage defects were found that need to be “fixed”, use any wood putty and a spatula. Excess is removed so that the surface becomes smooth. Be sure to apply at least one more layer of primer on top.
Coloring
Painting old furniture yourself is not difficult if it has been properly prepared. They operate in this order:
- Choose paint. The most important choice is for laminated chipboard - this type of board can remain smooth even after sanding, and many types of paint will not demonstrate good adhesion. If the “degree of roughness” is unsatisfactory, then it is better to take alkyd paint for better adhesion.
- Prepare paint according to instructions. This stage may include diluting with water, tinting, stirring - everything according to the instructions.
- Apply paint with a roller, dipping the entire roller into the paint container. It should be applied in one roll, not “rub in” too much. Rolls must be done in one direction.
- After rolling, squeeze the excess paint off the roller and wet it again.
- When the main layer is applied, carefully brush the ends and other hard-to-reach areas.
- Wait until the first layer is completely dry.
- Apply the second one in the same way as the first.
Instead of a roller, you can use a spray bottle - the coloring result will be even better. But a person who has not previously worked with a remote control should practice on something unnecessary (old broken furniture, a piece of cardboard). It is better to fully master the device before moving on to painting chipboard. The greatest attention should be paid to selecting the distance between the device and the surface - so that the paint does not splash in all directions and at the same time does not flow down the slab.
Painting decorative elements
If you need to first apply decor, and only then repaint a bed or other furniture, then varnish is usually chosen from all types of paint. It adheres best to decoupage and appliqués. And colorless varnish allows you not to spoil the painting - on the contrary, it makes it more expressive.
An important point is that furniture is decorated after stripping and priming, but before painting. Decor does not adhere very well over paint or varnish. You need to varnish in several layers - at least 3. Then the decorative elements will not come off.
Rules for applying varnish with your own hands
Wood chips and resin have different absorbent properties. When decorative compounds are applied to clean chipboard, a non-uniform color is obtained. The primer promotes uniform distribution of the coating. Therefore, the main rule for varnishing particle boards is mandatory priming.
How to varnish chipboard:
- the cleaned surface is coated with a primer;
- polish;
- apply the first layer of varnish;
- after complete drying, sand again;
- coated with a second layer of varnish;
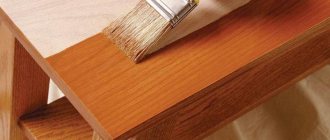
- finally level the dried surface.
The varnish is applied with a brush, and for a more uniform coating, a cotton swab with cotton filler is used. When applied with a swab, the composition saturates the surface well.