Today, decorative items made by hand are valued. They are given as gifts to relatives and friends at special events, and are used to decorate the interior of an apartment or country house. Decorative painting of bottles with acrylic paints is widespread, and many experienced craftsmen offer master classes
A bottle painted with acrylic paints will be a creative gift for a loved one or an unusual decorative element.
Painting a bottle with acrylic paints: step-by-step description, features and recommendations
Today, things made or decorated with your own hands are highly valued.
They look great in the interior and can be a good gift for loved ones. Today there are many materials that make the job easy. Paints can dry out quickly. However, they do not smell. An item painted using modern materials does not lose its appearance for a long time. There are many interesting ideas on how to decorate glass vases and jars. However, bottle painting is very popular. This is one of the most convenient forms for drawing. How to paint a bottle with acrylic paints will be discussed further.
General job description
Many interesting subjects, ideas and techniques can be chosen for painting bottles with paints. Decorator tips will help you do this job well. They claim that it is quite easy to draw on the bottle. The container can have different shapes. Its advantage is good stability. The workpiece does not need to be secured to apply the selected image.
Experienced designers claim that anyone can cope with this task. You don't have to have any special skills. It is enough just to have the desire to create an interesting, original thing. Design ideas can be found in various sources.
To create an interesting and durable decor on glass containers, you can attend a master class on painting bottles with acrylic paints or read advice from experienced designers. This will inspire you to create a real masterpiece. Finding a use for old bottles or other glass containers will be much easier.
Choosing a dye for plastic
The main requirement when choosing paints for plastic products is the absence of aggressive components that corrode this material. When deciding what paint to paint a plastic bottle with, pay attention to the following compositions:
- Ordinary enamels. They provide dense coloring, the film does not show through, and the coating is durable.
- Acrylic. They are also called water-soluble. To ensure that the coating lasts longer and does not begin to crack over time, it is best to pre-treat the plastic with acrylic-based varnish.
- Acrylic lacquer. This is not paint in the usual sense, but such compositions are produced with pigments. They can be used to tint plastic containers.
- Automotive. In addition to a good decorative effect, they provide a strong and durable coating. They are good for decorating items that will be placed outdoors.
From this list, ordinary enamels and acrylic paints are most often used, which are practically odorless and inexpensive.
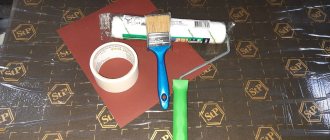
Tools and materials
Painting bottles with acrylic paints for the New Year, birthday or other holidays can have a variety of subjects. To carry out the work, you need to prepare the appropriate materials and tools.
In addition to the glass bottle, you will need: a foam sponge, alcohol to degrease the surface or acetone. You should also prepare a simple pencil and palette. Brushes will be required in different sizes. Acrylic paints must be selected in accordance with the chosen pattern.
Painting can be done using other materials. However, acrylic paints are easier to use. They also have a number of other advantages. They are distinguished by an elegant, bright palette, and do not yet have a specific smell. Acrylic paints do not spread throughout the bottle. After application, they do not smear as they dry quickly. This feature will allow you to quickly apply several layers to the surface. Acrylic paints are durable. They are resistant to sunlight.
How to decorate a painted bottle of champagne - fashionable options
Wedding champagne bottles with exclusive modeling from polymer clay are gaining popularity. An ensemble of pink buds of different sizes under a protective layer of glossy gel is itself a work of art and does not require bright coloring in natural shades.
For greater solemnity, it includes plain beads that reflect light rays.
You can make flower buds from satin ribbons and attach them ready-made to any place on the bottle and set of glasses using a glue gun.
To make the fabric look natural on the painted surface, additional details made from threads or braid are added to the created composition.
The finished drawings are placed on a bottle of champagne on an almost imperceptible basis using paper napkins. Fragments of thin paper with a pattern are glued into place and opened with glossy gel. The thickness of the napkin is practically no different from the paint layer.
A creative solution to decorating bottles for a themed wedding was the use of stencils, with which, after applying the main image, you can create an elegant frame with a brush.
This video will show several options for decorating champagne for a wedding:
You should not overload the champagne bottle itself with decorative details - you need to remember that to complete the composition, it is better to distribute secondary and background elements around the place where it is installed. The groom should be able to comfortably pick up this masterpiece, uncork and fill the glasses without significantly losing the appearance of the bottle.
Preparation
After the necessary tools and materials have been prepared, you can begin to consider the technique of how to paint a bottle with acrylic paints. First you need to prepare the glass surface itself. The bottle needs to be soaked in water overnight. This will remove all dirt, paper (if a label remains), etc. from the surface.
In the morning you need to take the bottle out of the water and wipe it dry. Before directly applying paint, the surface is wiped with alcohol or acetone. This will help the paint adhere well to the surface. If fingerprints, small dirt and other foreign substances remain on the bottle, the paint in this area will quickly crack.
If necessary, the surface can even be primed. To do this, you can use regular white or light acrylic paint. Subsequent layers will be applied to it. If desired, you can leave some parts of the bottle unpainted. If the glass is transparent, it will look impressive. For dark green or brown glass, it is recommended to paint the entire surface with light paint.
Expert advice
Painting bottles with your own hands with acrylic paints will be done efficiently and simply if you read the advice of experts before starting work. It is recommended to apply the first layer of light paint using a regular household sponge. It is dipped in paint and lightly squeezed. This will remove excess paint from the sponge. This creates a smooth, homogeneous base.
It is better to choose synthetic brushes. You don't have to buy a lot of them. Just three or four brushes are enough. In this case, it is worth giving preference to tools of flattened, round and oval shape. With their help you can create any drawings. They also need to differ in thickness.
Instead of a palette, you can use plastic or glass dishes, which you won’t mind throwing away later. Also, do not apply the sketch to the glass right away. It is better to first draw it on paper using a simple pencil and paints. Only after this is it transferred to the surface. This allows you to practice, choose the best colors and test paints.
Toilet paper as decoration
Take a dark glass bottle and white acrylic paint. We degrease the glass and apply a random design, wait until it dries. We impregnate small pieces of toilet paper with glue and use them to create voluminous irregularities on the fragments covered with paint.
After the paper has dried, re-coat the drawing area with paint. Now you can add rhinestones and open the entire product with varnish. Instead of toilet paper, bottles can be decorated with corrugated paper.
Bottle in marine motifs with light relief made of toilet paper
Features of working with acrylic paint
Painting glass bottles with acrylic paints is usually not difficult. However, before starting work, you need to know the features of this material. Acrylic-based paints can be matte or glossy. The choice depends on the artist's preferences.
Paints can be diluted with water or used as a paste. Most often, there are universal varieties on sale. Such paints can be applied not only to glass. If desired, they can be used to restore metal, wood, and fabric surfaces.
Acrylic paint dries within an hour. Professional artists recommend not to start re-coating for two hours after applying the base. The paint may darken slightly as it dries. If for some reason the drawing needs to be removed before the paint has dried, it can be washed off with water. Once dry, this becomes impossible. The layer can only be removed with sandpaper or a special type of solvent. If necessary, paint colors can be mixed to achieve the desired shade.
How to transfer a drawing to a surface?
Often a preliminary sketch is applied to the surface in pencil, and then it is painted. An experienced artist can handle this task. For those who do not know how to draw, other methods of applying a design to the prepared surface of the bottle are available.
Stencils are often used for painting bottles with acrylic paints. They are fixed on the surface of the bottle and create simple geometric, floral or other designs. You can create a stencil yourself. To do this, you need to select a drawing and print it on paper. You need to make slits along the contours. Paint is applied to the bottle through a stencil.
You can also create a sketch yourself on paper. You can transfer it to the bottle using carbon paper or a bold marker. Next, the selected plot is painted along the contour.
If the artist applies arbitrary curls, this can be done without drawing a sketch. This method allows you to achieve a high decorative effect.
Method No. 1: internal painting
Let's start decorating a plastic container from the inside by preparing the tools necessary to complete our task. We need to take:
- syringe;
- acrylic paint of the color you need;
- dissolving liquid;
- mixing container.
Let's move on to coloring:
- We thoroughly wash and dry the bottle.
- Place the paint in the prepared container. Pour in the diluting liquid and mix very well to avoid streaks.
- We collect the coloring mass into the syringe. We insert it into the neck and squeeze it inside.
- Slowly rotate the bottle along its axis, helping the paint cover the entire inner surface.
- Turn it upside down and wait for the excess paint to flow out.
Instructions
When the preparation is completed, you can begin to directly paint the bottle with acrylic paints. Once the base is applied, you can speed up the drying process. You can use a hairdryer for this.
Next, the sketch prepared in advance needs to be transferred to the bottle. If a stencil will be used, it must be firmly fixed to the surface. Next you can start applying paint. First, they are applied in a certain quantity to the palette. By mixing several colors, you get the desired shade.
Using brushes of suitable shape and size, apply acrylic paints to the bottle. If the contour turns out to be unsuccessful, you need to wash it off immediately with water and a sponge. Do not put a lot of paint on the brush. There should be an average amount of it on the pile.
When the drawing is created, it is allowed to dry. The painting process is completed by applying a special varnish. It will increase the durability of the acrylic coated bottle.
Method number 3: spray painting
Using a spray can at home is unacceptable; you will have to go outside. To carry out the work you will need:
- spray paint;
- vodka (and again of any quality);
- paper as bedding.
We suggest you familiarize yourself with whether polyethylene film allows ultraviolet rays to pass through. Does monolithic and cellular polycarbonate allow ultraviolet rays to pass through?
Everything follows a well-known scheme: with any dyeing method, we start by washing and drying the container. Then you should treat the surface with an alcohol solution. We place the bottle on the newspaper and begin to paint, spraying the contents of the can at a distance of 30cm from it. If several colors are used in the work, first cover with a dark shade, then apply lighter tones.
Simple drawings
You can create a beautiful bottle painting with acrylic paints using simple techniques. To do this you will need to use tape, rubber band and other available means. First you need to paint the entire surface one color. You don’t have to do this if the master so wishes.
Next, apply electrical tape to the bottle. You can make an even circle out of it, which will pass at a certain distance from the bottom. The bottom of the bottle can be painted a different color. Pearlescent acrylic paints and varieties with glitter look impressive.
If desired, you can use this technique to make a few more straight lines. Electrical tape can be wound around the bottle and in a spiral. In this case, you will get a simple, interesting drawing. Using an elastic band placed on the bottle, you can create uneven shapes. In this case, you can experiment. The rubber band is placed on the bottle at different angles.
What paint should I use for plastic containers?
Let’s clarify what composition is suitable for decorating a plastic bottle:
- Acrylic paints. When using them, the surface of the bottle after applying the paint must be coated with transparent acrylic varnish to protect it from cracks.
- The ideal product for painting plastic bottles is colored acrylic varnish.
- Painting composition from cans adheres well to plastic.
- Car paints give a beautiful decorative effect and adhere well to plastic surfaces. If you paint a product in this way, it will not lose color for a long time.
- Classic enamel paints are also used for painting crafts.
Acrylic paint is the most popular
Complex drawings
There are many interesting and beautiful techniques that allow you to create original drawings. For example, this could be a contour technique or dot painting of bottles with acrylic paints. In this case, thick varieties of materials are used. Lines or dots turn out voluminous.
A bottle painted using such techniques looks especially elegant. To apply points to the surface, you need to create a sketch with a pencil. The dots are applied not with a brush, but with a tube. In this case, you need to press on it with the same force so that the dots are the same size.
Using the dot-contour technique, you can create openwork painting reminiscent of lace, chic designs reminiscent of antique vases and other decor.
Having considered how to paint a bottle with acrylic paints, you can create an original gift with your own hands for all occasions.
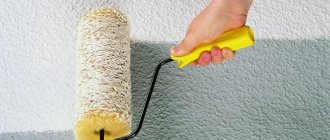
How to paint: sponge, brush or spray
- In order to paint a glass or plastic bottle, you can use a nylon brush, but in this case it will be very difficult to achieve a perfectly flat surface.
- You can use a sponge and dip it into the paint using point-to-point movements and apply it to the surface. This way the marks will not be visible, but you will have to cover the bottle with several layers of paint, each of which must dry, and this will take some time.
- The fastest and easiest way to achieve an even paint job is to use spray paint, which dries very quickly.
We invite you to familiarize yourself with Cherry varieties: photos, features, name and description, reviews
But you shouldn’t spray paint in an apartment, because it has a strong smell and takes a long time to air out.
DIY bottle decor: instructions and ideas from the Rusavtolak company
Any noisy home feast always ends with cleaning: dirty dishes go into the sink, leftover salads into the refrigerator, tablecloths and towels into the washing machine, and empty bottles... No, not into the trash bag. Why? We are looking for the answer in this material!
In fact, everything is very simple: empty bottles, especially those of unusual shapes, can easily turn from ordinary garbage into beautiful and functional interior elements or useful containers that a good housewife will always find a use for. From bottles you can easily make flower vases, decorative ornaments and even shades for chandeliers or night lights! But how to make bottle decor with your own hands?
First, you should stock up on everything you need: aerosol cans of paint, masking tape, as well as colored paper, glitter, buttons or other decorative decorations of your choice.
DIY bottle decor: instructions
1.
Before you start painting the bottle, it should be thoroughly washed and then treated with a special degreaser or acetone.
2.
Now you can start applying the first coat of paint. You need to spray it with careful movements from a distance of about 30 cm. We make sure that too much paint does not fall on the surface, since in this case smudges may appear.
3.
After spraying the first layer of paint, we wait for it to dry, after which we evaluate the result. If necessary, apply a second layer.
4.
Now you can start more complex bottle decor with your own hands. To do this, we will need masking tape, which we carefully stick onto the bottle, creating a pattern in accordance with our design.
5.
Spray paint on top.
6.
We wait for the coating to dry.
7.
Apply a second coat of paint.
8.
Now we prepare the surface for applying paint of a different shade: we cover the areas outlined in advance using old newspapers or wrapping paper.
9.
We spray the paint and wait for it to dry.
10.
We enjoy the result: an ordinary bottle has turned into a bright interior decoration!
11.
Don't be afraid to experiment by creating fancy bottle decor with your own hands.
12.
But sometimes even the simplest decoration option looks very nice.
DIY bottle decor: ideas
Originally designed bottles will make a great Halloween gift. At the same time, painting them like this is very simple: just spray one layer of paint on top of the other.
You can create such an exclusive set quite quickly - it only takes a couple of hours, including the process of drying the painted bottles.
A striking example of the results that can be achieved if you successfully use masking tape. Such creative bottles will become bold accents of a modern interior.
You can also paint the inside of any container. Pastel colors with a pearlescent sheen transform these ordinary bottles into stunning vases!
You can (and even need to!) glue a wide variety of decorations onto the dried paint. Rhinestones, ribbons, braid and even ordinary salt are perfect for decorating bottles. Looks amazing!
Golden paint gave these bottles a second life, turning them into original and at the same time practical vases.
Closed bottles can and should be decorated. In this case, they can be an excellent gift for any occasion. Decorating bottles with your own hands is a great opportunity to demonstrate your taste and creative approach to any business!
Bouquets of bright autumn leaves look stunning in colorful vases made from painted bottles. Combinations of yellow-orange shades of the composition look impressive.
Bottles painted white form a single composition, in which fresh accents are fresh flowers.
Bronze color looks noble and attractive. Such bottles will become an original decoration for an interior decorated in a minimalist style.
With the help of spray paint, masking tape, scissors and your imagination, you can make the bottle grin, create an interesting pattern or spectacular tone transitions.
To make such interior decorations, just coat part of the painted bottle well with PVA glue and sprinkle with ordinary salt! You can apply another layer of paint on top.
The matte paint looks impressive and makes these bottles a stylish decoration for a modern interior.
By turning the bottle over and spraying a lot of paint in one spot, you can achieve a beautiful dripping effect. Wait for the paint to dry, return the container to its original position and enjoy the magnificent result of your work!
Simple rope decorations look stylish and add a special touch to painted bottles.
Living greenery will be a great accent in a group of white painted bottles. Emphasize the originality of your interior with this work!
Stylish, creative and humorous! These bottles can easily be swapped, giving the saying a new meaning!
Metallic shades will add sophistication and sophistication to your decor. You can combine glossy and matte shades of the same color to achieve great visual effects.
Such letters can be easily formed from pieces of napkin, then attached to a previously degreased and painted bottle using glue. Apply another layer of paint on top.
By the way, you can create inscriptions using a regular marker, and then fix the result with colorless varnish. In this case, the bottle looks stylish and laconic.
DIY bottle decor using jewelry. Why not? Old boring decorations are perfect for decorating your works!
Before and after: a dramatic transformation.
You can create such a decorative group within two hours. All you need is paint, braid and your creativity. Creatively designed bottles will become a bright decoration of the interior.
Feel free to experiment with the sizes and shapes of bottles, as well as with the undertones and texture of the paint. The result will exceed all your expectations!
You can decorate bottles yourself using the paint that your husband had left after painting car rims. It will turn out stylish and original.
Or you can add a little imagination and create a pattern on the painted bottles using markers and rhinestones.
It is very easy to make such influxes using aerosol cans. Moreover, you can spray the paint with both hands at once!
Don't be afraid to use contrasting colors, experiment and let your imagination run wild. The unique style and bright personality of such decor will be a reward for your efforts!
What painting techniques are used?
There are two main techniques used for painting: interior and exterior painting. Painting the interior space allows you to achieve a beautiful glow, but you won’t be able to play with color combinations and textures with this technique. Outdoor technology does not limit your imagination and gives you the opportunity to use templates, allows you to make smooth transitions, and expands texture solutions. How to paint the internal and external surfaces of a container?
Method No. 1: Internal painting
Let's start decorating a plastic container from the inside by preparing the tools necessary to complete our task. We need to take:
- syringe;
- acrylic paint of the color you need;
- dissolving liquid;
- mixing container.
Let's move on to coloring:
- We thoroughly wash and dry the bottle.
- Place the paint in the prepared container. Pour in the diluting liquid and mix very well to avoid streaks.
- We collect the coloring mass into the syringe. We insert it into the neck and squeeze it inside.
- Slowly rotate the bottle along its axis, helping the paint cover the entire inner surface.
- Turn it upside down and wait for the excess paint to flow out.
Method No. 2: External painting
External painting is attractive in decorative terms. When covering the outer surface, you can paint it not only in one tone, but also create a pattern, draw stripes, or use a stencil. To work you need to take:
- water-based or acrylic paint;
- degreaser (alcohol solution, that is, vodka);
- brush or foam rubber;
- paper as bedding.
- Wash the selected bottle, remove the label, and dry it.
- We treat the outer surface with a degreasing solution. Vodka will do (any quality!)
- We begin coloring, starting from the bottom of the container.
- Having finished painting the bottom, place the bottle neck down on the newspaper.
- After complete drying, return the bottle to its original position and tint the top.
To create circular or vertical stripes, apply electrical tape to the walls. Free parts are painted in two layers. When the coating has dried well, the electrical tape can be removed. We follow the same technique when using stencils, which are best made from adhesive paper or tape. If you have the skills of an artist, you can easily decorate the bottle with a fancy pattern.
Method No. 3: Spray painting
Using a spray can at home is unacceptable; you will have to go outside. To carry out the work you will need:
- spray paint;
- vodka (and again of any quality);
- paper as bedding.
Everything follows a well-known scheme: with any dyeing method, we start by washing and drying the container. Then you should treat the surface with an alcohol solution. We place the bottle on the newspaper and begin to paint, spraying the contents of the can at a distance of 30cm from it. If several colors are used in the work, first cover with a dark shade, then apply lighter tones.
Method number 4: Sparkling glitter
Glitter is a coloring composition with sparkles. The technique of painting with glitter is no different from painting using acrylic paints. It is used to give bottles a festive look; champagne bottles are often decorated in this way at weddings and anniversaries.
Method No. 5: Textured painting
A visual demonstration of textured coloring is shown in the photo of champagne bottles. The custom of placing a couple of bottles of champagne in front of the newlyweds at a wedding has existed for a long time: one bottle is opened exactly one year after the wedding, the second - at the birth of the first child. How to perform this technique:
- We clean the bottle from labels, do not touch the foil.
- Degrease the glass surface with alcohol.
- Take white acrylic paint and a sponge.
- We paint the entire bottle with a sponge (the technique is described above).
- Let dry for 15 minutes. Apply the second layer. After it dries, we complement our ceremonial container with decor.
A painted bottle of champagne is a great gift.
The textured technique is also suitable for decorating large plastic containers used as flower pots. If you have a summer house, then crafts made from plastic or glass containers are perfect for decorating it. Now that you know how and with what you can paint them, the set of decorative elements for your home or garden will expand significantly. In addition, you can involve children or other family members in the process, which will create a warm, creative atmosphere in the house.
Thus, we have mastered a set of tools that allows us to create miracles in the truest sense of the word. Like a wizard, bottles can be used to create a bird feeder, an adorable pig or a proud eagle. Go for it!
Painting and decoration of cans and bottles
Recently, while cleaning my apartment, I discovered that the containers for storing bulk products and spices had lost their appearance. For the same reason, some flower pots remained unused, and it’s a pity to throw away jars of interesting shapes. What to do with all this? I remembered: in the House of Children's Creativity in the Zheleznodorozhny District of Gomel I saw decorated bottles, chairs, and tables. Yes, this is the way out! So, let's do creative work: decorate the products using decoration, painting, decoupage.
It's all fun and not that difficult. To begin with, I offer my very simple options.
Option 1 with a glass jar. I still had a small glass jar, pot-bellied, with handles, more like a porridge pot (by the way, can now be found in grocery stores). This will make a cute napkin holder. Before painting, I peeled the label off the jar, washed it well, and wiped it dry so I could get to work right away. I took red acrylic paint and, using a small piece of foam rubber, began to apply it with a slapping motion. As a result, the surface of the product looks slightly embossed. After a couple of hours, I applied a second coat of paint so that the glass would not show through. When everything was ready, I tied a bright lace.
Option 2 with a flowerpot. The flower pot was washed and dried. I picked up artistic acrylic paint “Pearl Silver” for it.
And I applied it the same way several times. Only the hand movements were different - broad strokes, just like with regular painting. When the flowerpot was dry, I glued the silver braid, having first thickly smeared the place for decoration with PVA glue. I pressed the braid to the product and folded the tails into a bow.
Option 3 with a glass bottle. Prepare the bottle for painting as in option 1. Think about what exactly you want to make from it. Sometimes this can be determined by the shape of the product. Choose several colors. To design this craft, I settled on titanium white and turquoise acrylic. I applied the paint several times so that it was uniform and the glass did not show through. Then I glued rhinestones onto the painted product and tied a bow from a satin ribbon.
Acrylic paints
They come in transparent and opaque, glossy and matte. Choose them depending on the effect you want to achieve. Acrylic can be diluted with water, or it can be used as a paste. Universal paints can be applied to glass, wood, metal, linen, and canvas. They dry within an hour (although I started further work only after a couple of hours), and become darker as they dry. Freshly applied acrylic paint can be easily removed from objects with water. When dry, it sets into a film, which can then only be removed using mechanical action (for example, sandpaper) or special solvents. Acrylic artistic paints have a low odor, are resistant to atmospheric influences, do not turn yellow or age, do not wrinkle or form cracks, and are mixed with each other in any ratio.
Comments from our readers who are fond of hand-made Veronica Anatolyevna Mitsura has been creating handmade crafts for several years. I like this kind of creative work. And most importantly, there is no need for gifts; you can make and decorate them yourself. My husband and two sons support me in all my endeavors. Veronica Anatolyevna says:
— My passion began with bottles. There were works with acrylic paint applied from a balloon, with rhinestones, ribbons, sequins, and beads.
Even nylon tights for an outfit and seaming caps for a hat are suitable for decorating a lady bottle. Then products appeared, decorated with paint on glass using a brush. You should have wide and narrow brushes at hand. If you use acrylic transparent paints or stained glass, then you need a contour that will hold them in and prevent them from spreading. The drawing must be immediately outlined, and only then colored. When painting the bottle itself, it can be positioned horizontally, otherwise the paint will leak and when it dries, unsightly bulges will remain - this will ruin the appearance of the craft. Paint one side of the bottle first, then the other after a few hours. Then stick on rhinestones, ribbons or apply some kind of design. Think about the colors of your decorations. If they are combined with each other, the product looks very beautiful. Gorgeous works are obtained using the dot technique, when the design is applied dotted rather than as a solid line. I love doing this so much, I do everything excitedly. Sometimes I can’t sleep - there are so many ideas.
By the way, Veronika Anatolyevna works as a pediatrician. And now the crafts decorate her office at the clinic. According to the doctor, children are not afraid to come to the appointment, they are even interested, they feel more confident.
Note: For coloring, choose jars that have an interesting shape, depressions and bulges. Remove stickers and labels from the product, wash thoroughly and you can degrease the surface. Do not try to apply the paint thickly at once; it is better to do this several times so that they are uniform. Use not only acrylic, but also stained glass paints. Don't forget that in this case you will need an outline. Draw on top of a product painted with acrylic paint using an outline or stencil. Don't worry, the colors won't mix. And one more thing: ventilate the room afterwards.
Olga Sudorgina , designer from Minsk: — For glass and metal, it’s good to use acrylic. Before work, degrease the product using acetone or white spirit. Or regular alcohol. Acrylic takes a couple of hours to dry. I prefer to apply it with a sponge, and this is the simplest dish sponge. It doesn't streak, and the end result is an interesting texture. When painting, I hold the sponge with tweezers. If you are decorating containers for bulk products, you don’t have to paint the inside. First, try the color on paper, wring out the excess paint from the sponge. To make it easy to remove dust from the product using a brush or even a damp cloth, it is better to fix the paint with a special varnish. I sometimes use yacht varnish. It is especially durable. Although this has its drawbacks: the varnish is applied in 2 - 3 layers, and the time for complete drying of one layer takes several days.
Works by another craftswoman, “GP” reader Irina Konyushenko
Vases made from glass bottles: decor, painting and trimming
Glass bottles of wine, cognac, champagne, milk, butter and even beer are excellent materials for making flower vases with your own hands. Painted and decorated vases and bowls can decorate not only the dining table and shelves in the house or country house, but also table settings at a wedding or party, and you can also make a wonderful gift from decorated bottles.
Master class No. 2: Painting a bottle with contours
Now let’s move on to a more complex and time-consuming, but very beautiful way of decorating bottles with your own hands - painting with contour three-dimensional paints. With their help, you can draw patterns and ornaments in an ethnic style, apply complex and simple designs, or write beautiful inscriptions, monograms, initials (photo below).
You can also draw with contour paints using the dot painting technique as in the photo below.
And in combination with stained glass paints, contour painting will turn into stained glass.
Materials: any alcohol-containing degreaser, cotton pads and swabs, a needle and contour paints. If desired, the painting can be supplemented with sparkles, as well as acrylic and stained glass paints, as in this master class.
Tip: if you don’t have contour paints or drawing with them seems difficult to you, then you can paint with the help of improvised means: a toothpick, a needle, a cotton swab or a thin brush.
- First we need to come up with an idea and prepare a supporting sketch. You can find it on the Internet and print it in a suitable size or draw it yourself. You can also use a homemade or ready-made template or stencil.
- If you are confident in your sight drawing skills, you can skip this step. If you are a beginner, then it is better to transfer the desired picture onto the glass, that is, outline the main details and lines of the picture/pattern. To do this, you need to: draw or print a picture, cut it out (you can roughly), then tightly paint over its reverse side with a soft pencil, and then attach the picture with the shaded reverse side to the glass and trace all or only the main parts of the drawing with the same pencil. There should be barely noticeable but useful lines on the bottle. If the image is not too complex, then it is enough to outline the main details directly on the bottle.
- Now you need to degrease the glass and wait until it dries.
- If you wish, you can cover the entire bottle with colored acrylic paint and wait for it to dry completely.
- Let's start painting: we trace all the contours, from time to time cleaning the tube spout with a needle and, if necessary, correcting flaws with a cotton swab moistened with water. It is better to start drawing with large details.
- If you draw with a contour using the stained glass technique, then the contours should be closed, and the stained glass paint should be in contact with them. Also make sure that all parts are painted completely without overpainting, otherwise the coating will not last long. Filling the contours with stained glass paints is possible only after 2 hours, but you can speed up their drying with a hairdryer;
- In the technique of dot painting with a contour, the main thing is to maintain the same and minimum spacing in one line of the drawing and maintain the same diameter/volume of dots (in one line).
Tip: Practice drawing outlines or dots on paper first. Remember that you need to press the tube with equal force.
- When the drawing is ready, all you have to do is dry or wait for the paints to dry, following the manufacturer's recommendations. Most often, painted glass is baked in the oven at a temperature of 170 degrees for about 30 minutes or left to dry naturally for a day.
We invite you to watch the following video tutorial, where you can see how to decorate a bottle with your own hands using contours using a chiseled technique.
Here are other interesting ideas for painting bottles with contours for your inspiration.
Master class No. 3: how to cut a bottle and make a vase, candlestick and other decorative items out of it
So, we've sorted out the painting and decor. Now let's talk about how to make a vase, candlestick, pencil holder, glass or any interior decoration from an ordinary bottle, as in the photo below.
You can cut a glass bottle with your own hands in different ways. In this master class we use the simplest methods that can be easily repeated at home.
Method 1. How to cut a bottle using alcohol-preserved thread
This method is more suitable for cutting wine bottles and bottles with thin glass.
- First you need to wrap a thick cotton thread around the bottle and cut off the excess (top photo on the left).
- Now this thread needs to be moistened in any alcohol-containing solution - white spirit, ethyl alcohol or nail polish remover, as in this master class. After the thread is thoroughly wet, it needs to be wound around the bottle again in the right place.
- Now you need to carefully light the thread, quickly rotating the bottle until the flame goes out.
- Next, you need to lower the bottle into a pre-prepared container with boiling water for 3 minutes, and then quickly lower it into cold water - the sudden temperature change should cause the glass to crack in the right place.
Tip: if you want to make a vase from a champagne bottle, then steps 2-4 will most likely need to be repeated.
- Carefully break the bottle, and then sand the sharp edges with sandpaper - first coarse-grained and then fine-grained. Woo-ala, the bottle vase is ready!
LiveInternetLiveInternet
—Tags
—Categories
- * COMPUTER PROGRAMS * (201)
- browser and everything about it (4)
- online games (12)
- delivered from red eye in photo (1)
- how to make a video and slide (17)
- comp. programs for needlework. (20)
- my computer (54)
- music from “my world” to the computer (4)
- unnecessary object in the photo (1)
- working with a printer (6)
- download video from any site! (5)
- enlarging photos without losing quality (4)
- photoshop, photo editor (68)
- *AUDIO, VIDEO, LITERATURE.* (284)
- audiobooks (91)
- video. favorite music (19)
- magazines (13)
- films, plays (52)
- books (9)
- beautiful poems (23)
- There's no better way to say it. (18)
- cartoons (6)
- parables (28)
- educational cartoons (1)
- this is interesting (1)
- humor, video jokes (11)
- *BEAD* (88)
- embroidery (2)
- knitting with beads (9)
- knitting with beads (1)
- beaded jewelry (49)
- *EVERYTHING FOR LIRU* (235)
- saving a diary on your computer (1)
- how to make a diagram (1)
- pictures for comments (2)
- buttons (8)
- comments (7)
- HTML codes (1)
- code window (3)
- issued text and pictures (4)
- player (10)
- dividers (9)
- video frames (10)
- frames for text (134)
- screenshot (1)
- backgrounds (1)
- *EVERYTHING FOR THE HOME* (668)
- aromatic oils (1)
- bath bombs (6)
- for a summer residence (91)
- rugs (81)
- doll amulets (4)
- washcloths (4)
- soap (37)
- soap bubbles (1)
- stoves, fireplaces, barbecues (2)
- blankets (85)
- pillows (31)
- useful little things (24)
- bed linen (5)
- potholders (43)
- napkins (42)
- candles (9)
- chair seat (31)
- tablecloths (9)
- apron (9)
- figures from towels, diapers (11)
- car covers (5)
- shampoo (1)
- curtains (65)
- *EMBROIDERY* (64)
- ribbon embroidery (34)
- smooth surface (5)
- cross (11)
- *KNITTING FOR CHILDREN* (677)
- tights (1)
- overalls (8)
- envelopes (10)
- blouses (98)
- swimwear (3)
- booties (38)
- dresses and tunics (169)
- poncho (14)
- hats, berets, caps, scarves, shirt-fronts (134)
- skirts (34)
- *KNITTING FOR WOMEN* (1261)
- lingerie and swimwear (31)
- blouses and tops (193)
- trousers, shorts (4)
- collar (1)
- sweaters, vests, jackets (102)
- coats and cardigans (31)
- sweaters and half-shirts (204)
- bags (27)
- tunics and dresses (132)
- hats and berets (91)
- scarves, stoles, shawls (83)
- shrugs, boleros and ponchos (24)
- skirts (35)
- *KNITTING FOR MEN* (73)
- vests, jackets (5)
- tying ties (1)
- shirts and tank tops (2)
- sweaters and half-overalls (40)
- hats, scarves (19)
- *CROCHET* (1876)
- MK. Crochet hook made from a toothbrush! (1)
- hanging hinges (1)
- connection of squares (3)
- everything is Irish (48)
- knitting a side dart (2)
- pattern (1)
- neckline, yokes, raglan (6)
- jacquard (8)
- knitting ideas (9)
- leather+hook (1)
- shoulder seam, sleeves (4)
- extended, decreased knitting (4)
- Tenerife (15)
- patterns for yokes, skirts (24)
- crochet patterns and motifs (198)
- crochet lessons (17)
- *KNITTING* (1034)
- shoulder seam, sleeves (9)
- Knitted Christmas balls (3)
- extended, decreased knitting (1)
- pattern (1)
- neckline, yokes, raglan (10)
- jacquard (113)
- working with elastic when knitting (2)
- knitting pattern calculation (2)
- ruffles, cuffs, collars (10)
- knitting patterns (94)
- knitting lessons (19)
- symbols (7)
- *COOKING* (431)
- air fryer (11)
- video recipes (2)
- baked goods (74)
- hot to the table (87)
- cook in pots (2)
- getting ready for Easter (24)
- dessert (7)
- breakfasts (1)
- stock blanks (3)
- snacks (63)
- smoking (1)
- ice cream (2)
- dumplings (6)
- salads (33)
- alcohol (27)
- table and dish decoration (95)
- Easter decorations (3)
- *HOLIDAY WITH US* (818)
- oh, this wedding. (53)
- video - postcards (1)
- fun and games (120)
- gift ideas (228)
- carnival costumes, makeup (36)
- compliments (1)
- princess crown (22)
- soap bubbles (1)
- New Year (2)
- remake songs (30)
- playcast, backing tracks, songs (25)
- Happy New Year! (7)
- Thank you for your congratulations (1)
- wall newspapers, letters, diplomas (59)
- poems for a gift (3)
- instant performance scripts (6)
- holiday scripts for children (16)
- scripts for holidays, congratulations (181)
- TWISTING balloon compositions (17)
- toasts, wishes, congratulations, chants (93)
- *MISCELLANEOUS, USEFUL* (115)
- How to post photos (1)
- virtual piano (1)
- horoscope (4)
- name meaning (2)
- World map (1)
- cards and fortune telling (17)
- Chinese baby gender determination chart (1)
- catmatrix (10)
- manicure (1)
- my city (2)
- hairdresser at home (41)
- We write correctly (3)
- search sites (2)
- pom poms quick and easy (4)
- PORTFOLIO (1)
- we travel. (3)
- relaxation (1)
- tests (7)
- learn English (6)
- *FENG SHUI* (9)
- *SEW* (114)
- patchwork (2)
- Anton_Zemtsov (8)
- ALL ABOUT TOYS (181)
- MACHINE KNITTING (1)
- Health (15)
- interesting links (7)
- VERY SKILLFUL HANDS (1069)
- crafts made from matches (3)
- cat house (2)
- DIY house (1)
- costume jewelry (1)
- bouquet (65)
- fabric burning (1)
- lay out the mosaic (6)
- ganutel (1)
- decoupage (25)
- activities with children (140)
- kanzashi (6)
- quilling (24)
- carpet embroidery (12)
- sand composition (1)
- DIY mannequin (1)
- master class, video lessons (185)
- DIY furniture (31)
- wall panels, vases (30)
- origami, crafts made from paper, cardboard, boxes, shk (271)
- Junk decor. (66)
- crafts made from nylon and organza (6)
- crafts from pasta, beans, coffee (7)
- clothing repair (1)
- draw with moss (1)
- scrap - booking (51)
- dough and plastic (22)
- topiary and flower tea pairs for gift (46)
- stencils (9)
- learning to draw (8)
- cones (2)
- repair school (53)
- GUIDE TO OSINKA (1)
- STATE SITES. AUTHORITIES (4)
- Fitness_beauty_health (22)