Home / Types of ceilings / Painted and bleached / How to paint a ceiling without streaks and streaks?
Most people have faced the need to paint a ceiling at least once in their lives. In principle, there is nothing complicated about this, but not everyone knows how to paint the ceiling so that the finished surface turns out without stripes and stains. We’ll talk about all the subtleties of the process that allow you to get a decent result.
Preparing for painting
In order for self-painting of the ceiling with water-based paint to be high-quality and uniform, preliminary preparation of the ceiling is necessary. Uniform coloring can only be achieved on a flat, puttied surface. Therefore, before starting work, you need to clean the ceiling from any previous coating (with the exception of water-based emulsion, which holds up very well).
How to remove whitewash
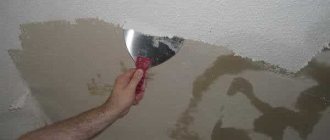
If you have whitewash on the ceiling - chalk or lime - you need to moisten the ceiling with water and remove the coating with a spatula. They clean everything down to concrete. Even the smallest fragments must be removed. Sometimes it is very inconvenient to scrape small areas with a spatula; it is easier to do this with a wet cloth.
It is easier to remove whitewash by wetting it with water.
In any case, after removing the whitewash, the ceiling must be washed with water and detergent. After complete drying, prime and putty with gypsum or cement (preferably white) putty until smooth, which is also called “egg-like.”
How to remove old water emulsion
If the ceiling has already been painted with water-based emulsion, you won’t be able to simply remove it. The procedure depends on how the paint adheres to the ceiling. If it just changed color and you need to renew the ceiling, there are no swelling, cracks or other similar problems, you can get by with a little blood. First, remove the dust (with a cloth and water), dry it, then prime it. After the primer has dried, you can paint it. But once again we draw attention to the fact that this procedure is used only if the water-based emulsion holds well and there are no defects.
Cleaning waterproof emulsion from the ceiling is still a pleasure
If there are cracks or swellings on the surface of the water-based emulsion, it must be cleaned off. There are two ways - dry and wet. Dry means cleaning with sandpaper (manually or using an angle grinder), wet means rinsing off. This method must be used for paint that is not afraid of water. But it is very difficult to remove such paint. If water-based paint holds up well, no tricks help, but there are surface defects and putty is needed, take sandpaper with coarse grain and make the surface rough. After this you can putty. Next - according to technology: we prime and then paint.
Wash off the ceiling painted with water-based emulsion by moistening it twice with plenty of hot water. The water should be almost boiling water - about 70°C. After wetting part of the ceiling, wait 10 minutes, then wet the same area again with hot water. After about five minutes you can remove the paint with a spatula.
Related article: How to get rid of the smell of cat urine: videos, tips, recipes
Removing old paint is a lengthy process
You can repeat this procedure several times, gradually removing loose paint from the ceiling. Small residues can be sanded off, and then the ceiling can be washed, dried and primed. You can putty and sand over the primer, smoothing out imperfections.
Preparation is one of the most important stages of work
Even before you start painting, you will need to perform some actions on the surface to be painted. You have to perform the following manipulations:
- Clean the floor from all peeling or crumbling fragments of the old finish. This is the most important stage, after which it will be possible to move on to further actions.
- Next, you just need to clean the entire ceiling plane from dirt and dust. If there are other contaminants, they should also be removed.
- After cleaning, unevenness and other defects may form that must be repaired with plaster or putty. However, before this you need to carefully prime the entire surface of the floor.
- When the putty dries, it is leveled with a grater and the surface is again cleaned of any dust that has formed. This moment cannot be skipped, since subsequently dust particles will negatively affect the coloring result.
- Next, apply a second layer of primer, which will allow you to apply the paint more evenly and reduce its consumption.
Types of water-based paint
Water-based paint is a water-based emulsion that contains polymer particles undissolved in water. The composition also includes pigments and various additives that change the characteristics of the final product. After applying the paint, active evaporation of water occurs and a thin polymer film remains on the surface.
Painting the ceiling with water-based paint begins with choosing the composition. They use four types of polymers:
- Acrylic. An aqueous emulsion based on acrylic resins allows you to obtain a smooth surface, has good hiding power, and hides small surface defects, even cracks up to 1 mm wide. Its disadvantage is its high price, but it is easier to work with. In their pure form, acrylic compositions are hygroscopic and can only be used in dry rooms, but they do not interfere with the passage of steam. To create a waterproof film, latex is added to the acrylic water-based emulsion. The same additive increases the elasticity of the dried film. Such compositions can be used in damp areas.
Acrylic-based water emulsion - a smart choice
- Silicates. This type of water-based paint is based on liquid glass. The coating is resistant to precipitation and does not interfere with the release of vapors, has a long service life (10 years or more), and can be used for outdoor work.
Silicate paints are vapor-tight
- Minerals - lime or cement. Mineral water-based emulsions have good adhesion to any surface, but are quickly washed off. As a result, they are gradually losing popularity.
Water-based paints based on minerals (lime) are the cheapest
- Silicone. Silicone-based water emulsions are the latest achievement in the industry. These compositions are good because they “tighten” cracks up to 2 mm thick. As a result, the surface painted with them, even without excellent preparation, turns out to be even and smooth. The film turns out dense, but vapor-permeable. Silicone water-based emulsion can be used to paint ceilings in bathrooms and other wet areas. The disadvantage of this type of paint is its high price.
Silicone water-based paints can even paint over cracks
Latex can be added to any of the compositions. Latex water-based paint is water-repellent. It is not afraid of moisture and can be used in damp rooms.
Based on the main characteristics of these compositions, you can choose the best type of water-based paint for yourself. Each case requires its own properties and the “best water emulsion” is different each time.
Secrets of painting the ceiling without streaks, streaks and unevenness
In order to perfectly and evenly paint the surface without streaks, stripes, spots and unevenness, you need to know some nuances. But first you need to thoroughly prepare the room in which the painting will be done. And also choose paint.
High-quality painting with water-based paint - how to do it
So, before you start painting the ceiling, you should understand the painting material. What should it be and what should you pay attention to when purchasing:
- Manufacturer. It is important to buy those paints that have already proven themselves and are very popular among consumers. These include CAPAROL, DUFA, CERESIT, TIKKURILA. However, they are expensive, but they are worth the cost. Less expensive products include ŚNIEŻKA products;
- Type of paint. Water-based paints are divided into three types - for walls, ceilings and floors. Their difference is that for floors and walls they are considered to be of higher quality and last longer. But for ceilings they are not so durable and are not designed for frequent washing, wiping and cleaning. But don’t think that paints for floors and walls are not suitable for ceiling surfaces. If ceilings need to be constantly washed and wiped, then it is best to use wall paint;
- Paint structure. The structure of this product can be matte or glossy. If preliminary preparation is not planned, then it is better to use a matte product; it will hide all the irregularities. But glossy, on the contrary, will highlight all the defects, so before painting with this type of product it is better to pre-prepare the ceiling;
- Color. Here you can already choose according to your taste. Water-based paints are mainly available in white. They can be given a different color with pigments and special dyes.
What primer to use
A primer is necessary for better adhesion of the paint to the surface being painted. It allows you to avoid the appearance of cracks and blisters after the paint dries. If there is no primer, this can happen. You'll have to clean everything off and putty again. Because in order for painting the ceiling with water-based paint to be of high quality, the surface must be well primed.
The base of the primer should match the base paint. Acrylic water-based paint requires the same primer; silicone paint requires a silicone-based primer, etc. Moreover, it is advisable not to save: the quality of this composition determines how smoothly the water-based emulsion will lie on the ceiling.
Acrylic primer for the same water-based paint
There is an economical method of priming: the base paint is diluted with water (1 to 2) and the surfaces are painted with this mixture a couple of times. It's certainly better than nothing, but the primer gives a better grip.
Coloring
Almost everyone who has encountered painting ceilings with acrylic paint has wondered how to paint a ceiling without streaks. It's not that difficult and you can learn it on the job.
You can start by first preparing a paint solution, slightly diluted with water. It is needed to apply the first layer, which will “reveal” all the existing defects and imperfections of the overlap. This will allow you to identify the most “problematic” fragments of the floor, which need to be approached with special attention during work.
When the first layer has dried, you need to pour undiluted paint into the paint bath. All subsequent layers will be applied without diluting it with water. Next, the roller is dipped into the ditch and rolled along a horizontal platform to remove excess emulsion. This way you can put the required amount of solution on the roller so that it does not leave drops on the overlap and does not create areas with too thick a coating.
You need to start rolling from the walls, gradually moving towards the middle of the ceiling. Each new strip is placed edgewise on an already painted area. If a sprayer is used, the application technology changes somewhat, but the direction of applying the emulsion layers remains the same.
It is important to follow the correct direction of the layers when rolling out the emulsion. Their direction should alternate and each new one is superimposed across the previous one. There will be several layers and you need to calculate them in such a way that the last of them is applied in the direction of the light entering the room.
You can learn more about how to paint a ceiling with acrylic paint yourself by watching the video below.
How to paint a ceiling with water-based emulsion with your own hands
Each of the water-based paints has instructions for use on the can. The operating procedure is described there. Some compositions just need to be stirred well before use: undissolved polymers may settle at the bottom of the jar. Some formulations require dilution. The amount of water added is also specified in the instructions and depends on the application method. For spray guns, the dilution is stronger; when using a roller, thicker formulations are required.
Paint tray makes the job easier
When diluting the emulsion with water, add it in small portions. Stir thoroughly and try on a surface area. If the paint goes on evenly and almost completely covers the base, you can paint.
It is more convenient to pour the paint into a special container with a tray and a ribbed platform. You can use a regular basin and a clean piece of oilcloth spread nearby. It's not as convenient, but less expensive.
Which roller to choose
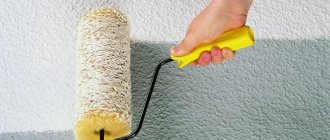
A roller for painting the ceiling with water-based emulsion is needed with dense short pile. You need to examine him carefully. The pile should “sit” firmly and under no circumstances should it “climb out”, even if you pull on it. Then inspect how the seam is made. Under no circumstances should he stand out. It must be difficult to find. It is best if it is made obliquely.
Rollers for painting the ceiling with water-based emulsion
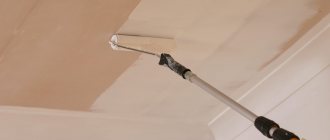
Pay maximum attention to choosing a roller: the quality of painting - the absence of stripes on the ceiling - largely depends on how good a tool you have chosen. It is more convenient to whiten the ceiling with water-based emulsion not from a stepladder, but from the floor. To do this, the roller is placed on a long handle and secured well.
How to paint without streaks
To avoid streaks on the ceiling, painting the ceiling with water-based paint should be completed no later than in 20 minutes. Immediately after application, water begins to actively absorb/evaporate and stripes appear at the junction of the dried and “fresh” paint. Therefore, it is advisable to prepare the room. It is necessary to turn off (wrap up) the heating radiators and prevent a draft. It is also advisable to wash the floor immediately before whitewashing; even if you work during the day, turn on the lighting, this will allow you to better control the quality of the paint. Afterwards you can start working.
Ready-to-use water-based paint is poured into a container, a roller is dipped into it, then rolled well over the site, achieving uniform distribution over the entire surface. When the roller has a uniform color, they begin to paint.
The corners are painted first with a brush. After applying a little paint, take a small roller and roll it out well. Then they begin to paint the main surface. The first layer is applied parallel to the window, the second - perpendicular.
You need to stand so that you look at the area to be painted at an angle. This will give you a good look at how evenly the paint has spread, as well as where you have already painted and where you haven't. Move systematically, without jumping from one piece to another.
It is more convenient to paint from the floor, and to do this, the roller must be attached to a long but light handle
The width of the strip painted at a time is slightly larger than the width of the roller. After wetting the roller, place it approximately in the middle of the strip. Quickly roll the paint in both directions from one wall to the other. Don't waste a lot of time: you don't have much of it. On average, the water emulsion dries in 10-20 seconds. If you didn’t have time to apply the strip next to it before, the border will be clearly visible, which you won’t get rid of. Having distributed the paint more or less evenly over the strip, dip the roller into the paint and roll it out again from the middle of the ceiling. At the same time, go beyond the already painted strip by about 10 cm. All this at a good pace without stops and smoke breaks. The edges of the painted strip should not dry out. In general, these are all the rules.
After applying the first coat of paint, some areas may not be painted as well. You need to wait for it to dry completely and paint it a second time. This should already be enough to obtain a flat surface. If even after the third layer of water-based paint you still have streaks and stains on the ceiling, you will have to redo it again. It is necessary to level the surface with sandpaper, prime it again and paint again.
Preparing the instrument and room
To achieve the best results, the correct work attachments must be used. Among them should be:
- Paint bath
- Roller, if it is chosen as a working tool
- Not too wide brush for painting corners and stripes along walls
- Protective glasses
- Ladder
- Masking tape
It is important to use the right tool. When painting with acrylic paint, it even matters which roller you use to paint the ceiling. It is best if it is covered not with synthetics, but with natural threads or fur and the pile is of medium length. This “coat” is best suited for acrylic paints.
All areas not intended for painting must be carefully sealed with masking tape, and the floor and those furnishings that could not be removed from the room must be covered with plastic wrap.
Preparing the ceiling surface
The ceiling is cleaned of soot stains, grease and other contaminants, as well as paint flakes that have come away from the base. It is better to widen the detected cracks, prime them, fill them with putty, and then sand them.
Significant level differences and cavities need to be treated with a primer, followed by sealing with leveling mixtures like Volma.
Grease stains are cleaned using detergent mixtures. They will also soften the old layer of paint, which will then allow you, after working with spatulas, to remove it - in sections or completely. Lime whitewash in areas of delamination is cleaned off with scrapers and a spatula using a dry method. And in those places where it holds firmly, they work with grinding machines.
Wet removal of chalk coatings is done by preparing a soap solution when 300 g of laundry soap and 150 g of soda (sodium bicarbonate) are dissolved in 10 liters of water. This soap suspension is applied to the whitewashed ceiling with a sponge or spray bottle and then cleaned off with a spatula.
You can remove chalk whitewash with old newspapers. To do this, the ceiling and sheets of newspapers are covered with liquid paste. Newspapers are glued to the ceiling, waited for them to dry, and then torn off along with the layer of whitewash adhering to them. After this, the surface is cleaned with a scraper, spatulas and emery cloth.
Putty and primer
Use putty to level the ceiling so that over a section of at least 2 meters the height difference is no more than 1.5 mm. The dried layer of putty is sanded to an even matte state using sandpaper of varying degrees of grit. There is a distinction between starting putty, when filling joints between floor slabs and to eliminate large differences in heights, and finishing putty.
After the ceiling is completely leveled, the surfaces are adjusted using machines or manually, the adhering dust is swept away from the surface and the ceiling is treated with a primer. The purpose of this treatment is to reduce the porosity of the coating material.
The primer, due to its high fluidity, can be applied not only with a brush or roller, but also with a spray gun.
Both methods have disadvantages and advantages. It is cheaper to apply the primer with a brush and roller - renting a spray gun will still cost a hefty sum. In addition, they still need to be able to work. But if you know how, and are going to use it in the future (not only apply a primer, but also paint the ceiling with it), it is better to give preference to it. You just need to remember that you can’t work with a spray gun without safety glasses and a respirator - there is a great danger of inhaling sprayed small particles of paint.
When choosing the type of spray gun for the ceiling, it is better to choose models in which the paint tank is located below or to the side of the spray nozzle.
Preparatory stage
To obtain uniform coloring, it is necessary to carefully prepare the surface.
- Level as much as possible and clean from dust, dirt and debris. Undesirable elements on the base contribute to the appearance of streaks and bald spots;
- Don’t forget about a high-quality primer: it allows you to make the color more even and the paint will adhere better;
- The roller also needs to be cleaned of dust and dirt, even if you just purchased it at the store. Before starting work, the tool should be cleaned with running water, wrung out and dried;
- The paint reservoir into which the roller is dipped must be clean and suitable for this type of work; dipping the roller directly into a paint can or bucket is not recommended. It is most advisable to purchase a special rolling tray with a ribbed surface to evenly distribute the composition on the tool.
Advantages of acrylic paint
Acrylic paint is used to treat any surfaces - concrete, metal, wood, plastic, plastered and others. It is a polymer solution in a dispersion form and is highly soluble in water. Odorless and non-toxic.
The dried layer takes on the appearance of a glossy film, which is very durable. The advantages of acrylic paint include its fire resistance, resistance to abrasion and alkali. The disadvantage is the absolute intolerance of low temperatures; under their influence it bursts.
Until recently, ceilings were not particularly diverse. And, although today the white color of the ceiling is quite relevant, changing its color scheme using acrylic paint is quite possible. To do this, you just need to mix the desired color with acrylic ceiling paint. It is also important that the ceiling covered with such a composition does not change color for a long period of time.
Paints “Snowball”: characteristics
The leading manufacturer of paints and varnishes produces a wide range of products for all surfaces.
This paint can be applied to concrete, plaster, drywall, wood.
All products of the plant are manufactured in accordance with European environmental safety standards and international standards.
The main characteristics of the “Snowball” paint are:
- strength and wear resistance;
- long service life;
- good adhesion and quick drying;
- free penetration of air and steam;
- environmental cleanliness and absolute safety;
- acceptable pricing policy.
Any surface painted with Snezka looks perfect and unsurpassed.
Painting compositions for ceilings are available on a water or acrylic basis.
There are several series of paints that differ slightly in their composition and purpose.
Thus, the Disney series, intended for decorating children's rooms, is absolutely environmentally friendly, does not cause allergic reactions, looks great and does not require special care.
The stable and breathable Snezhka Eco series is especially in demand.
This paint is presented in the middle price range and allows you to create uniquely smooth and functional ceilings that are easy to clean and do not emit harmful substances.
The base color of ceiling paints is white.
If the design of the room requires the use of other shades, you can purchase ready-made colored paint or tint white paint by adding a special organic dye.
In this case, you should take into account the required amount of paint for all stages of finishing.
If there is not enough color dye composition, it is not always possible to guess the proportion of the dye and get a completely identical tone.
When adding dye, the paint should be thoroughly mixed until smooth.
It is advisable to use a construction mixer or drill with a special attachment.
Choosing acrylic paint
Acrylic paint is produced in various types - it can be intended for wall surfaces, ceiling doors, etc.
Therefore, when making a purchase, you need to carefully read the instructions:
- matte or glossy: if you plan to paint in a room where humidity is high, it is better to give preference to the glossy option;
- color: white paint also has its own shades, so you need to immediately choose the right option, and you need to immediately buy the required quantity from the same manufacturer;
- When painting a ceiling, not a lot of material is used, but glossy paint uses less matte paint. The number of layers must also be determined in advance.
