Modern water-based materials can be used to paint any surface, including in rooms with high humidity, where previously only oil paints could be used.
To obtain an even structure, the surface should be properly prepared by performing the following steps:
- The whitewash or previous paint is removed. Before cleaning the surface of old materials with a spatula, it is necessary to treat the ceiling twice with hot water, after which the old paint can be removed much more easily;
- Water-based emulsion can also be applied over old paint, but before performing work, you need to wipe the ceiling with a damp cloth to remove dust and fine dirt. However, it should be remembered that in this case it will not be possible to achieve a perfectly flat surface;
- After the ceiling is freed from old materials, small cracks and holes are puttyed; large cracks should be glued with a special cloth and plastered;
- The prepared surface is leveled with special plaster compounds. Irregularities in the plaster are removed with sandpaper;
- The final stage of preparation is applying primer.
After the primer solution has dried, the main work begins.
Required tools and materials
High-quality application of water-based emulsion is impossible without special tools. To perform work in the kitchen, room, bathroom or toilet, purchase:
- Roller with faux fur skin;
- Brush-flutz. Required for painting corners and ceiling surfaces adjacent to the wall. The width of the brush should be from 7 to 10 cm;
- Rectangular container with a ribbed cuvette. Used to place a single portion of material and roll out a roller;
- Mixer. Required for mixing the water emulsion;
- Paper tape. With its help, you can protect the wall surface from the ingress of material during work;
- Overalls. You will need a hat, glasses and a set of clothes.
If it is necessary to apply different colors to the wall surface, it is recommended to use different tools for each shade.
Rules for roller painting the ceiling
To better understand how to paint a ceiling with a roller without streaks, you need to study the following recommendations:
- It is better to do the work in natural light; heating of the lighting fixtures will spoil the result;
- The starting point is chosen to be the corner farthest from the entrance to the room;
- You need to paint in parallel lines. In such a way that the strips lie slightly overlapping each other;
- To avoid stains showing through, you need to apply the next layer only after the previous one has dried;
- It is better to apply a new layer perpendicular to the previous one.
You need to paint in parallel lines.
Selection and preparation of water-based paint
There are several types of paint of this type. Their difference lies in the presence of a basic substance, which determines the parameters for using this material.
- Acrylic paints have excellent resistance to abrasion when washed, are odorless, and are suitable for painting almost all types of premises. The cost is average.
- Latex paints are among the most expensive, but this drawback is compensated by improved properties. Surfaces painted with latex materials can be treated using household chemicals.
- Polyvinyl acetate paints are classified as inexpensive. Recommended exclusively for dry rooms; water should not be used for washing.
- A water-based emulsion based on silicate compounds is recommended for application to plastered surfaces or concrete.
- Silicone-based water emulsion is suitable for working in rooms with high humidity, as they have increased vapor permeability.
Almost all of these paints are produced in two types: with the formation of a matte or glossy surface. To calculate how much paint is required, you need to know the area of the ceiling and the paint consumption indicated on the label.
Which roller to use
How to paint a ceiling with water-based paint without streaks? Here, first of all, you should carefully approach the choice of tool. The simplest and most reliable device for obtaining an ideal ceiling surface is a roller. The following simple tips will help you decide which roller to paint the ceiling with water-based paint.
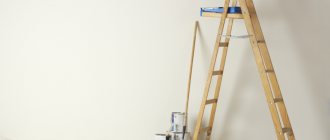
It is advisable to select a tool with a long handle, which allows you to carry out work without using a stepladder. The fastening of the device must be reliable so that when force is applied, the tool does not change its position.
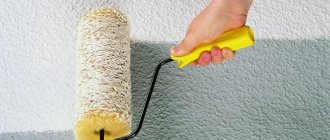
There are many types of roller sandpaper, but for painting the ceiling it is recommended to use only faux fur sandpaper (pile length from 10 to 12 mm). The sandpaper should sit tightly on the base, and the joint should not stand out, and it is good when it is made tangentially.
Stages of work
The more serious the condition of the ceiling, the more stages of work. So, if there is mold, it is necessary to clean off all the plaster down to the ceilings, then dry the surface with a hairdryer (high temperature kills the fungus) and cover with antiseptic and antifungal solutions until completely absorbed.
Almost any condition of the ceiling requires preliminary putty and primer before painting. The number of layers depends on the condition of the surface. In the average apartment, when updating the coating, a thin layer of preparatory agents is sufficient.
Wooden ceiling in the interior of the apartment
What a wooden ceiling can be like in the interior: ideas and photos
For a stronger grip, you must follow the following sequence:
- primer;
- grinding;
- two layers of putty;
- primer;
- two layers of paint.
All layers when applied should be as thin and neat as possible. The plaster should be applied with an iron spatula, and the primer with a long-nap roller.
Each subsequent layer is applied only after the previous one has thoroughly dried.
Padding
Painting the ceiling with water-based paint begins with applying primer to a previously prepared surface. Many people ignore this mandatory process, which leads to uneven coverage and streaks.
The primer improves the adhesion of the water-based emulsion to the plastered surface, as a result, the appearance of bubbles, microcracks, stains and mold can be avoided. This preparation also increases the length of time the ceiling retains its appearance after painting.
The surface must be primed with special compounds (primers), which are selected based on the composition of the water emulsion. Thus, acrylic primer is used for acrylic paint, and silicone primer is used for silicone paint.
At least three layers of primer are applied to the concrete surface, and for plastered ceilings it will be enough to walk over the surface twice.
If special compounds are not available, you can use the water-based emulsion itself to prepare the primer. To do this, you need to dilute the material in the following proportions: water emulsion - 1 part, water - 2 parts.
Surface preparation
Proper preparation of the ceiling surface plays an important role when painting.
The step-by-step technology for carrying out the work looks like this:
- Remove old finish. Moisten lime whitewash or water-based paint with water and, after soaking, remove it with a metal spatula. Knock down alkyd or oil enamel with a hammer or hatchet, electric drill or hammer drill with a cord brush, and remove with a solvent or chemical remover.
- Remove moldy plaster completely. Treat concrete slabs affected by fungus with chlorine-containing or antifungal agents.
- Fill cracks, crevices and connecting seams between slabs.
- Strengthen the surface with a polymer-based primer. This synthetic product will strengthen the adhesion of the plaster to the base and make painting easier.
- Height differences of more than 1 cm should be leveled with plaster or putty compound. After the first layer has dried, sand the surface, apply the finishing coat and rub it in.
- The day before applying the coloring composition, coat the surface with a primer.
In order to quickly prepare the ceiling for painting, you need to have everything at hand.
If you do not plan to re-glue the wallpaper, you need to take care of its integrity - glue strips of polyethylene to the junction of the ceiling and walls around the perimeter of the entire room. To fix the film to the pasted walls, use only masking tape (clothing tape can damage the wallpaper when peeled off).
Coloring instructions
There are several ways to whiten a ceiling with water-based paint without streaks; various tools are used for this purpose.
Painting with a roller
You can get excellent ceiling coloring using a roller. This option is quite economical, and even a beginner can cope with the whole process. It is enough to follow the following tips, which explain how to paint step by step with this tool:
- Before painting, the room is prepared for work. It is advisable to glue the wall at the junction with the ceiling with paper tape so that the water emulsion does not get on the wall;
- Objects in the room should be covered with paper or film;
- Mix the material thoroughly, especially if colored dye is added to the white base;
- For the initial layer, a material of a thicker consistency is prepared than for subsequent layers;
- If small particles are found during mixing, you will have to strain the entire volume of paint through gauze so that the surface of the ceiling is free of flaws;
- A strip 8-10 cm wide is applied along the perimeter of the ceiling with a brush;
- The prepared material is poured into a container suitable for the size of the roller. For rolling, a piece of flat plywood is used, but it is more effective to use special containers equipped with a ribbed ditch, which allow you to evenly saturate the tool with paint;
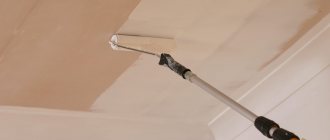
- Painting is carried out from the corner in stripes 40-50 cm wide. The initial layer is applied parallel to the window, the subsequent one perpendicular. When working, maintain an inclination angle of 45 degrees. Painting of the next strip is carried out with an overlap on the previous one (about 100 mm is covered);
- It is necessary to take into account the drying time of the material (up to 20 minutes), so the entire amount of work should be done quickly, without being distracted by rest;
- The quality of painting can be checked in good lighting, and if daylight is not enough, use a powerful flashlight;
- Each new layer can be applied only after the previous one has completely dried, usually no earlier than 12 hours after completion of work;
- Irregularities are sanded with fine-grained sandpaper, after which another leveling layer of paint is applied.
Painting in 2 layers.
Painting in 3 layers.
Spray painting
Using a paint sprayer allows you to get an even painting of the ceiling, while the worker makes a minimum of effort. The disadvantages of this technology include fairly high requirements for the power of the spray gun or spray gun.
An apparatus for spraying water-based paint must have a special compressor that is capable of creating the necessary pressure to force a fairly thick liquid through the nozzle.
How to paint a ceiling with water-based paint using a spray gun correctly:
- To facilitate this process, diluting the emulsion with water is often used. The water-based emulsion should be diluted in a ratio of one to one, as a result of which at least three layers of thinner paint will need to be applied to obtain a beautiful coating;
- Before starting work, it is recommended to adjust the sprayer on an unnecessary flat surface (a piece of plywood or drywall) to achieve the required coverage;
- Noticeable boundaries of the joining layers should be rubbed with fine sandpaper so that when applying the second layer this defect will be eliminated;
- Paint is sprayed at a distance of 50-55 cm from the surface to be painted; it is advisable to maintain a perpendicular inclination of the nozzle to the ceiling;
- The material is applied in squares, covering the surface first along, then across. You should move to the next area without delay to prevent excessive accumulation of material in one place. It is better not to completely paint the area, since this drawback can be eliminated by covering the defect with subsequent layers, and a thick layer will have to be cleaned and the entire volume redone.
Painting with a brush
It is possible to paint the ceiling using a brush, but the result will certainly be disappointing. It will not be possible to avoid stains and uneven paintability of the surface.
Repairs made with a brush are possible in non-residential premises, such as storage rooms, but you will have to put up with increased paint consumption, since drops of material, even with the most careful control, will flow from the tool onto the floor.
Leveling small unevenness in the ceiling
To paint the ceiling, minimizing the chance of streaks, you need to apply the paint to a well-prepared, flat surface. You can easily remove uneven ceilings with your own hands. Putty is used for this. It is applied with a spatula to problem areas, then sanded with a sanding mesh.
The next step is to apply finishing putty to the ceiling. Final sanding is done with sandpaper. To speed up the process, you can use a grinder. Before applying the first layer, the ceiling must be impregnated with a primer. This will significantly reduce the chance of streak formation and improve the quality of the painted surface. You can also prepare the primer yourself. To do this, mix PVA glue and water in a ratio of 1 to 2. Completing all stages of preparation will significantly reduce the chance of streaks, but the correct choice of water-based paint is equally important.
How to avoid stains
Obtaining an ideal ceiling structure when painting is achieved not only by the correct technique for applying the material to the surface, but also by preliminary preparation of the room. You need to do the following:
- Turn off the heating or insulate the radiators by wrapping them with thick material.
- Close all windows to prevent drafts.
- Good lighting should be provided to monitor the quality of work.
When painting with a roller, you must be at an angle of 45 degrees to the ceiling surface. This position allows you to control the uniformity of application of the material. Each subsequent strip should overlap slightly (up to 10 cm) with the previous strip, and the time between applying the first and second strip should not exceed 20 minutes. If you apply the material on a dry surface, the border will be visible.
Any flaws are corrected with fine-grained sandpaper, after which a finishing coat of paint is applied.
Preparing the ceiling for painting
In order for the paint to lay evenly, you need to prepare the base for painting. It is necessary to select tools and materials, otherwise streaks or other defects cannot be avoided.
Removing the old paint layer
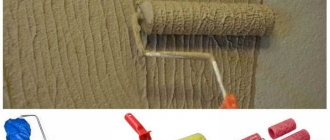
Removing old water-based emulsion from the ceiling using a spatula.
The first stage of preparatory work is the removal of the old coating. This is a rather labor-intensive process, especially if it is not clear what composition the ceiling was painted with before and how to remove the old layer.
But insufficiently thorough removal of the old coating can cause cracks in the base, so you need to be careful.
Layers of material should be removed using a spatula. To make the work easier, the old coating can be slightly moistened with water.
If, after removal, it is discovered that there are traces of rust or mold on the surface, they must be treated with appropriate chemicals, such as a solution of hydrochloric acid. In this case, you need to use personal protective equipment.
Ceiling leveling
The next step is to level the ceiling. To do this, you need a thin-layer putty, with which you can seal small irregularities and cracks. It is applied to the ceiling using a spatula. Sometimes, in order for the putty to fill all the voids, the cracks have to be slightly widened. After drying, the surface is treated with fine-grained sandpaper.
Before painting, the ceiling is treated with a primer - this improves the adhesion of water-dispersion paint to the surface.
Primer
Applying a primer improves the adhesion of the paint layer to the base. As a standard, a primer is selected that matches the paint composition. For example, acrylic - for paints containing the same resins.