To rinse or not to rinse and why?
Of course, each of us will be looking for a way to avoid having to do extra work, especially considering that removing old whitewash is a very messy process. Indeed, there are situations when to do this at all :
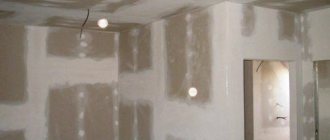
- For example, if you plan to install a suspended or stretch ceiling, old whitewashing is not a hindrance to the process. But only if she herself has not begun to peel off from the plane. In this case, the peeled areas must be carefully cleaned with a spatula. And especially pay attention edges. If every movement of the tool is accompanied by the whitewash leaving the ceiling, then there is a possibility that the coating in this place will come off on its own over time. Pieces may fall off onto the new ceiling. Therefore, stripping should be carried out until no more force is required;
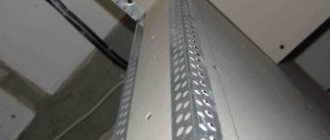
- If the walls are whitewashed, the surface of which is planned to be sheathed with plasterboard using profiles, the old mortar can also be left. And other finishing materials that are attached using a frame method can be mounted on the old coating.
Now let’s look at cases when it is imperative to wash off old whitewash
- When you plan to paint the ceiling with waterproof paint. Even if the layer of old whitewash itself does not peel off and looks normal, you will still have to remove it, since its presence significantly reduces the adhesion strength. Soon the paint may simply fall off from the whitewash;
- The same thing will happen with wallpaper pasted over whitewash. It doesn’t matter whether you stick them on the ceiling or on the wall;
- If there is a need to simply refresh the appearance of the ceiling, then this should definitely be done with a similar solution. Then, provided that the old coating is intact, it does not need to be removed. However, if the repair work was not previously carried out by you, then it is almost impossible to accurately determine the composition. Layering materials of different densities and heaviness can lead to cracking. Therefore, in order not to have to do the same work twice, it is better to remove the old whitewash;
- Be sure to remove the old whitewash if mold has formed on it. Even if we are talking about the surface of the ceiling, which will be covered with a tension structure. If you do not start fighting mold in time and do not treat the base with special solutions, over time it will begin to affect the walls;
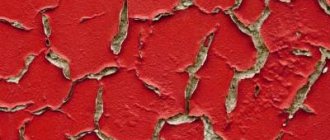
- With prolonged use, noticeable stains may appear on the whitewash. In the kitchen, this process can be triggered by the accumulation of fat and soot. In bathrooms, these may be traces of rust from old pipes or a result of leaks and neighbors above. In any case, you will not be able to hide such defects, since they will show through even through several layers of paint.
A little trick that will help determine the approximate composition of the whitewash - you need to apply a couple of small drops of water to the surface. If they are absorbed, then the main component is chalk. If they remain or begin to drain a little, it means the whitewash is lime.
Removing limescale with acid
Well, radical, but the most aggressive method is the acid-solution method. In principle, the technology is safe, since the acidic reagent is used in moderate concentrations that cannot cause harm (burns, irritations, etc.). Safety glasses are required as the eyes are incredibly easy and permanently damaged by acid.
Preparation of the required solution will require table acetic acid (concentrate of at least 90.2%) or hydrochloric acid, which is very dangerous. The components must be dissolved in large containers (min. 25 liters). You also need to prepare a spatula and brush.
The technique consists of a sequence of steps:
1. Dilution is carried out in the appropriate amount of 3% - maximum 4.5% acid reagent solution.
Attentively! When diluting, first water, and then add acid concentrate in minimal portions, otherwise a very active reaction will occur!
2. Gently moistening a wide brush in an acid solution, the sequential treatment of the ceiling surface begins. Starting from the edges or from the center - there is no fundamental difference, since absolutely everything needs to be washed off.
3. Acid molecules, interacting with the lime substance, begin a chemical reaction that destroys the material (foaming, peeling). This is a sign of starting to work with a trowel, which will easily remove the softened mass of whitewash.
4. Any remaining fragments are simply cleaned off with a brush or spatula.
5. Finally, the entire ceiling surface must be washed with soap or powder solution.
Recommendations for preparing the premises
When the scope of work and the need to remove old whitewash have been determined, it is necessary to properly prepare the room for the work process. We have already said that removing whitewash, which is based on chalk, is a rather messy business. White stains are guaranteed for you. To minimize the process of subsequent cleaning of the room and protect as many things as possible, you need to follow simple steps:
- First of all, if possible, you need to remove as many pieces of furniture from the room as possible. Especially if we are talking about the process of removing whitewash from the ceiling. If the work surface is a wall, then you can simply move the furniture as far away from it as possible. Anything that cannot be removed must be carefully covered with thick film and secured with film. This is necessary so that if you accidentally touch it, it will not slide completely, and you will not have to straighten it with dirty hands;
- It wouldn’t hurt to protect the windows, that is, the glass itself. Also, use tape to stick the film around the perimeter of the glass unit. Be sure to use masking tape that does not leave a layer of adhesive on the surface after removal. Otherwise, you will have to scrub everything with alcohol, and this, again, is extra work;
- When you plan to remove whitewash from the ceiling, it is very rarely possible to keep the wall covering in its normal form. It is almost impossible to do this if the walls are covered with wallpaper. It is not advisable to put tape on them, and it will only stick to a smooth surface, and that’s not a fact. Things are much simpler with painted walls, which can actually be protected by gluing a film on them. Therefore, keep in mind that in most cases, updating the ceiling plane also entails updating the wall covering;
- If possible, do not be lazy to remove the chandelier. Otherwise, tie a plastic bag around each of its shades;
- Now it's time to protect the floor surface. For the best effect, it is recommended to first cover the surface with newspapers, possibly in several layers, and then cover with film;
- While working, you may need to leave the room. In order not to spread the already removed whitewash throughout the apartment after your shoes, be sure to lay out a damp cloth at the exit and thoroughly dry your feet.
Preliminary preparation
There are several methods for removing the entire layer of whitewash from the ceiling surface. However, despite each option, adequate preliminary preparation is required. The following steps should be taken.
Preparatory activities:
1. There are many methods for removing a layer of whitewash from the surface of a ceiling material, but, in any case, you will need to ensure proper personal protection and become familiar with basic current knowledge.
2. Try to remove any movable materials and structures away from the door. Electronics, furniture, household appliances, curtains, carpets and other decorative and functional elements must certainly be moved to another, separate room.
Selecting and preparing the necessary tools
It is very important to reduce the number of times you walk around the apartment in dirty shoes to get the necessary tools. It is better to prepare what you may need in advance:
- You will definitely need a spatula with a wide blade;
- If it is more convenient for you, you can replace it with a scraper. In many hardware stores you can find a scraper specifically designed for removing whitewash. It has a special design that is difficult to confuse. Under the scraper itself there is a small scoop for collecting material. This will make the process less messy;
- Sander;
- Brush with the shortest long bristles;
- Foam sponge or soft cloth;
- Foam roller;
- Something wooden or plastic that can serve as a long handle for a paint roller. There may be a strip of wood that you can tape the roller to. Perhaps there are remnants of plastic pipes, in general, what can be found on the farm;
- You will also need a container of warm water;
- And personal protective equipment is a must. We are talking about a hat and glasses if the work will be carried out on the ceiling, and about clothes that you don’t mind throwing away later, and about closed shoes.
Application of grinding machine
Using a modern device - a grinding machine, removing the coating is quick and much easier, for example, in comparison with the “spatula” method. Of course, there is a significant drawback - the formation and spread of a considerable amount of fine dust.
Advice! It is better to use a grinding machine when carrying out general overhauls, when the room is completely empty, and debris accumulates from other manipulations!
Using the technique under consideration, you will need the following tools and materials:
- respiratory protection, respirator;
— the grinding machine itself;
— special clothing that reliably covers the employee;
— durable safety glasses for construction and installation work;
- a suitable bedspread.
First, you need to reliably protect the working person (or yourself) - dress in appropriate clothing and use protective equipment.
Important! A gauze bandage or a medical mask is an unreliable way to protect against dust particles and all kinds of tiny fragments!
Method for removing whitewash using a sander
Now let's move on to the most traditional methods by which you can effectively remove a layer of old whitewash. The most radical methods of dry cleaning include a method that involves working with a power tool such as a grinder. We can say that this is the tool without which it is difficult to imagine even cosmetic repairs. After all, by selecting various attachments, you can use it to remove both old plaster and old paint from various surfaces.
To combat old whitewash, it is best to use an abrasive attachment of the largest diameter that can be used on your tool, with the largest grain size. Next, everything is primitive - press the nozzle against the wall with little force and gradually move forward. It is especially good to use this method when the whitewash layer is quite thick. As it becomes thinner, you should change the nozzle to a finer-grained one. That is, you don’t need to try to get to the base with the same nozzle. This way you can complete the task quite quickly. The main disadvantage of the method is the large amount of dust.
The process of cleaning walls from whitewash: stages
The procedure for cleaning walls from lime includes several steps.
The first step is to prepare for cleaning work. To do this, the room is completely cleared of furniture, the chandelier is removed, the equipment is removed, and the floor covering is covered with a thick layer of newspaper or polyethylene. The less polluted, the less to clean.
Next, they change clothes, change shoes, put on protective equipment, bring tools, and put them in working condition.
They start from the upper sections of the wall, since if they clean in a different order, everything will be in vain: a layer of whitewash will fly from top to bottom and stick again to the treated surface.
Sometimes it takes several passes to wash off the lime properly.
It doesn’t matter how to remove lime from all walls before wallpapering; it is important that the base is completely dry.
Next, the walls are left to dry, or the room is left closed to allow dust particles to settle.
Remove old whitewash using a spatula or scraper and water
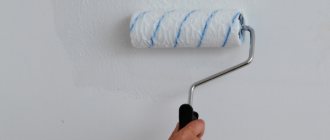
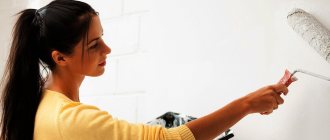
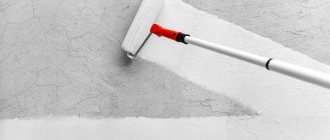
This method will not be as dirty and dusty. To make your task easier, you need to soften the whitewash thoroughly. To do this, you need to saturate the surface with water. Choose the tool that is most convenient and easiest for you to work with. The surface can be wetted using a foam roller or simply sprayed with a spray bottle. If the surface to be treated has a large area, there is no need to try to cover it entirely at once. Divide it into small pieces. The optimal size is meter by meter.
Wet the first sector well, then wet the next one. Now take a scraper and start removing the whitewash from the first section. By the time you process the first sector, the second will already be sufficiently saturated. Next, look at the situation - perhaps the area is too large or, conversely, too small. Make your own adjustments. It is worth moistening the surface generously, but you should not allow streams to flow directly down the walls onto the floor. Also, if you decide to moisten the entire wall at once and do not have time to process it, there is a high probability that the water will simply dry out and the whitewash will harden again. The process will have to be repeated again. By the way, if you determine that the whitewash is chalky, you can simply wash it off with warm water and a sponge.
Dry removal method
This processing method, which is carried out using a grinding machine, is the fastest in terms of time, but it should be borne in mind that when using it, a huge amount of dust arises. When removing whitewash with this tool, you must protect your respiratory tract and eyes by wearing a respirator and special goggles, and to protect your hands and the rest of your skin, you will need to wear gloves and overalls.
Note! If loose pieces of whitewash are visible on the walls, they can be removed with a scraper or spatula, and they can also fall off with a few light blows with a hammer.
Sequence of work when using a grinding machine:
- It is necessary to install sandpaper of the coarsest grit on the tool.
- After plugging it into the outlet and starting it up, you should carefully move across the surface of the walls. Having removed all large pieces of whitewash, it is necessary to sand the entire area again.
- Upon completion of the procedure, you should sweep the room and wash the floor several times.
You can begin further work only after performing wet cleaning, during which all generated dust will be removed.
Removing old whitewash from the ceiling using paste
This little trick will help you complete the task not only much faster, but also with the least damage to the room. We only need a package of the cheapest wallpaper glue or regular paste. The mixture is prepared as follows:
- 1 tablespoon of flour is dissolved in a small amount of warm water;
- Then pour 1 liter of water into a saucepan and bring to a boil;
- Dissolved flour is poured into boiling water.
After complete drying, the resulting paste is ready for further use. It must be applied to the ceiling using a roller. Try to distribute the mixture evenly. Now you need to wait 10 minutes to let the paste dry. Then start removing it using a regular spatula. The beauty of this method is that the whitewash will not crumble into small flakes and scatter throughout the room, but due to the denser adhesive base, it will fall off in layers. Cleaning up after this will be much easier. And if you use a special scraper with a tray, or attach a regular plastic scoop to a spatula, then contamination can be completely minimized.
“Paste” technique for removing the whitewash layer
As a similar means, you can use a paste, which is not at all difficult to “cook” yourself. Its ingredient composition includes a minimum of components: pure starch (or high-quality flour) and hot (no more than 66.7 C) water.
Before starting work, you need to prepare a set of the required tools:
- spacious capacity;
- spatulas;
- brushes.
We will subject the process of performing the work itself to a step-by-step analysis:
1. Of course, it is necessary to weld the paste first. In an appropriate (more than 15 l) container, water is brought to a full boil. A substance (starch or flour) is poured into it to create a viscous-adhesive structure.
Recipe! For 1.0 liter of boiling water you will need 32.0–40.1 g. starch or 73.0 gr. refined wheat flour!
The ingredient is poured into water, with constant stirring. It is necessary to control the formation of lumps and destroy them in a timely manner. The mass must be absolutely homogeneous - not a single clot or lump.
2. After sufficient dissolution and a certain thickening, the container can be removed from the heating fire. Allow to cool to an acceptable ambient temperature.
Method for removing whitewash using newsprint
Old newspapers, which are likely to be found in almost every home, can make your work much easier. This method is good for use on both ceiling surfaces and walls. We will need the same paste or wallpaper glue, which must be applied in an even layer to the surface. stick newspaper sheets on top of it There is no need to overlap the sheets. Let there be a small gap between each one along the contour. One of the edges of the sheet must be bent and left unglued. When the glue mixture dries, carefully begin to tear the sheets off the surface. To do this, slowly pull the free edge. Avoid jerking and sudden movements; the sheet may tear. Remains of whitewash along the contour of the sheet can then be removed using a spatula.
Watch the video on how to remove whitewash
3. Any movable furniture located in the room must be moved (removed) directly outside the doorway.
Surely there will be no difficulties with carpets, small furniture, or appliances. If things are large, then you need to carefully and generously cover them with polyethylene. The film should be carefully secured with tape around the perimeter, scrupulously gluing all seams and tears. 4. Then you need to cover the floor surface with a protective film. As a replacement - film or special paper.
5. Lamps or a chandelier from the ceiling will need to be temporarily disassembled. For work safety, you will have to turn off the apartment electricity, then all the plaster can be removed without fear.
Attention! It is necessary to ensure that the apartment is completely de-energized, since wiring from neighboring rooms can carry electricity. Especially in dorms or communal apartments!
6. Lime coating is not a completely safe material for everyone’s health. It can irritate mucous membranes, eyes, wound surfaces and skin.
It is necessary to be completely protected from splashes and lime dust when working:
— respirator and plastic mask;
— adsorption suit;
— gloves made of thickened rubber;
- an additional medical cap to prevent lime from dripping.
Homemade solutions to make it easier to remove old whitewash
Almost every method involves moistening the whitewash layer to facilitate its peeling and softening the surface. In most cases, regular warm water is used, but there are little tricks that will make moisturizing more effective. In addition, all the ingredients will definitely be found in every home:
- Cooking soap solution. This method is used by a large number of professional finishers. Moreover, it is not expensive at all. You will need soda ash and a bar of laundry soap. Pour warm water into a bucket. The recipe is designed for a 10 liter container. Dissolve 5 tablespoons of baking soda and 2 tablespoons of grated laundry soap in water. In principle, rubbing is not necessary. It just dissolves faster this way. Now you can either simply wash off the chalky whitewash with a sponge soaked in the prepared solution, or spray the work surface and then use a spatula. If you decided to simply wash it off, then it is better to pour the solution little by little into a smaller container and rinse the sponge there so as not to immediately contaminate the entire mixture;
- Table concentrate is also often used as a washing solution . To do this, dissolve 1 kg of salt in a bucket of boiling water. After the liquid has cooled to approximately 40°C, work can begin. Don't forget to wear medical gloves to protect your hands;
- Another solution can be prepared using ammonia and bath foam. Dissolve 2 tablespoons of ammonia in three liters of water and pour in 2 caps of any bath foam. Now you need to prepare a soda composition in a ratio of 3:1 (3 parts of soda) and pour it there. Add another 1 tablespoon of table vinegar and pour in 2 liters of boiling water. Mix the solution thoroughly and wait until it cools to a temperature of approximately 50°C;
- Alkaline solution also does an excellent job. You will need a container of warm water and regular soda. Dissolve 5 tablespoons of soda in 10 liters of warm water and wait until the water cools slightly.
There are also ready-made products for removing old whitewash, which are sold in many hardware stores. True, their cost will be much higher than what you will spend to purchase ingredients for preparing a homemade wash. One such product is a remover called “Probel”.
How to properly remove whitewash from walls and ceilings quickly and without dirt?
Clearing walls and ceilings of lime is always accompanied by dust and dirt, so much so that the house then needs to be washed for about a week after the work has been completed. But how to cleanly wash off lime from walls? It is possible to minimize the consequences if you cover the floor with newspapers, remove all furniture and appliances, or completely cover everything with construction polyethylene sheeting.
The main part of the whitewash, which crumbles the most, can be removed in different ways so that you can get the job done quickly and without dirt.
Dry method
Let's look at how you can clean whitewashed walls without using water or special solutions.
For example, use a grinder or electric drill with a special attachment.
Another option is to tap the swollen areas with a rubber hammer, which will help the easily coming off part of the whitewash to fall off easily. Next, you need to go over the canvas with a spatula, the main thing is to try not to spoil the layer of plaster below. All that remains is to clean off the smallest residues using fine-grain abrasive paper.
Such methods involve a strong fall of lime, therefore, you should prepare safety glasses, work gloves, and preferably a respirator, so as not to damage the respiratory tract.
Dry cleaning
Wet method
Wet wall cleaning methods involve the use of special compounds or clean water to remove the limestone coating. But simply washing it out with water takes a very long time; chalky stains remain all the time, although the work takes place without any dust at all.
Experts recommend using special solutions that you can easily prepare at home yourself. It is enough to rub a couple of tablespoons of ordinary laundry soap, take baking soda (about 5 tablespoons) and mix with 10 liters of liquid. The soap component perfectly removes dry coatings and greasy stains, and the soda additive disinfects the coating and completely degreases it.
Wet cleaning
Whitewash and paste
Lime does not adhere well to the main surface with other material, but instantly absorbs wet components. Using wallpaper glue or homemade paste is a great way to quickly, easily, and without unnecessary dirt, remove lime from a room.
The use of this method provides two options: coating and gluing.
The first is applying glue to the walls. After coating, you need to wait 5-10 minutes, after which you can safely remove the absorbed substance with a spatula.
The second method suggests cleaning the walls using newspapers or remnants of old wallpaper. First, the walls are also covered with adhesive, then paper is applied, releasing a little in the corners and sides. Leave again for 5-10 minutes. Next, you need to carefully pick up the sheet on one side and gradually remove it from the surface: all the whitewash has been absorbed into the glue.
Treatment with adhesive solution
A few more tips
We familiarized ourselves with all the possible ways to remove old whitewash. Now it's time to share with you some useful tips that can make the process much easier:
- If the surface of the walls is smooth, use a wide spatula, which will allow you to remove more whitewash at a time. If the walls are curved, choose a narrow tool so as not to leave gaps and not return to the same place every time;
- After removing the coating, the surface must be thoroughly rinsed with clean water. This will significantly increase its adhesive properties. To get rid of white stains, change the water as often as possible;
- If in some places, for example, in depressions on the surface, the layer of plaster is thicker, try tapping it with a hammer before removing;
- To moisten the ceiling surface, it is better to use a foam roller;
- If, after removing the whitewash, you find dark spots on the surface, treat them with regular whitewash. After the liquid dries, they will lighten.
The article was written for the site.
Tags:Preparation for room renovation, Ceiling
In what cases should whitewash be washed off?
The previously applied layer of lime must be removed before wallpapering or painting the main surface. The lime layer is very dry, which prevents high-quality adhesion of the new material to walls or ceilings, even if everything is thoroughly primed.
If you decide to leave the whitewash, you should prepare for the fact that the paint will soon peel and fall off, the wallpaper will fall in sheets, and the tiles will fall off absolutely chaotically.
To avoid splitting the coating and flying around the new layer of whitewash, the previous finish is also thoroughly cleaned.
Mold Cleaning
Re-treatment of areas exposed to oxidation (for example, when yellow or rusty deposits form around a pipe, in the middle of the ceiling, behind a slab) requires the removal of the existing coating. Ignoring this stage of work leads to the fact that very soon the painted over spots appear again.
The formation of fungus and mold is a direct indicator that it is time to immediately renew the surface of the walls and ceiling. The affected areas are completely cleaned, treated with antiseptics, and re-painted with lime. In such a situation, even the presence of a suspended or suspended ceiling will also require cleaning the infected parts, otherwise everything will gradually cover more and more, begin to appear from under the seams, and ruin the structure.
Instructions
There are many technologies for removing whitewash, but let’s consider the two most effective: dry and wet removal. We will provide detailed step-by-step instructions for each of them, so that the repair work does not cause a lot of trouble for apartment owners.
Dry removal
This method will extremely quickly and effectively remove a layer of whitewash from the walls, so if there is little time allotted for repair work, you can use exactly this method. However, keep in mind that when the grinding machine works intensively, quite a large amount of dust is generated, which subsequently settles literally everywhere: on the floor, pieces of furniture, hair and clothes of workers. When choosing a dry option, protect yourself and the room from an abundance of dust.
Selection of cleaning tools
To remove whitewash use:
- Hammer . This tool is only suitable for dry removal of chalk or lime whitewash. Naturally, you can’t remove all the whitewash with one hammer – but it will become a faithful assistant. Knock and a significant part of the old whitewash will fall off on its own.
- Putty knife . It has sufficient size and strength. Suitable for removing thick layers of whitewash.
- Sander . Quickly removes old whitewash, but raises dust.
Which one you need depends on the method of removing the whitewash. A hammer, spatula and sponge will definitely be needed.
What you will need
Before starting the process, it is necessary to carefully prepare the room itself. All furniture and carpets are removed; items that cannot be removed should be covered with film to prevent dust particles from getting on them. Dust can also cover the floors in a thick layer, so save yourself the extra work of cleaning the floor and lay down a protective film in advance.
The work ahead is not only labor-intensive, but also poses considerable danger to an unprotected person. Protecting yourself is quite simple - prepare a protective set of clothing, consisting of a respirator, special overalls, goggles and rubber gloves. And finally, before telling you how to remove whitewash from walls, let’s outline the required equipment - without it, starting work is pointless.
For dry removal you will need the following tools: a grinding machine (a desirable device if you decide to clean the walls from whitewash using a dry method), in addition to it, use a spatula or scraper (the process will be delayed, but will be no less effective).
If you decide to wash off the lime, you will need: water, a large container for it, a sponge or foam rollers (they are much more convenient to use), a spatula and a rag.
Safety regulations
Lime whitewash is a very caustic substance. Work to remove it from the wall can only be carried out by adhering to certain safety rules:
- Wash off lime only with rubber gloves, goggles and a respirator.
- During work, the room must be periodically ventilated (there is a high risk of poisoning with toxic fumes).
Using “wet” methods for removing lime, before starting work, it would be a good idea to turn off the power supply to the house (there may be sockets and switches on the wall).
Wet whitewash removal
Fill a container with warm water, soak a sponge in it and wipe the walls with it. The procedure must be repeated several times, since the surfaces quickly absorb liquid. For comfortable wetting of the walls, you can use a foam roller with an oblong handle. The success of removal directly depends on the level of water saturation of the surfaces, so it needs to be given sufficient attention.
After moistening, you need to wait a little, and then using a spatula or scraper you can begin to remove the coating, repeating the procedure with all existing layers. If this method using ordinary warm water is not suitable, then further we will talk about how to remove whitewash from the walls using a special solution.