Whitewashing is an old, once quite popular finishing option. It does not fit into modern interior styles at all, but dismantling such a coating is a troublesome and unpleasant process. Therefore, many people prefer to glue wallpaper onto lime whitewash without washing off the old coating. We suggest you find out whether such a step will cause irreparable damage to the fresh renovation.
Is it possible to glue wallpaper to whitewashed walls or ceilings?
The answer to this question depends on the type of finishing material applied to the surface. The compositions used for whitewashing can be divided into two types:
- Colloidal solutions, the main element of which is slaked lime.
- Chalk-based mixtures.
Experts name several conditions under which wallpapering walls and ceilings is possible:
- The base is lime whitewash.
- The whitewash adheres firmly to the wall surface and can be removed with great difficulty with a spatula.
- Apply no more than two layers.
How to apply wallpaper to whitewash
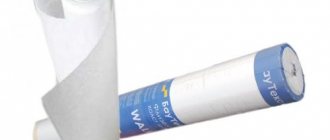
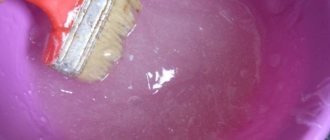
In order to paste wallpaper over whitewash, you will need a product called concrete contact.
Concrete contact is a kind of strong primer that loosens the layer and creates good adhesion, which is then easy to glue any materials to.
Concrete contact is sold in ready-made form.
All you need to do is pick up a brush and paint all the walls with this pink liquid. Then you need to wait until the product dries completely.
When is it necessary to remove whitewash?
If the condition of the base does not meet at least one of the above conditions, the freshly pasted wallpaper may simply fall off. A finish of unsuitable quality cannot withstand additional loads; it swells and falls off, pulling the wallpaper with it.
Summarizing all the factors, we strongly recommend taking the time to clean the whitewashed surface in the following cases:
- The base is chalk whitewash.
- The finish is easy to clean and falls off.
- More than two layers were applied to the wall.
- Mold was found on the surface; if it is not removed, this problem will spread to the renovated walls.
- The whitewash is applied in an uneven, thick layer.
- The room is not heated, which means the walls were frozen.
Wall preparation process
If you chose the first method of getting rid of whitewash, i.e. washing the walls, you also need to take follow-up steps to ensure that your wallpaper ends up sticking well to the walls.
Prime the walls! Buy a very ordinary primer and prime all the walls so that the liquid forms an invisible film, which will become an excellent basis for wallpapering.
How to understand whether whitewash is suitable for wallpapering: 4 tests
It is almost impossible to visually determine the type of whitewash. Therefore, it is necessary to find out whether the existing basis is suitable for our purposes experimentally.
- Just run your hand over the whitewashed wall. A chalk base, unlike lime, will turn your palm white. Wallpapering such walls is a waste of time. Wallpaper sheets will simply fall off from a coated base and even the highest quality primer will not be able to save the situation and provide the necessary adhesion.
- The second test will help determine how firmly the mortar adheres. You should carry out a test pasting on an inconspicuous area. The wallpaper strip must be pasted in compliance with all technologies and manufacturer's recommendations, let it dry, and then try to pull it. If it takes minimal effort to tear off the sheet along with the whitewash, you shouldn’t even think about completely covering the room without cleaning the walls.
- The abundance of whitewash layers applied to the surface guarantees that they will definitely delaminate under the weight of the wallpaper. To check, break off a small piece of whitewash in an inconspicuous place.
- Another obstacle to pasting is frozen whitewash. You can determine this fact by simply swiping your hand. Remains of dust indicate that no matter how you try to erase it, there will be no result.
Keep in mind that even if the finishing in the apartment has passed all the tests, but the walls are uneven, gluing wallpaper will not give good results. Exit: clean off the whitewash, plaster and putty the walls.
How to prepare whitewashed walls for wallpapering
How to wash off the remains of low-quality lime
There are times when you have to deal with an old coating that cannot serve as a basis for wallpaper. If the lime is yellow, friable, or falls off in pieces, then under no circumstances should you glue canvases onto it. In this case, you need to clean the wall:
- Cover the floor along the wall with newspapers or film so that old lime does not get on the coating. Otherwise, you will have to do double work and clean the floor.
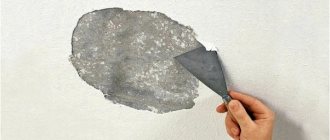
- Take a spray bottle of water and run it over the entire wall, covering all areas, while gradually removing the whitewash with a spatula.
- If the lime layer is thin, then you only need a rag and a sponge to avoid scratching the wall.
If the coating cannot be removed with plain water, then you need a more powerful product; you can prepare a lime remover according to one of the recipes:
- Dissolve two tablespoons with shavings of laundry soap in 10 liters of warm water. Then add 5 tablespoons of soda ash to the container and mix everything thoroughly.
- Mix 1-2 tablespoons of ammonia with 10 liters of warm water.
- For 10 liters of warm water, take 300 or 150 grams of soda (depending on the condition of the coating) and 150 grams of salt, mix it all.
- Add 3 caps of liquid detergent and 2 tablespoons of acetic acid to 10 liters of warm water.
- Take 1 tablespoon of vinegar and 2-3 caps of bath foam, pour the product into 5 liters of warm water and mix thoroughly.
The application for all mixtures is the same: applied to the desired areas of the wall for 5 minutes, until the old lime becomes limp and is ready for cleaning. After this, you can remove the coating using a spatula.
Are you planning to wallpaper with lime or remove it from the walls?
For lime
Delete
How to prime walls
Before you start gluing wallpaper, the lime surface must be carefully treated. Here it is important not to save money, but to purchase a high-quality primer, preferably a foreign brand. To get a good result, you need to choose the right material. The primer must be water-repellent, since lime is afraid of moisture.
Using the wrong primer mixture can result in yellow stains on the wallpaper, which will ruin the overall appearance of the room. In addition, the water-repellent composition protects against the appearance of fungus, which is very important for health.
After the primer has dried, you can begin gluing the wallpaper.
How to clean surfaces from old whitewash?
If we are dealing with a relatively small and thin layer of coated whitewash, it can be removed with a damp foam sponge. The entire surface is gradually cleaned; you just need to monitor the cleanliness of the water. This method is virtually dust-free, but takes a lot of time.
If we are dealing with a thick limestone layer, it will be more difficult to wash off the whitewash.
- The entire surface is moistened using a spray bottle with warm water.
- The soaked layer is removed with a spatula or scraper.
- To prevent severe contamination of surfaces, you can use a scraper with a tray.
After removing the main thick layer, it is recommended to rinse the entire cleaned surface with a sponge. This removes any remaining chalk and dust.
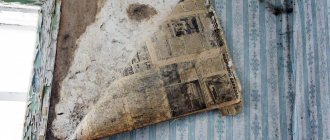
If the whitewash crumbles
If the surface has yellowed, crumbled or shown other signs of aging, you need to remove it before wallpapering. Otherwise, after applying the glue, it will begin to peel off in large fragments, which can be dangerous.
Whitewash removal procedure:
- Cover the floor with plastic film or a thick layer of newspapers, cardboard, etc. This is necessary in order to protect the floors from the mixture of lime and water that will drain from the walls.
- Using a spray bottle, wet a small area.
- Remove all whitewash. If the layer is thin, you can use a sponge or rag, otherwise you will have to work with a spatula.
With abundant wetting for half an hour, the lime whitewash can be easily scraped off with a spatula - After this, it is recommended to dry the walls for 2-3 days, apply a primer and begin wallpapering.
Of course, before pasting it is better to remove the old coating, be it lime whitewash or any other material. This is the only way to achieve a high quality coating. If you don’t have the time, energy or desire, you can bypass this procedure, but then you should be prepared that the coating will quickly fail.
Gluing wallpaper to whitewash: surface preparation
Regardless of the chosen type of wallpaper, before gluing, the base covered with whitewash should be prepared:
- The surface is sanded so that small grains, almost always present on lime, do not interfere with adhesion. For this purpose, sandpaper or fine mesh with an abrasive coating is used.
- Remaining dust is wiped off with a damp sponge; the next stage can be started only after complete drying.
- If there are cracks on the surface of the walls, they should be widened, cleaned, treated with a primer, and filled with putty. After it dries, the surface is leveled with a narrow spatula.
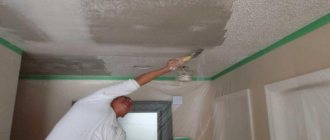
- The whitewash is covered with a deep penetration primer, preferably in two layers. This way it is possible to increase adhesion to the base and strengthen the whitewash. The primer is applied with a paint brush or roller.
- Apply thinly diluted wallpaper glue to the dry wall. This way you can get rid of minor wall defects. After this layer has dried, the surface will be ready for final finishing.
What kind of wallpaper can be glued
Lime is an active chemical that can interact with cellulose, which is part of most types of wallpaper. In this regard, they must be carefully selected so that they do not subsequently spread out or inflate.
Paper
Under no circumstances should you glue paper wallpaper - it will begin to bubble due to the whitewash. Unfortunately, there are no special products for whitewashing, so you need to independently select embossed or smooth wallpaper on a non-woven basis.
Vinyl
Compared to thin paper ones, these have no chance of sticking to lime. Varieties such as vinyl, cork or fabric should not be glued over whitewash, otherwise the coating simply will not last long on the wall.
Liquid
This option is most suitable for lime, only on the condition that the surface for the wallpaper is properly treated in advance.
You cannot apply liquid wallpaper directly to the lime; the walls must first be treated with a waterproof primer.
What to do after wallpapering
After you have cleaned the walls, primed them and hung wallpaper, all you have to do is wait.
We advise you to temporarily close the room and not enter it for half a day or even a day. Avoid drafts and do not place windows for ventilation. Let the glue dry well and only then proceed to use the room.
You must provide conditions so that the glue dries well without your wallpaper peeling off in some places.
If the wallpaper has come off in some places, then simply glue it back and smooth it out thoroughly.
Wallpaper
0 votes
+
Vote for!
—
Vote against!
Many of the houses we live in were built a very, very long time ago. Therefore, quite often people decide to carry out renovations in order to update the interior (so that the apartment sparkles with new colors). It is at this stage that they encounter a small problem: the walls of old-type houses are whitewashed. Previously, this was a very popular type of decoration - simple and cheap. But these days, the development of building materials makes it possible to treat walls with a much better texture for the same money. Then people begin to ask questions: “how to glue wallpaper on whitewash, and is it even possible to do this?” In this article we will try to answer all your questions.
Table of contents:
- Advantages and disadvantages of wallpapering over whitewash
- The first method of wallpapering
- The second method of wallpapering
- Features of working with certain types of wallpaper
- Whitewash wallpaper: is it possible to do this?
- Useful tips for wallpapering
Advantages and disadvantages of wallpapering over whitewash
Whitewash particles made from chalk or lime have a fairly fine fraction and are almost weightless. During the application of this type of finish, that is, holding it on the walls due to the force of surface tension. After the moisture evaporates, the whitewash dries and an evenly applied layer of coating is obtained. Whitewash is often compared to dust - when you run your hand over the surface, chalk remains on your fingers. It is precisely because of this composition of the material that wallpapering over whitewash is recommended only in extreme cases, because:
- Even the strongest whitewash cannot always support additional weight. Under the load of wallpaper (especially heavy ones), it can simply move away.
- When the wallpaper begins to peel off, the whitewash disappears along with it, thereby making it impossible to re-stick it.
- Glue applied to whitewash soaks it and thereby contributes to its falling off.
- Most primers do not have the ability to penetrate whitewash layers (especially when the whitewash is made of lime).
- Traces of streaks, itchiness and unevenness may appear on the surface of the wallpaper.
Why then do many people decide to whitewash wallpaper? It's all about the timing of the repair. When you ask a professional builder how to remove whitewash from walls, you can get only one answer: “very simple, but it will take a long time.” So it is, it will take a very, very long time to remove such a finish. And when a person is running out of time for repair work, he decides to glue wallpaper over the whitewash.
Since the choice depends solely on a person’s circumstances, we will consider both options for wallpapering.
The first method of wallpapering
In this method, the first step will be to clean the walls from whitewash. As already mentioned above, this task is not at all difficult, but quite dirty. Before you start cleaning, you need to cover the furniture with film and the floor with newspapers. If you forget about this, then everything will be covered with a white, ingrained coating, which is very difficult to wash off.
Let's start cleaning:
1. Wet the surfaces of the walls with warm water using a sponge or a wide brush (which must have natural bristles).
To speed up the process of washing off whitewash, you can use special solutions. Recipes for some washes are listed below.
- We grate laundry soap, mix these shavings (about 3 tablespoons per 10 liters) with warm water, and add 4 tablespoons of baking soda. Mix thoroughly;
- Dissolve 1 spoon of ammonia in ten liters of warm water;
- Dissolve 400 g of soda and the same amount of salt in ten liters of water;
- Mix 10 liters of water with 150 grams of liquid soap and two tablespoons of vinegar;
- For five liters of water add one table. a spoonful of acetic acid + two caps of bath foam. We wet sections of the wall with this solution, and after five minutes the finish will have acidified and will be ready for cleaning.
2. Use a wide spatula to scrape off the whitewash from the walls.
3. Treat the surfaces of the walls with an acrylic primer mixture.
4. We remove the garbage and wash the floor with a solution of warm water and acetic acid.
Quite often people make the mistake of confusing whitewash with chalk putty (if the putty is durable, it is not necessary to remove it).
Difficulties in removing whitewash arise when the wall is rough. Often, whitewash is applied to the plaster layer without using putty. In this case, whitewash particles get stuck in the recesses of the top layer of plaster, thereby complicating its washing off. In this case, the action plan will be as follows:
1. Wet the walls well.
2. Remove the top layer of finish using a spatula.
3. Wash off the whitewash that is in the recesses with a sponge or brush. It is not advisable to use a sponge, as it becomes unusable very quickly. The best option is a stiff brush with a comfortable handle.
4. It is impossible to completely wash off the whitewash from the plaster, so it is necessary to prime the wall.
If you hear the word primer for the first time, there is no need to worry. Do-it-yourself wall priming is a very simple process. It does not require special skills. You just need to buy the right type of primer at a building materials store, mix it with water in the proportion indicated on the package and cover its walls. Apply layers of primer using a roller. Then let it dry, this will take about 24-38 hours. The next layer can be applied only after the previous one has completely dried.
After the whitewash has been cleaned and the surface has been primed, the preparation of the walls for wallpapering is complete. Let's proceed directly to the main process. First you need to calculate the amount of wallpaper that will be required for repairs.
There is a special online calculator for calculating wallpaper. It is enough to enter all the necessary data into it (area of the room, height of the walls, etc.). And if the room has standard dimensions, you can simply look at the table below. Please note that all figures are presented for rolls with a length of 10 m and a width of 50 cm.
| Room area | Wall height | ||
| 2.5m | 3m | 3.5m | |
| 14 | 7 | 9 | 14 |
| 17 | 7 | 10 | 15 |
| 25 | 10 | 13 | 20 |
| 29 | 12 | 15 | 25 |
| 31 | 13 | 16 | 27 |
Having purchased the required number of rolls, we begin gluing.
The main tool for wallpapering is a roller or brush for applying glue. Also, for work you will need:
- a stationery knife; regular scissors will do;
- a simple pencil;
- roulette;
- container in which we will mix glue;
- sponge;
- dry cloth.
Having collected all the tools, we begin cutting into strips. Roll out the rolls face down, measure the length (add 10 centimeters to the height of the walls). If there is no ornament on the wallpaper, it is possible to immediately cut the required number of strips. If there is a pattern, you need to cut it in such a way that the pattern forms correctly.
Let's proceed to the next process: wallpapering with your own hands. In order to do this perfectly evenly, you need to measure the width of the canvas and draw a vertical line on the wall.
In order not to worry about the evenness of the markings, you can do this: rub the tracer with chalk (the color is unimportant), then apply it to the surface and sharply remove it. The result was a clear, even stripe.
In a container prepared in advance, dilute the glue, the proportions are indicated in the instructions. Apply glue so that it lies uniformly over the entire surface of the cut strip, especially carefully spread the edges. The sheet must be sweetened inside for 6-8 minutes so that it is evenly saturated.
After everything is prepared we can start gluing. We start from the window and slowly move inside the house in the direction of the light. We glue the paper wallpaper onto the walls with an overlap (don’t forget to make sure that the pattern on the wallpaper matches). We take a strip soaked in glue and press it with a piece of dry cloth from the middle to the edges, then continue to press, making movements from top to bottom. Since we measured the length longer than necessary, we cut off the remainder using a utility knife to the level of the baseboard.
An important point is the gluing of sockets. First of all, turn off the power to the apartment and unscrew the sockets (switches). Glue the strips after cutting out the squares. After the glue has dried, insert the sockets into their previous places.
The second method of wallpapering
In this method, we will consider gluing wallpaper over whitewash. Use this option only when you are very pressed for time, or when you do not have high demands on the quality of the repairs performed. Under no circumstances should you whitewash the ceiling.
Applying glue helps the paper wallpaper soak and expand. During the drying process, they shrink and return to their original size. The heaviest load falls on the edges of the wallpaper, so most often they come apart at the seams. When gluing wallpaper over an unprepared surface, be sure to stick the strips overlapping.
Step-by-step instructions for gluing wallpaper on whitewash:
1. Remove whitewash in places where it is unusable.
2. Clean the corners.
3. We apply a primer to the walls, in our case we choose deep penetration.
4. Dissolve glue and cut strips of wallpaper.
5. While working, coat the top of the wall and corners with PVA glue.
6. Coat paper wallpaper with glue and roll it up for 6-7 minutes to swell.
7. Glue the wallpaper, as in the previous method, starting from the window.
A video on gluing wallpaper over whitewash is at the end of the article. Be sure to watch to ensure each process is performed correctly.
Features of working with certain types of wallpaper
In addition to paper, popular types are non-woven and liquid wallpaper. While the first type can still be glued over the finish, the second type is not possible under any circumstances.
To make gluing non-woven wallpaper onto whitewash possible, in addition to the strips themselves, we also coat the walls with glue. Buy special glue for this type of work.
When liquid wallpaper is used in renovations, it is necessary to be very diligent in cleaning the surfaces. Apply the mixture using a trowel or the so-called spray method.
If you try to apply liquid wallpaper to whitewash, the following consequences may occur:
- no matter what you do, wallpaper of this type will not be able to stay on the walls;
- the color may change or yellow spots may appear;
- if you apply liquid wallpaper using a trowel, the whitewash will begin to drag on the mixture and move along with the components, thereby ruining the texture;
- if you apply wallpaper from a gun, it will begin to slide (the whitewash will repel the mixture).
Whitewash wallpaper: is it possible to do this?
There are no special wallpapers produced for whitewash. It is, of course, prohibited to whitewash paper wallpaper; it will simply become wet and unusable. In the case of textured or smooth wallpaper that is not afraid of moisture, whitewashing is possible:
- The first thing you need to check is how tightly the wallpaper adheres to the walls.
- We dilute and filter the whitewash, which is based on chalk.
- We apply whitewash (1st layer), for this we use a sprayer.
- Apply the next layer only if there are gaps left after the previous time. For the second coat, use a sprayer or brush. You cannot use a roller in your work; the dried layer begins to stretch behind the coat of the tool.
Useful tips for wallpapering
1. It is best to choose a water-repellent primer; it will become a reliable basis for wallpapering.
2. It is best to buy meter-long wallpaper. They simplify all the work (the number of seams is reduced and the purchase costs are reduced). One meter of wallpaper costs less than two half-meters.
3. Buy wallpaper with a reserve; walls are not always smooth, which also affects the number of rolls used, so a slight overspend cannot be avoided.
4. When using wallpaper with patterns, pay attention to the instructions; they indicate the size of the stripes so that the pattern is preserved.
5. Glue the strips with an overlap of 3-4 mm.
6. When mixing the glue, be sure to follow the instructions indicated on the packaging, because the consistency of even the same glue is different for different types of wallpaper.
7. If your choice falls on wallpapering over whitewash, you shouldn’t do all the repairs at once, first make a test piece. The thing is that the wallpaper can not only fall off, but also become covered with yellow spots that will ruin your entire interior.
In order to more accurately understand the technology of wallpapering, read the entire article and watch the video at the end. Choose the option that you like, follow all the instructions and the repair will take place without any failures.
Wallpapering
In fact, the technology for gluing wallpaper on whitewash is practically no different from the methods for finishing any other base. Instructions on how to hang wallpaper:
- Select a vertical landmark and, taking it into account, apply height markings. It is applied using a ruler and a marker or pencil and is checked with a laser and a regular level.
- Roll out the material on the floor and cut it into pieces of the required length. It is better to leave a reserve, since the excess can be removed, but gluing the missing is problematic.
- Prepare wallpaper glue. To do this, you need to follow the manufacturer's instructions. Typically, the dry mixture is poured into a clean container, after which water is slowly added, stirring constantly. Then you should leave the solution to infuse for 15 minutes, then repeat stirring.
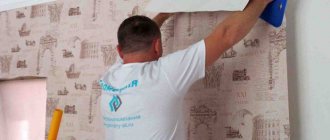
- Apply glue to the wall and the back side of the wallpaper (if technology requires it).
- Strictly follow the markings and lean the first piece of material against the wall. To avoid problems with falling parts of the coating later, you need to carefully smooth the glued materials with a rubber roller or spatula. During the smoothing process, glue will appear from under the surface; it must be promptly removed with a rag or sponge.
- Glue the second fragment taking into account the vertical of the first. At the same time, it is important to form the seams correctly: paper wallpapers are attached with an overlap, all others are attached end-to-end.
Regardless of the type of base, the technology for gluing wallpaper remains unchanged.
On a note! If there is a pattern on the wallpaper, it is recommended to cut it and join it at the preparatory stage so that there are no problems during pasting.